DIY drum making: with natural materials to your own instrument
👉 The key facts from this guide
- You build your own frame drum completely from natural materials that you collect yourself in the forest – no purchased parts, just real nature.
- The centerpiece is the raw hide: unprocessed, dried animal skin (e.g., deer or goat), which becomes stiff and is thus perfect for the rich drum sound.
- The frame of your drum is made from flexible, young woods (e.g., maple), which you shape into a ring and let dry firmly.
- Before you attach the membrane, you soak the raw hide until it is soft like leather – this allows it to be stretched well.
- The drum skin is attached to the frame using a sophisticated cross or star lacing, often creating a practical grip loop as well.
- After drying, the skin becomes tight and resonant – and you hold your very own drum in your hands, thoroughly handmade.
Campfire. Dancing flames. And then: a deep, earthy rhythm. The sound of your homemade drum.
It hardly gets more original than this. Feel the pulse of nature – on an instrument crafted with your hands, from materials of the forest.
The construction of a rawhide drum is a true adventure. A project that requires patience, some skill, and dedication to an ancient process. But the reward? Unique.
My Journey to the Nature Drum: A Project Without Compromises
My personal goal for this adventure was clear: I wanted to build a drum that is made entirely of natural materials that I find and process myself.
Order nothing, buy nothing – only what the forest gives me. It should be a true wilderness experience, a return to the essentials.
What has emerged is not just any drum, but a small, characterful companion that I have come to love and whose sound tells a special story.
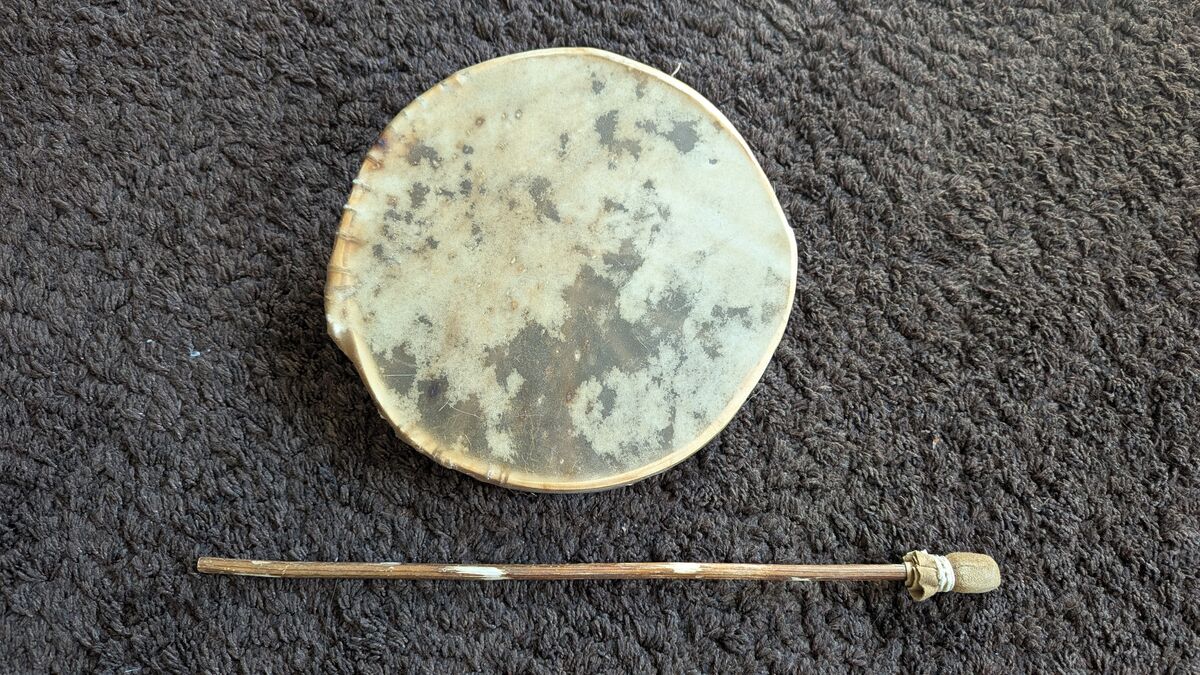
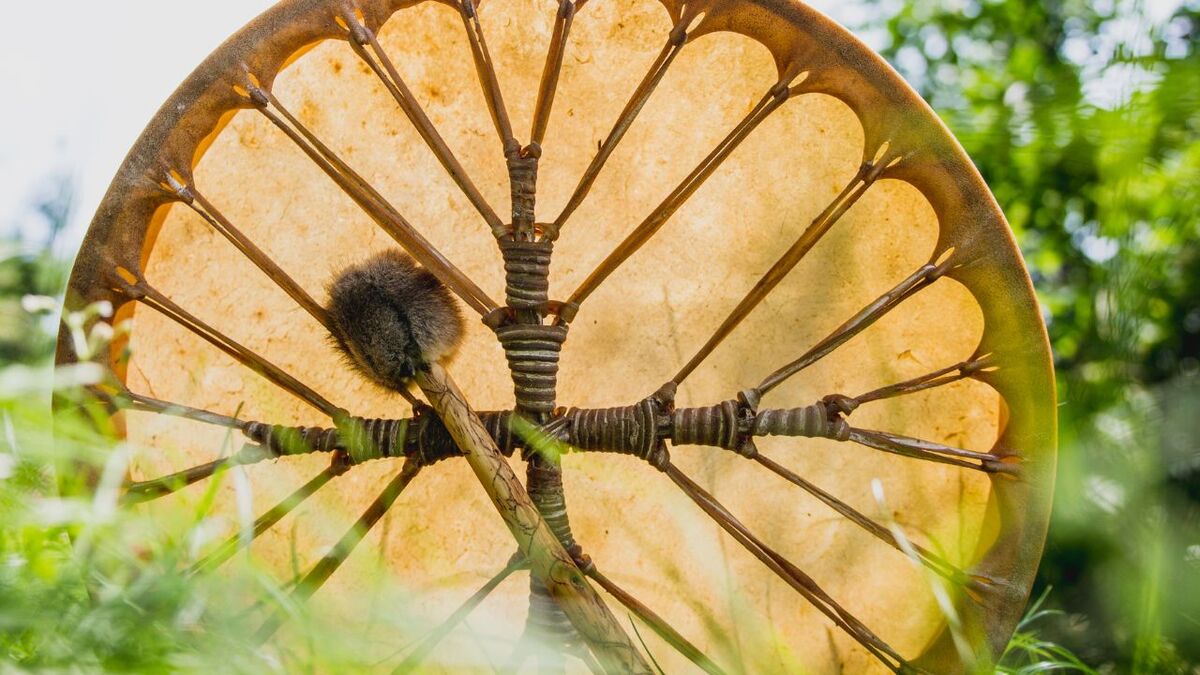
Here is a first visual impression of my self-built rawhide drum:
And if you want to experience the process and the sound, take a look at this video (with good speakers on your PC):
The Heart of the Matter: What is Rawhide, and How is it Prepared?
Perhaps you, like me, are lucky enough to already have a piece of rawhide available. But for everyone who is curious: How is this special material actually created?
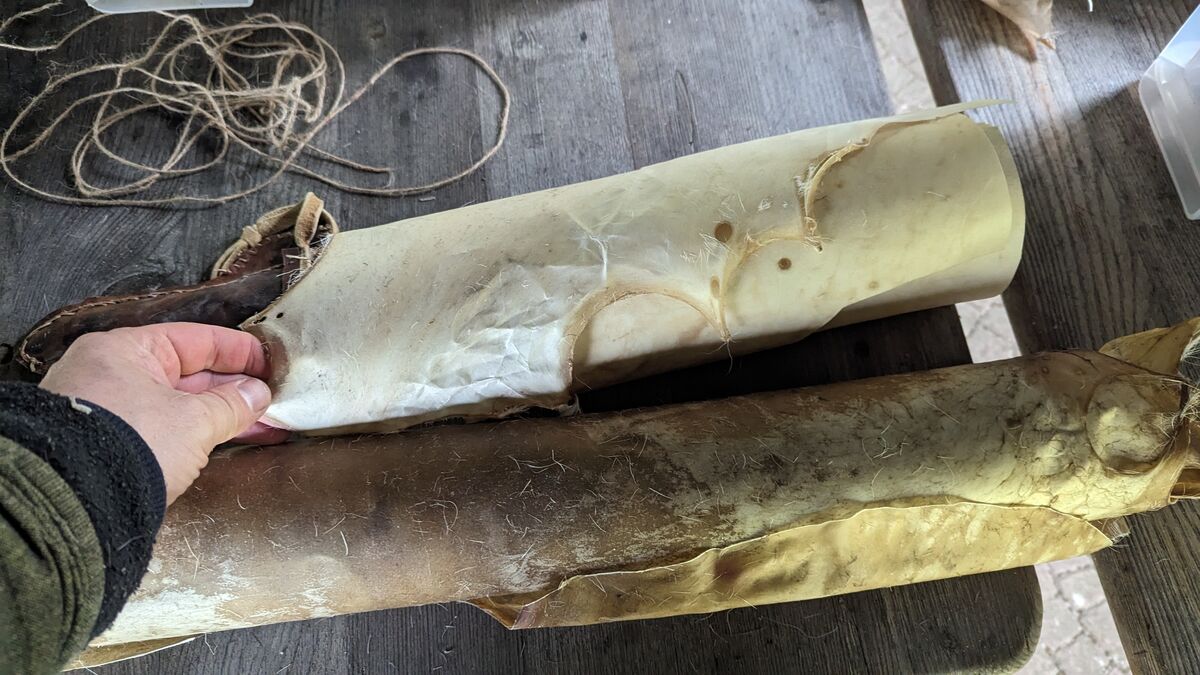
In short: Raw hide is animal skin (e.g., from deer, roe deer, goat) that is not tanned, but only freed from flesh residues and hair and then dried.
It is crucial that the skin is usually stretched on a frame during the drying process.
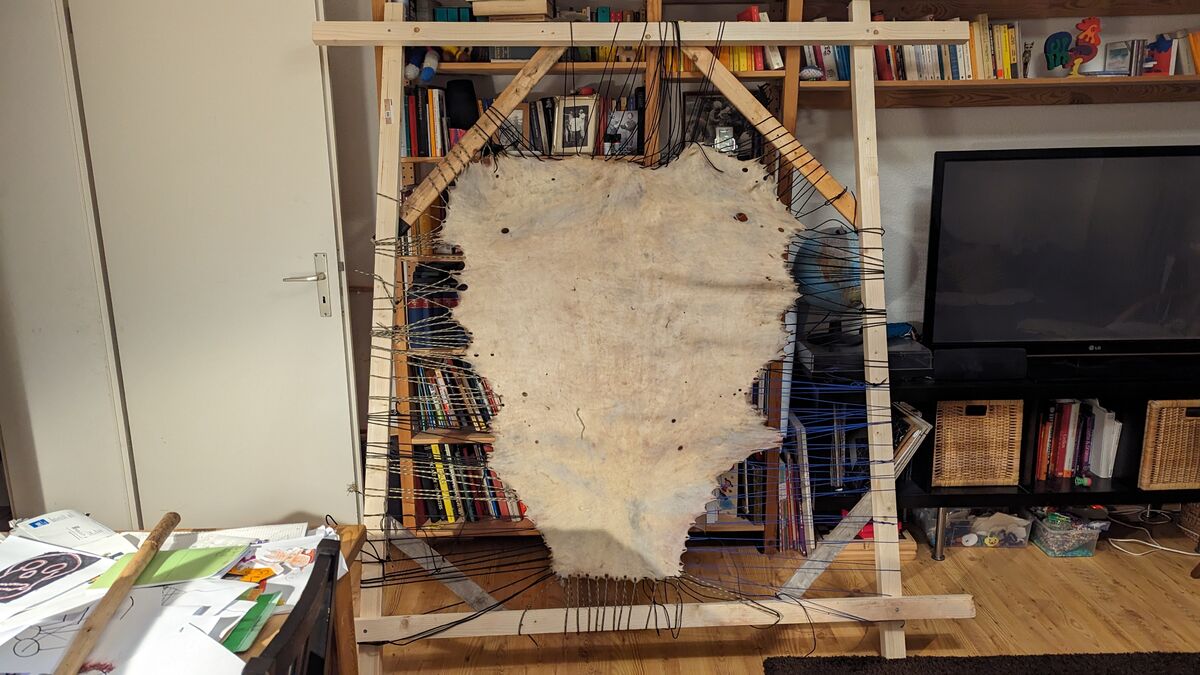
This prevents uncontrolled shrinking and ensures that it retains its shape. This process makes the skin incredibly stiff and hard – and it is exactly this property that we need for a resonant, powerful drum sound!
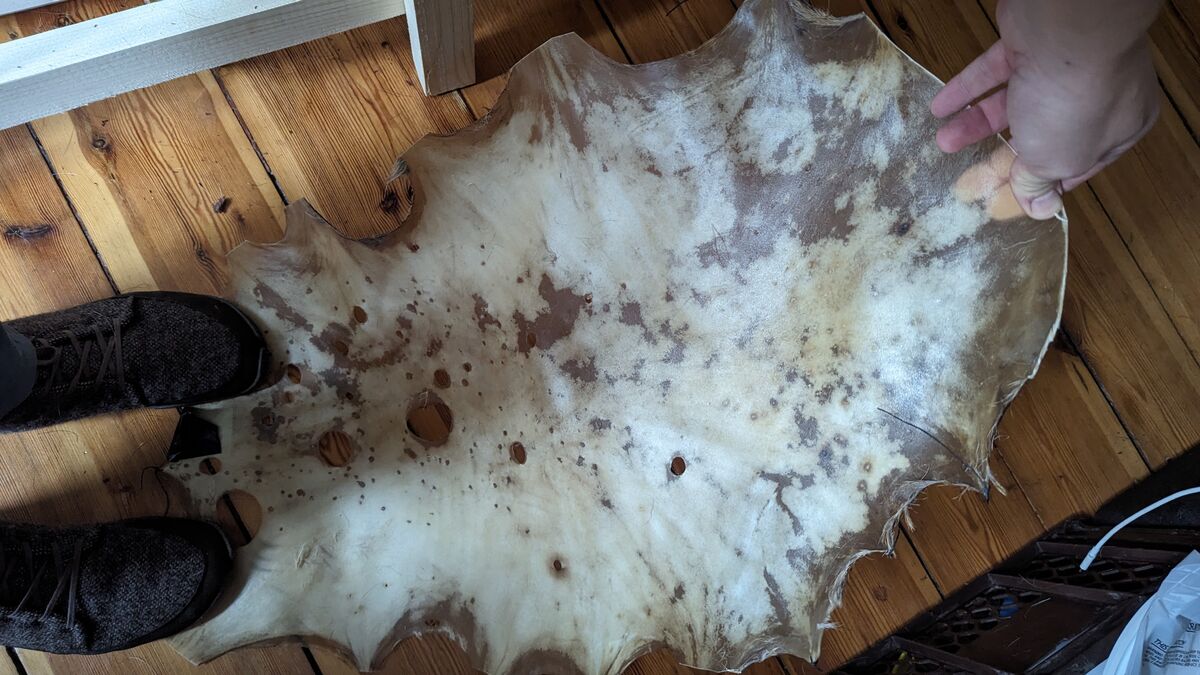
If you want to dive deeper into rawhide production, that's a whole adventure on its own. Have a look at my guide "What is brain tanning for leather? - How to make suede / buckskin" for that. For our drum, we assume that we have a suitable piece of rawhide ready.
Step 1: The Frame – The Skeleton of Your Drum
Every good drum needs a stable skeleton, the frame. And we get that directly from the forest!
Material search: The flexible friend
Ideal for drum frames are young, flexible woods. I have often relied on young maple shoots (sprouts) for my drums.
They are relatively easy to find, easy to work with, and can be bent excellently. But other woods like willow, ash, or the versatile hazel can also work.
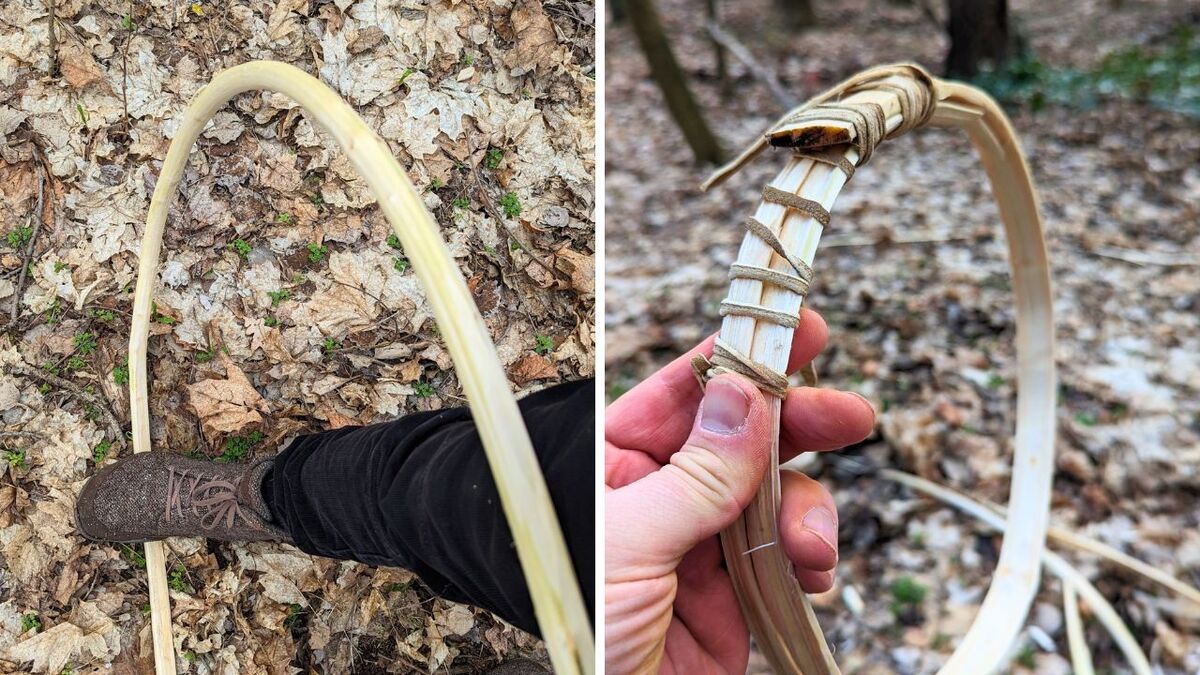
It is important that the sprout:
- Long enough is for your desired drum diameter (plus overlap).
- Relatively straight has grown.
- Not too thick is (about 2–4 cm in diameter is a good guideline, depending on the size of the drum) so that it can bend well.
- As knot-free as possible is or has only small branches that you can cleanly remove.
Harvesting & Preparing
Harvest your maple sprout (or your chosen wood) respectfully and thoughtfully. Carefully remove the bark if you wish (this is not strictly necessary, but many like the look and it can make bending easier).
Carve the ends of the sprout so that they overlap well and can be connected later (e.g., carve one end slightly thinner and slightly hollow out the other).
Bending & Fixing
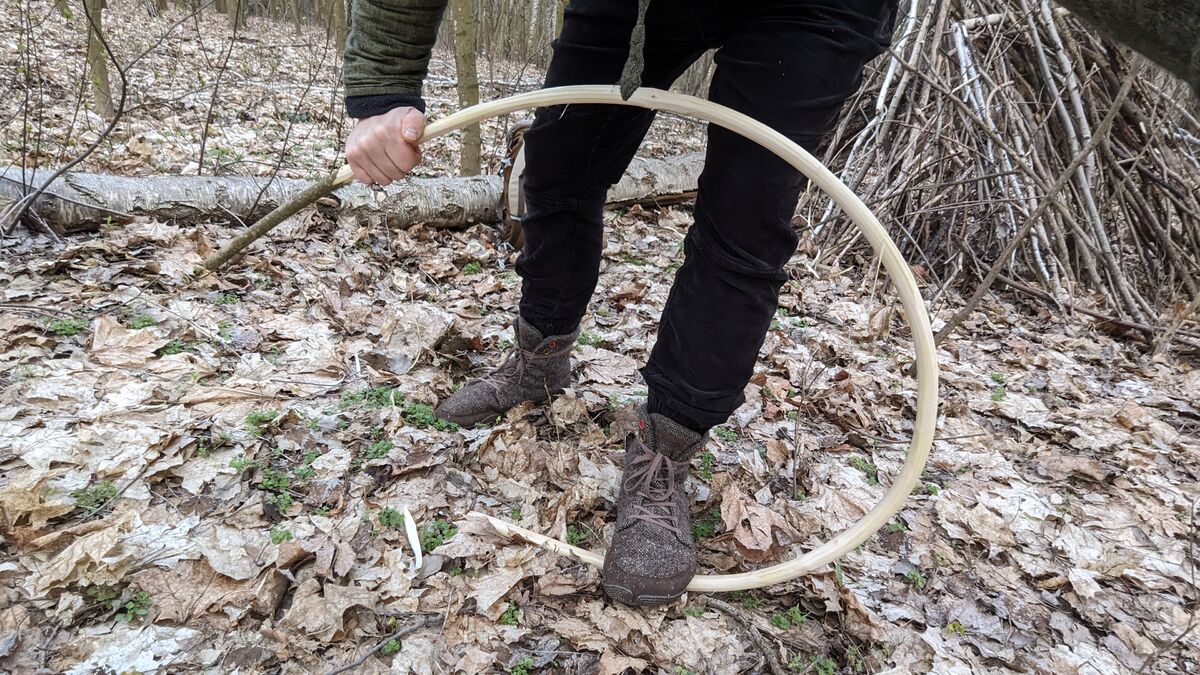
Now comes the exciting part! Carefully bend the prepared sprout into a ring. This requires a bit of feeling so that it doesn't break.
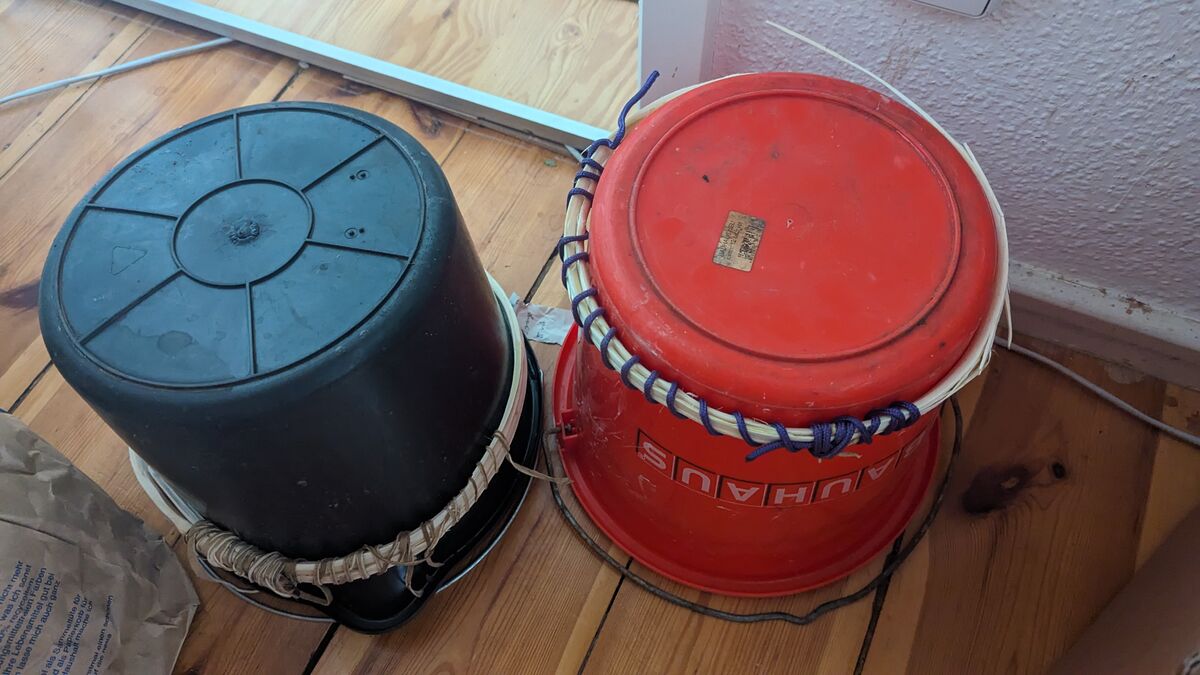
A great trick is to stretch the curved sprout around a round object that has about the desired diameter of your drum – a sturdy bucket is often perfect here! Overlap the ends and secure them tightly with string or wire.
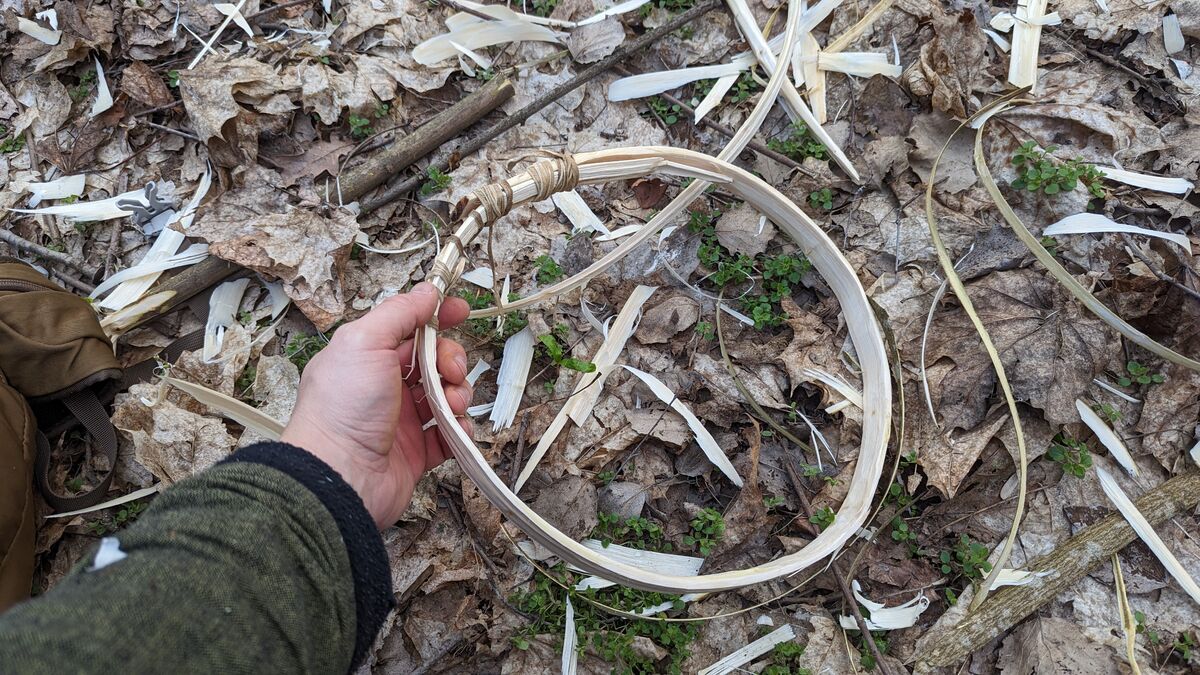
Let dry
Now the frame needs time. Let it dry slowly in a dry, airy place while clamped. Depending on the thickness of the wood and humidity, this can take several days to weeks. This step is crucial for the frame to maintain its round shape when you release the tension.
Step 2: Prepare the skin – From the board to the membrane
Your dried rawhide is probably as stiff as a board. To be able to work with it, it needs to become soft and pliable again.
Cutting
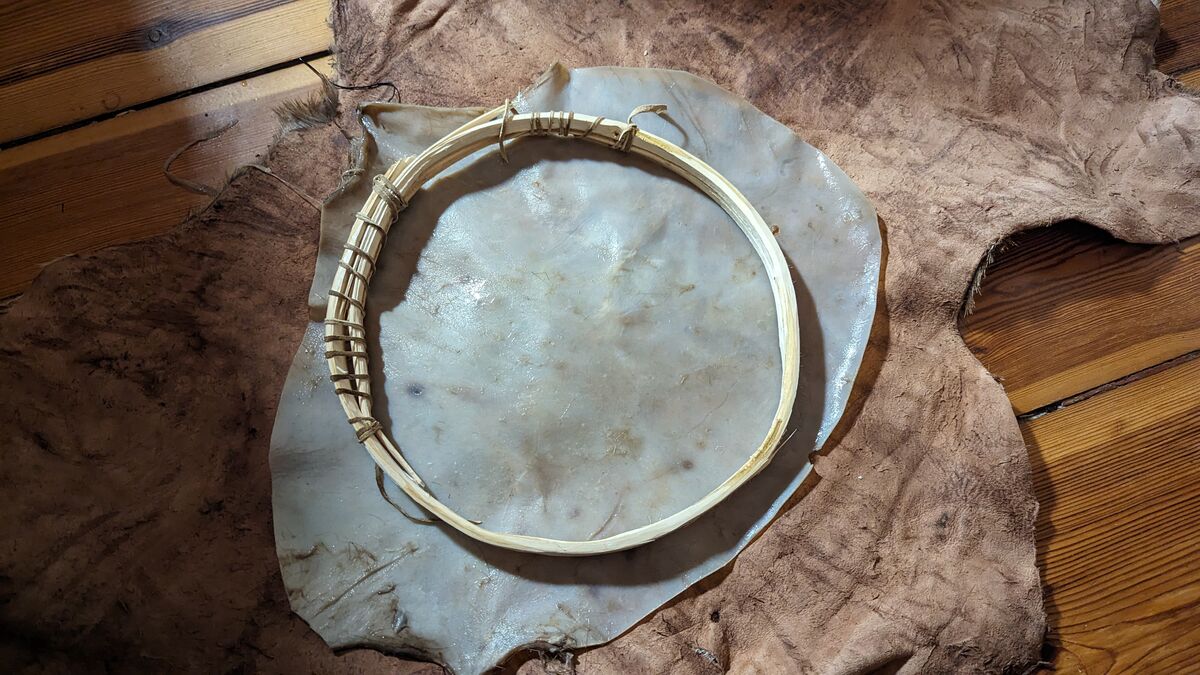
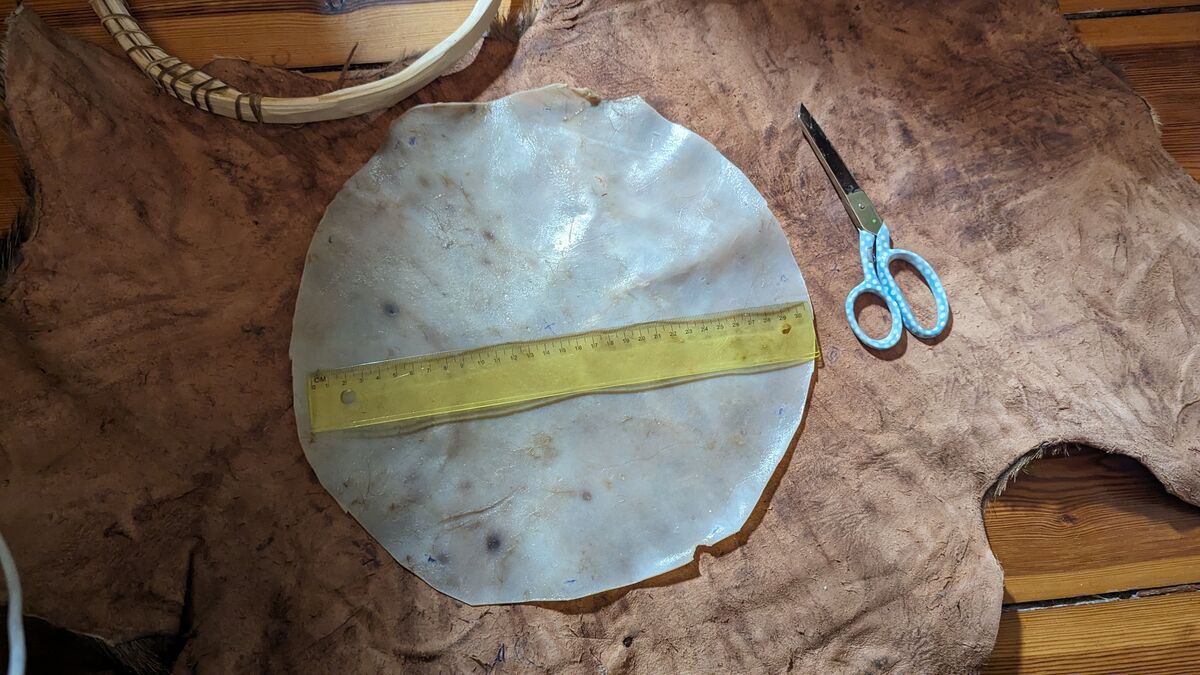
Place your dried wooden frame on the dry, spread-out rawhide. Now cut the hide roughly into a circular shape so that it is clearly larger than your frame on all sides.
An overhang of about 8–15 cm (depending on the drum size and desired tension) is a good guideline. This overhang will later be needed for tensioning and securing.
The water bath: Patience is the key
Then place your raw hide piece in a sufficiently large container (a tub, a large bucket, or even a clean stream if conditions permit) and completely cover it with cold or lukewarm water.
You should avoid hot water as it can alter the collagen structure of the skin.
Waiting until everything is dry
Now it’s time to be patient! The leather must completely soak through until it feels like a thick, damp leather cloth – soft, pliable, and stretchable. This can take several hours to a whole day (or longer), depending on the thickness and type of leather.
Regularly check the condition. The skin should no longer feel "crisp," but should really be smooth.
Step 3: The Wedding – Uniting Skin and Frame (The Binding)
This is the magical moment when your drum takes shape!
There are various methods for binding. Here, I describe a common and stable variant that is often used for frame drums.
You need a stable cord for this, which you can also make from rawhide.
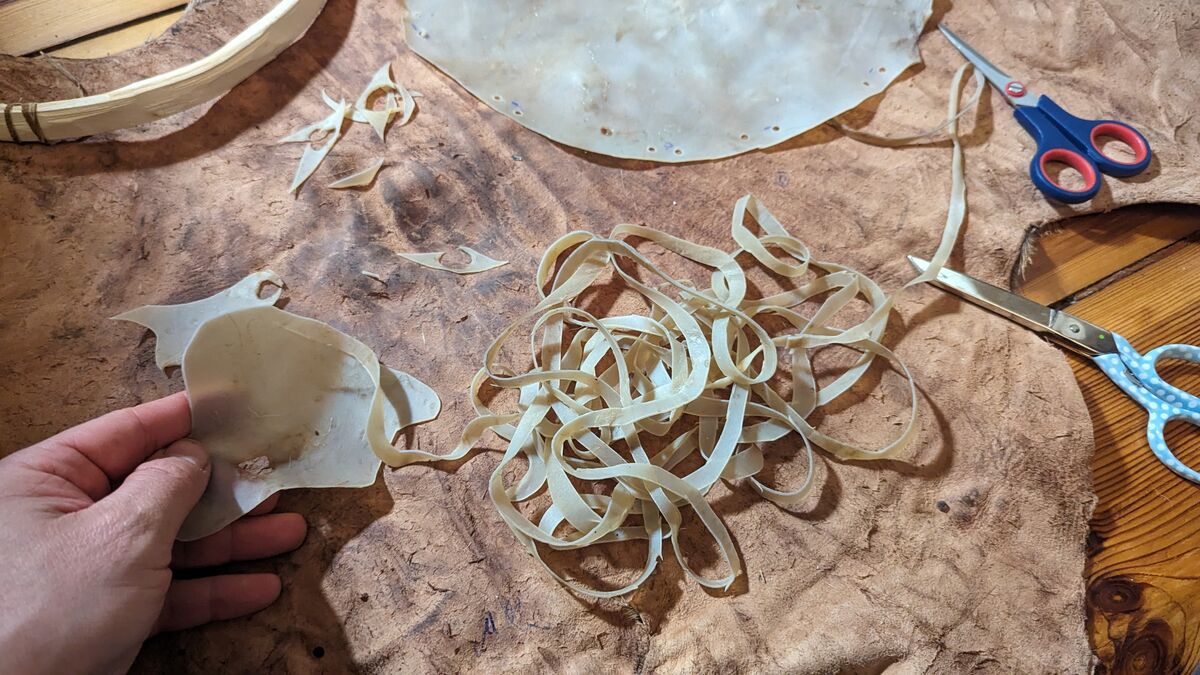
Piercing holes
Along the outer edge of your rawhide circle, you now punch two holes at regular intervals. The two holes have a distance of 1 to 1.5 cm. This pair of holes has a distance of about 3–5 cm between the other pairs of holes.
Use an awl, a sharp knife, or a special hole punch for this. The holes should not be too close to the edge so that the skin does not tear when stretching.
The number of hole pairs should ideally be divisible by 4 if you are aiming for a traditional tension (see below).
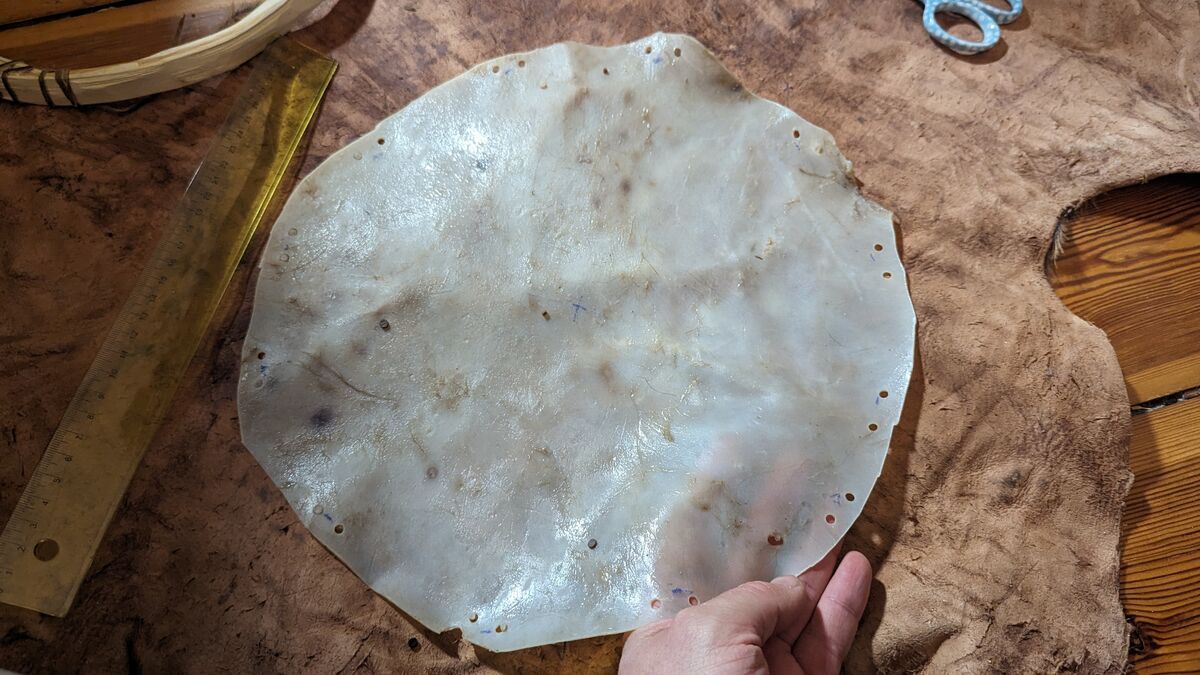
Tying – Step by Step to Sound
This method creates a tension that often appears as a "star" or "cross" on the back of the drum.
Centering Skin
Place the perforated, damp rawhide with the hair side (if still visible, otherwise the smoother side) facing down on a clean surface. Center your wooden frame in the middle of the hide.
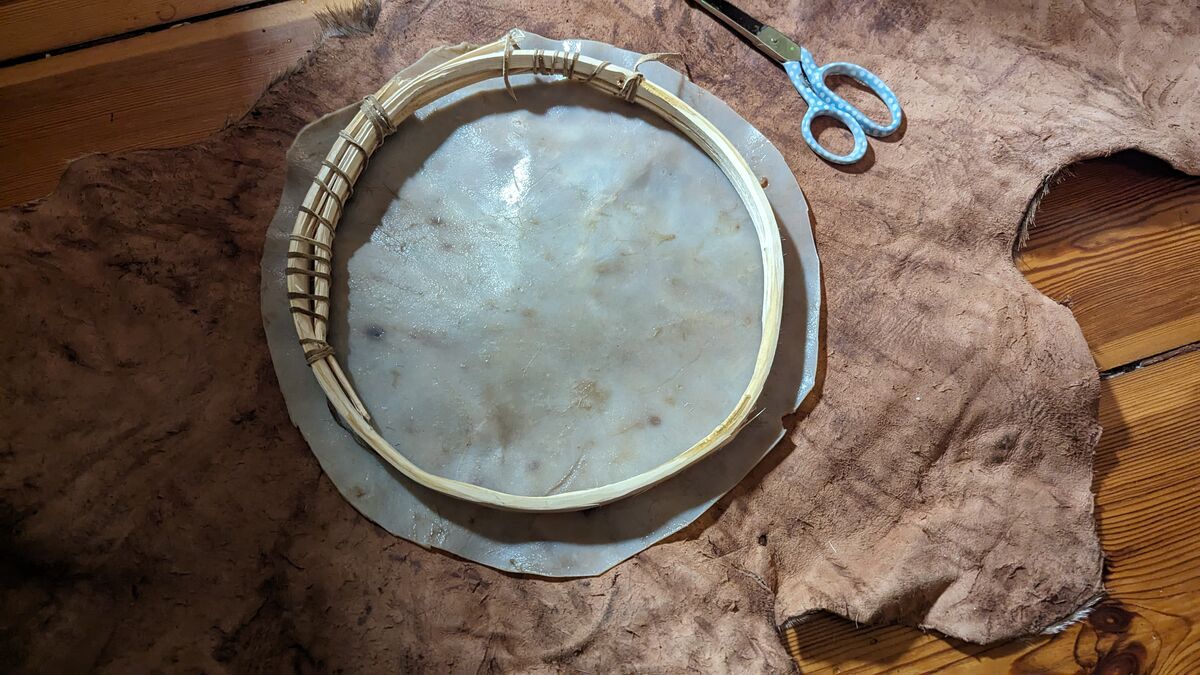
First Fixation Points (The Four Cardinal Directions)
Take your string. Start at a pair of holes and thread the string from the outside in. Make a knot.
Now pull the skin over the frame at this point. Then go to the opposite pair of holes and thread the cord again from the outside to the inside through your pair of holes (from the outside into hole one over to hole two and then inside).
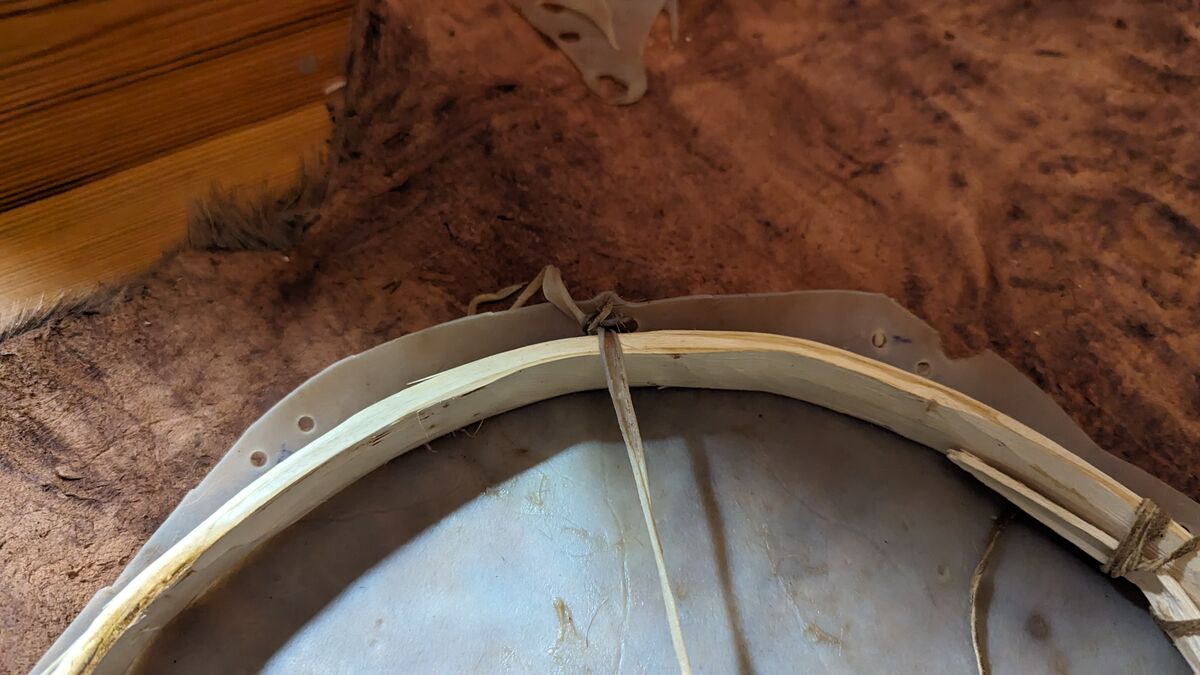
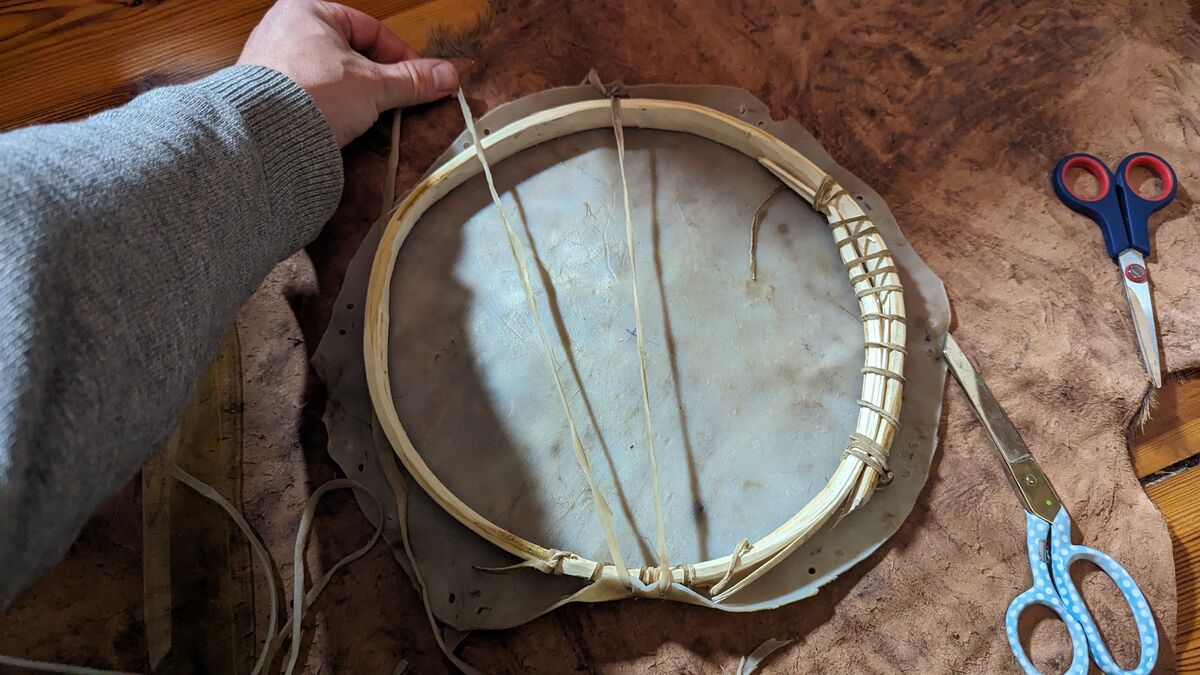
Gently tighten the skin here so that the frame is held in place.
You now return to your starting node and select the next pair of holes that is to the left or right of the starting node (see image).
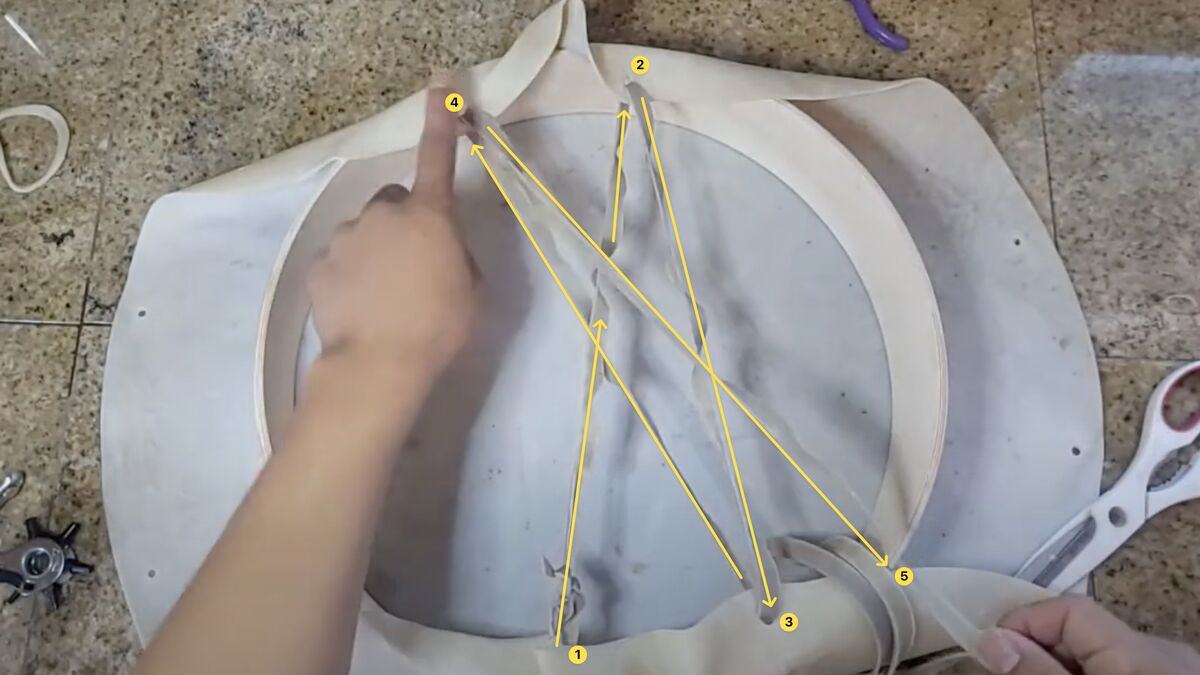
The first tension round (Zig-Zag)
Now it's about pulling the skin evenly over the frame. You will work your way from hole pair to hole pair.
- When you reach the third pair of holes, run the string from the last fixation point to the exactly opposite pair of holes.
- Pull the skin edge of this hole over the frame and to the back.
- Now run the string to the opposite side and choose the corresponding adjacent pair of holes there.
- Pull the string tight, but not with all your might. The skin is still damp and will shrink and tighten as it dries. Too much tension now can warp the frame or cause the skin to tear.
- Work your way around the entire drum from opposite sides until all holes are laced and the skin is evenly stretched over the frame. Make sure that the skin folds that form on the back lie as evenly as possible.
The second tension round (The star is born)
Now comes the actual tension that creates the typical pattern on the back.
- Start with three strings on the back if you have 12 pairs of holes like I do. If you have fewer or more, you will also have more strings on the back.
- Wrap the string several times around the three strings and pull it tight. You will see how the membrane tightens on the front.
- Now move to the next three opposite strings and repeat the process, always making sure to distribute the tension evenly. Often, you work in a star pattern here by always going to the opposite strings.
- The goal is to create a network of taut strings on the back that pulls the skin evenly and tightly against the frame.
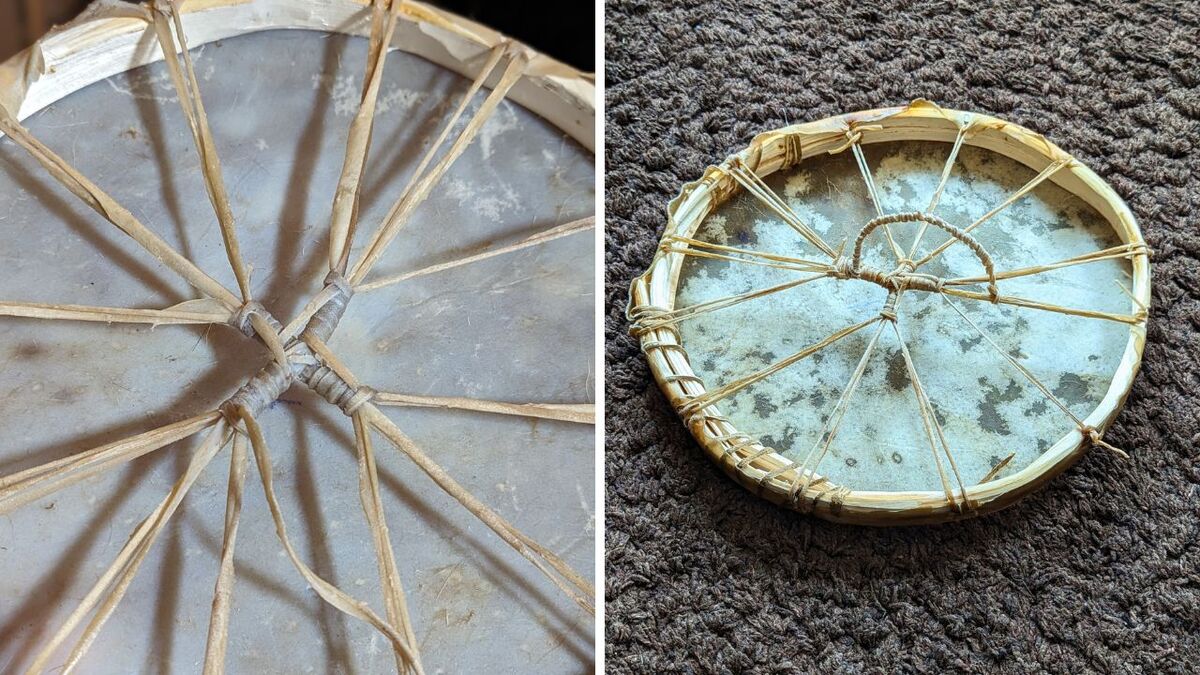
Grip strap (Optional but practical)
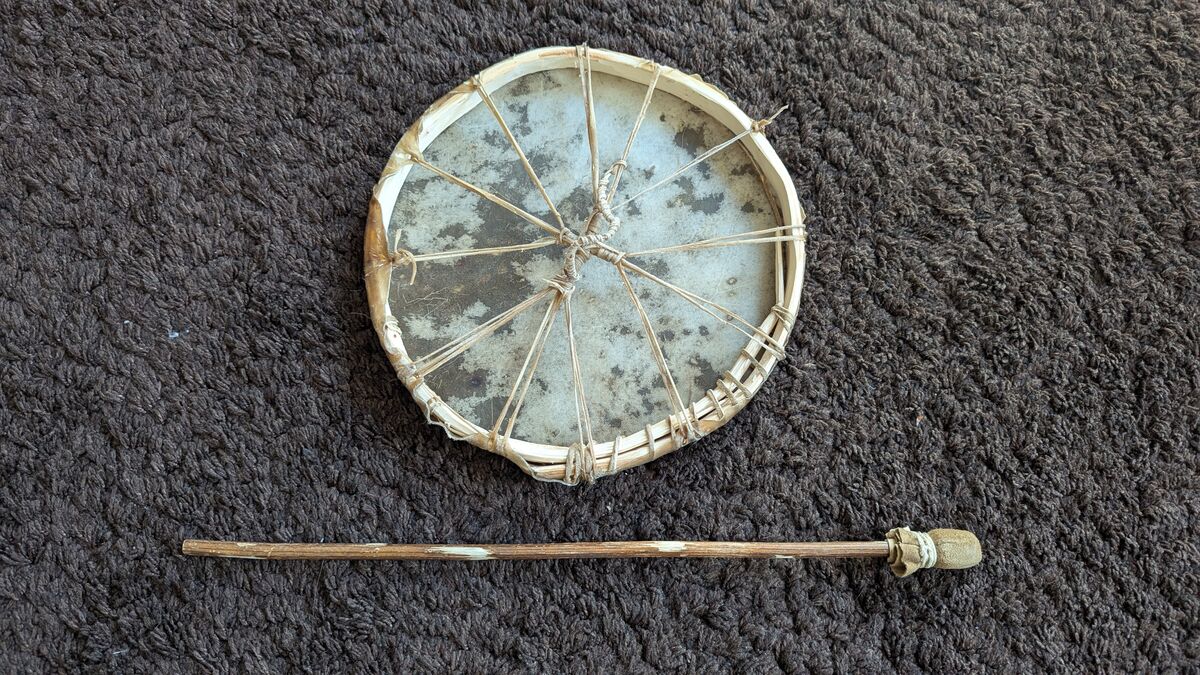
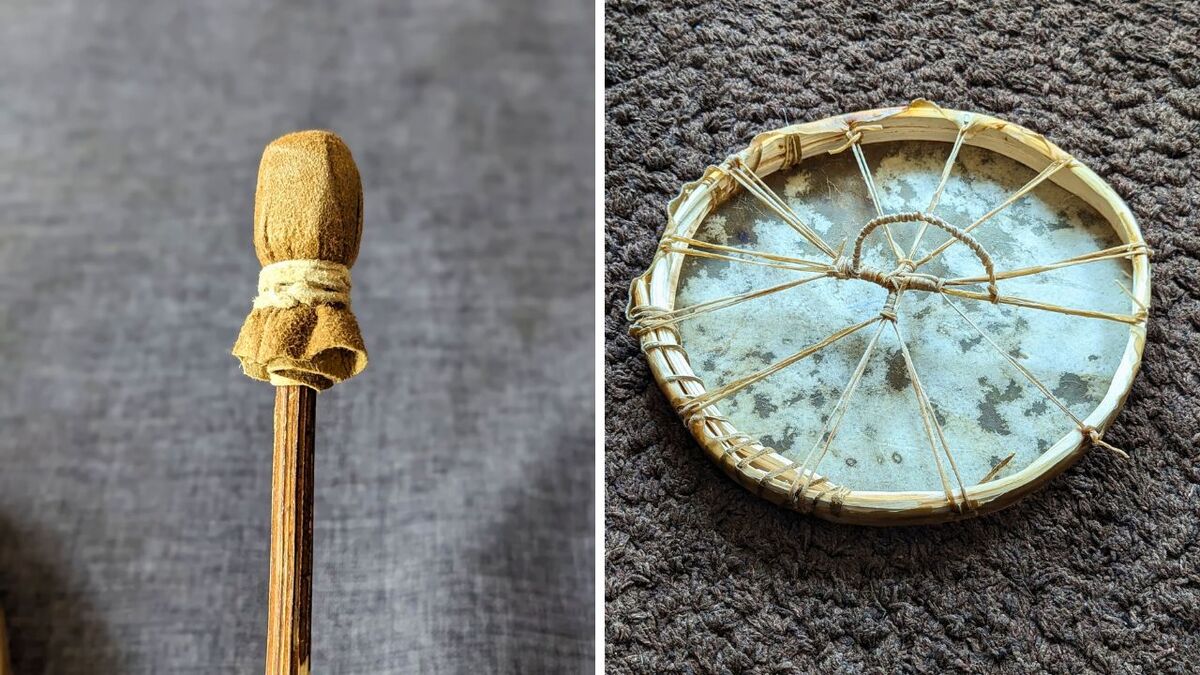
Often, when tensioning, some strings are bundled together or additionally wrapped in such a way that a stable grip is created on the back, allowing you to hold the drum. This is especially useful for larger frame drums.
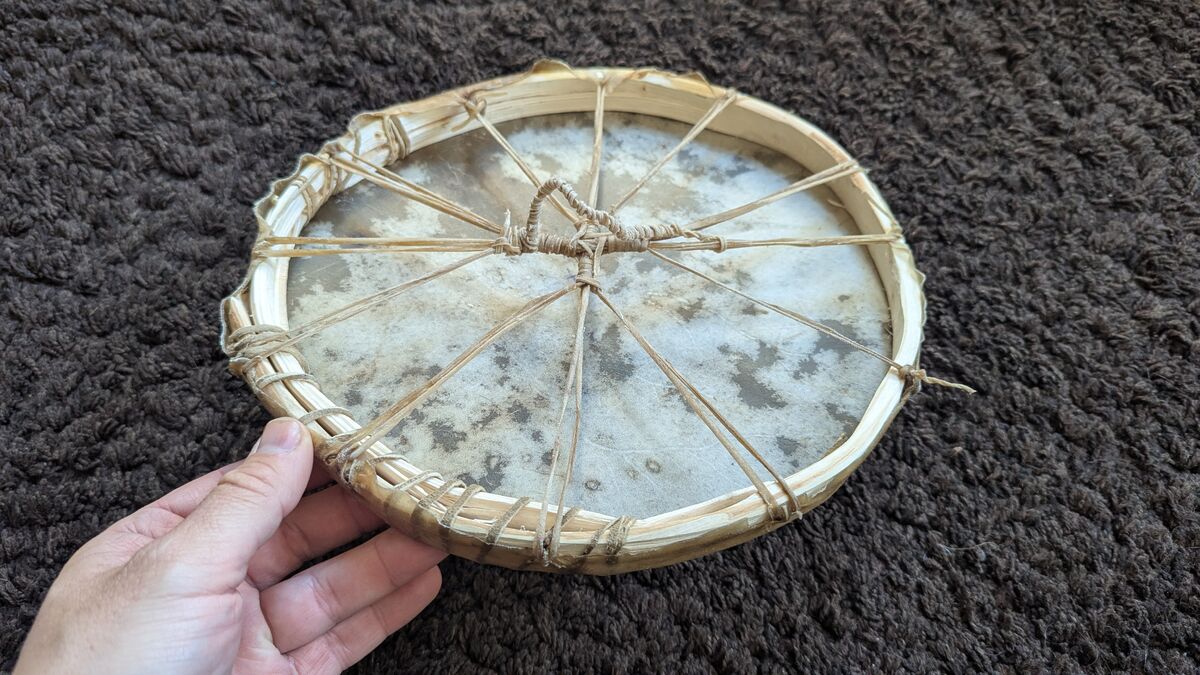
Here is another example of how it can look:
Here is a video that shows well how it works.
Final Inspection & Drying
Check the tension. The skin should already produce a slight sound when you tap it, but it shouldn't be trumpet-tight yet.
The main tension comes from drying!
Hang the drum in an airy, not too warm and not too sunny place to dry. Direct heat or too rapid drying can cause the skin to crack or warp the frame.
Patience is once again your best friend. It may take a few days for the drum to be completely dry.
The first blow: The heartbeat awakens
When your drum is completely dry, you will be amazed! The skin is now hard and incredibly tight.
Take a mallet (which you may have carved from a branch and wrapped in leather or fur) and strike your drum for the first time. This deep, resonant sound that you have created yourself – that is pure magic!
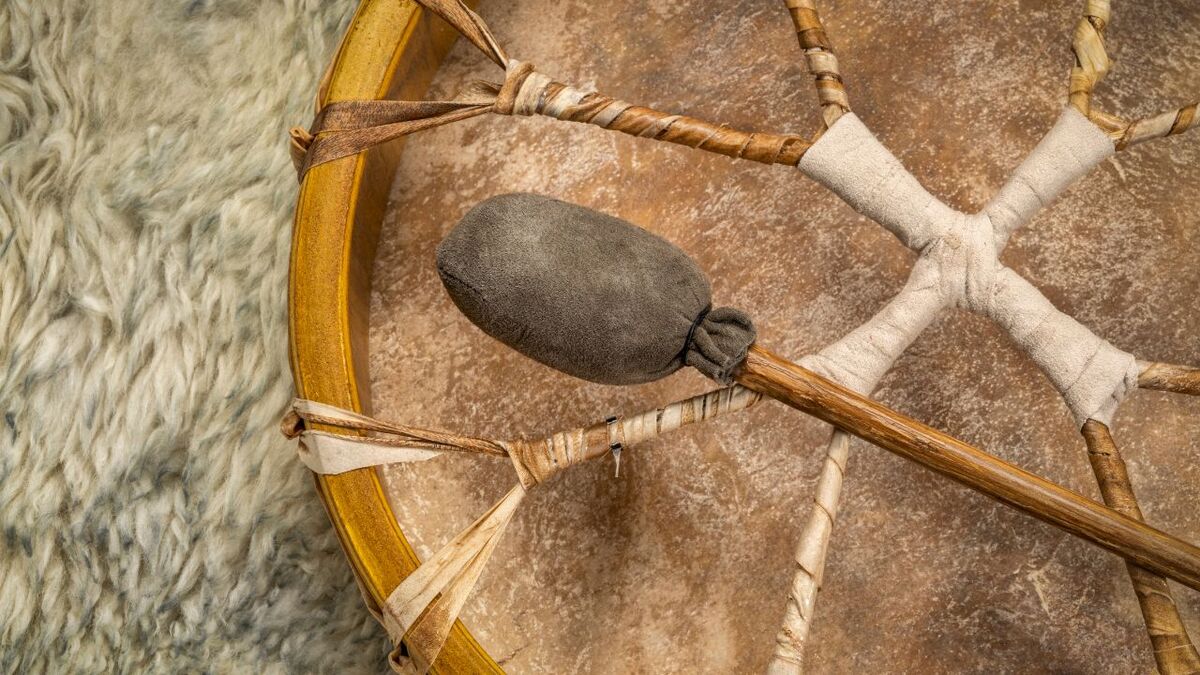
Building your own drum is more than just a craft. It is a journey, a process of connecting with natural materials and ancient techniques.
It teaches us patience, mindfulness, and respect for the resources that surround us. And in the end, you hold a unique instrument in your hands that unites your heartbeat with the pulse of the forest.
Have fun building and drumming!


Author of the guide
Martin Gebhardt
Hey, I'm Martin. On my blog, you will learn the basics and numerous details about living in the wild. I think survival, bushcraft and the good life in nature are the keys to happiness. Find me here on Instagram or on YouTube. You can find more about my mission on the About Me page.
Was this guide helpful?
16 people found this guide helpful.
5.00 out of 5 points (16 Ratings)
Comments (0)
This post may contain affiliate links. So if you click on the links and make a purchase, I will receive a small commission at no additional cost to you. Click here, to learn more about it.


