Bushcraft First Aid Kit: Compile and Apply
Learn what a bushcraft first aid kit contains and how to deal with injuries. If the injury is fatal, your life is at stake.

From Martin Gebhardt. Check out my “About me” page.
👉 The key facts from this guide
- An emergency kit is essential in the wilderness, as you must act quickly and effectively in case of injury to save your life.
- Your Bushcraft first aid kit should include wound dressings/plasters, scissors, bandages, a compress, a rescue blanket, gloves, a triangular bandage, a tourniquet system, and a tick removal tool.
- In case of injury, it is important to stop the bleeding and cover the wound to prevent bacteria from entering. In case of deep cuts, a pressure dressing or a tourniquet system may be necessary.
- It is significant to be able to assess whether you need a doctor. For heavily bleeding, larger wounds, wounds with frayed or gaping edges, and heavily contaminated wounds, you should seek medical attention immediately.
- Make sure that you always have your first aid kit with you that none of the items have expired, and that it is kept in a waterproof container/bag.
- Take regular first aid courses to ensure that you know how to handle injuries.
Out in the wilderness, you are on your own.
A first aid kit is incredibly important. Because once you are injured, it will be crucial for your progress.
If your injury develops poorly, your life is at stake.
Learn today what your bushcraft first aid kit must contain and how to deal with injuries.
Why have a first aid kit?
In case of an injury, you have to help yourself - quickly and effectively.
If you can't stop a heavy bleeding, you run the risk of bleeding to death until proper help arrives. But even a small cut with your pocket knife can lead to an infection.
Once you are injured, injuries have a massive impact on your progress. You are not only biologically impaired, but also psychologically affected.
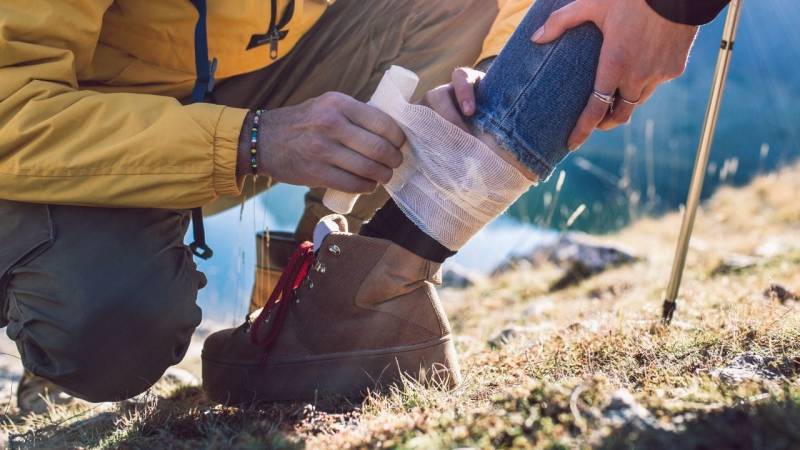
Please note that first aid primarily does not involve wound cleaning and extensive care (such as stitching wounds). Both of these are the responsibility of a doctor. First aid means stopping bleeding and covering and treating wounds to prevent bacteria from entering.
Therefore, it is important that you can assess whether you need a doctor. In case of doubt, abort your tour and immediately seek medical attention.
More heavily bleeding, larger wounds, wounds with frayed or gaping edges, and those that are heavily contaminated must be treated by a doctor.
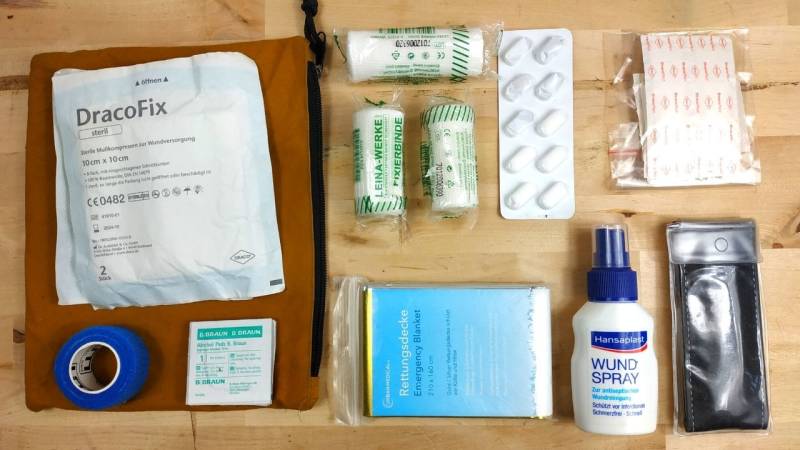
Look, most people who are out and about have a first aid kit:

Contents of your first aid kit
I will now list my recommendations for you. Please note that such a set is often a personalized compilation and depends on your needs. Many of the individual products can also be purchased separately at your pharmacy.
Adhesive bandage / plaster
With adhesive bandages, you can treat superficial injuries. Also pack a few wider strips.
McKesson Adhesive Bandages, Sterile, Fabric Patch, 2 in x 3 in, 50 Count, 1 Pack
- Rectangle bandages are suitable for patients of any age and are 2 inches x 3 inches, small enough for inconspicuous wound care
- Fabric is pliable to suit a variety of wounds while still providing a comfortable wearing experience
- Long-lasting adhesive sticks successfully to the patient's skin so that the 3-inch bandage doesn't easily come off and the wound stays protected
- Bandage comes sterilized and ready to use, remaining clean and safe for application
- Absorbent, non-stick pads easily conform to the skin and minimize discomfort to the skin
$8.31
View ProductScissors
With these, you can not only cut your bandages to size. You also require scissors to cut clothing to quickly locate the bleeding.
Bandages
Always take at least two bandages with you. This way you can generally treat injuries. But a bandage is also useful as a pressure material.
- Self adhesive bandage wrap has been the support and comfort for ankle and wrist when playing sports, Works perfect for wrapping ankle wrist before sports.
- The bandages suitable for body parts, such as ankle, wrist, finger and so on, can provide for swelling, dressing woounds, sprain and general soreness, also suitable for pets.
- The bandage wrap gives good adhesion, sticks to itself without sticking to skin.
- The self adhering bandage wrap made of high quality porous non-woven, which is soft and safe for your skin with function of ventilation.
- Bandages Wrap Quantity: Cohesive bandages, 6 rolls of self adherent bandage, 2 inches X 5 yards each roll. Each package has 6 rolls ankle athletic tape of skin colour, individual package.
$6.39
View ProductCompress
With a compress, you can efficiently cover large-area injuries in a sterile manner. The compress is also needed for a pressure bandage.
- 𝐅𝐈𝐑𝐒𝐓 𝐀𝐈𝐃 𝐃𝐑𝐄𝐒𝐒𝐈𝐍𝐆: This compress bandage allows for quick wound dressing wherever you are to prevent further infection for the patient. Comes with an extra absorbent 4” non-stick pad for early cure
- 𝐇𝐈𝐆𝐇 𝐐𝐔𝐀𝐋𝐈𝐓𝐘: The compress bandage comes with high-quality manufacturing. Comprised of a non-adherent dressing pad attached to a soft gauze bandage, effective for versatile trauma dressing
- 𝐂𝐎𝐌𝐏𝐀𝐂𝐓 𝐒𝐈𝐙𝐄: This compress bandage is completely lightweight in size which can be easily stored in your trauma kit, medical cabinet, or outdoor adventure backpack with ease
- 𝐄𝐀𝐒𝐘 𝐓𝐎 𝐔𝐒𝐄: This compress bandage is very easy to use for dressing. Just pull out from the pack and apply where you need. The woven stretch gauze will provide a comfortable feel
- 𝐌𝐔𝐋𝐓𝐈𝐏𝐔𝐑𝐏𝐎𝐒𝐄: The sterile compress bandage is ideal for a few different purposes. It is perfect for trauma response teams, EMTs, homes, offices, restaurants, outdoor activities, and much more
$16.21
View ProductEmergency Blanket
With the emergency blanket, you can protect yourself or the injured person from hypothermia or overheating.

Amazon
Offer
Data updated 9 hours ago
- Emergency Mylar Thermal Blankets - Emergency Blanket,Space Blanket,Thermal Blanket,Mylar Blanket,Survival Blanket.Our durable advanced aluminized Mylar blankets are perfect for civilian bug out bags, go-bags, and home/auto emergency kits.
- Space Blanket Survival kit Camping Blanket (Pack of 4)- Each survival blanket is individually folded, wrapped, and sealed for easy storage and retrieval. They are reusable, waterproof and windproof and can also be used for both ground cover and shade. Durable and advanced aluminized dual-sided Mylar blankets are perfect for conserving body heat in emergency survival situations.
- EMERGENCY USE - Perfect for emergency situations where warmth or protection from all-weather conditions is required. Helps prevent hypothermia and shock by retaining/reflecting up to 90% of a user's body heat. our blankets can help block rain, snow, and moisture to keep you dry in damp, wet, cold, rainy environments
- Manufactured from the best Weatherproof Material : Waterproof and weatherproof foil and Mylar emergency thermal blanket for retaining or deflecting heat. Mylar insert provides insulation and the foil cover can reflect heat back to the body or deflect heat from the sun
- Provides compact emergency protection in all weather conditions: Perfect for camping trips and sporting events. uses are nearly limitless: use as tent footprint, backpack cover, rain poncho, emergency signal, solar oven, shade cover, fishing lure, bird repellent, emergency shelter, sleeping bag liner, ground cover, bivouac sack, wind blocker, arm sling, tourniquet, bivvy, trail marker, water collector, snow melt container and so on.
$6.29
List Price: $12.99
Gloves
The disposable gloves are useful to prevent dirt from entering the wound. When it comes to bushcraft and survival, it is inevitable that you will get your hands dirty. And there is another advantage to the rubber gloves: if you have to help others, you will not come into contact with their blood or other fluids.
- SAFESKIN Light Duty Gloves: Help keep your hands clean and protected anytime with the SAFESKIN Nitrile Powder Free Gloves! Designed with our new lightweight and flexible pack, these medical grade gloves are ideal for on-the-go coverage, no matter what comes your way.
- Be Prepared Anytime, Anywhere: These nitrile disposable gloves come in a portable POP-N-GO Pack - pops open and snaps shut. Compact enough to fit in a glove compartment, makeup kit or diaper bag, the POP-N-GO Pack dispenses one glove at a time, and it is resealable - so you are always prepared.
- Task Focused Protection: Offering a comfortable fit and feel, these medical exam gloves are powder-free and are not made with natural rubber latex. These gloves are disposable and can be used for food handling, baby and pet care, first aid or hair/beauty. SAFESKIN makes taking on new challenges easy.
- Convenient Design: These Nitrile exam gloves have an ambidextrous design and feature textured fingertips for better tactile sensitivity. SAFESKIN cleaning gloves have a 9.5-inch length cuff that covers the wrist while you are working to keep your hands clean and protected.
- Ready for Life’s Surprises: These examination gloves offer barrier protection for low exposure to fluids or chemicals. They can be used for pet or baby care, first aid, or hair coloring and fabulous makeup looks. They are great to use as gloves for food preparation - so you are ANYTHING READY.
$12.99
View ProductTriangle Scarf
You can use the triangle scarf in many ways. For example, to splint bone fractures or simply to have a headscarf in hot weather. You see, it is also useful to wear a neckerchief. If you always have one with you, then leave the triangle scarf behind.
- Soft Material: The shemagh scarf men is made of 100% cotton, extremely soft, breathable and durable. Soft material of the arab scarf for men provides comfort in any weather condition. The desert scarf will soften up with multiple use to give you a good adventure experience.
- Proper Size: Our shemagh measures approximately 43 * 43 inches, both men and women can wear it. The military scarf is suitable for all the classic neck & head scarf wraps. It protects from heat in the summer and keeps you warm during the cold weather.
- Multiple Purpose: Keffiyeh is a versatile tactical scarf. The scarf for men is perfect for outdoor activities. It not only protects your face and neck from sun, wind and sand when hunting, hiking, climbing and fishing, but also can be used as a blanket, arm sling, sweat rag, camouflage.
- Various Colors: Tactical scarf are available in multiple color choices, tan, black, white, red, green. You can choose whatever you like. Classic stripe patterns with tassel of the head scarf for men make you look more stylish and fashion.
- Gift Choice: The turban for men is a gift choice for men and women on their birthdays, thanksgiving days, Christmas, etc. Hand wash in cold water is recommended. Do not bleach. Hang to dry. Proper washing methods will keep military shemagh from fading, deforming, and wrinkling.
$12.99
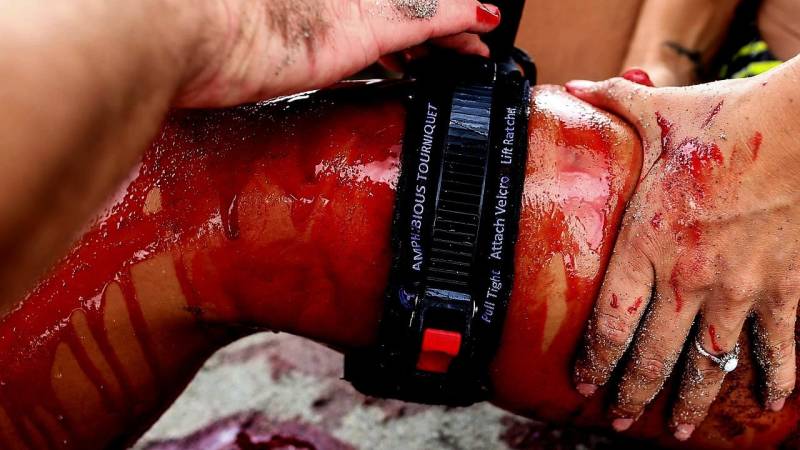
View ProductTourniquet Binding System
The word Tourniquet comes from French and means "turnstile", also "artery press". A Tourniquet is a binding system with which you can stop or completely interrupt the blood flow in the veins and arteries. This prevents bleeding.
The area of application is a severe external bleeding on the extremities, such as the legs. Pressure bandages, especially on the legs, are often not sufficient for a significant external bleeding.
Since the application (especially for the inexperienced) takes a little longer, manual compression (e.g., knee in groin or armpit) is sometimes useful as a bridging measure.
With a Tourniquet, the blood flow must be completely interrupted; otherwise it will only worsen the bleeding tendency - that is the task of the Tourniquet. Furthermore, the applied Tourniquet will cause extreme pain to the person seeking help in a short time.
Tourniquets are mainly used when many injured people need to be treated, for example in explosions with amputations.
- Effectively and quickly block the blood flow of upper limbs and lower limbs, and inhibit the outflow of arterial blood.
- One-Handed operation. The total length are 36 inches, suitable for most people's arms and legs.
- The design of the composite hasp ensures that the tourniquet will not affect its use on rainy days.
- The red oval marking on the tip provides additional visual cues during use.
- The tourniquet has a wide application range, can be used for military, medical treatment, rescue and the like, and is small in size and convenient to carry.
$14.99
View ProductTick remover and tick tweezers
In our latitudes, there are more and more ticks and these annoying creatures can really get on your nerves. It is important to remove ticks from your body as quickly as possible. Therefore, a tick set is indispensable for me. Read here for more information about ticks and how to protect yourself.

Amazon
Offer
Data updated 9 hours ago
Acronde 3 Pack Tick Remover Tool Set Stainless Steel Tick Remover Kit for Cats and Dogs
- Best thick remover kit for cats and dogs: Kit includes one double-ended tweezer, one single ended hook tool and one specially shaped super-fine-tip tweezer. Tiicks removal kit that allows you to be safe and effective to remove any sizes tiicks from pets, people, and other animals.
- Easy to use: Our tools require no instruction; The tiick removal fork can be used to remove larger tiicks. The double-ended tweezer is used to remove the smaller tiicks. The ultra-fine-tip tweezers can be used to precisely remove tiny tiicks.
- Easy to carry: Keep your tiick remover kit in your first aid kit, glove compartment, or backpack to easily remove tiicks wherever you go.
- 100% Natural: Three tools are made with high quality stainless steel that wont upset your pet!
- University tested: The tools in this tiick removal kit have been field-tested and designed for easily and safely removing tiicks from humans, dogs, cats, or other pets.
$7.99
List Price: $8.49
Treating Injuries
First, I would like to mention that I am not a doctor. I have learned a lot and now want to pass on my acquired knowledge to you as a bushcraft and survival friend.
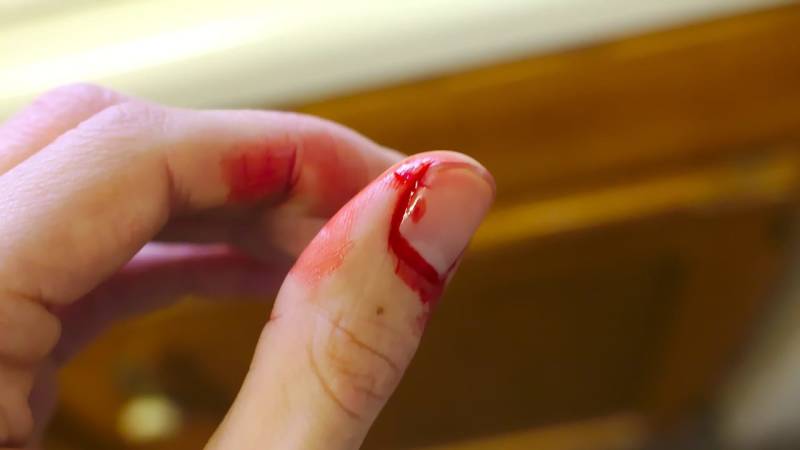
Superficial cut injury
For a small cut, usually a band-aid is sufficient.
Let it bleed out, so any dirt particles are flushed out.
If the bleeding does not stop after a few minutes, press a sterile bandage lightly on the wound for five to ten minutes until the bleeding subsides.
Tips for wound care:
- Do not suck on the wound (saliva contains many germs)
- Do not rub or squeeze the wound
Deep Cut Wound
When dealing with a deep cut (a larger, more heavily bleeding wound), proceed as follows:
- First, you treat the wound with a sterile dressing (such as a compress) and wrap a gauze bandage around it.
- As the next step, if the wound continues to bleed heavily, you apply a pressure bandage.
- If the pressure bandage still does not help, it is very likely that a larger blood vessel is injured. You must then stop or completely interrupt the blood flow in the veins and arteries (such as with a tourniquet).
Raise the injured body part high so that less blood flows in.
It is incredibly important that the bleeding stops. If you can't manage this, you will bleed to death.
How to make a pressure bandage?
For most injuries, a compress and a bandage are probably sufficient. However, there are also more serious injuries where you need a pressure bandage.
I will show you in a few simple steps how to create this.
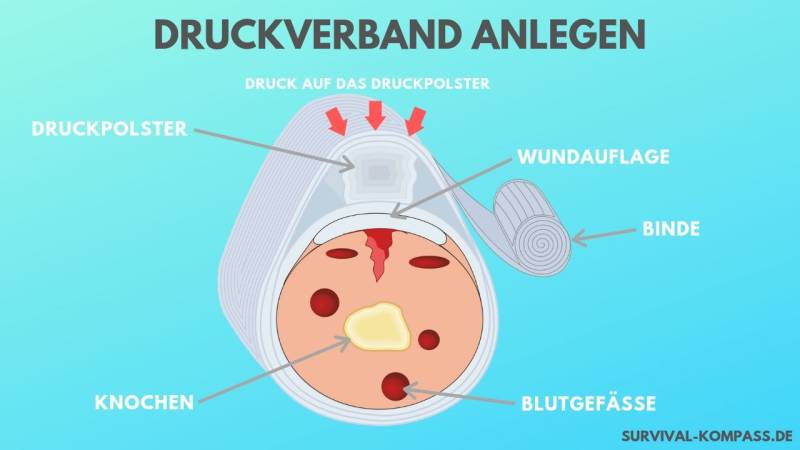
- Hold the injured body part up.
- Place a compress on the wound.
- Wrap the gauze bandage around 2–3 times.
- Then place a stable object that is not absorbent over the wound.
For example, an unopened gauze bandage is suitable for this, so you should always have at least 2 packages of gauze bandages with you. In an emergency, a closed package of tissues will also work. - The object is now wrapped and fixed with pressure on the wound.
The pressure must now be strong enough to stop the bleeding. - If the bleeding does not stop, another pressure bandage must be applied over the first one.
Below in the graphic you can see how a pressure bandage is constructed.
Furthermore, I have created a video for you in which you quickly and easily learn how to apply this to yourself.
The advantage of the compression bandage is that it only applies pressure to one part of the body. Ideally, this should be where the wound is located.
A regular bandage that is very tight would constrict the entire body part. This can result in the complete cessation of venous blood flow or arterial inflow.
A few more notes:
- A pressure bandage should only be applied to the extremities (arms, legs)
- It must be ensured that blood supply is guaranteed and no nerves are pinched
- If possible, call an emergency doctor as soon as possible
Tips for your first aid kit
I have a few tips that I have noticed over the course of my time.
- Always make sure you have your first aid kit with you (especially if you are traveling with children!).
- Make sure that no plasters, bandages, gauze, or compresses have expired.
- Always keep the first aid kit within reach in your backpack.
- Bring a flashlight so you can treat injuries in the dark.
- If you are allergic or need other medication, always bring it with you.
- Adapt your first aid kit to the duration of your trip, type of travel and country.
- Store your first aid kit in a waterproof container/bag.
- If you are traveling for several days, bring diarrhea medication and painkillers.
Read also
Bushcraft without frustration: These 12 mistakes you should avoid as a beginner – You are starting with bushcraft and want to avoid typical beginner mistakes? Here you will learn what pitfalls there are and how to avoid them.
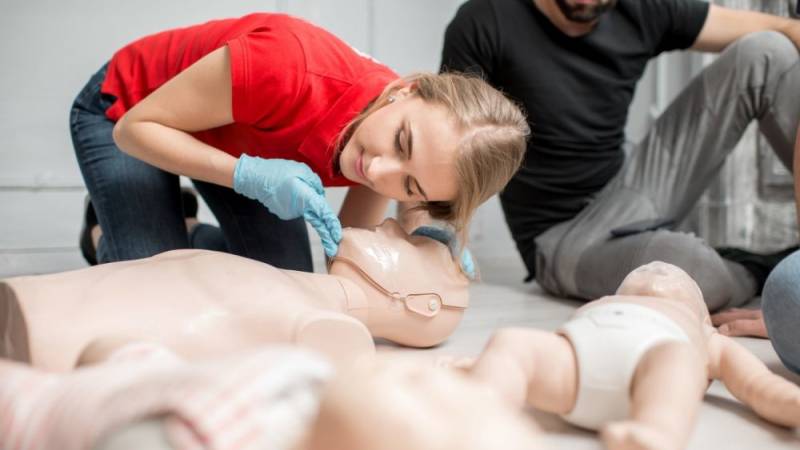
Regularly conduct first aid courses
You have a first aid kit - great. But what good is it if you can't apply a pressure bandage or don't know how to react to circulatory problems?
Therefore, I recommend that you participate in a first aid course. These are often offered for free in every city.
I can assure you that these courses will alleviate fears and make you feel more confident in case of injuries.
Summary
Even though dealing with wound care may not be a great topic, the equipment, and knowledge about it are immensely important.
Because when push comes to shove, you need to know how to apply what you need. Without a first aid kit, you're lost in the wilderness if you get injured.
Therefore, put yours together as quickly as possible and learn the basic techniques.
What does your first aid kit look like? Did I forget anything essential?
What do you consider to be particularly significant?
Write your opinion in the comments now!

Sources for the guide
https://de.wikipedia.org/wiki/Tourniquet-Abbindesystem
https://www.netdoktor.de/therapien/wundversorgung/schnittwunde/
https://www.netdoktor.de/therapien/wundversorgung/druckverband/

Author of the guide
Martin Gebhardt
Hey, I'm Martin. On my blog, you will learn the basics and numerous details about living in the wild. I think survival, bushcraft and the good life in nature are the keys to happiness. Find me here on Instagram or on YouTube. You can find more about my mission on the About Me page.
Was this guide helpful?
20 people found this guide helpful.
5.00 out of 5 points (20 Ratings)
Comments (0)
This post may contain affiliate links. So if you click on the links and make a purchase, I will receive a small commission at no additional cost to you. Click here, to learn more about it.


