How to ignite a fire with just one match – The complete guide
👉 The key facts from this guide
- The preparation is crucial for lighting a fire with just one match. This includes collecting dry wood of varying sizes and finding a suitable area for the fire.
- The wood should be collected from resinous conifers or oil-rich trees, as these types of wood burn particularly well.
- The fire should be built on top of a layer of dead, dry branches to keep moisture away from the ground and to have an additional source of fuel in the center of the fire.
- The match should be lit correctly to minimize the risk of it going out.
- The fire should be built from small to large, starting with delicate twigs ignited by the match, followed by pencil-thick branches, and finally thumb-thick branches.
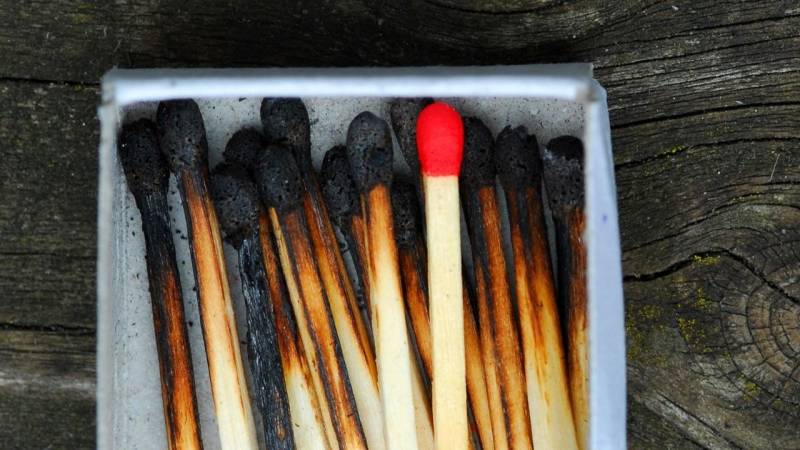
Suddenly, the six participants faced the challenge of igniting a fire with only one match.
The task is actually simple. You can use anything you find in the forest, be it wood or kindling.
The result: None of the participants managed to do it.
What did I learn from this?
Igniting a fire with one match is not easy.
- Participant #1 had too large branches. Nothing caught on fire.
- Participant #2 didn't protect the flame. The match went out.
- Participant #3 tried to use flower seeds. They only smoldered and did not ignite the wood.
- Participant #4 broke the match while trying to light it.
Your keen eye probably already recognizes the first mistakes.
Let's now delve deeper into how to build the perfect fire and successfully ignite it with just one match.
Laying the groundwork for more challenging ignition methods
Starting a fire in the wilderness is an essential skill. Fire making should therefore be at the top of your list.
With fire, you cook, keep warm, dry your clothes, keep away wild animals or gather with your friends around it.
Fire also boosts your morale and is an important psychological factor.
Fire means survival.
My recommendation is: practice igniting your fire with one match. It is a wonderful exercise to sharpen your skills. Only by practicing do you gain experience from which you learn.
These experiences will be extremely helpful to you when it comes to more complicated ignition methods, such as with the firesteel, the flint and steel or the bow drill.
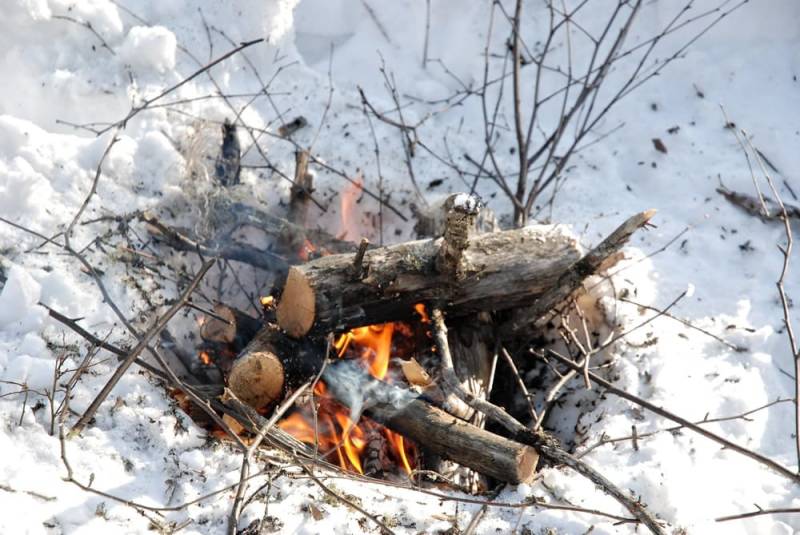
The video of starting a fire with just one match
I love videos because I can learn very well with them. That's why there's a video for this essential topic, too.
Preparation is the key to starting a perfect fire
Thorough preparation will greatly improve your result. Sit down, take a deep breath, then go through the points and prepare yourself optimally to light a fire with a match.
Basics to get started:
- Collect dead wood that hangs on trees, it is dry.
- Do not collect wood that is on the ground. It is likely damp.
- Collect your wood from resinous conifers or oil-bearing trees. Conifers such as pine, spruce, or fir are perfect. However, not the larch. Birches are also suitable because the bark contains essential flammable oil.
And this is what you collect first:
- Search for small, thin wooden sticks that are dead and dry. They should be as thick as matchsticks. Pine needles are perfect for this. The small sticks should break clean with a clear and distinct "snap".
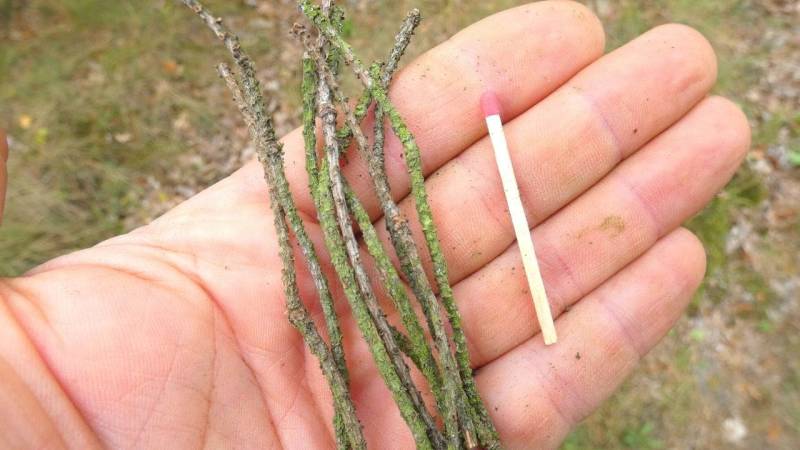
Another advantage of the aforementioned evergreen trees is that they often have dead branches low on the trunk.
Little light comes from above to reach the branches, so the tree does not waste energy to maintain them. The branches die.
The best part: The branches are protected from rain and snow by the overhead limbs.
You can easily collect many small dry branches in a short amount of time.
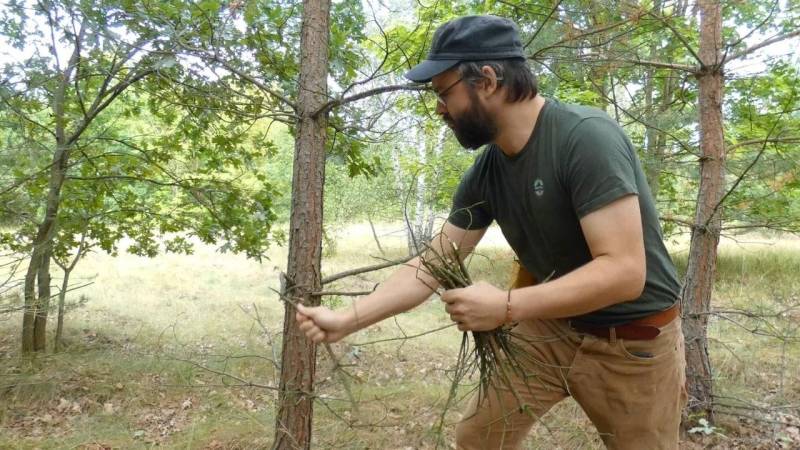
How to find dry tinder for a campfire
Now we have completed a necessary step: We ignite the small, fine twigs with the match. After the first ignition, we now need slightly larger branches.
Pencil-thick branches are good for the next stage, then finger-thick branches, and then thumb-thick branches.
The idea is that each type of branch ignites easily from the previous one.
What does not work: Trying to ignite a branch the size of a thumb with a match. The length of the match will not be sufficient to ignite the wood. It will burn out too quickly.
So, you have to collect some medium-sized branches and use them to build your fire from small to large.
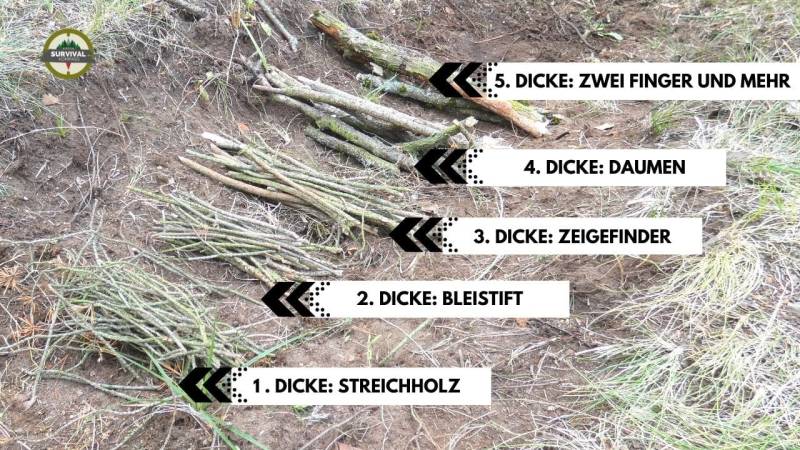
All branches should be dead and dry. Collect and sort them before igniting, and place your fuel next to the fire.
Find a place for the bonfire
Now, you still require the right spot for your bonfire.
Look around and make sure that there are no tree roots that could potentially ignite. Furthermore, look up to make sure that no branches are hanging too low and could catch fire. You definitely don't want to start a forest fire.
Then clear away the leaves, needles, pieces, and grass in the chosen area. Do this until you have bare earth in front of you.
If you notice that the ground consists of peat, you should NEVER start a fire there (dry peat burns!). Look for a rocky, sandy, or damp area.
It's always good to start a fire near water. This is especially good practice in dry coniferous forests. This way, you will be close to the source if you have to put out your fire.
Now build your fire pit like this:
- Dig a pit, about 10 to 20 cm deep.
- Remove any remaining roots.
- Place dead and dry sticks, about the size of your thumb, on the bottom of the pit.
- Light your fire on top of the sticks.
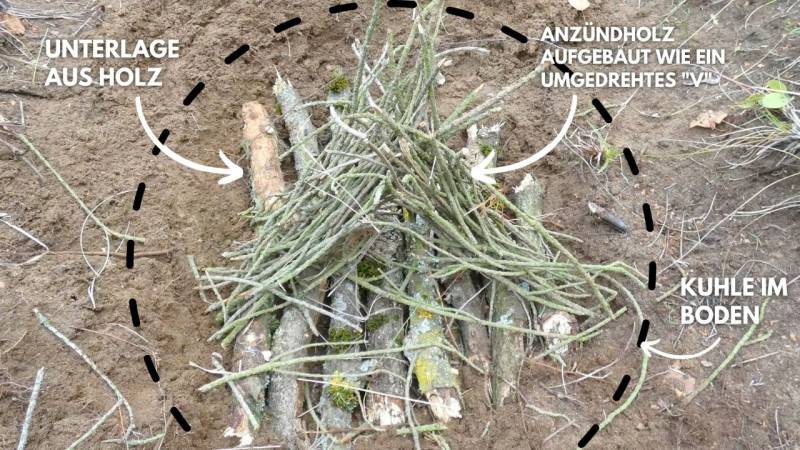
Why do I lay sticks on the ground before lighting my fire?
Here are three advantages:
- The sticks protect the tinder from direct contact with damp or cold ground.
- The sticks provide a ready source of fuel in the center of the fire, which will create good coals later on.
- The gaps between the sticks allow air (especially oxygen) to be drawn into the center of the fire.
After preparing the area and pit, separate the thin sticks (about the thickness of a matchstick) into two hand-sized bundles.
Place the two bundles in a tent or V-shape (inverted). Make sure to leave a gap in the middle to hold the matchstick.
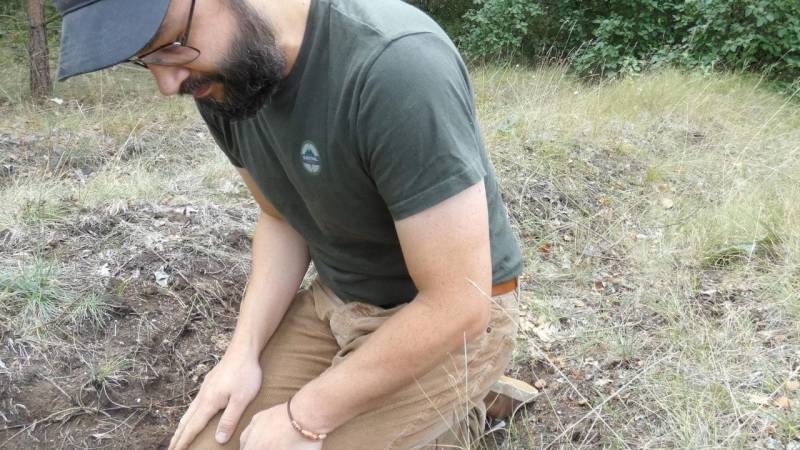
Furthermore, pay attention to the wind. Kneel with your back to the wind and close your legs to protect your fire. Otherwise, a wind channel will form between your legs.
Reading tip: Check out what makes an ideal Bushcraft campsite.
Now you are ready to light your fire
Now you are perfectly prepared.
You have plenty of dead, dry wood in various sizes.
You have also found a suitable area.
Your fire pit is prepared and lined with branches on the ground. Your kindling is arranged in an upside down V shape.
Your body is positioned considering the direction of the wind.
Now you can light your match.
How to correctly light a match
But you need to do it right.
By right, I mean in a way that minimizes the risk of it going out.
What if it's your last match? My tip: Always practice as if it is.
Here are my tips for lighting a match.
Firstly: Pay attention to how you open the matchbox.
If you have a normal matchbox, you can open it in two ways. So that the match heads are immediately visible. Or so that the tips of the matches are visible.
What if it's raining, or it has rained and drops are falling from the trees? Or if snow is falling from the trees? Imagine a huge water drop falling right on the match heads. That's it, you won't be able to start a fire.
So, open the matchbox in a way that the tips of the matches are visible. That's safer.
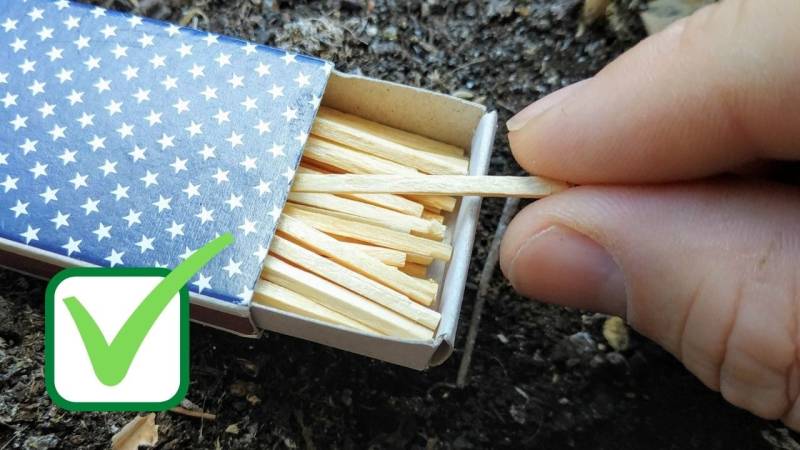
Secondly: Holding the match correctly.
A match breaks easily when pressure is applied at a right angle to its length. However, it is difficult to break when pressure is applied along its length. When you light a match, you should therefore apply pressure along its length, not across it.
In difficult situations, it is especially important to be able to light the match correctly. Imagine the situation in winter: cold and shaky hands, or generally reduced dexterity, will make life difficult for you.
Then the chance is very high that you will exert too much force and break the match. And it gets really serious when it's your last match.
So, here's what to do:
- Hold the match between your thumb and middle finger.
- Support the match head with your index finger.
Don't worry, you won't burn yourself when you light it. Of course, you remove your index finger at the end of the ignition.
- Then close the match directly in your hands to protect the fragile flame.
- Wait until the match head is burning properly.
- Keep the matchbox in your hand and don't put it away.
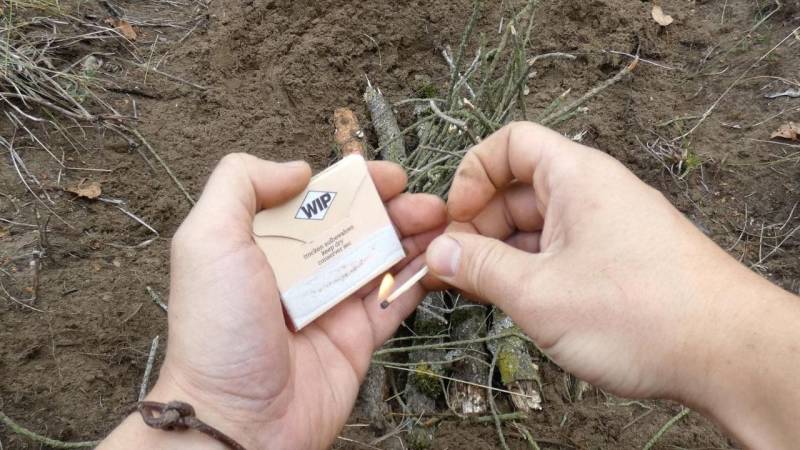
As soon as the match is burning well, bring the flame carefully to the campfire. Remember to keep the flame protected. This is a critical phase of the process.
Now light the match and hold it to the ignition material so that the flame touches the fine twigs. The best point is in the middle of the V-shape. Hold the match about 1 cm under the material.
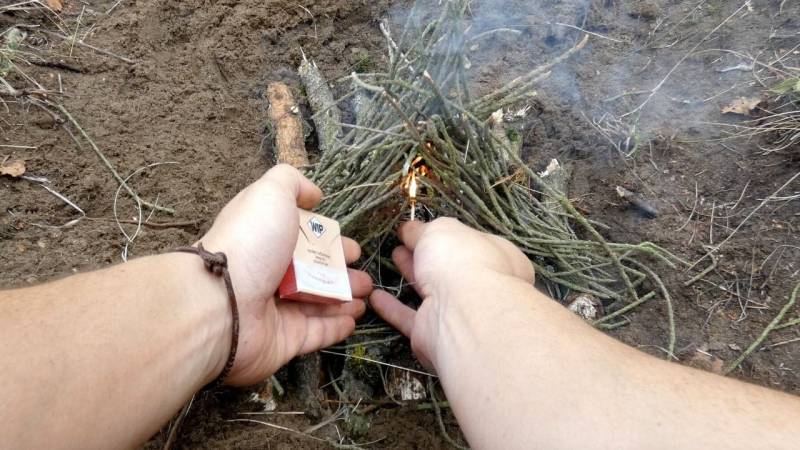
You still hold the matchbox firmly. Why is that?
A normal matchbox is not waterproof, weatherproof, and by no means stable. Imagine your friend stepping on it, or it's getting wet. Or even worse, it gets lost among all the leaves.
Only store the matchbox safely in your pocket when your fire is burning.
If the developing fire needs a little more oxygen, raise your ignition material slightly. You may have to experiment with it because air supply is a key factor.
As soon as the flames rise strongly, lay the next material on top - the pencil-thick branches. Gradually add larger and larger branches to build up your fire.
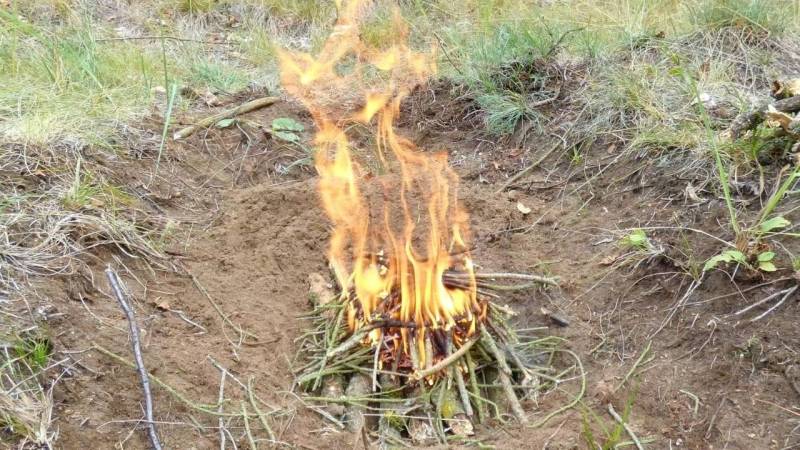
Great, your fire is burning. You have succeeded!
P. S. To boil a cup of water, you only require pencil-thick branches. You don't even need to build your fire any bigger.
Summary
I can't repeat it often enough because it's so important.
Prepare yourself well.
Collect the right materials, choose a suitable fire pit, pay attention to the weather conditions, and carefully strike your match.
If you follow all of these steps, not much can go wrong.
You might be thinking: "Wow, that sounds like a lot of work."
And yes, the first time might be a bit time-consuming.
But if you practice a few times, it will become easier and easier. I promise.
I wish you success in starting your fire.
Moreover, be sure to check out my book "The Fire Primer" where I cover everything in detail.


Author of the guide
Martin Gebhardt
Hey, I'm Martin. On my blog, you will learn the basics and numerous details about living in the wild. I think survival, bushcraft and the good life in nature are the keys to happiness. Find me here on Instagram or on YouTube. You can find more about my mission on the About Me page.
Was this guide helpful?
18 people found this guide helpful.
5.00 out of 5 points (18 Ratings)
Comments (0)
This post may contain affiliate links. So if you click on the links and make a purchase, I will receive a small commission at no additional cost to you. Click here, to learn more about it.


