Making fire with children: Tips for a successful campfire
👉 The key facts from this guide
- Turn your campfire with children into an unforgettable experience by actively involving them and teaching them how to handle fire safely.
- Establish clear rules, such as a safety circle around the fire pit, and be a role model in responsible fire handling.
- Choose a suitable location for your fire, collect firewood together with the children, and show them how to build a fire properly and ignite it safely.
- Explain to the children how to control and maintain a fire, and let them be "fire keepers" under supervision.
- Use the time by the fire to cook together, tell stories, sing, and playfully teach children about fire and safety.
- Always provide enough water for extinguishing and show the children how to completely and safely extinguish a fire before leaving the site.
To make a fire is more than just holding matches to tinder. It is an adventure that brings together young and old, creating unforgettable moments.
As someone who has spent half of their life outdoors, I know that there is nothing more beautiful than sitting around a campfire with children.
The embers crackle, the flames dance, and the children's eyes sparkle with excitement. It's all about involving them in the experience, showing them how to handle fire safely, and having fun together.
Whether it's making stick bread, telling stories, or simply enjoying the warmth - I share my experiences and tips so that you can also have a safe and joyful campfire with your children.
Safety rules for a campfire with children
When having a campfire with the little ones, safety comes first. We practice how to safely handle matches and establish clear rules - no playing with fire, always have an adult present.
Setting Campfire Rules
I know, campfires with children sound like fun and adventure. But before we dive into the sparks and melting marshmallows, let's talk about safety.
Setting rules is the first step to a successful evening. Here are my golden rules:
- We establish a safety circle around the fire pit. No toys or running inside this circle.
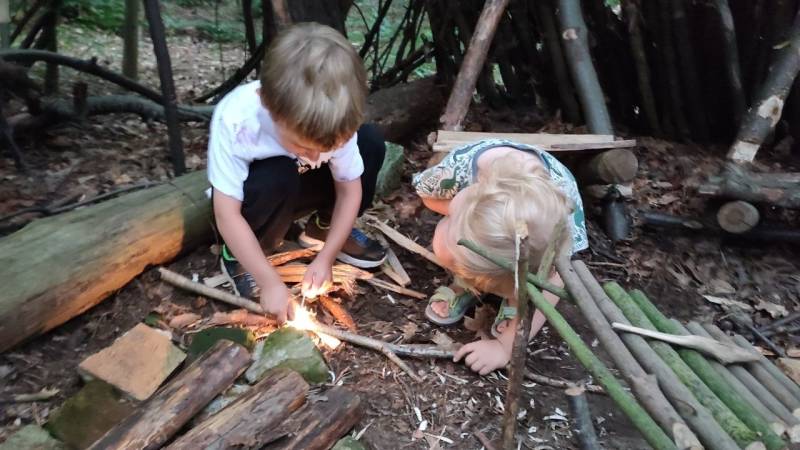
- I show the children how to safely use matches, a lighter, and a fire starter. Each child is allowed to practice under supervision.
- For now, only adults add fuel to the fire. Children learn quickly, but this part remains my responsibility at the beginning. I will later appoint a fire guardian.
- We keep water or a fire extinguisher handy – just in case.
- No one leaves the fire unattended. Neither I nor the children. There is always someone in charge.
- No one lights sticks and walks around with the embers.
- Children should wear close-fitting clothing and tie back long hair to avoid accidentally catching fire.
- It should be made clear that only firewood should be placed (not thrown!) into the fire. No plastic, glass, cans, trash, etc.
I repeat these rules every time we make a fire. They have become like a ritual - one that promises safety while still leaving room for fun.
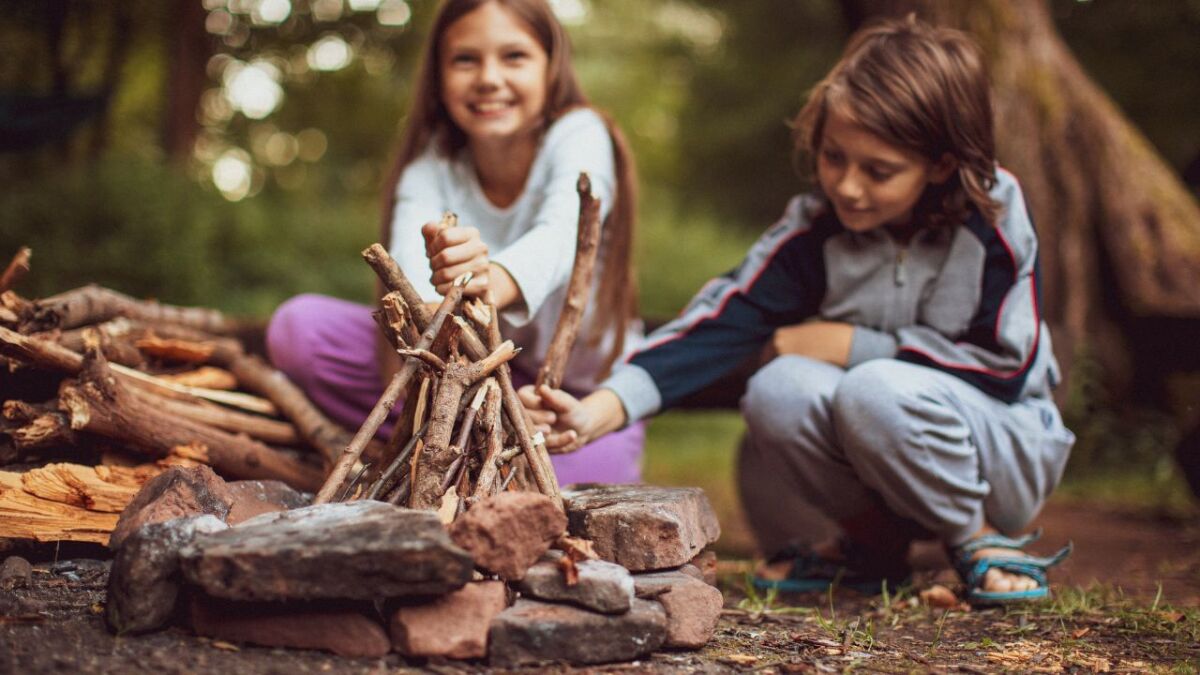
Watching the children carefully handle the fire fills me with pride. It shows me that they not only respect the flame, but also understand why we have these rules.
And that's the beauty of it all: To see how small moments by the campfire turn into big life lessons.
Preparing for the Campfire Experience
A campfire with children is more than just fire and flames. It's an adventure where every action counts.
Before we ignite the fire, let's dive together into the world of preparations.
A fire without preparation does not burn well and not for long.
We choose a safe location, ideally a fire pit - away from trees and always keeping an eye on the wind.
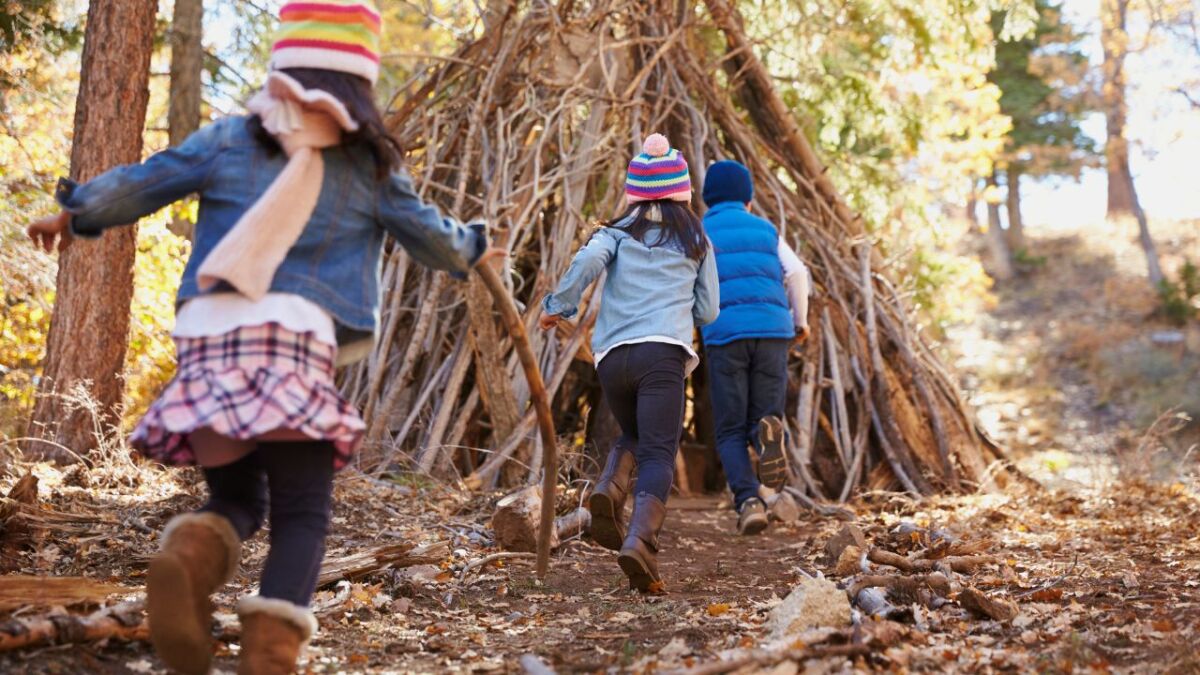
The children help prepare the fire pit and collect small branches and thicker twigs. This way, they playfully learn how to handle the element of fire with respect.
Selection and Preparation of the Right Fire Pit
The search for the perfect spot for our campfire is like a journey. I make sure there is enough space and we keep a safe distance from trees and bushes.
Ideally, you should only make a fire if you have permission. Read here if making a fire in the German forest is allowed. For example, I only make my campfire in my leased forest.
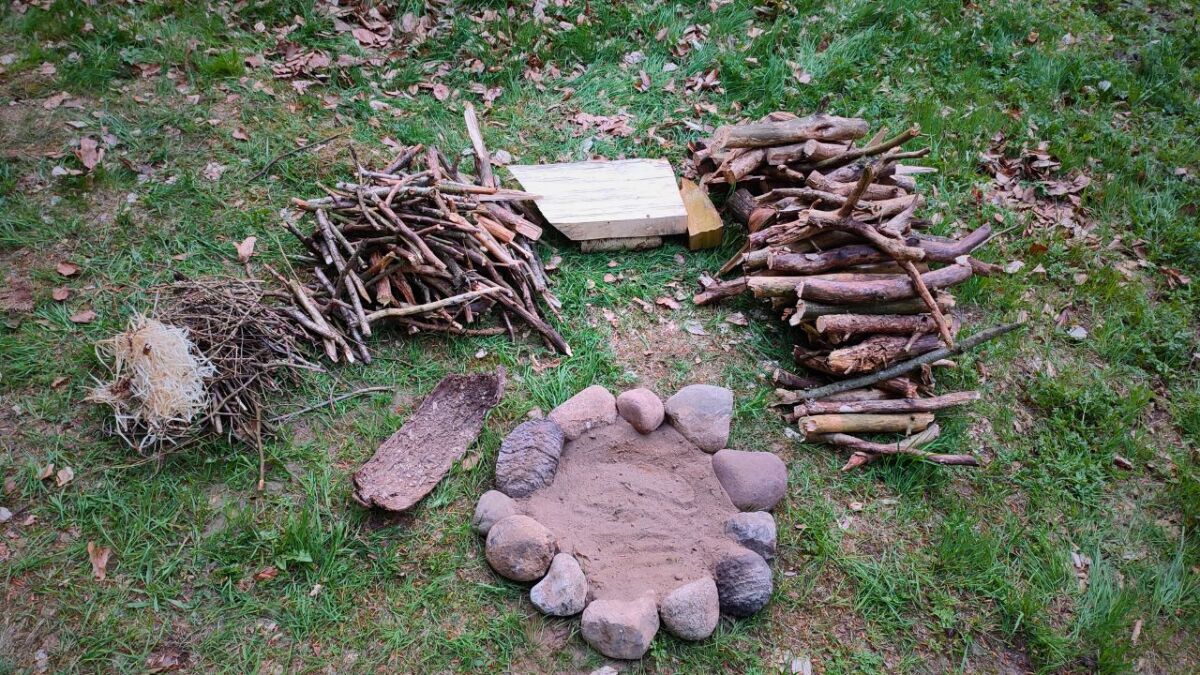
There is a sheltered place where the wind cannot surprise us.
Clearing the ground of leaves and branches together with the children is not only fun, but also part of the preparation.
We need a flat surface for our fire to burn steadily and safely.
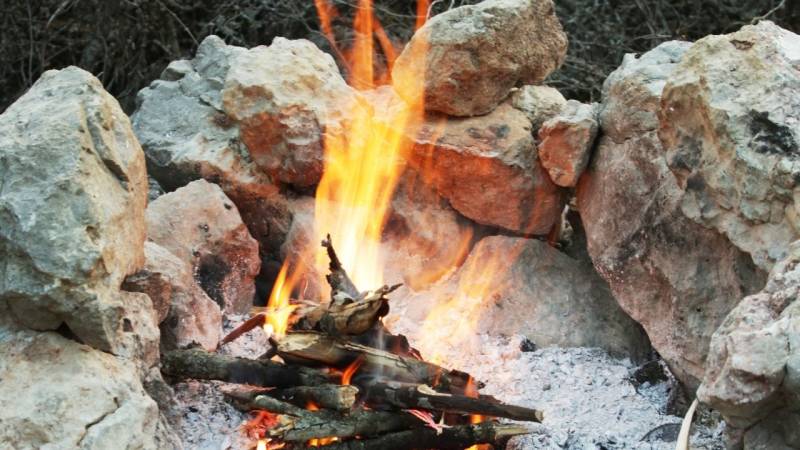
Then we place stones around our fire pit (or use a fire bowl). This not only looks good, but also keeps the fire in place.
P. S. I prefer a fire pit in the backyard and garden because it is easy to handle and keeps the fire clean.
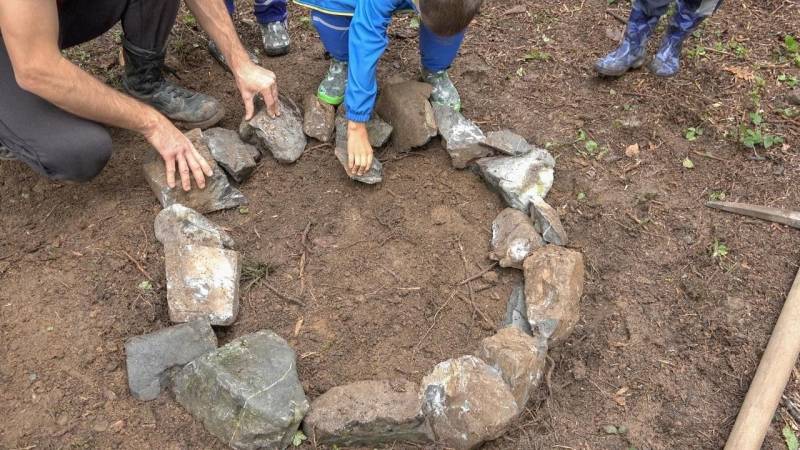
Once the fire pit is ready, it's time for the next step: We search for firewood and kindling.
In addition, I have a video here where you can witness me building a fire pit. It starts at minute 2:27.
Gathering Firewood - It Should Be Dry and Dead, But Not Rotten
Let's make a great fire together with the children and involve them by now motivating them to collect firewood such as branches, twigs, and birch bark.
It's like a treasure hunt in the great outdoors - every found branch is a small victory.
I will show you how to identify and safely collect dead wood (not rotten, like Punk Wood). "Look, these dry branches here burn really well!" I explain to them, while their eyes light up with excitement.
So it's about collecting wood and kindling. We will collect tinder later.
Watch the video and learn about the differences between tinder and kindling:
We must not only collect thick trunks.
We need:
- fine thin twigs
- pencil-thick sticks
- sticks as thick as a marker pen
- arm-thick branches
And when you think you have collected enough, collect a bunch more. Usually, the firewood is not enough.
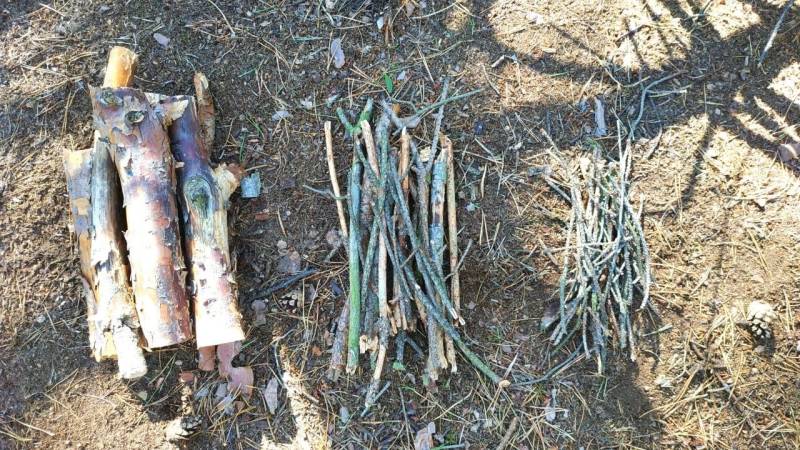
We stack the firewood together in a star or pyramid shape. I tell them: "This is like building a house for the fire."
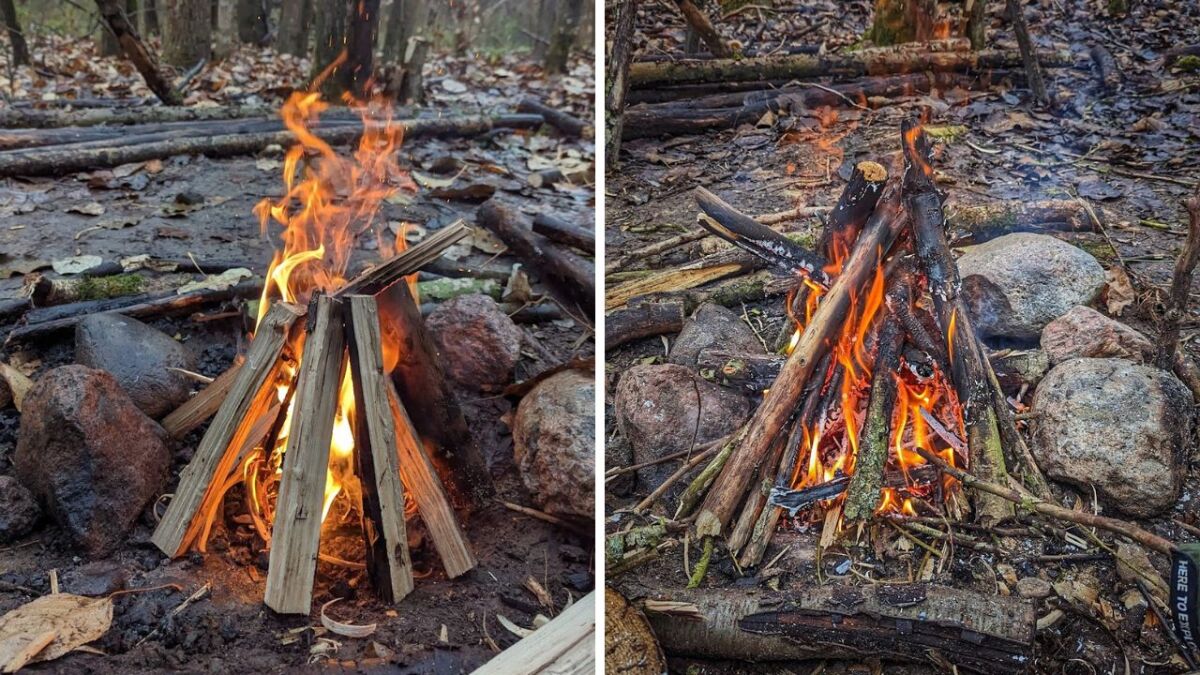
Your little hands are eager to help me, while also learning how to build a fire correctly.
It's not just an activity, but real learning by doing.
Every campfire starts with a spark of curiosity and the willingness to learn.
Read also
What is the best wood for the campfire to burn? Your guide to staying warm and cozy by the campfire - Without wood, no fire, and the wrong wood poses more risks than support. Learn in this guide which wood is best suited for your fire.
Collecting Tinder - Igniting the Flame
Before the fire really gets going, it needs the right kindling.
This is the secret ingredient for a perfect campfire. Together with the children, we set out to find the best materials.
Tinder is easily flammable material that helps us ignite the initial flames.
The following natural materials are suitable for this purpose:
Tip: I don't like to use dry leaves and foliage, it often smokes more than it burns. Read my guide "Collecting and Making Tinder for Making Fire [20+ Examples]" to learn all about the right tinder.
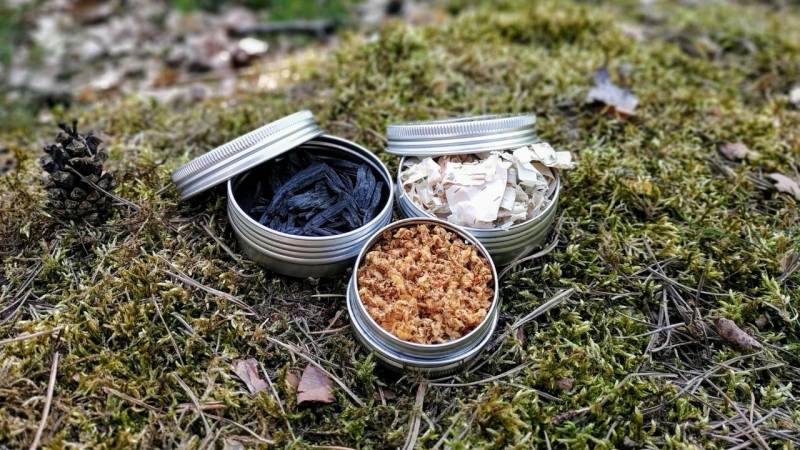
I explain to the children: "We are looking for tinder that is so light and dry that it catches fire immediately when we ignite it. Like magical material that brings our fire child to life!"
The children love to go on the prowl and find the perfect ingredients. It's like a treasure hunt in the forest. Every contribution counts, no matter how small.
Back at the campfire, we gather the tinder in the middle.
I will show you how to arrange it so that later only one match is enough to set it on fire.
The children are very excited. Soon their collected loot will produce the first flames.
Tinder is the key that unlocks the door to the flickering campfire magic.
As we prepare the tinder, I can feel her excitement. Now the campfire adventure can truly begin.
Secret Tip: Igniting Fire with the Fire Steel
There is a special moment that makes children's eyes light up every time: When I pull out my fire steel and the first sparks fly. That is the moment when the campfire adventure truly begins.
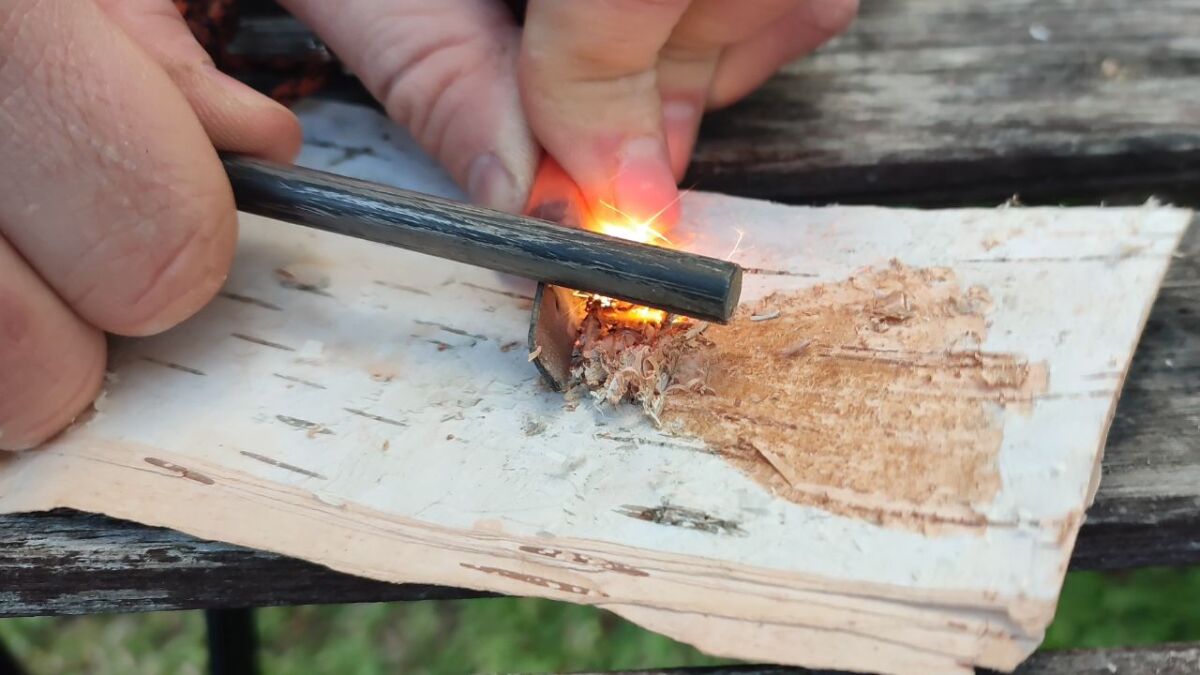
I show them how to hold the fire steel properly and catch the sparks with a piece of birchbark. "Watch closely," I say, "something magical is about to happen!"
With a targeted blow, sparks fly and set the birchbark on fire. The children are fascinated. They want to try it themselves immediately.
Equipment recommendation:
Under my guidance, every child is allowed to try out the fire steel. I stand next to them and give tips. "Hold the steel at a slight angle for better results, then the sparks will fly further," I explain. Or: "Try placing the bark closer to the fire steel, so the sparks can reach it."
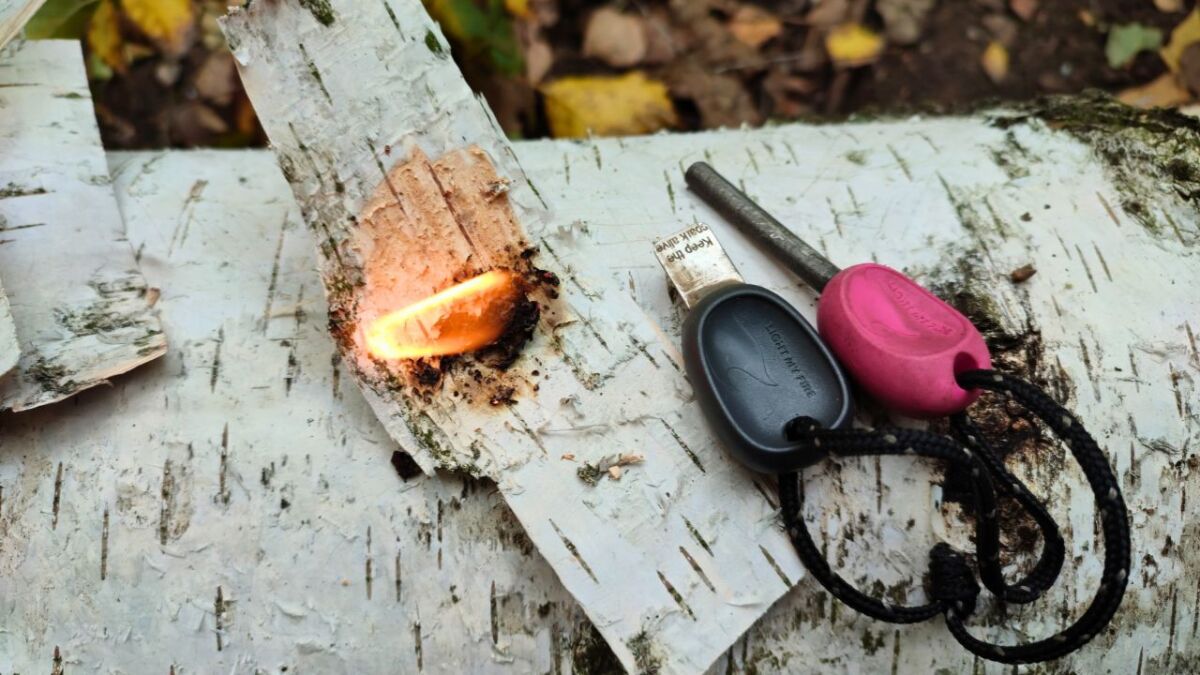
Every child has their style. Some hit hard, others are more cautious. But all of them have joy written on their faces when their efforts are successful and the birch bark catches fire.
Here is a short video for you on how I ignite a fire with the fire steel:
The spark of the firesteel is the magic wand that makes children's eyes light up.
With the glowing pieces of birchbark, we ignite the kindling together in the fire pit. I let the children be up close so they can see how a tiny flame turns into a campfire.
For the children, it is a small miracle every time. And for me, it is always a special moment to see their eyes light up when the fire comes to life with their help.
Safely Igniting the Fire
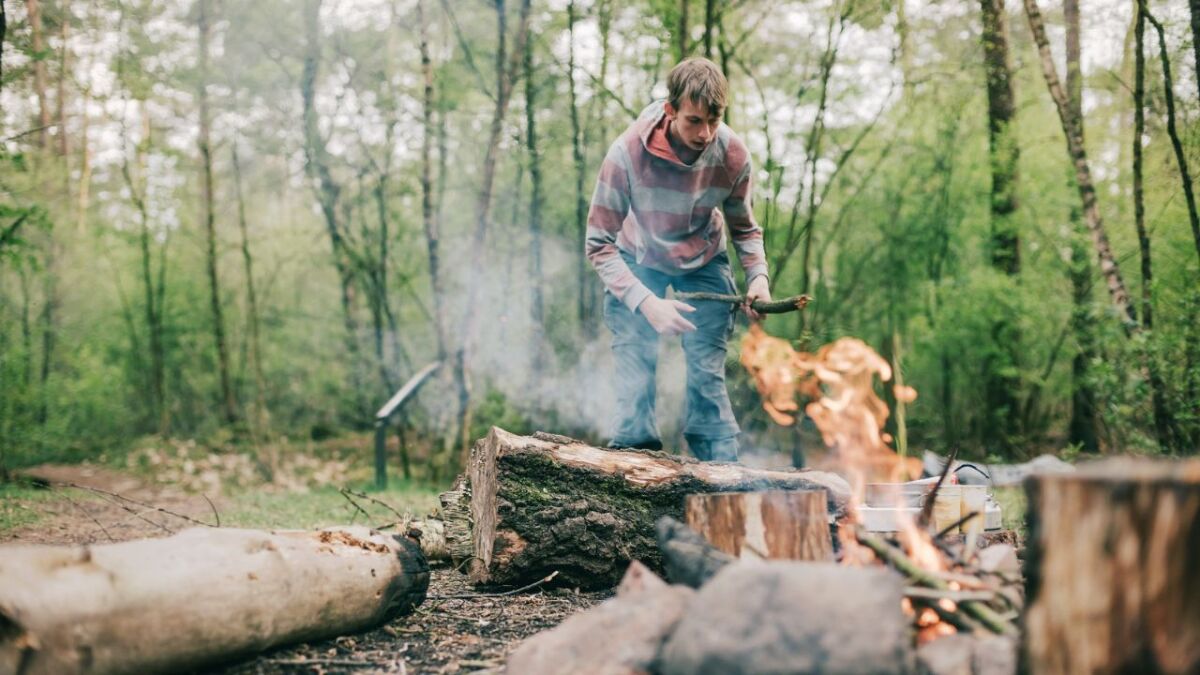
To safely ignite the fire, I recommend using the firesteel - this method is much more exciting than a match.
So I will show them how to hold the fire steel and create sparks so they understand the principle (see video above). This is not only exciting for them, but also a good lesson in safe handling of fire.
If you ignite a fire with the match, I have the complete video for you here:
Always pay attention to the direction of the wind. Sparks and embers can take unpredictable paths. Position yourself so that the wind blows the sparks away from your body. This reduces the risk of accidents.
If the birchbark burns, place it under the layered, fine wood. Then hopefully the flames will spread to the larger logs.
We carefully place the burning birchbark in several spots in the fire pit so that the fire can ignite evenly. The children help me with this and learn how to start a fire in a controlled and safe manner.
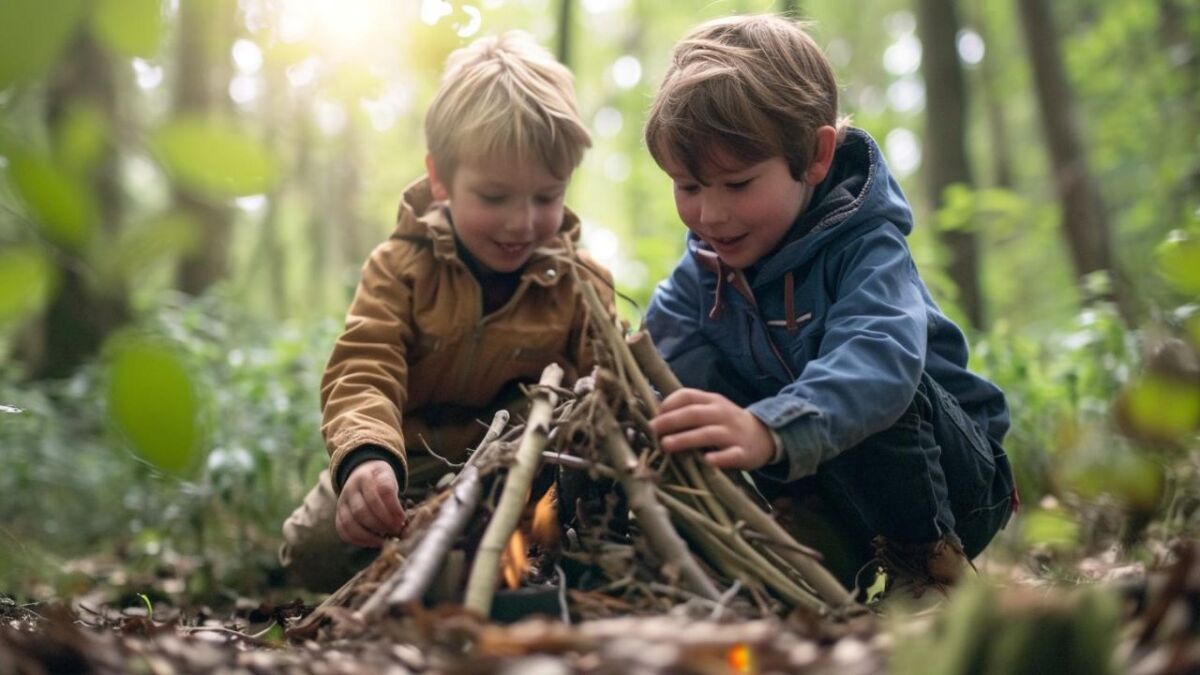
Entertaining a Fire with Children - Who is the Fire keeper?
Now comes the part that I find most elaborate and challenging myself. Maintaining a fire so that it burns really well and no one sits in the smoke.
The worst thing would be if:
- the fire gets too big
- the fire goes out or
- the fire smokes
How to maintain a fire?
Once the fire is ignited, the key is to keep it alive. This requires a fire keeper - someone who keeps an eye on the fire and ensures that it neither grows too large nor too small.
I explain to the children: "A fire keeper is like a shepherd who takes care of his flock. He makes sure that the fire has enough to feed on, but does not get out of control."
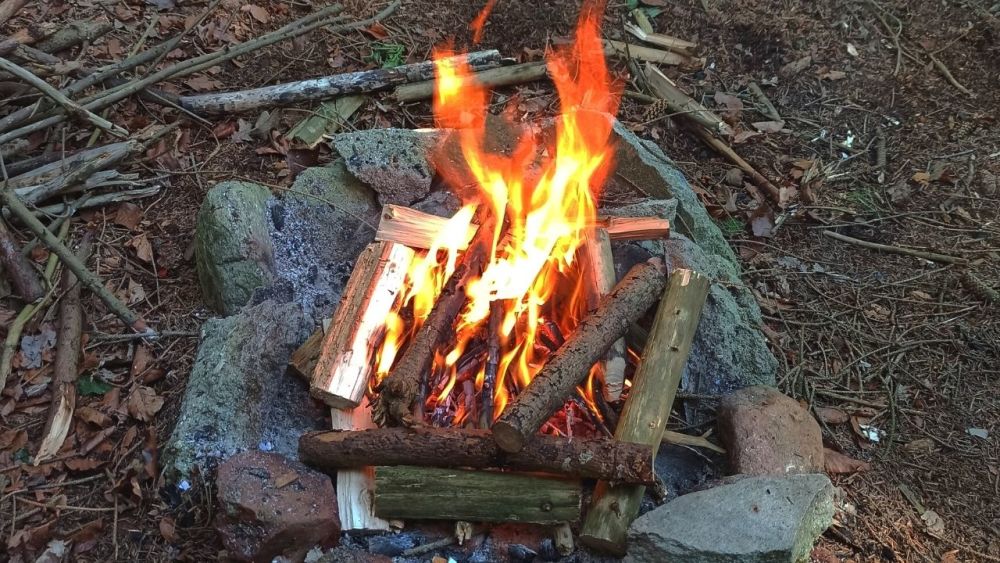
We practice together how to feed the fire properly. I show them that they should always add only a few logs at a time, so the fire doesn't suffocate. "Put smaller wood in the middle, then the fire can flare up again," I explain.
Tip: Firewood doesn't go to the edge, it just starts to smoke.
The children also learn to not simply throw the wood into the fire, but to place it carefully. This way, we prevent sparks or burning logs from falling out of the fire pit.
For this, I usually have two long sticks with which I can arrange the burning logs.
A well-tended fire burns evenly, calmly, and without smoking.
I show the children how to recognize if the fire needs more fuel based on the flames and the embers. "Do you see how the flames are getting smaller and the embers are getting darker? That means it's time for two or three new logs."
We watch together as the fire reacts to the new wood, how the flames engulf it and slowly lick higher. The children learn to be patient and give the fire the time it needs.
What to do when it smokes and the flame dwindles?
A good fire does not smoke. Period.
If a fire is smoking, something is going wrong. And I'm not just saying that because the smoke makes my eyes water.
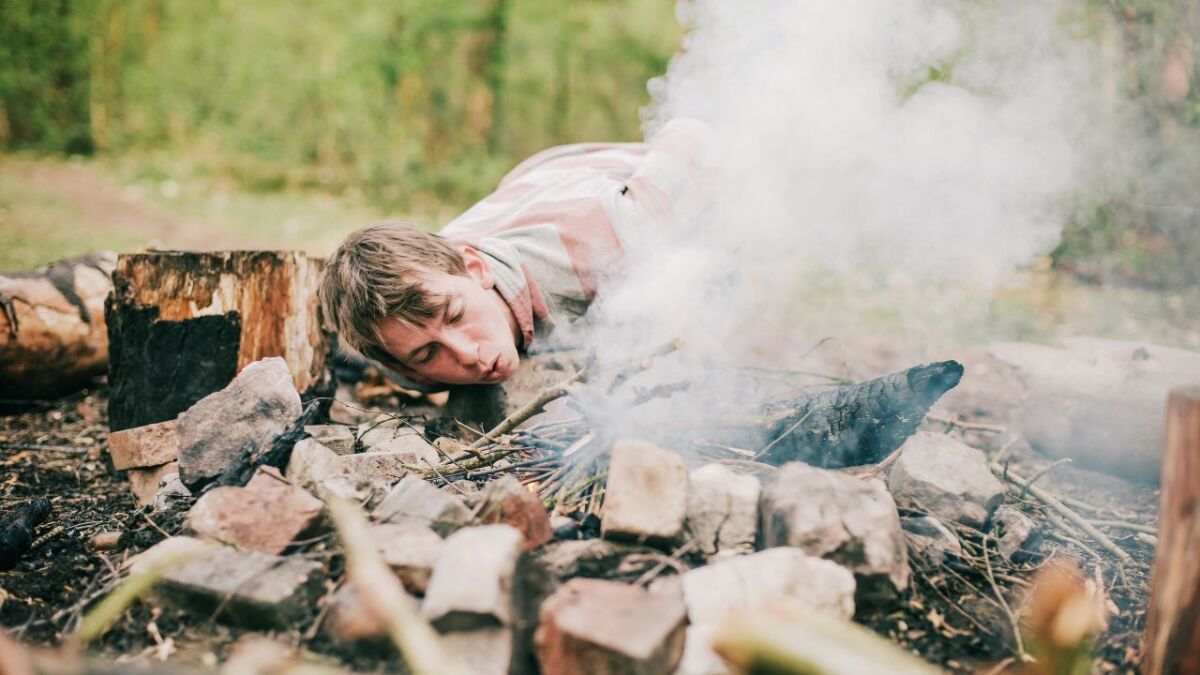
It is important because smoke is poison for your lungs.
Have you ever spent a whole evening sitting by the smoking fire? Then you know what I mean when you wake up at two in the morning because you have to cough.
Sporadically, it happens that the fire smokes more than it burns. The children often ask me: "What do we do now? Is the fire broken?"
I smile and explain, "No, the fire is not broken. It just needs a little more oxygen. See how the flames rise higher when I gently blow into the embers?"
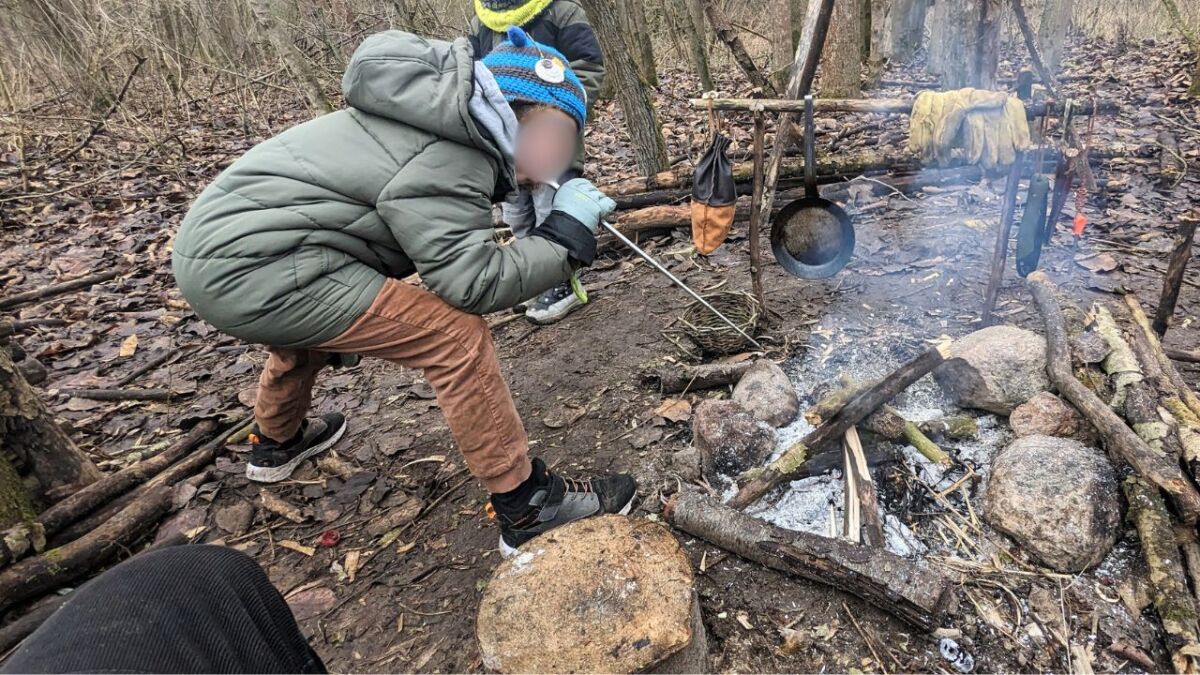
Together, we practice how to help the fire get back on track through gentle blowing (I also often use my Pocket Bellows Fire Bellowing Tool) or fanning. The children are fascinated by how quickly the fire recovers and burns brightly again.
And an essential point are the logs lying at the edge, smoldering and not catching fire. With your two long sticks, you must always make sure that smoldering pieces of wood come to the center to the flames.
We also discuss that too much smoke can be a sign that the wood is still too wet. "That's why it's so important that we collect dry wood," I emphasize. "With wet wood, our fire will never burn properly."
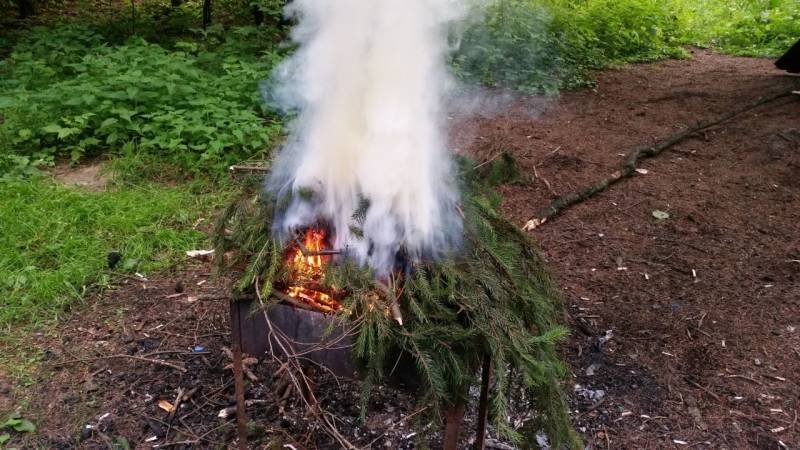
Smoke can also occur when the fire doesn't get enough air. In that case, it helps to spread the logs apart a bit so the fire can breathe. The children learn that a fire, just like us, needs oxygen to live.
To tend a fire means taking responsibility - for the fire and for the people around it.
During the evening, we take turns as fire keepers.
Every child is allowed to take on the responsibility of tending the fire under my guidance. This way, they not only learn how to maintain a fire, but also what it means to be mindful and responsible.
Preparing Delicious Treats at the Campfire with Kids
Preparing food over the campfire with the children is a very special highlight for me. It transforms simple ingredients into adventure snacks - from crispy bread on sticks to sweet, melting chocolate fruits.
Just a note from me: Depending on their age, children may not always enjoy cooking over the fire. I don't know any child who turns their stick bread precisely for 15 minutes and sits still. Have a Plan B ready; otherwise you'll have five sticks with bread in hand after 5 minutes.
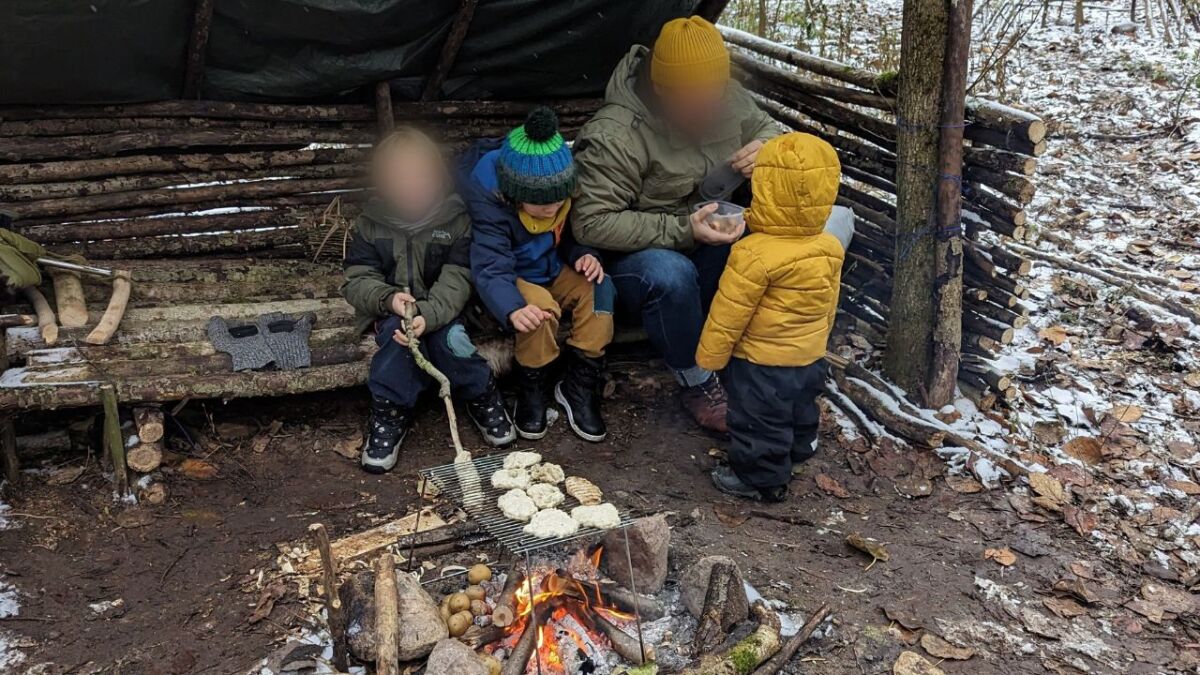
Before Cooking: How and where do you want to cook over the fire?
Before we start cooking over the campfire, we need to think about how and where we want to cook. This is important so that we can make the right preparations and cooking goes smoothly.
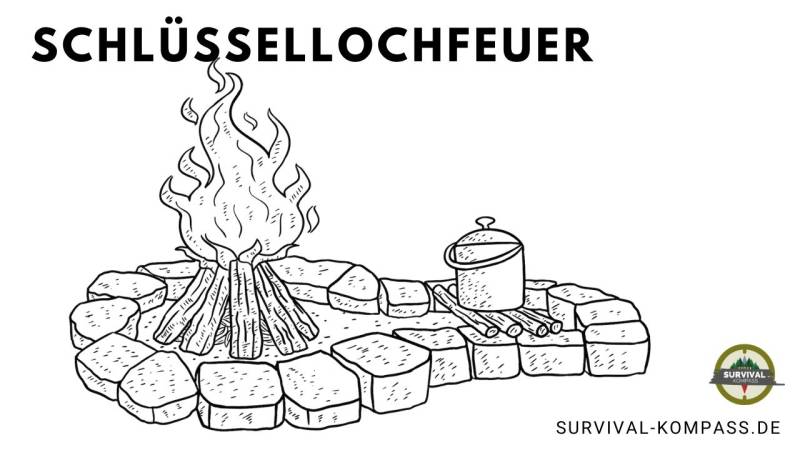
One option is to build a keyhole fire. To achieve this, we simply push some embers away from the main fire and let them continue burning in a shallow pit.
On this ember, we can then prepare our delicacies. This "keyhole" is like a small cooking area where pots and pans can be placed.
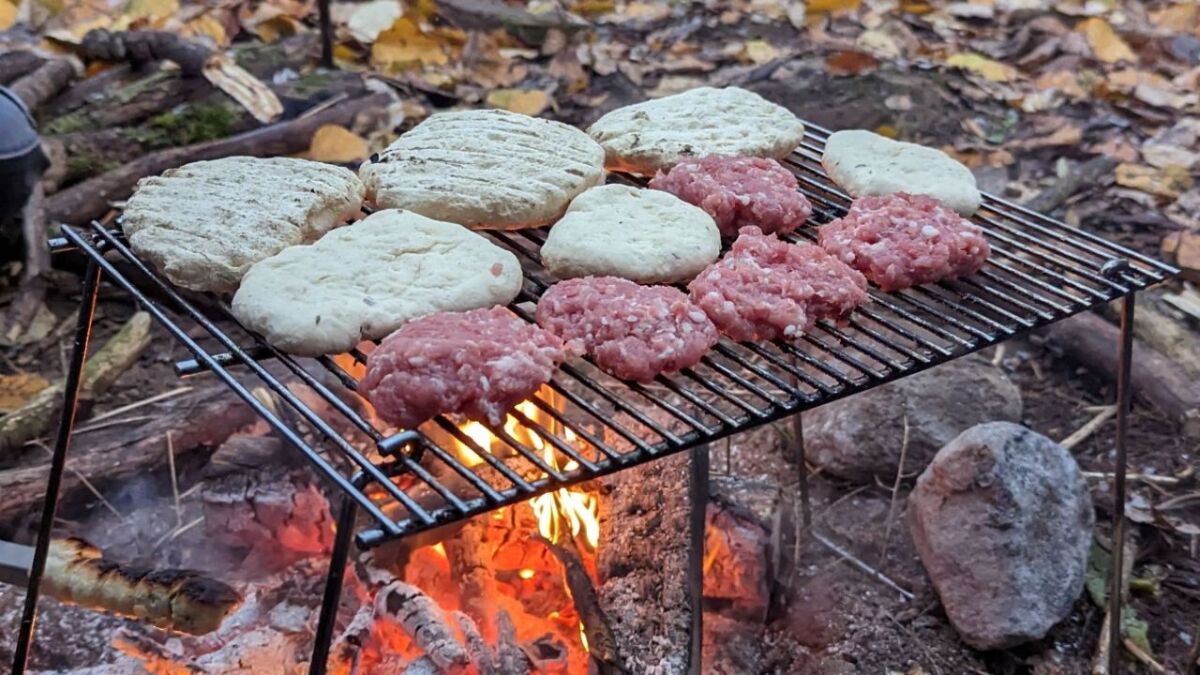
If you like it simple, you can also set up a grill over the fire.
I truly enjoy doing this because I don't have to hold anything in my hand. Additionally, a grill is very versatile and suitable for many dishes.
And if you have bigger plans, you need the right cookware.
I prefer sturdy cast iron pots and pans (like the forged iron pan with a 20 cm diameter) that hold heat well and can withstand a bump. Long sticks or skewers are sufficient for bread on a stick and marshmallows.
It is also important that we have enough space for cooking. No one should have to crowd around the fire or risk getting burned. That's why I often divide large groups of children into small groups that can take turns.
The secret to a successful campfire meal lies in preparation and the ability to cater to the needs of the children.
And as I said before: Having a Plan B is always a good idea. Not every child is patient enough to turn their campfire bread for minutes over the fire.
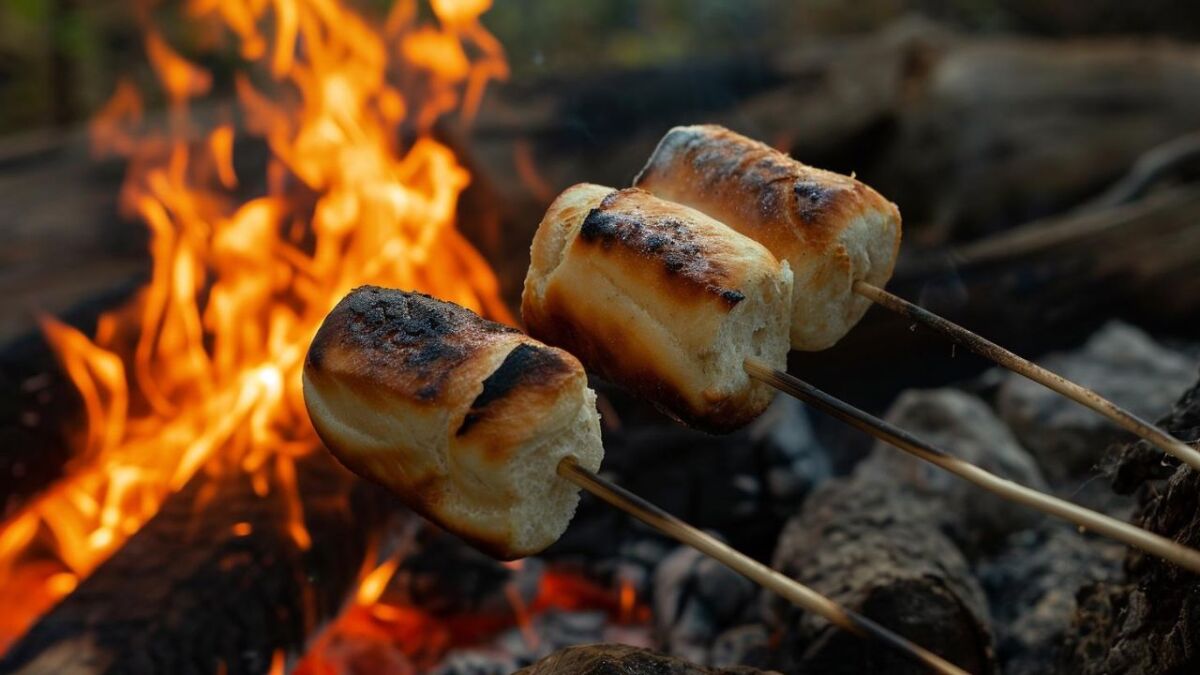
Therefore, I always have a few alternatives ready, such as sausages that I quickly put on the grill, or marshmallows that I only need to hold briefly into the flames.
With the right preparation and a little flexibility, cooking over a campfire becomes an unforgettable experience for the kids.
You will not only learn how to cook outdoors, but also how to work as a team and consider each other.
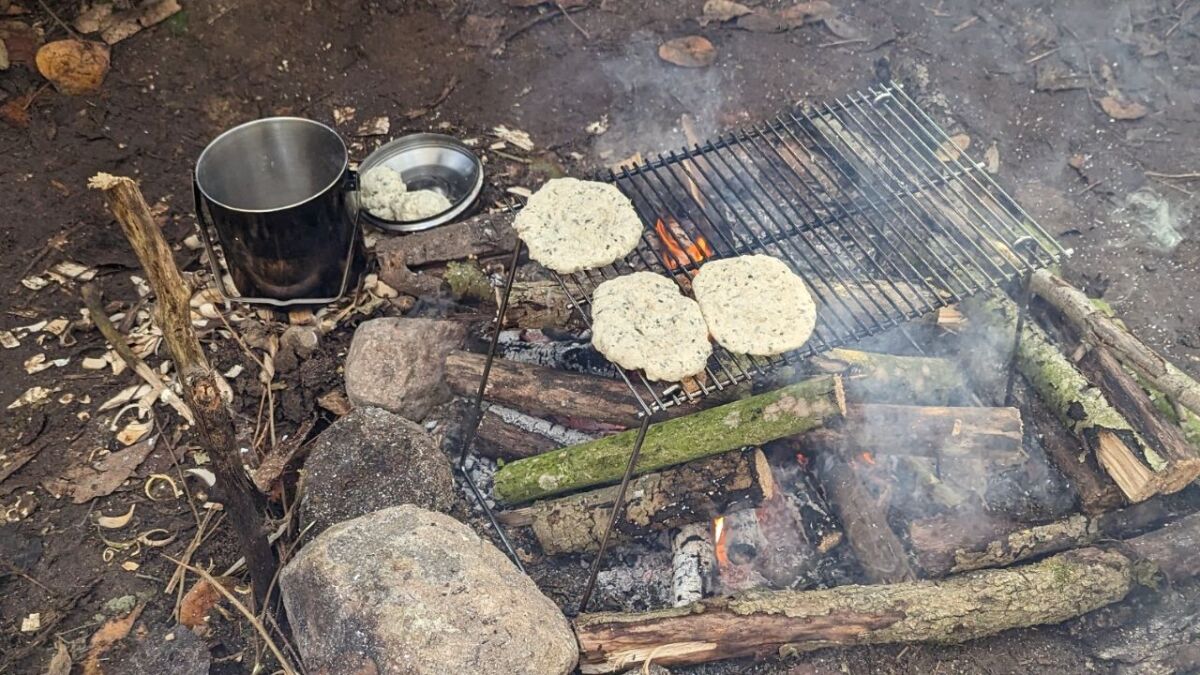
Make campfire bread - even for impatient children
Making stick bread is easy and fun. You take the dough, wrap it around a stick, and hold it over the embers.
I am making a very simple dough right on the spot:
- Flour
- Baking powder
- Salt
- Water
I already mix flour, baking powder, and salt at home. Then I add the water gradually until a firm dough forms.
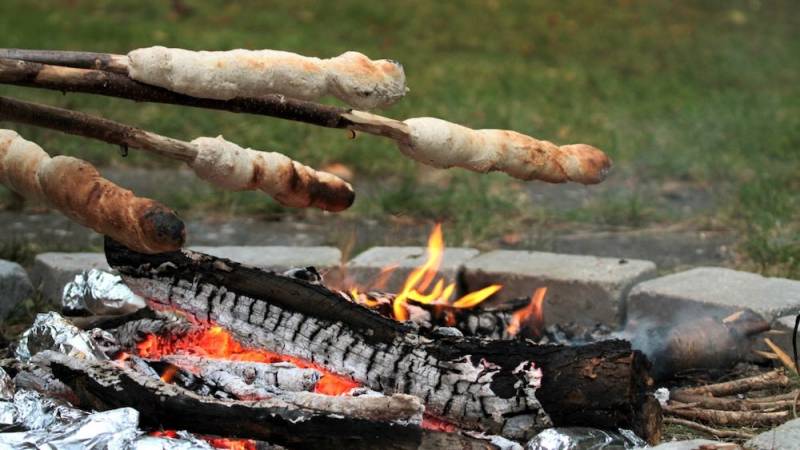
I have often sat by the fire with my children and watched as the stick bread turns golden brown.
This shared experience strengthens the bond and turns a normal evening into a little adventure.
Pro tip: Take a grill grate with you and make flatbread. My kids never sit long by the fire with a stick in hand. With the grill grate, everything is easier. Make flatbread, place them on it, wait, done.
Potatoes from the Embers
Putting potatoes directly into the embers is so simple and yet damn delicious.
You simply take a few medium-sized potatoes (I don't wrap them in aluminum foil!). Then you find a hot spot in the ashes of the fire.
There, you let the potatoes cook for about 30 to 60 minutes. The waiting time may seem long, but it's worth it. The heat slowly penetrates the inside of the potatoes and makes them nice and soft and aromatic.
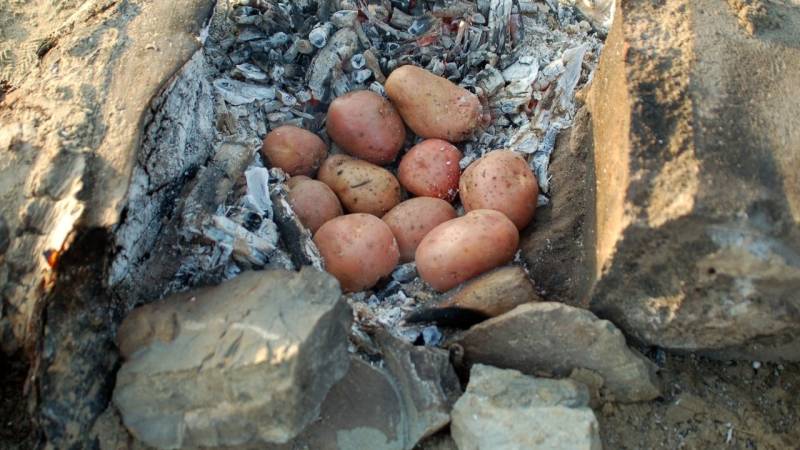
Once they are done, remove them from the embers with tongs. Caution, hot! You can watch as the children's eyes widen when they see how simple potatoes turn into a delicious campfire dish.
With a little butter or a dollop of sour cream on top, they become a highlight. Cooking together at the campfire not only brings fun, but also teaches patience and awareness of nature.
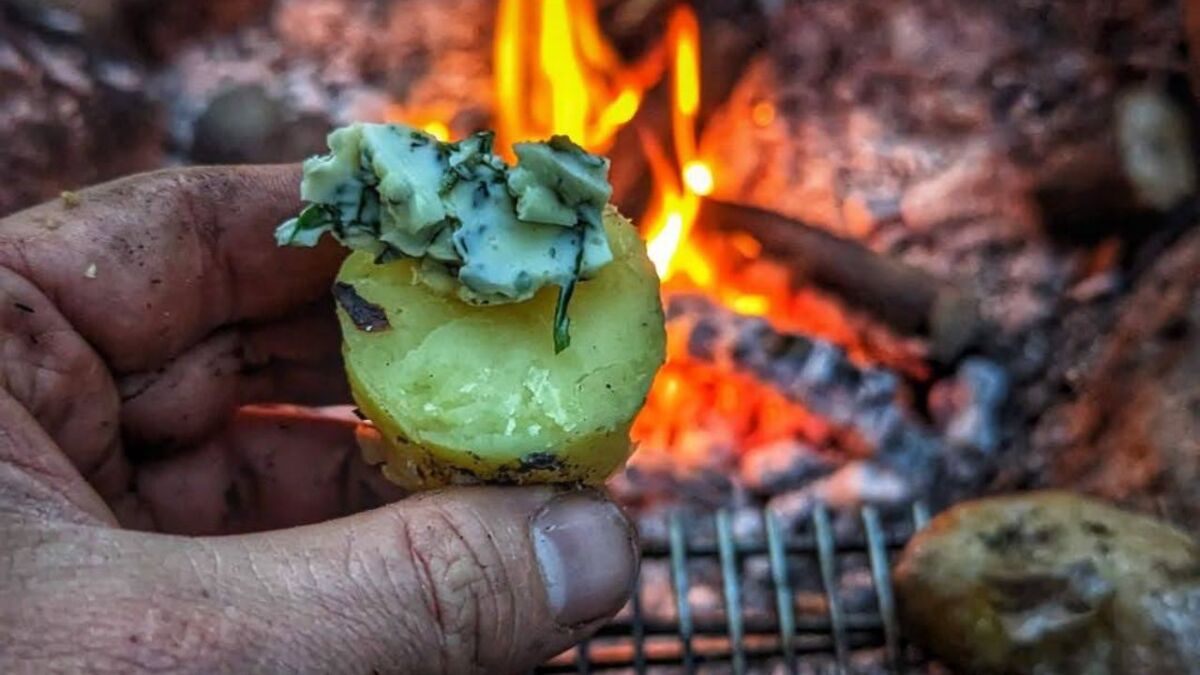
Pro tip: Pre-cook the potatoes at home, then it only takes 5 minutes for them to be warm in the campfire. I like them best with olive oil/butter, rosemary, and coarse salt.
Chocolate Bananas
Making chocolate bananas at the campfire is a real hit. Grab some bananas and chocolate, then get started.
- First, cut the bananas lengthwise a little, leaving the peel on.
- Then insert the chocolate pieces into them.
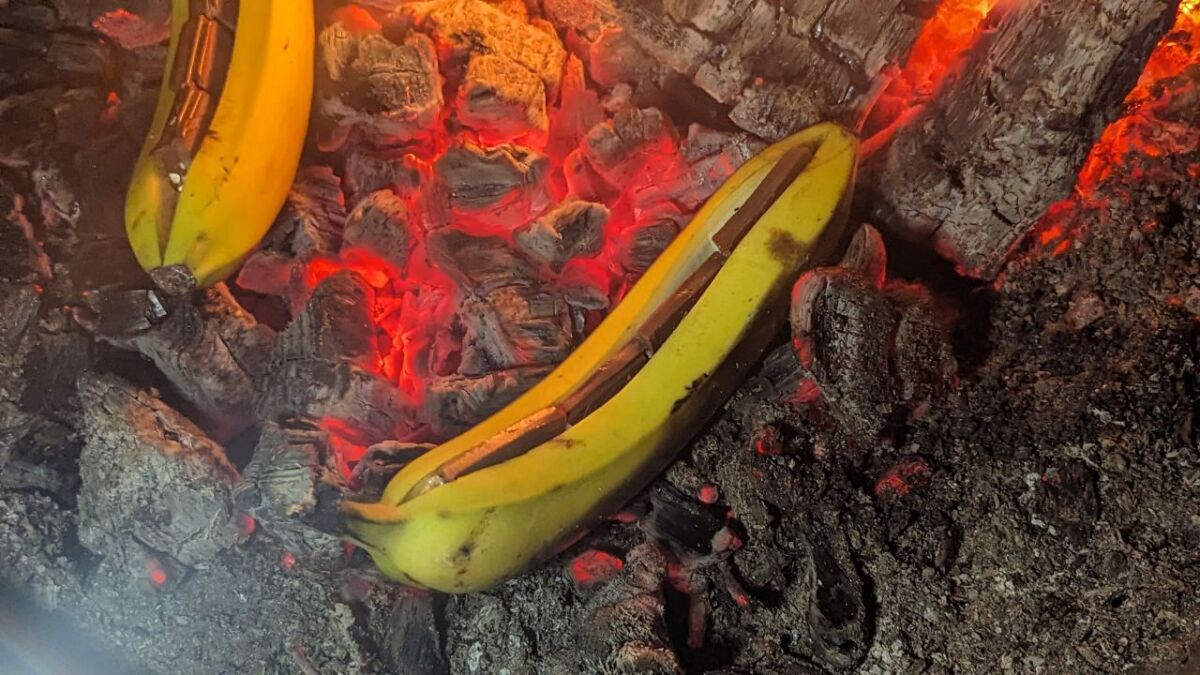
- After that, place them in the embers.
The heat does the rest. It won't take long, and soon you can enjoy the sweet, melting delight.
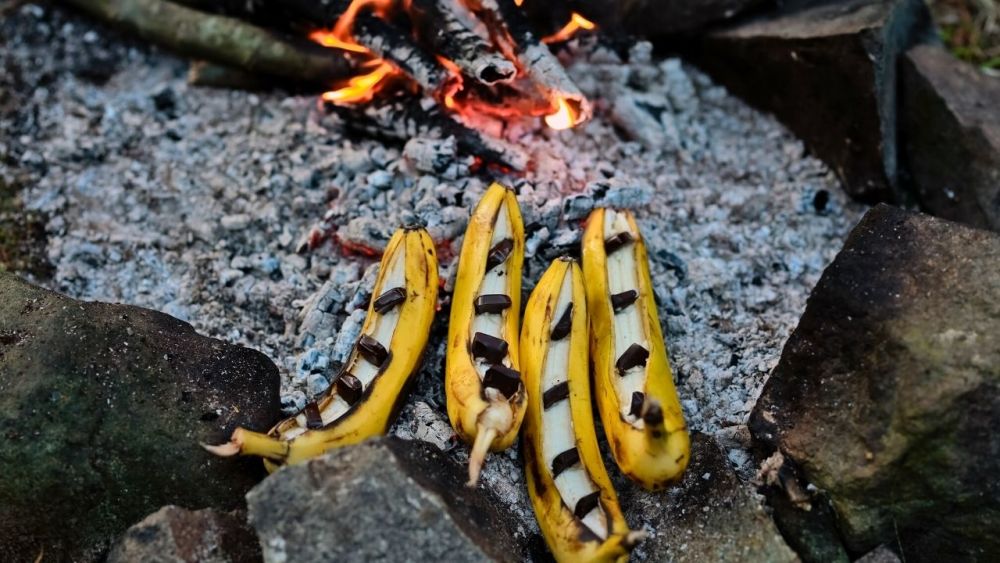
It's so easy that even the little ones can join in. They love creating their own treats and then proudly enjoying them.
I tried it myself - a great experience. It wasn't just the food that impressed. The whole experience: the preparation, the waiting, the first cautious taste...
These moments they don't forget so quickly. And every time we repeat it, we add something new - mini marshmallows, nut pieces, or whatever comes to mind. It stays exciting and delicious.
Safely Extinguishing the Fire
To extinguish the fire sounds easier than it sometimes is. I always take enough water to safely suffocate the flames. Once I made the mistake of thinking it was enough to just dampen the embers.
But in the middle of the night, the fire flared up again. Since then, I make sure that not only the flames, but also the ashes are completely soaked.
By stirring in the ashes, I make sure that even the lowest embers are reached.
After everything has been thoroughly extinguished, I carefully touch the ashes to make sure they have cooled down.
This additional control helps to ensure that we can all sleep or go peacefully and that the fire does not unexpectedly return.
Checklist for a successful campfire experience with children
A campfire with children is always a great adventure. As a wilderness mentor, I know how important good planning is for this. Here is my checklist for you:
- Prepare safety equipment: Make sure you have water and a first aid kit. Safety first!
- Choose the right clothing: Long sleeves and pants protect children's skin from sparks.
- Prepare the fire pit: Choose a spot away from trees and bushes. The ground should be flat. Place stones in a circle. Never use a forest floor with roots!
- Collect firewood: Dry dead twigs, small dead branches, and tinder help with starting the fire. Thick branches keep the fire going.
- Don't forget matches, lighter, or fire starter: This is how you safely light the fire.
- Have water ready: In case of emergency, you need to be able to extinguish the fire quickly.
- Plan snacks: Marshmallows and chocolate bananas are real hits at the campfire.
- Lead by example: Show the children how to make a fire in an environmentally friendly way and how to extinguish it.
- Prepare games: Telling stories or singing songs makes the time by the fire extra enjoyable.
- Secure space for everyone: Everyone should be able to sit comfortably and enjoy the fire.
This list has often helped me to experience unforgettable campfire evenings - with lots of laughter, learning, and delicious food.
Frequently Asked Questions about "Making Fire with Children"
1. How can I safely make a fire with children?
To safely start a fire, it's best to learn the basics together: Choose a safe spot at the campsite or a fire pit. Show the children how to build the fire in a star shape for optimal burning. Pay attention to the wind direction and explain why dry wood and both thicker and thinner branches are important.
2. Why is making fire with children pedagogically valuable?
Teaching children how to make fire teaches them responsible handling of open flames. They learn how to ignite a fire, keep it burning safely, and extinguish it. This knowledge boosts their self-confidence and ensures unforgettable adventures.
3. What tips are there for a successful campfire experience?
For an unforgettable campfire experience, grill together over the fire or try cooking with skewers. Guess the wind direction together and practice how to build a pyramid fire. Don't forget: Always have water ready for extinguishing!
4. What should I avoid when making a fire with children?
Never light a fire near easily flammable materials and make sure not to risk causing forest fires. Never leave the fire unattended and always exercise caution when handling fire.
5. Are there special fire starters that are suitable for making fires with children?
Yes, there are natural fire starters that are specifically designed for safely igniting a fire. I exclusively use birchbark, as it burns exceptionally well. This allows me to start a fire quickly and with minimal effort.
6. How can I make fire having an unforgettable experience for the children?
Tell stories around the fire, sing songs together, or bake bread. Use the time by the fire for exciting lessons about nature and how to protect it. This way, making a fire becomes an adventure they will not forget.
What role do you play as an adult?
As an adult, you are primarily a role model and mentor when making fire with children.
You are responsible for the safety and well-being of the children and must demonstrate and teach them the proper handling of fire.
"In you must burn what you want to ignite in others" (Aurelius Augustinus)
Here are some key points that define your role as an adult when making fires with children:
-
Be a Role Model: Adhere to all rules and safety precautions yourself that you teach to the children. Show them how to handle fire responsibly and respectfully.
-
Explain and Demonstrate: Explain every step of making a fire to the children - from choosing the right spot to building the fire to safely extinguishing it. Demonstrate everything calmly and answer their questions patiently.
-
Maintain Overview: Even when the children are actively involved, you must always keep an eye on things. Make sure everyone respects the rules and that no one puts themselves in danger.
-
Promote Self-Responsibility: Encourage children to act independently, but always under your supervision. Let them gradually take on more responsibility, for example as a "fire guardian" who watches over the fire.
-
Create Learning Experiences: Use fire-making as an opportunity to teach children about nature, safety, and responsibility. Connect the experience with knowledge and values that will also be useful to them in other areas of life.
-
Be Patient and Understanding: Children learn through experimentation and sometimes through mistakes. Stay patient and support them in learning from their mistakes rather than scolding them.
-
Create a Positive Experience: Your enthusiasm and positive attitude are contagious. Create an atmosphere where everyone feels comfortable and where the joy of the shared experience is paramount.
By taking on this role as an adult, making fire with children becomes a safe, educational, and unforgettable experience.
The children not only learn how to handle fire correctly, but also valuable skills and values that will benefit them throughout their lives.
Children Love Questions - Pick Up On That
Starting a fire offers many opportunities to engage in conversation with children and deepen their knowledge about fire and how to handle it safely.
A great idea is to have everyone sitting around the campfire and turn it into a kind of quiz or question game.
You can ask the children questions like:
- Who needs to be present when you try something with fire?
- Do you know what can burn? Can your sweater burn? Can your hair burn? Can the sand burn? Can this paper burn?
- What can you use to extinguish fire?
- Where can you find water or sand to put out a fire?
- What can we use to put out a fire in case of emergency?
- Where is the nearest fire extinguisher?
- Imagine you are home alone and a fire starts. What do you need to do first? And then?
- What is the phone number for the fire department?
Respond to the children's answers, praise them for correct knowledge, and gently correct them if something is wrong.
Explain to them, for example, why sand or water are suitable for extinguishing fires and that in case of emergency, one should always call the fire department first
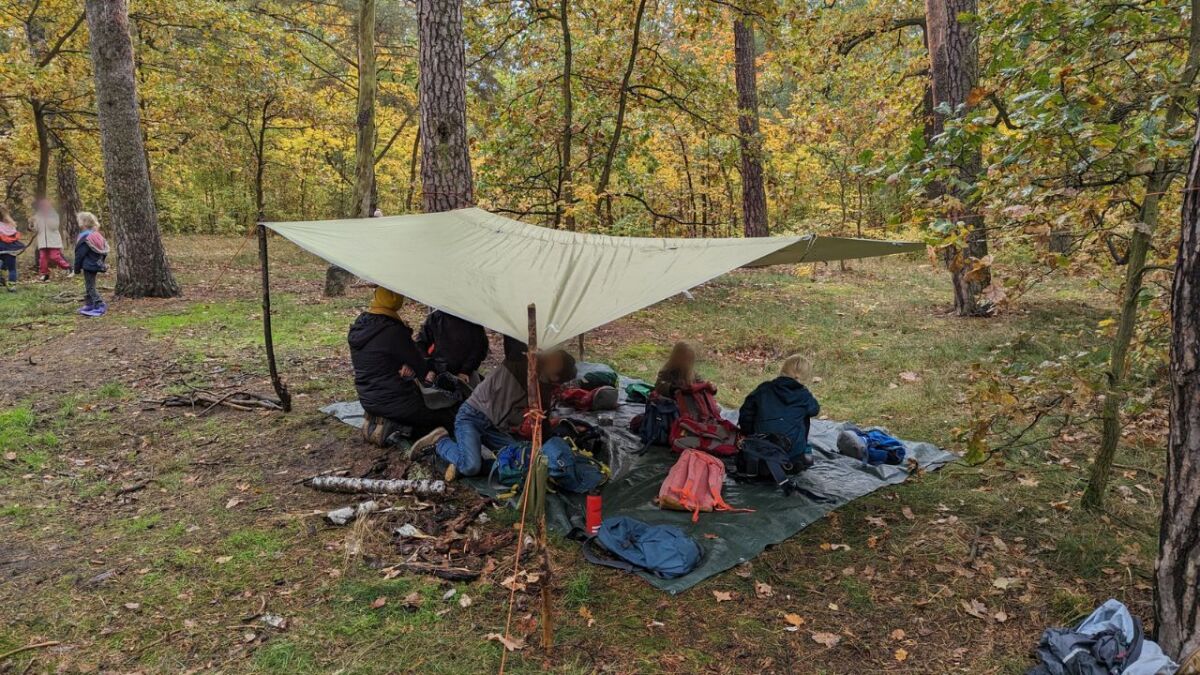
You can also package the whole thing into a story or turn it into a role-playing game. Maybe you take on the role of a firefighter who gives children important tips.
Or the children play firefighters themselves and demonstrate what to do in case of a fire.
In addition to safety questions, you can also ask or convey general knowledge about fire:
- Why does smoke rise upwards?
- What does a fire need to burn?
- How does the heat of the fire feel?
- What colors can flames have and why?
This turns making fire into an interactive learning experience that imparts knowledge and sharpens children's awareness of safety.
At the end, the children can be proud to be responsible "fire keepers".
The most important thing is that children learn playfully and with joy, and can apply what they have learned directly at the next campfire. This way, the knowledge is consolidated, and the fire experience becomes even more enriching.
Making Fire with Kids - Be a Role Model and Respect the Rules
Starting a campfire with children is a small outdoor adventure. We have learned how important it is to be careful and follow rules.
With the right preparation and building the fire, safety and fun are guaranteed.
And then – the best part – the food! Bread on a stick, potatoes, and chocolate-covered bananas make the day perfect. Sometimes also popcorn.
Finally, extinguishing the fire safely teaches children how to take responsibility.
Every campfire becomes a memorable experience this way. Let's go out and enjoy beautiful moments by the fire together!


Author of the guide
Martin Gebhardt
Hey, I'm Martin. On my blog, you will learn the basics and numerous details about living in the wild. I think survival, bushcraft and the good life in nature are the keys to happiness. Find me here on Instagram or on YouTube. You can find more about my mission on the About Me page.
Was this guide helpful?
17 people found this guide helpful.
5.00 out of 5 points (17 Ratings)
Comments (0)
This post may contain affiliate links. So if you click on the links and make a purchase, I will receive a small commission at no additional cost to you. Click here, to learn more about it.


