

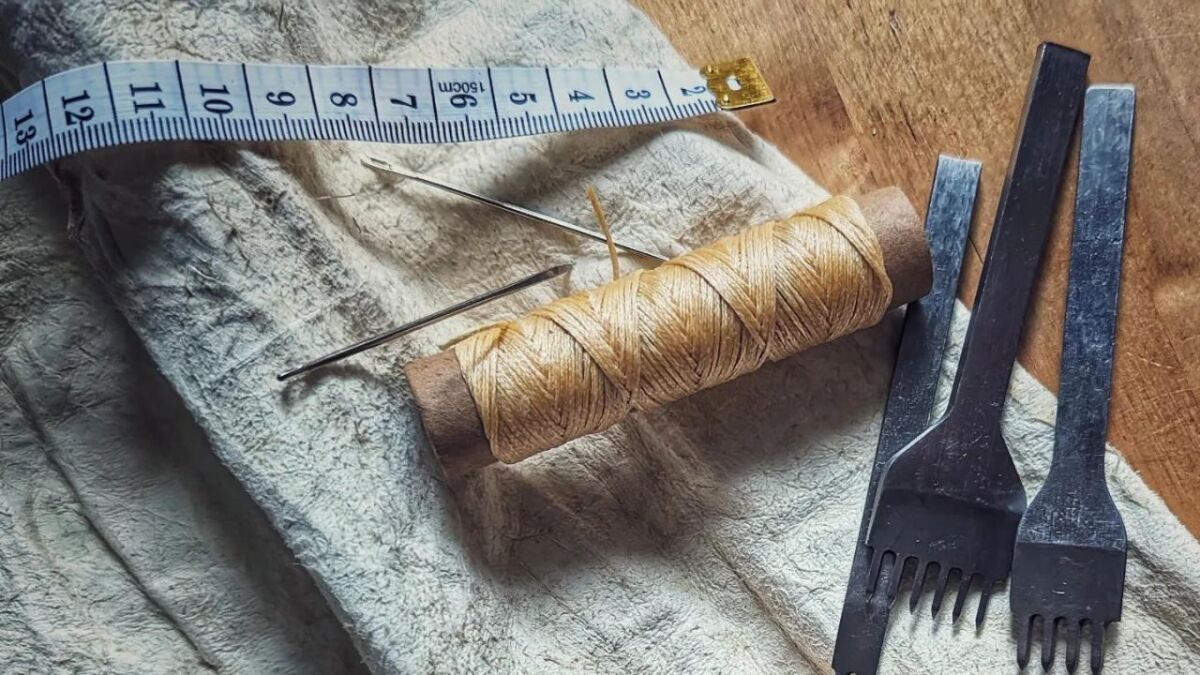
The most common stitch patterns for sewing for buckskin

Free 35 Survival Hacks you'll love!
You will get 35 easy-to-implement survival hacks so that you don't have to stand aimlessly in the forest from tomorrow when things get tough. Take your skills to the next level!
DOWNLOAD HERE FOR FREE👉 The key facts from this guide
- The whip stitch is suitable as the first sewing stitch for beginners in buckskin.
- With the baseball stitch you achieve an appealing result.
- The running stitch is simple and fast for your leather projects.
- The french roll seam combines strength and elegance.
- The welted seam holds the shoulder seams of jackets together robustly.
- Choose the appropriate stitch from the table for each sewing project.
Unpack the suede and get ready - sewing buckskin is not difficult and anyone can learn it.
You want to create something great, but find the stitches confusing?
No panic.
I'll show you which stitches hold and bring your creations to life.
Come along on this entertaining journey into the world of leather craftsmanship.
From horizontal to butt seam: Overview of stitch and seam techniques
When sewing buckskin (Here is my guide to "What is Brain tanning and Buckskin?") the correct choice of stitches and seams is crucial to the final result.
Here is an overview that will help you find the right technology for your project.
Stitches categories
Horizontal: The horizontal stitch is controlled, tight and not very flexible. Ideal when you need a tight, strong seam that won't give in. The Running Stitch is one such stitch.
: Die besten Nähstiche")
Diagonal: Perfect for projects worn in summer. The diagonal stitch is more flexible and adapts, but distorts over time. The whip stitch is one such stitch.
: Die besten Nähstiche")
Seam categories
Welded Seam: This type of seam is smooth and almost invisible, ideal for jobs where appearance counts.
Overlapping seam: Strong and robust, well suited for areas that have to withstand a lot of stress.
Butt seam: This seam category can only be done with diagonal stitches. It is ideal when two pieces of leather need to be joined without overlapping.
: Die besten Nähstiche")
Every stitch and seam has its place in the world of leather crafts. Choose wisely depending on your project and the demands it places on the seam.
With the right stitch and seam, you will achieve results that are not only functional but also visually convincing.
So, let's get started so you can get to know the most important stitches.
The Whip Stitch - Your First Companion
We start with a stitch that never lets me down: the whip stitch for suede, also known as the whip stitch.
: Die besten Nähstiche")
This stitch is like a good friend - uncomplicated, reliable, and always there when you need it.
He is the perfect start to connect your suede works, whether it's for sewing furs together or for your first leatherworking projects.
: Die besten Nähstiche")
Step-by-step into the whip stitch
Imagine it's like lacing up your hiking boots:
- Take the leather, place the pieces edge to edge.
- Thread your needle, sturdy thread is worth its weight in gold here.
- Start at the edge, pass the needle through both pieces of leather.
- Now pull the thread through, creating a loop around the edge.
- Continue in rhythm - pierce, wrap, tighten.
Tada! You are now officially a Whip Stitcher.
: Die besten Nähstiche")
The whip stitch - More than just an emergency solution
What makes this stitch so special? Here are the advantages at a glance:
- No seam allowance required: That means more leather for your projects and less waste.
- Simple and fast: When the sun sets and the campfire beckons, you don't want to spend more time sewing than necessary, do you?
- Flexibility: Corners and uneven edges? No problem for this stitch.
: Die besten Nähstiche")
Limitations of the whip stitch
It can't always be perfect, so consider the disadvantages as well:
- Not the windbreaker: For your outdoor jacket, it's better to choose a different stitch.
- Good, but not for eternity: On adventurous paths, the running stitch sometimes reaches its limits.
- Consistency takes practice: Beginners beware - uneven can also mean uneven. Practice makes perfect!
: Die besten Nähstiche")
The Baseball Stitch - Full Control on Leather (Baseball Stitch)
Imagine designing your own bushcrafting tool case. You want it to be not only practical, but also look really stylish.
That's where the baseball stitch comes into play.
: Die besten Nähstiche")
With this stitch, I have taken my best leather projects to a new level.
Every time I hold the finished work in my hands, it feels like hitting a home run!
Step-by-Step: The Baseball Stitch
The baseball stitch lives up to its name - precise and powerful. Here's how to get it right:
- Start at the beginning of your leather edge and sew the edges together edge to edge.
- Insert the needle from bottom to top.
- Then go to the opposite side and insert the needle again from bottom to top.
- Alternate: from one side to the other, creating the typical "V".
: Die besten Nähstiche")
A versatile all-rounder with style
Now let's get down to business: The baseball stitch is not just a practical matter.
- Impressive Look: The edges of your leatherwork look like they come straight from a professional studio with the baseball stitch.
- Clear Recommendation for Beginners: Easy to learn, perfect for getting started in the wonderful world of leatherwork.
- Seam Allowance - What is it? Similar to the running stitch, you can make full use of the leather.
: Die besten Nähstiche")
But not everything is a home run...
The baseball stitch also has its pitfalls:
- If the wind blows, you know where it comes from: Your seams hold, but they are not windproof.
- Beauty takes time: What looks good can sometimes take longer.
- Challenged, but not invincible: Under strong pressure, even the baseball stitch can give way.
: Die besten Nähstiche")
The Continuous Companion - The Running Stitch
When it comes to the basics, the running stitch is the stitch that cannot be avoided.
Like the foundation of a log cabin in the forest, it gives your leather projects the necessary structure and stability.
Believe me, once you've mastered the running stitch, you'll wonder how you ever managed without it.
: Die besten Nähstiche")
Step-by-Step: The Running Stitch - Easy to Understand and Fast
This stitch is like a smooth path through the dense forest. Follow these steps and you will definitely keep your orientation:
- Position the leather pieces flat on top of each other - this is your base.
- Start at a corner, take the needle and pierce it through both layers.
- Bring the needle back up, but leave a distance from the first puncture point.
- Repeat the process, forming a straight, continuous line.
: Die besten Nähstiche")
The Running Stitch - Reliability Personified
Check out what this simple yet effective stitch can do:
- Save material: Your thread will thank you, you need very little of it.
- Windproof weapon: With this stitch, no breeze will pass through.
- Thick leather? No problem: The running stitch can handle any challenge.
- Turbo stitch: Efficient and fast, ideal for projects that need to progress quickly.
- Master the basics: Every master started small - the running stitch is the ideal teacher.
- Holds well: You can rely on this stitch.
: Die besten Nähstiche")
Not everything is perfect under the sun
However, the running stitch is not infallible either. Here are some points to keep in mind:
- Not intended for long-term use: Especially under extreme stress, the running stitch may give way.
- Simplicity preferred: While functional, the running stitch offers little room for aesthetic embellishments.
- Not a specialist: For detail-oriented projects, you should look elsewhere.
- Consistency matters: Even when time is of the essence, you cannot afford to compromise on precision.
: Die besten Nähstiche")
The Noble Finisher - The French Roll Seam
You want your leather works to be not only sturdy, but also elegant?
The French Roll stitch is like the shimmer on the surface of a calm lake - breathtaking and full of depth.
This stitch adds a professional and refined touch to your projects. I'm telling you, once you master it, there are no limits to your leather craftsmanship.
: Die besten Nähstiche")
Step-by-Step: Elegance meets Strength
Here's how to create a seam that looks as good as it holds:
1. Punch holes like a running stitch - all at the same distance
: Die besten Nähstiche")
2. Insert from the bottom into hole one and from the top into hole 2.
: Die besten Nähstiche")
3. Tie everything together at the bottom.
: Die besten Nähstiche")
Then reinsert from below through hole 2.
: Die besten Nähstiche")
Then you poke through hole 4 from above.
: Die besten Nähstiche")
From below, you now stab through hole 3.
: Die besten Nähstiche")
Come out in front or behind your yarn. Then insert into hole 6.
: Die besten Nähstiche")
Then come back up from below through hole 5.
: Die besten Nähstiche")
Now you've got the hang of it. 😊
: Die besten Nähstiche")
A stitch with many talents
Not convinced yet? Check out what the French Roll Stitch has to offer:
- Durability in focus: It's like a good leather boot - sturdy and long-lasting.
- Show your artistic side: Here you not only get functionality, but also get to unleash your creativity.
- Multi-talent: Whether it's for cuffs or collars, the French rolled hem stitch excels in every league.
: Die besten Nähstiche")
The flip side of the coin
Here are the challenges to consider when doing the French Roll stitch:
- Yarn is no longer just yarn: Please keep in mind, more material is needed - so calculate carefully.
- Good things take time: Like a good wine, it takes time for true beauty to emerge.
: Die besten Nähstiche")
The Robust Connector - The Welted Seam
Especially in shoulder seams of jackets or vests - wherever a lot of movement comes into play - this stitch shows its full class.
: Die besten Nähstiche")
Step-by-Step: Completion with the Welted Seam
With these steps, you create the most stable of all connections:
- Take two pieces of leather and place them with the edges together.
- Fold and sew a thin strip of leather into the seam - like a proud tree thriving between two rocks.
- Thread the needle through each piece of leather alternately, so that the strip of leather is clamped and secured.
The Advantages of Welted Seams
See why this stitch should not be missing from your repertoire:
- Aesthetically eye-catching: The welted seam is the George Clooney among stitches - always looks good.
- Ideal for wind jackets: Because what good is the most beautiful jacket if the wind whistles through every crack?
- Nothing moves anymore: It is the rock in the surf and holds your leather pieces together securely.
: Die besten Nähstiche")
Mastering Challenges
Of course, there are also a few tricks to keep in mind when it comes to the Welted Seam:
- Thick stitches: This stitch can make the end product a bit bulkier - but what's a little more effort for a great result?
- Flexibility under control: A world-class stitch that sometimes restricts freedom of movement a bit.
- A stitch for the patient: More layers also mean more work - take the time it needs.
Overview - Which stitch suits your project?
Now you have already learned some stitches. But when do you use which one?
Here comes the decision-making aid in the form of a table, so you are prepared for every Buckskin project.
Table: Types of stitches compared for suede / buckskin
Here is a clear table that shows you when to use what:
| Type of Stitch | Application | Advantages | Disadvantages |
|---|---|---|---|
| Whip Stitch | Quick repairs, beginner projects | Material-saving, flexible, easy, fast | Not windproof, can be irregular |
| Baseball Stitch | High-quality leather goods, decorative seams | Aesthetic, no seam allowance necessary, easy to learn, fast | Not windproof, less durable |
| Running Stitch | Larger projects, thick leather | Windproof, fast, simple execution, strong | Less decorative, lower durability |
| French Roll Stitch | Cuffs, collars | Decorative, strong, versatile | High material consumption, time-consuming |
| Welted Seam | Windproof outdoor clothing, shoulder connections | Stable, attractive, windproof | Thicker, limited flexibility |
With this table, you can better estimate which stitch is optimal for your purposes.
Think carefully about what you want to sew and then choose the stitch that will give you the best result.
Testing stitches and gathering personal experiences
Stay adventurous.
Often you only discover which stitch really suits you when you start doing it.
My table will give you a head start, but nothing can replace your experiences. Try out different stitches, find out what you enjoy and what showcases your leatherwork the best.
Every stitch has its time and place, and over time you develop a sense of when to use which stitch. Enjoy the journey!
Tips for strong and durable seams
You want your leather works to not only look good, but also withstand the wildest adventures? Strong and durable seams are key.
After numerous test projects, I am quite knowledgeable. Here are my golden rules for seams that deliver on their promises:
Keep your stitches tight and your holes small
That's my most important advice to you, because you don't want to:
- that a butt seam overlaps
- that your yarn slips back and forth through the holes
Tight stitches and small holes are important, like this:
- that the leather around the holes does not tear. Tight stitches and small holes help distribute the load evenly.
- that the seams do not come loose. Stitches that are close together create more friction and hold the seam together more tightly.
- that no moisture penetrates through large holes. Smaller holes mean less exposure to elements like water.
- that the leather is not deformed. Holes that are too large can weaken the leather and lead to an uneven shape.
- that the seam does not expand over time. Tighter stitches prevent seams from loosening and stretching over time.
Sharpen your awl regularly
Your awl must always be sharp. This way you can make clean holes without damaging the leather. A sharp awl also makes your work easier.
Choose the right material
Leatherwork is only as strong as its weakest link - and that is often the stitching material. Here is my top list for the thread that won't tear on you:
- Polyester or Nylon: Weatherproof and durable, does not rot. (buy here)
- Waxed linen thread: A traditional choice, strong and reliable. (buy here)
- Leather straps: You cut them directly from your suede, they match perfectly with your clothing. Biodegradable.
P. S. In case of emergency, you can also use dental floss or sew. Our ancestors exclusively sewed with animal sinew.
Treat the leather well
Suede/buckskin is a natural product and requires care. Here is a checklist for durable leather:
- Clean the leather before sewing.
- Store the leather in a dry, cool place.
- Beware of moths and carpet beetles - store the leather in a bright place and move it around from time to time.
: Die besten Nähstiche")
Pay attention to the stitching technique
Your technique determines the lifespan of your seams. These tips have helped me:
- Don't sew too tightly: The leather can tear.
- Avoid loose stitches: The seam can lose its grip.
- Consistency is key: It ensures even stress and visual elegance.
Conclusion and Beginning of a Seam
- Knotting: Knot the beginning and end of your seam tightly so that nothing comes undone.
- Reinforcing: Reinforce stressed seam ends with an additional stitch.
With these tips, you are laying out the red carpet for the durability of your leather projects. And now, grab the needle.
Read also
Bark tanning (vegetable tanning) - A guide on how to tan a fur or skin yourself without prior knowledge - With the step-by-step guide to bark tanning, beginners can learn how to easily tan a fur or skin and process it into leather.
Common Mistakes in Sewing Suede and How to Avoid Them
We all learn from mistakes, but in the leather craft, they can be costly - in the truest sense of the word.
I have paid my dues so that you don't waste your buckskins on unnecessary mistakes. Here are the traps that await you and how to cleverly navigate them.
Save on material
The first thing I learned: Cheap yarn is a waste of money. It tears, it frays, it simply isn't enjoyable.
Solution: Invest in high-quality, durable yarn. Your future self will thank you. Or sew with suede strips cut from your suede.
The wrong seam thickness
A common embarrassing error: Too thick yarn for delicate leather, the seam then dominates the piece.
Solution: Choose the yarn thickness that matches the leather - harmonize instead of competing.
Unequal stitch lengths
Here a longer, there a shorter - looks like a zigzag path. Okay at the beginning, but not what we want in the long run.
Solution: Use a stitch wheel or mark the stitches in advance. Ensures a nearly professional execution.
The seam tension
Stitched too tightly and the leather deforms, stitched too loosely and the seam becomes loose.
Solution: Practice the even pull. A constant tension is the key.
Cutting without backup
Simply cutting off the yarn end and hoping everything holds? A risky game.
Solution: Always tie a knot or weave the ends. Better safe than sorry.
With these tips, you are prepared for most of the pitfalls of leather crafting. And if you stumble, remember: Leather is patient, and every mistake is a step on your path to mastery.
Frequently Asked Questions and Answers
During my journey through the intricacies of leatherwork, I encountered many questions. Here, I have compiled the most frequently asked questions and their answers for you, so that you won't be left pondering.
Which needle should I use for buckskin?
One of the key questions. Buckskin is supple, so you need a needle that is strong enough but doesn't damage the material.
Answer: I recommend using a leather or saddler needle. Its tip is rounded to penetrate the leather without tearing the fibers. With a rounded needle, you push the fibers aside and they remain intact. Intact fibers last much longer.
How often should I wax my yarn?
Waxed thread glides like a dream. But how much wax is too much?
Answer: My tip: Pull the thread through the beeswax two to three times. That's enough to keep it smooth and increase its durability.
Why is my thread breaking while sewing?
This happens to the best and can be so frustrating!
Answer: Be careful not to exert excessive tension. Also, old or low-quality yarn can break. Always pay attention to good quality.
How do I fix a faulty seam?
Honestly, that can happen to anyone.
Answer: Carefully pull out the thread until the last correct stitch. Knot everything. Then start again from that point. Patience is the key here.
Can I use machine stitch for buckskin?
In our fast-paced world, a valid question.
Answer: Sure, if you have a sewing machine that is suitable for leather. However, keep in mind that hand-sewn seams have their own unique charm.
How should I store my leather?
Good storage is essential for the longevity of your suede.
Answer: Store flat and at moderate temperature. Moisture is the enemy - keep it dry. And move it regularly to prevent moths.
Read also
Buckskin care: How to properly wash and maintain buckskin – Learn how to thoroughly wash and maintain your beloved buckskin with my step-by-step guide to gentle cleaning.
Your Journey into Leather Craft
Now you have reached the end of this guide. It has been a journey full of knots and stitches, through the world of suede.
Believe me, I know the feeling of happiness that arises when you put your hands into your finished leather work - priceless.
: Die besten Nähstiche")
Summary of the key findings
Before you start on your own, let's go over it again:
- Good preparation: Your leather and you - you are a team. Take good care of it.
- The right material: Don't skimp on the thread. Choose the right stitch for every seam.
- Patience and practice: Sometimes you're faster, sometimes it takes time. Either way, every stitch takes you further.
- Learning from mistakes: Every setback is a step forward if you learn from it.
: Die besten Nähstiche")
Motivation and Inspiration for Advanced Leatherwork
Now the thread is in your hands. Try out what you have learned and bring your ideas to life. Whether it's jackets, pants, bags, belts, or moccasins - it's your craft, your art.
And when you're stuck, look back on these lines. I'm sure you'll find just the stitch you need to move forward.
Or you can turn to the community because learning together is easier.
With every cut and every stitch, you become more skilled and your projects become more magnificent.
In the world of leather craftsmanship, there is always something new to discover - so get out there and have fun being creative.
Read also: What is Brain Tanning for Leather: Definition & Guide for Beginners (Natural Hide Tanning)


Author of the guide
Martin Gebhardt
Hey, I'm Martin. On my blog, you will learn the basics and numerous details about living in the wild. I think survival, bushcraft and the good life in nature are the keys to happiness. Find me here on Instagram or on YouTube. You can find more about my mission on the About Me page.
Was this guide helpful?
22 people found this guide helpful.
5.00 out of 5 points (22 Ratings)
Comments (0)
This post may contain affiliate links. So if you click on the links and make a purchase, I will receive a small commission at no additional cost to you. Click here, to learn more about it.