What is a bow drill and how does it work (+ free construction manual)
👉 The key facts from this guide
- Bow drill: A simple tool that creates fire through friction. It consists of a spindle placed on a wooden board with a depression and a notch.
- Methods: There are various methods, including hand drill (spindle is rotated with hands), bow drill (spindle is rotated with a bow) and pump drill (spindle is rotated by a pumping-like hand motion).
- Wood selection: Choosing the right type of wood is crucial. Recommended woods are poplar, willow, lime, aspen, and cedar.
- Notch: The notch in the board allows the glowing wood pieces to fall through.
- Practice: Bow drilling requires practice and patience to find the appropriate speed and pressure.
- Tips for beginners: Beginners can use tools such as eggcups, saws without blades, and aluminum foil.
Back when humanity was still young, there were neither lighters nor matches.
Fire was a precious thing, maintained by the community day and night.
The art of reigniting it was unknown. But around 8000 years ago, people discovered the bow drill.
This ingeniously simple device allowed them to ignite the much-needed flames as required.
In this article, we will describe how you can create such a tool. It will also be explained why it works and what else you need to know.
The goal is for you to be able to make fire yourself in case of an emergency.
What is a bow drill?
A bow drill is a roughly two centimeter thick branch (the spindle) that is rounded at one end. The tip is placed on a wooden board with a depression and a notch. When the spindle is rotated, over time, black and glowing sawdust accumulates in the notch due to the abrasion.
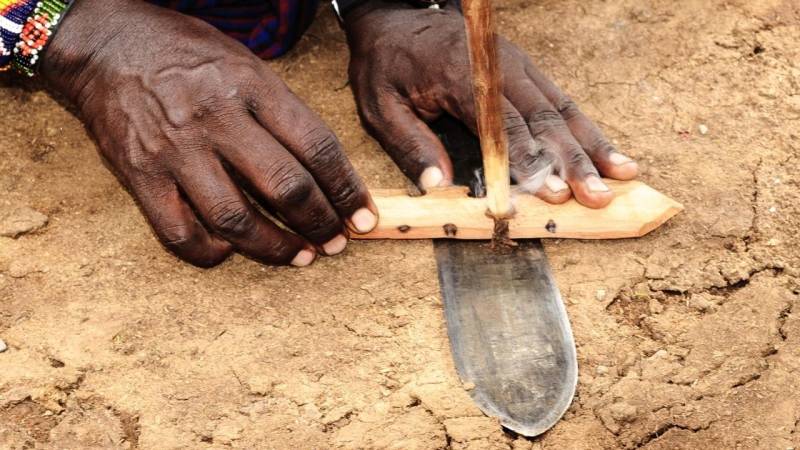
The wood can either be rotated with the hands or with a bow.
With both methods, additional pressure must be applied to the tip in order for the device to work.
There are three methods for fire starting with a hand drill:
- Twist drill: the spindle is rotated between the hands (also called "Hand Drill")
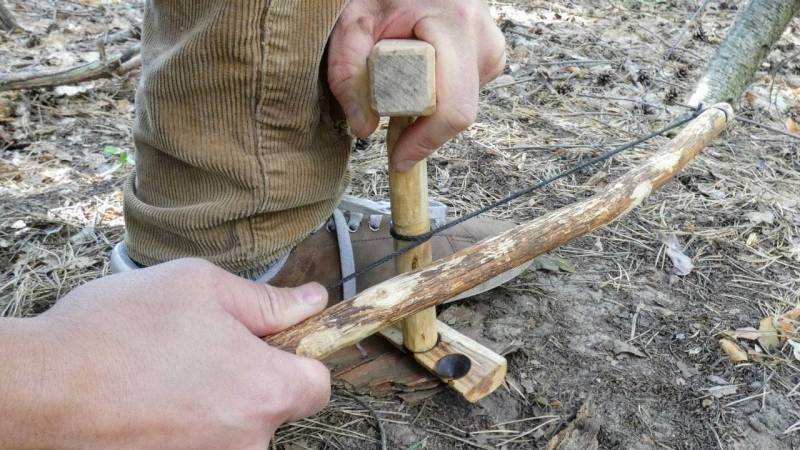
- Brace drill: the spindle is driven by a bow
- Pump drill: similar to the brace drill, but with a flywheel. The rotation is achieved by a pumping motion of the hand.
In this article, we will take a closer look at the brace drill.
How is the Heat and Embers Generated?
Although the rotation speed and pressure applied by hand are rather low, the friction created is enough to scrape off small wood particles.
These ignite, depending on the type of wood, already at 280 degrees Celsius and remain as glowing pieces.
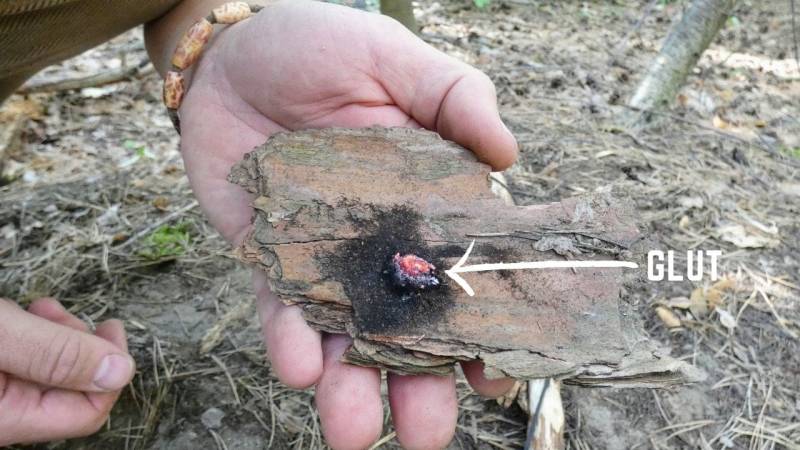
When the embers are placed on a flammable medium (such as tinder or a tinder nest), it starts to burn.
Also read: Survival Basics: Collecting and Making Tinder [22 Examples]
What components are needed?
If you now want to build such a bow drill yourself, then you only require a few things.
I advise you to use a bow-driven bow drill. It is not as exhausting and much faster.
What you require is listed in the following list.
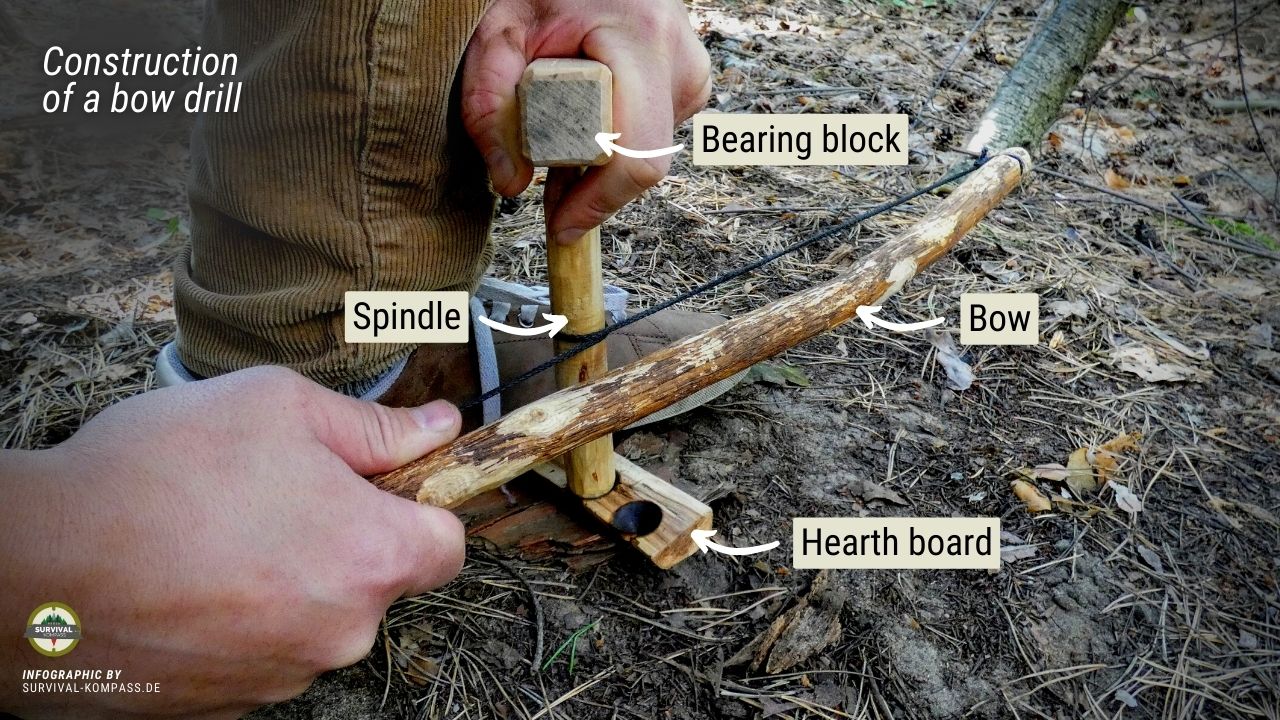
- Spindle: A straight, pointed at the top and rounded at the bottom branch with about 20 cm in length and 2 cm in diameter.
- Bearing block: A stone or wooden block as a counterpart.
- Hearth board: A wooden beam, at least 20 cm long, two centimeters high and 4 cm wide. It should have a pre-processed recess in which the rounded tip of the spindle runs.
- Bow: A curved branch for the bow, from tip to tip it should be around 50 cm.
- Cord: A sturdy cord about 80 centimeters long for the bow.
- Highly flammable material such as tinder, straw, or damp wood.
What string should I use for a bow drill?
Depending on the length of your bow drill, you will also need a string. Usually 80 cm is enough - it's better to cut a string that is too long rather than too short.
I recommend using a plastic string that is 3 to 4 mm thick. Consider a polypropylene string that is finely braided.
I am very satisfied with this rope from Hornbach: Seil Paraloc Mamutec Polyester Ø 3 mm, 20 m.
If you want to order quickly, then take the cord "Abma Cord 3 mm Paracord made of nylon", which I also use. It works just as well, and I am very satisfied.
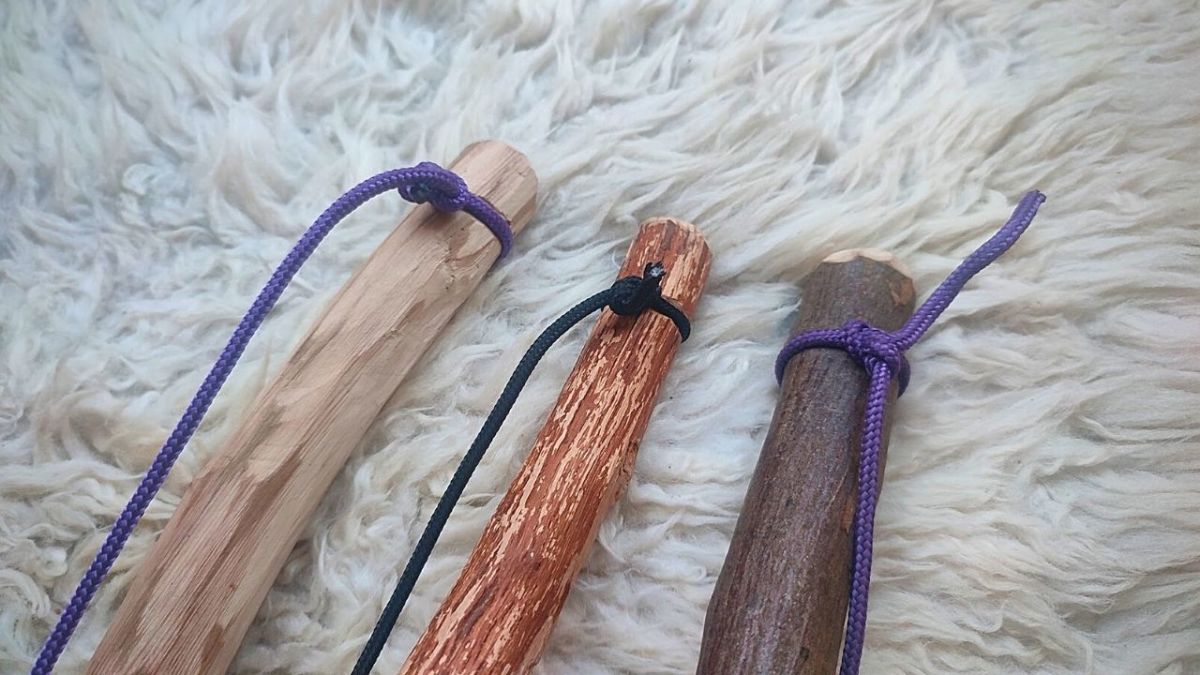
But cord is not cord and I have the best success with leather cord, suede cord or rawhide. That's why I wrote a detailed guide about it.
👉 Read here: Which cord for the bow drill? - How to choose the right bow drill cord (list)
Carve your first bow drill set
Simply carve your hearth board, spindle, and bearing block according to my carving instructions.
With the bow drill building instructions, you're on the safe side, and it's particularly suitable for beginners. You can use the template for free.
Just enter your email address below, so I know where to send it.
Which types of wood are perfect for bow drilling?
I'll say it briefly: There aren't many types of wood that are perfect for bow drilling.
Even though there are people who just go into the woods and quickly carve out their bow drilling set.
Believe me, it's not that simple. Those people have experience and they use it.
The choice of wood when bow drilling plays a massive role.
50% of your success depends on choosing the right wood.
For several years now, I have been testing various types of wood and one thing I can say is:
If you get the wrong type of wood, you'll be drilling and drilling, but there won't be any thick, hot embers. Only biting, white smoke.
Firstly: The wood must be soft, dry, and resin-free. As a beginner, stay away from hardwoods such as beech or oak.
Fire Bow Drill: The Best Wood
My recommendations for the spindle and hearth board wood for your fire bow drill. Prioritized from top to bottom.
- Poplar
- Willow
- Linden
- Aspen, also called Populus tremuloides
- Cedar
For the bearing block, use hard wood to make it last longer.
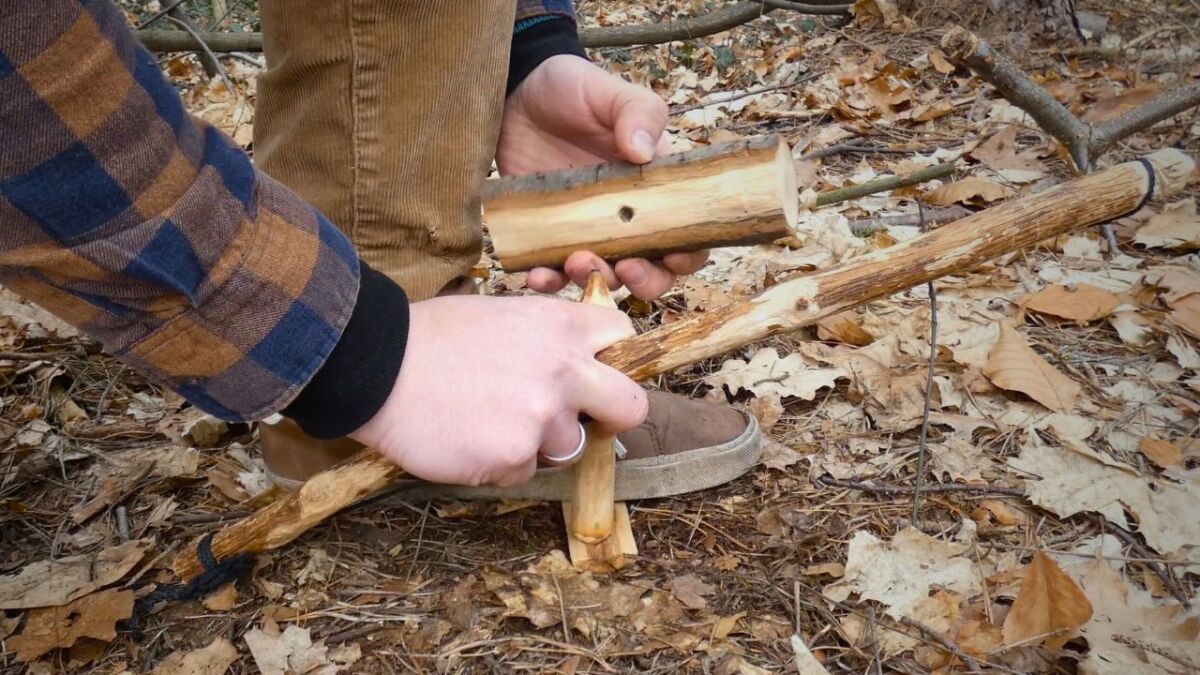
Just as a reminder because I wrote: hardwoods are not suitable. Beech wood works too, but poorly.
And let's be honest? Do you want to make fire efficiently or bore like a woodworm in the wood and sweat like a boxer?
I have written a separate guide regarding wood selection, and I strongly urge you to read it.
Especially beginners should not put too many obstacles in their way.
The fact is: With the right wood, anyone can make a fire with a fire bow.
Read now "Which wood for the bow drill? How to choose the best wood for your bow drill?".
How is the fire ignited?
There is one detail that I have not yet revealed to you.
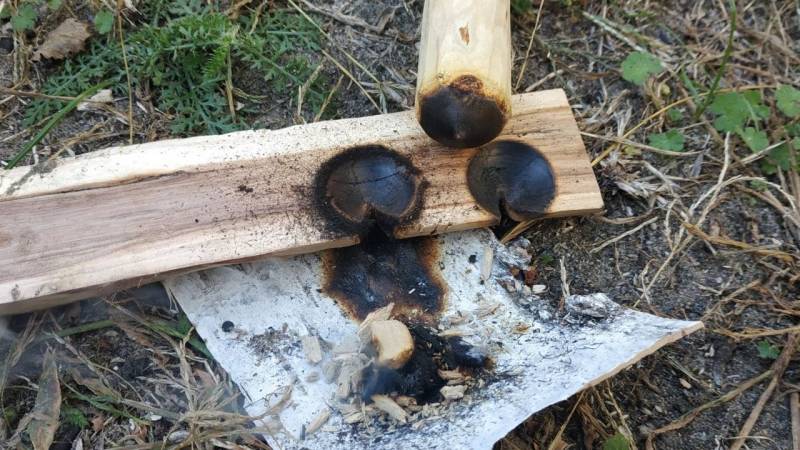
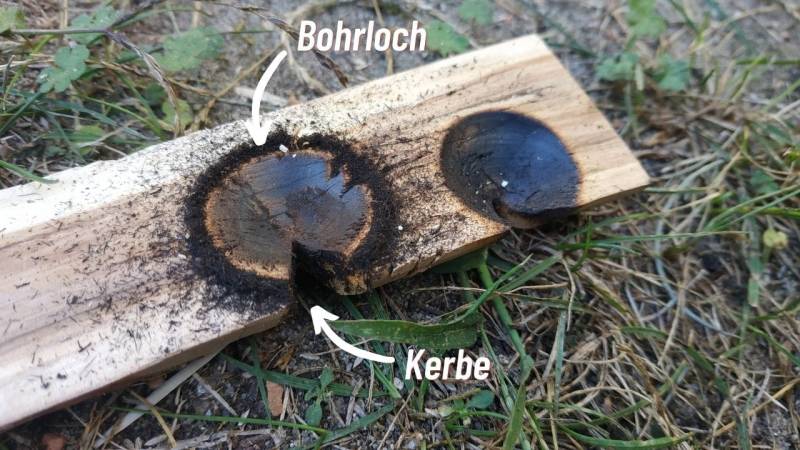
That's the notch in the hearth board. It allows the glowing wood chips to fall out of the groove.
If the notch is missing, you will rub for hours without creating anything more than wood dust and thin smoke.
Let's get started.
This is how to drill:
Carve a hole in the hearth board and insert your spindle. Turn the spindle a few times back and forth under light pressure. Continue until smoke appears. Then stop.
Carve a notch next to the hole so that the rubbed off material can fall out. Without the notch, you would have to rub for hours without producing more than thin smoke.
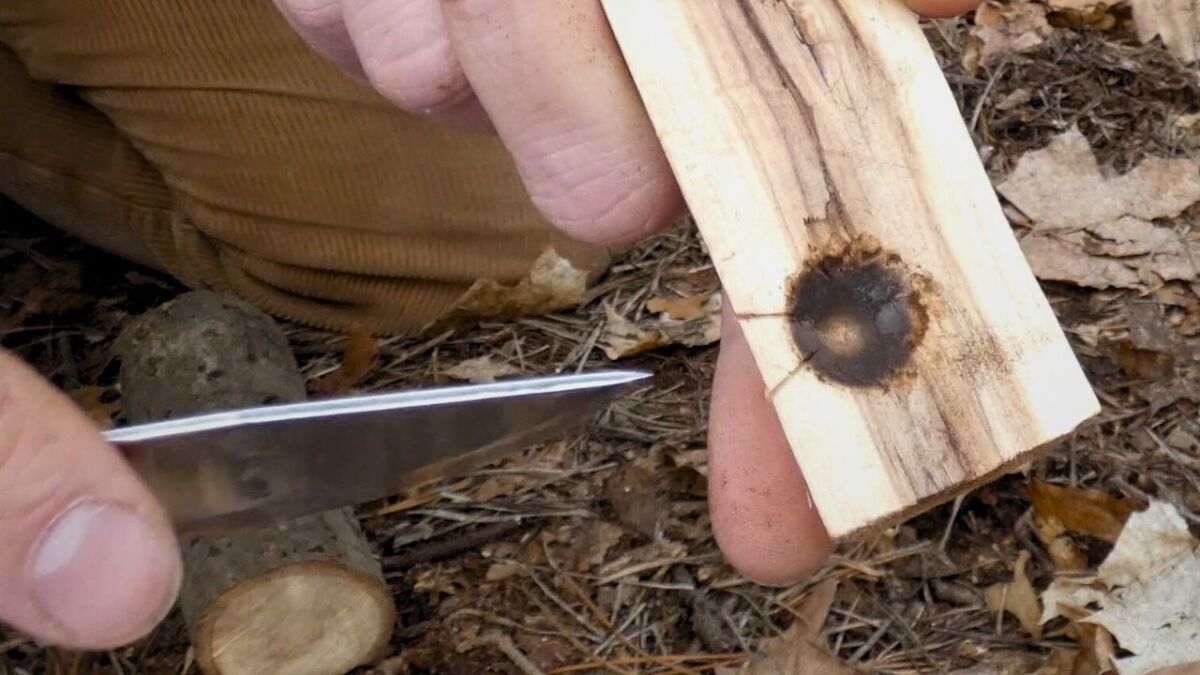
Here is a picture of the notch:
And then it really starts with bow drilling:
- Place a base on the ground to catch the sawdust from the notch (e.g., flat birchbark). On top of that, place the hearth board and stand on it with your left foot. Your foot should be close to the drill hole. Kneel down with your right leg.
- Now wrap the bowstring around the spindle one or two times and place it in the pre-drilled hole with the rounded tip. The bow must point to the right, and the spindle to the left leg.
- Finally, add the bearing block and pull the bow back and forth. Initially, do it slowly to conserve your strength. Fix your hand with the bearing block with your left leg and upper body (press your wrist against the shin of your standing leg).
- With the first smoke rising, you'll go faster. Make sure enough abrasion falls out (as much as a hazelnut).
- Then increase the pressure on the spindle. The smoke will now be stronger. Give it your all and pull the bow quickly back and forth.
- Then remove the spindle from the drill hole and check if the abraded substance is smoking.
Here's a video about it:
When the pile smokes, take a deep breath. It will continue to smoke if you've done everything correctly.

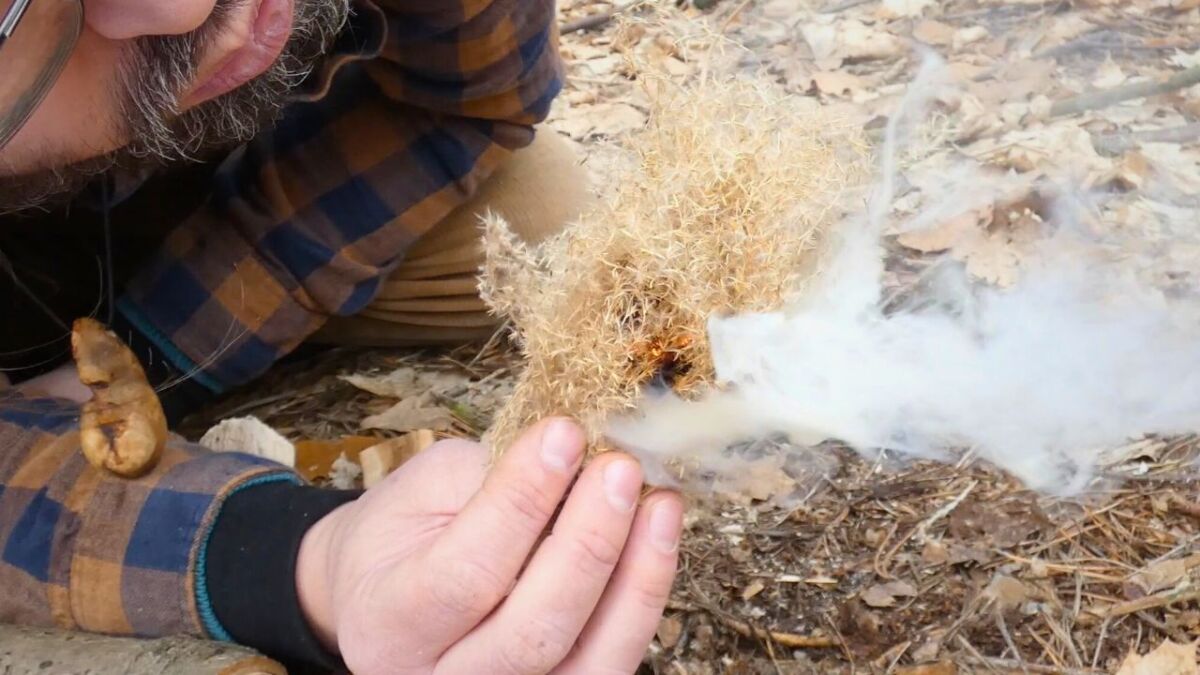
Now you just have to transport the ember to your tinder nest and blow on it.
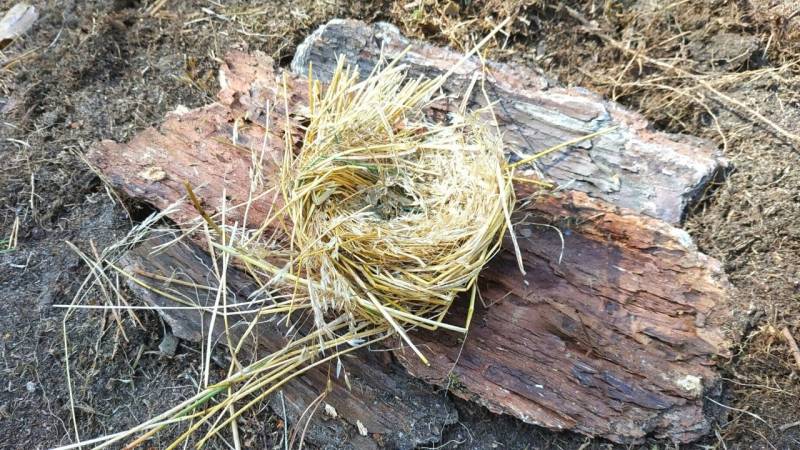
Blow gently into the tinder nest, but not too laxly. Wrap the embers up a little, but not too tightly.
Understanding Tinder
It can happen that you produce a lot of tinder, but no embers. This is frustrating and annoying.
Therefore, here are a few tips on what abrasion can mean. Problems can often be solved by examining the color and consistency of the abrasion.
| Color | Consistency | Problem |
| Light brown | Dusty | Too slow in speed, not enough pressure applied |
| Light brown | Fluffy | Too slow in speed |
| Dark brown/ Black | Fluffy | Perfect |
| Dark brown/ Black | Small rolls | Hard to say, sometimes too fast and not enough pressure applied |
| Dark brown/ Black | Crispy | Too much pressure applied, speed too fast |
A big mistake that many people make is working too quickly and with too much pressure. If you fill the notch slowly with fine dust, a fluffy, combustible pile is created that will likely ignite when it comes into contact with the hot spindle.
Consider dust as your tinder. It needs to be finely and loosely stacked before you attempt to ignite it.
A little more speed and pressure downwards for the last ten seconds is often all that is needed then. The rest of the time, you can take it easy and focus on filling the notch.
With too much speed and pressure, you'll end up getting coarser material and the unfortunate side effect of it burning before it even falls into the notch. This happened to me frequently in the past. I couldn't even ignite the powder with a lighter.
Tips for Beginners
bow drilling can be difficult for beginners. That's why I have some tips for you, so you can start more relaxed.
- Bearing block: Instead of using a wooden piece, use an egg cup, a shot glass or a candleholder. This will make it easier to turn, and the heat will be concentrated mostly on the hearth board.
- Bow: Instead of using a curved branch, use a saw without a blade.
- Spindle: If you cannot find a straight round piece of wood, purchase one from the hardware store. It should be about 20 cm long and 2 cm in diameter.
- Hearth Board: You can also purchase this from the hardware store.
- Catch Material: Instead of using birchbark, use aluminum foil - this can be used to create a small container.
Summary
Now you know everything you need to know to handle a bow drill.
It may be tiring, but if the wood is dry and resin-free, it should work.
By the way, there are numerous alternatives to the method presented here.
Some swear by shorter drills or choose a different diameter. Still others build a pump drill or spin the stick with their hand.
No matter how you like to start a fire, practice makes perfect.
I had to experiment for a while before I got the hang of it.
And if you are already good at using the bow drill, but still no embers, then read "Frequent reasons why the bow drill fails and what solutions there are".
Have you ever built or even used a bow drill?
Did it work? What difficulties did you encounter?
Now write your experiences in the comments!


Author of the guide
Martin Gebhardt
Hey, I'm Martin. On my blog, you will learn the basics and numerous details about living in the wild. I think survival, bushcraft and the good life in nature are the keys to happiness. Find me here on Instagram or on YouTube. You can find more about my mission on the About Me page.
Was this guide helpful?
66 people found this guide helpful.
4.88 out of 5 points (68 Ratings)
Comments (0)
This post may contain affiliate links. So if you click on the links and make a purchase, I will receive a small commission at no additional cost to you. Click here, to learn more about it.


