Common reasons why the bow drill fails and what solutions there are
Drawn into the wilderness and having trouble with bow drilling? I show you the most common mistakes and how to get rid of them.

From Martin Gebhardt. Check out my “About me” page.
👉 The key facts from this guide
- Understand the basics of bow drilling and practice regularly to improve.
- Choose the right material for your bow drill, especially dry wood and suitable wood types.
- Prepare your bow drill set carefully and pay attention to details such as the length of the bow and the consistency of the wood.
- When drilling, use the entire length of the drill and keep the bow parallel to the ground.
- Treat the resulting ember with caution and make sure your tinder is dry and well-prepared.
- Use the proper technique to ignite the fire with your tinder nest and keep it alive.
Again and again, I regularly receive letters like this:
„I approached bow drilling with great motivation. Unfortunately, it hardly works for me. There is no abrasion at all. The drill hole and the spindle get slightly warm, but otherwise the wood slowly becomes smoother.“
Maybe you feel the same way?
Then let's dive into detailed bow drilling.
Today we dedicate ourselves to the way of making fire with the bow drill method - one of the fundamental skills of survival, bushcrafting, and wilderness education.
And there are a few core elements that I want to show you today so that you can finally get closer to your glow.
The Bow Drill: widespread, but often difficult - especially when practicing alone
Before we delve deeper into the subject, I would like to point out the following:
This text is not intended as a comprehensive beginner's guide to the bow drill method.
I assume that you are already familiar with the concept of how a bow drill set works.
If not, then I recommend you to take a look at my two guides:
"What is a bow drill, and how does it work?" and "Which wood is best for the bow drill? How to choose the best wood for your bow drill."
You will get the most out of this text if you have already tried to drill an ember with a bow drill a few times.
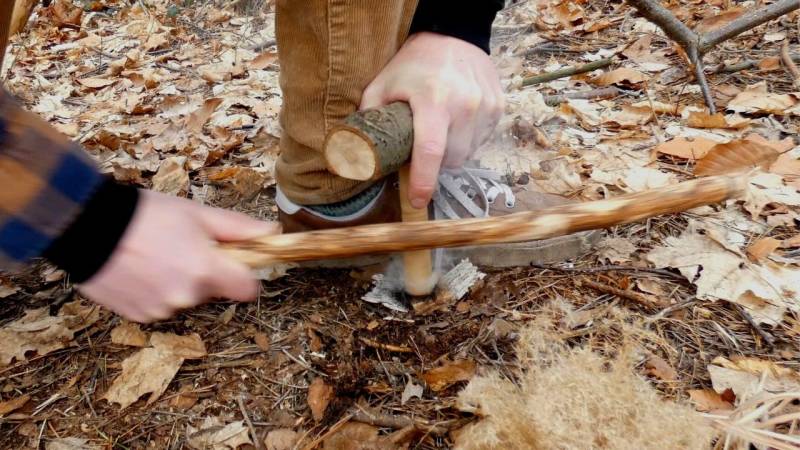
This text is perfect for people who want to practice. But you also have to be willing to work hard. It's like playing football. Practice makes perfect!
I want to help you become better. We don't want you to fail.
Probably you just need to practice, and you shouldn't give up - and maybe pay attention to my key elements here and then it will work.
Selection of bow drilling materials
As is often the case: preparation is essential.
The first step is therefore to select your materials.
The fact is: The time you invest in a good material selection will pay off.
Your ability to go into nature and distinguish between suitable and unsuitable materials is an important factor for success or failure.
Practice with types of wood that you will likely find in the wilderness
Some species are well suited for friction fire making, but are rare or not widespread in the wilderness.
Sure, you can practice with wood from the hardware store, but most likely you won't find this type of wood and quality outdoors.
Try to get used to what you find outside.
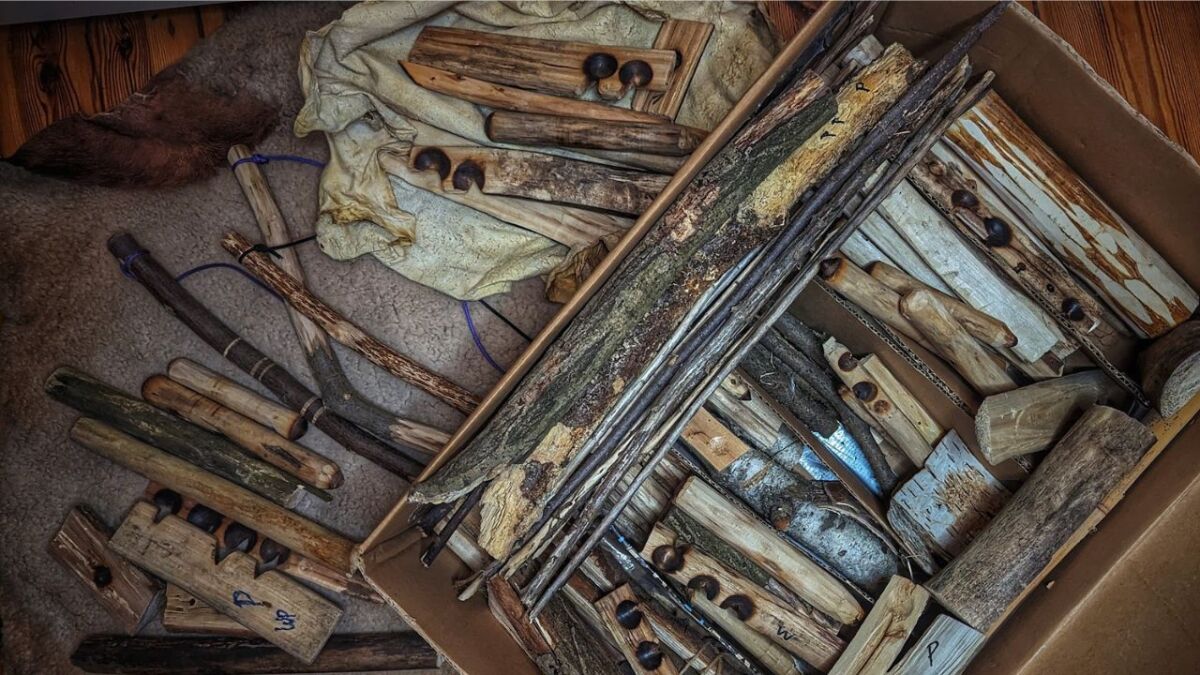
I recommend training with softwood such as poplar, lime, and willow. You can read why here in my guide.
"The key to successful bow drilling is choosing the right wood for the hearth board and spindle."
– Ray Mears
This creates familiarity with species that are relatively common and easy to identify.
If you are good at bow drilling, you can also use pine, spruce, and other types of wood, such as birch, alder, and maple.
This is especially good because you can find these trees almost everywhere. Especially when you are high in the mountains or far in the north. There are often not so many other trees there.
Hearth board and spindle are made of dry deadwood
The spindle and the hearth board of your bow drill set must be made from dead, dry, standing wood.
Any moisture in the wood will decrease your chances of success.
Make sure to choose the driest wood you can find.
Ideal dry wood stands upright, like an old tree or parts of it. Anything that lies below is usually unusable or will make it difficult for you.
In addition, wood that hangs from the trees branches is wetter because it collects more rain.
The spindle and the hearth board should be made from the same type of wood
Even preferably from the same piece of wood.
You can also use two different types of wood together.
But be careful! The more different things you try, the more likely something can go wrong. So, keep it simple and don't overthink.
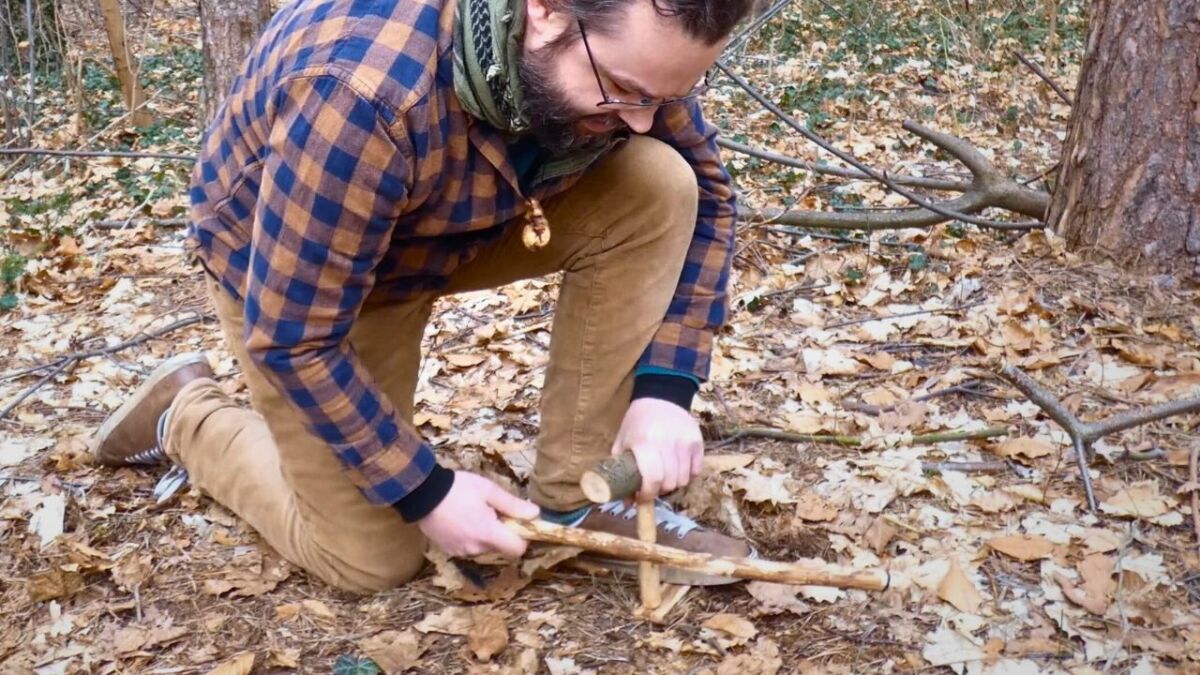
The wood for your spindle and hearth board should have the right consistency
If it's too hard, you won't get any dust. But you need that to get embers.
If it's as soft as punk wood (What is Punk Wood?), your set will simply fall apart. That's not good either.
Test the wood with your thumbnail. You should be able to make a small dent without your thumb hurting.
Ideally, your bow should be lightweight and durable
The bow should fit perfectly in the hand. Otherwise, it is difficult to use.
He should be strong, but not too heavy. Otherwise, you won't be able to drill long enough.
The bow should be slightly curved, but not too much. Otherwise, the string will slip off the spindle.
It is important that the bow is light, stiff, and stable. It doesn't matter which wood you use for the bow.
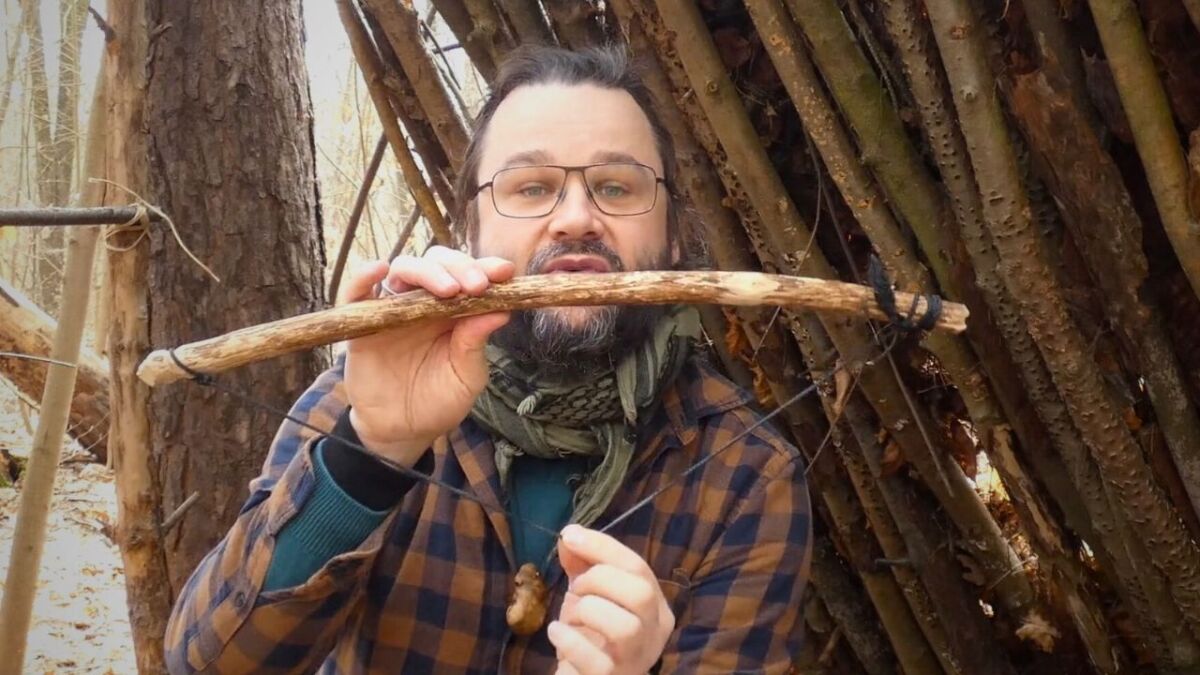
Length of the bow: From the armpit to the fingertips
To know how long your bow should be, stretch out your arm. The bow should reach from your fingertips to your armpit.
If the bow is too long, it is difficult to use. If it is too short, it does not work as well.
Your bearing block is made of hardwood
For the bearing block, use the hardest wood you can find.
Some Native Americans even used a stone with a hole in it.
Tip: For practice, an egg cup or a shot glass is also suitable - this creates very little friction on the pressure piece at the top.
But we don't have all that outside when you build your bow drill there. So just take the hardest wood you can find.
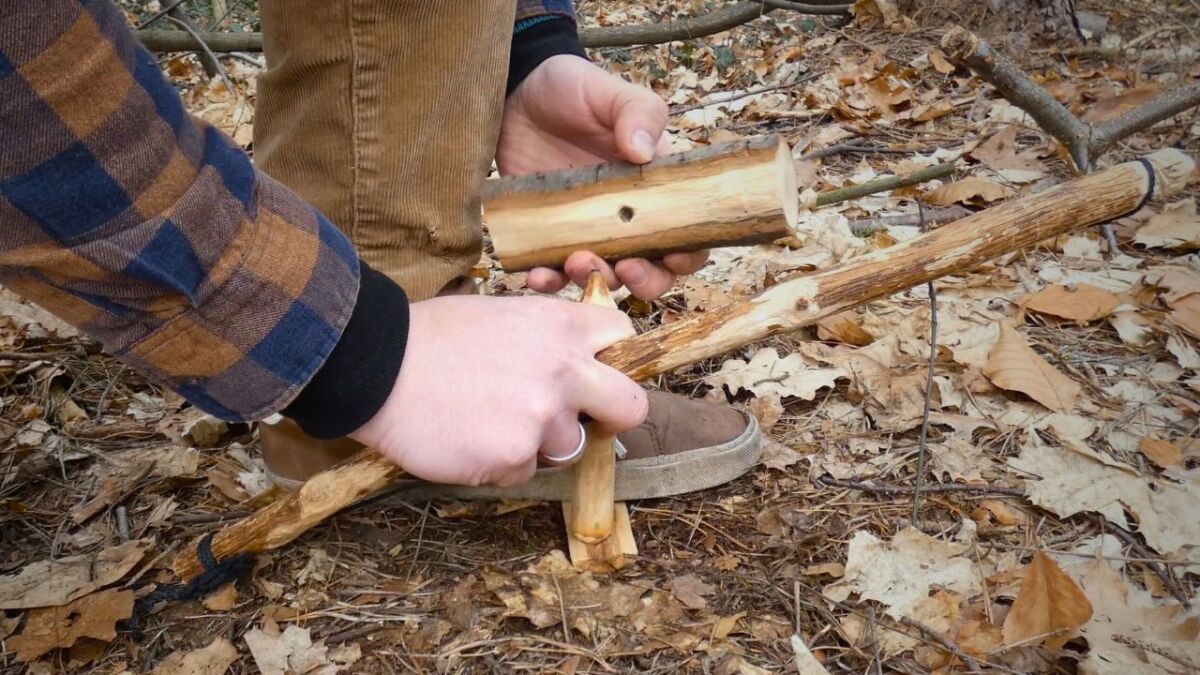
For the bearing block, I ideally use green wood. Because it is still alive, it is moist. I particularly like oak and beech, as both are hardwoods.
The moisture and the hard wood help to lubricate the pressure piece and reduce friction where you don't need it.
Collect more tinder than you think you need
It's like collecting firewood. If you have collected enough, then collect double the amount again.
Moreover, here, preparation is a key factor.
Unfortunately, I have often seen that while there is a spark, only a measly tinder nest has been built.
This is not only annoying, but also frustrating, especially when it worked the first time.
So: Collect good and dry tinder!
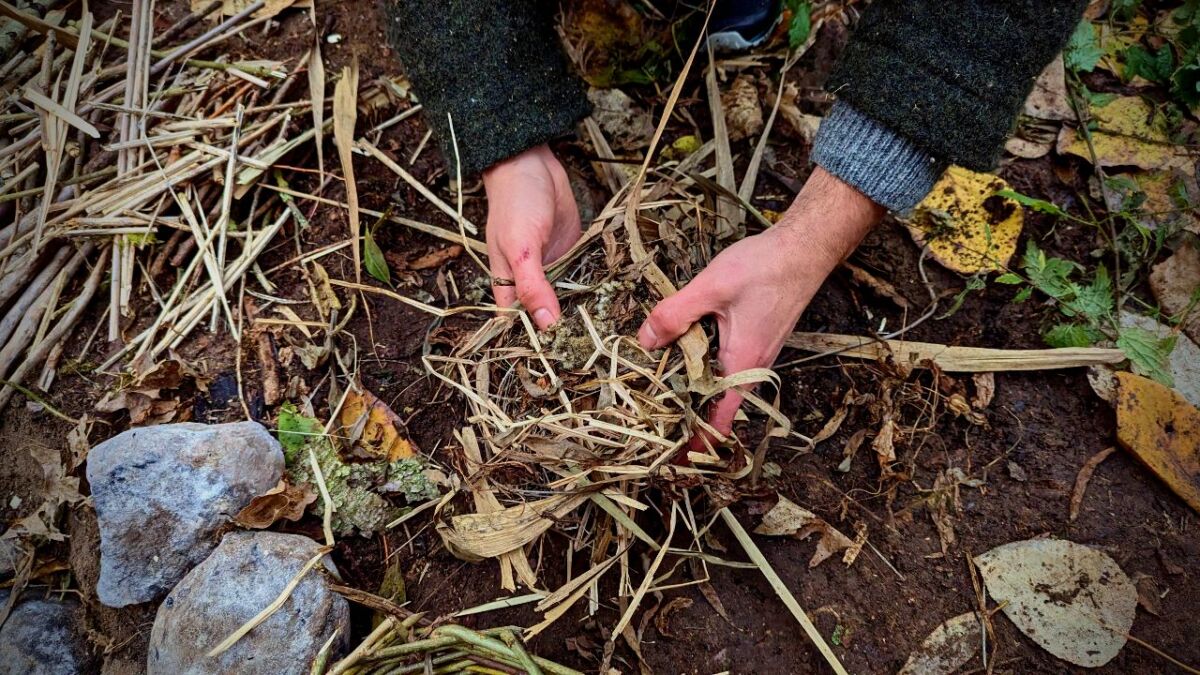
I have often collected seeds because I used to think they burn well.
Yes, they do - but they dissipate more than they burn.
The combination makes it. Dry grass, leaves, birchbark, and so on - there are many methods to obtain good tinder.
Also remember that your tinder will decrease over time - or fray, especially if you carry it in your pocket for a long time or rub it to make the fibers smaller.
String is precious and hard to come by
In winter, when most plants have died above ground, trees do not shed their bark, and everything is covered in snow, it becomes difficult to make a rope.
And even if you find some nettles, there isn't much else left that you can use (read here how to make a cord out of it).
The fact is: In the wilderness, you should always have a rope with you that you can use for bow drilling.
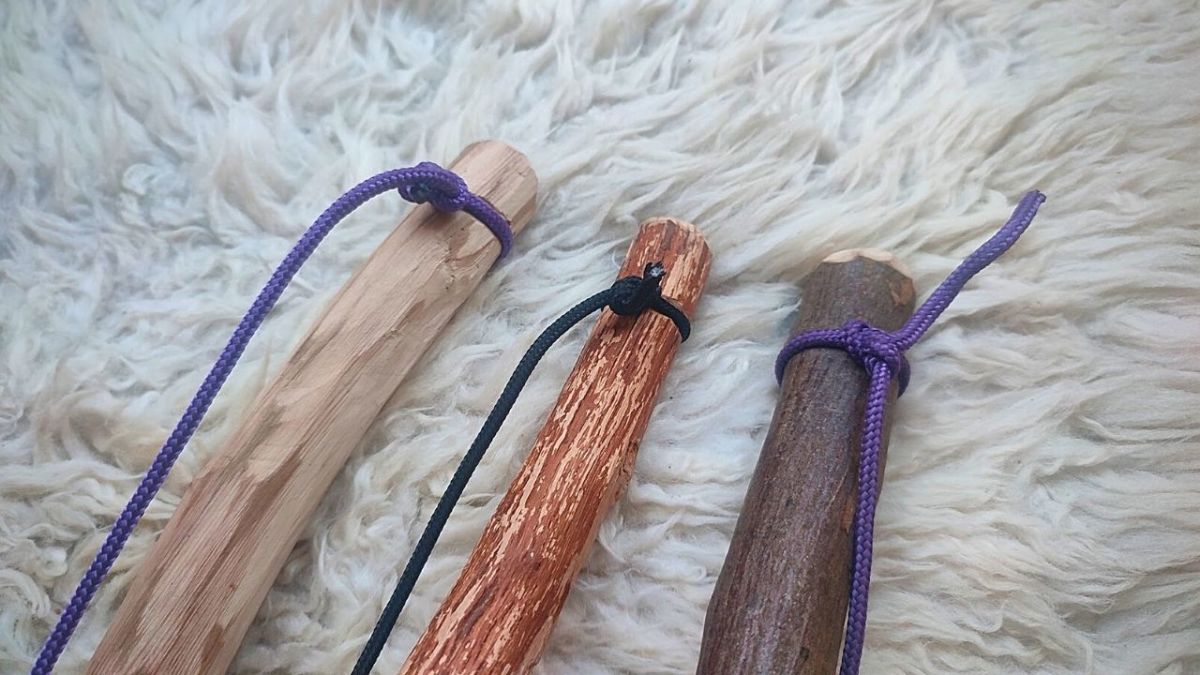
Previously, people used leather straps. They last a long time and the spindle only slips away with difficulty. I really like this style too, especially made from buckskin or rawhide. (👉 Read here: Which cord for the bow drill? - How to choose the right bow drill cord (list))
If you don't have leather at hand, you should always have a nylon paracord (3-4 mm in diameter) with you. You can use it for various other things (Read more here).
Pack one in your bag. When you replace all your shoelaces and straps with paracord, you always have cord for bow drilling with you.
Creating your own bow drill set
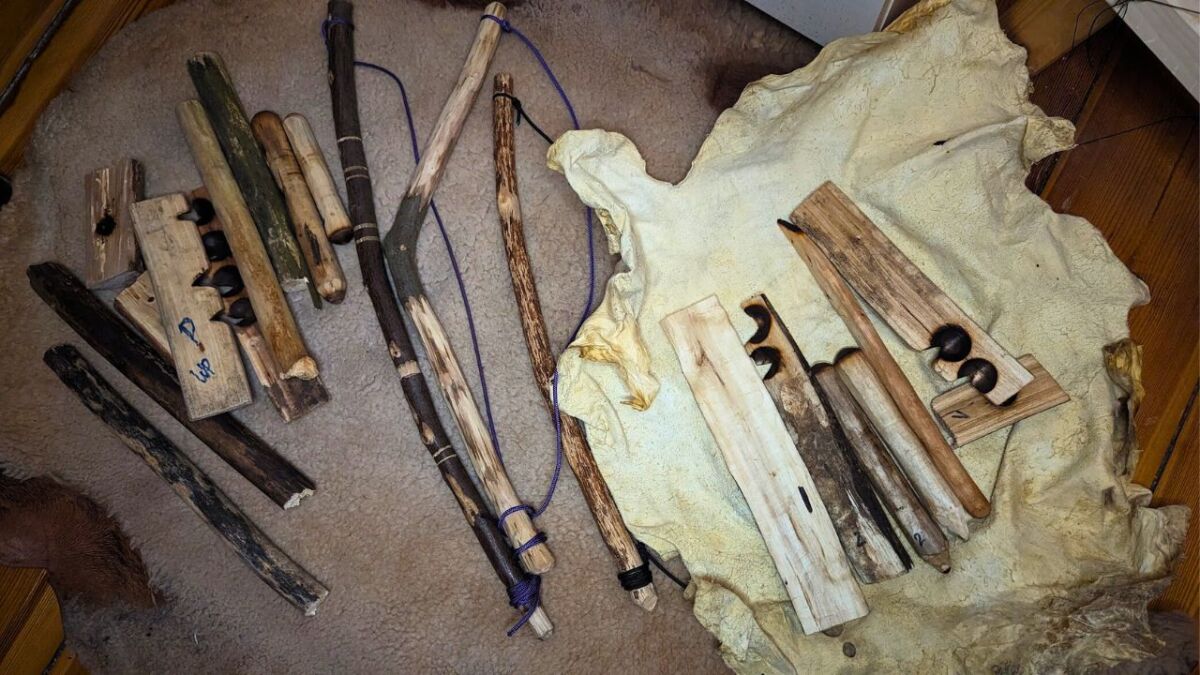
The Spindle
Be careful when carving the spindle. A shaky drill has no grip - just like a tree trunk without roots in the storm.
Your spindle should be straight and about 20-25 cm long.
A little more or less is also okay, as long as she stays straight.
For the diameter, approximately 2.5 cm applies. Think of the ankle where your thumb meets your hand. That's your guideline.
The spindle should have the same diameter from one end to the other, except for the tips. Sharp like a pencil at the top and blunt like a sausage at the bottom - that's how it should be.
The hearth board
Your hearth board, on the other hand, should not be thicker than the spindel.
An ideal board is between 2 and 2.5 cm high.
If it's too thin, you'll pierce it faster than a squirrel finds a stash of nuts.
If it's too thick, it's hard for you to generate sparks - the dust cools down before it can settle in the groove. Remember how important the right balance is in nature.
👇 In the video below, I build a bow drill from collected wood and use it to ignite my fire.
Now it's time: Everything comes together
Place your spindle on the outside of the cord
Insert your spindle into the cord so that it is on the outside of the cord, not between the cord and the bow.
Imagine she was a fish swimming in the current and not stuck between two rocks. That's how you make the most of the full length of the rope.
Make sure the cord catches the spindle
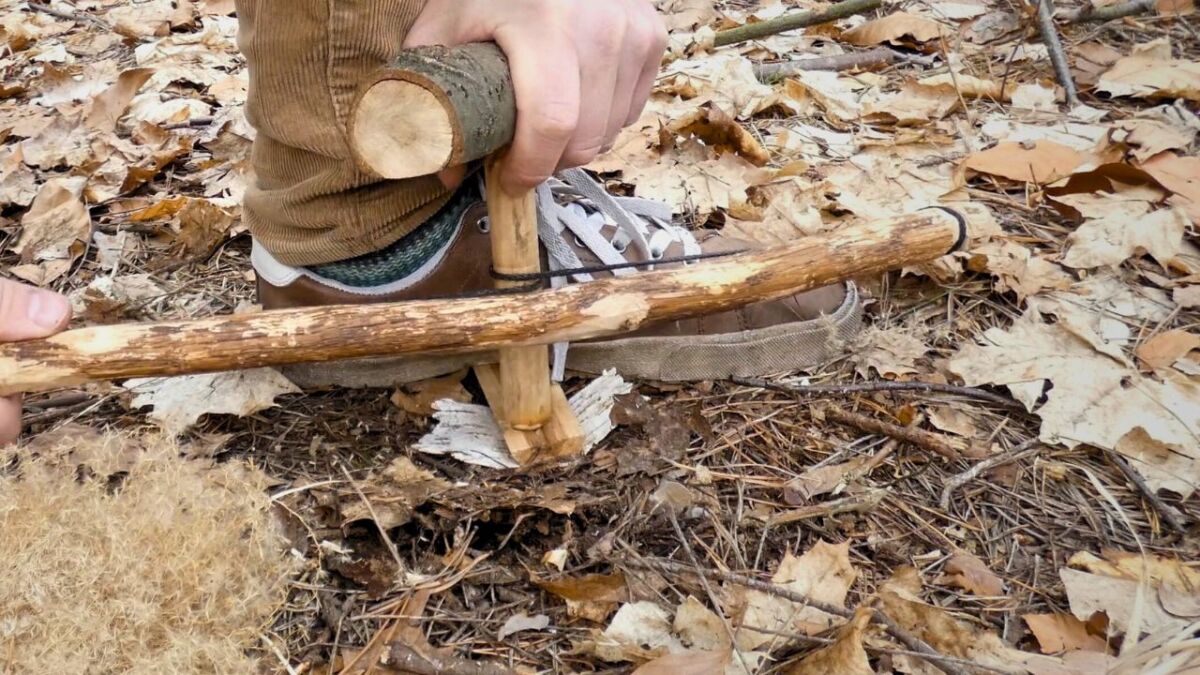
Have you twisted your spindle into the string of your bow, take the spindle, press it against your belly like a familiar walking stick. Now try to slide the spindle up and down.
Slide it here, slide it while drilling. If that happens, remove the spindle, tighten the cord, and try again.
Lubricate the bearing block
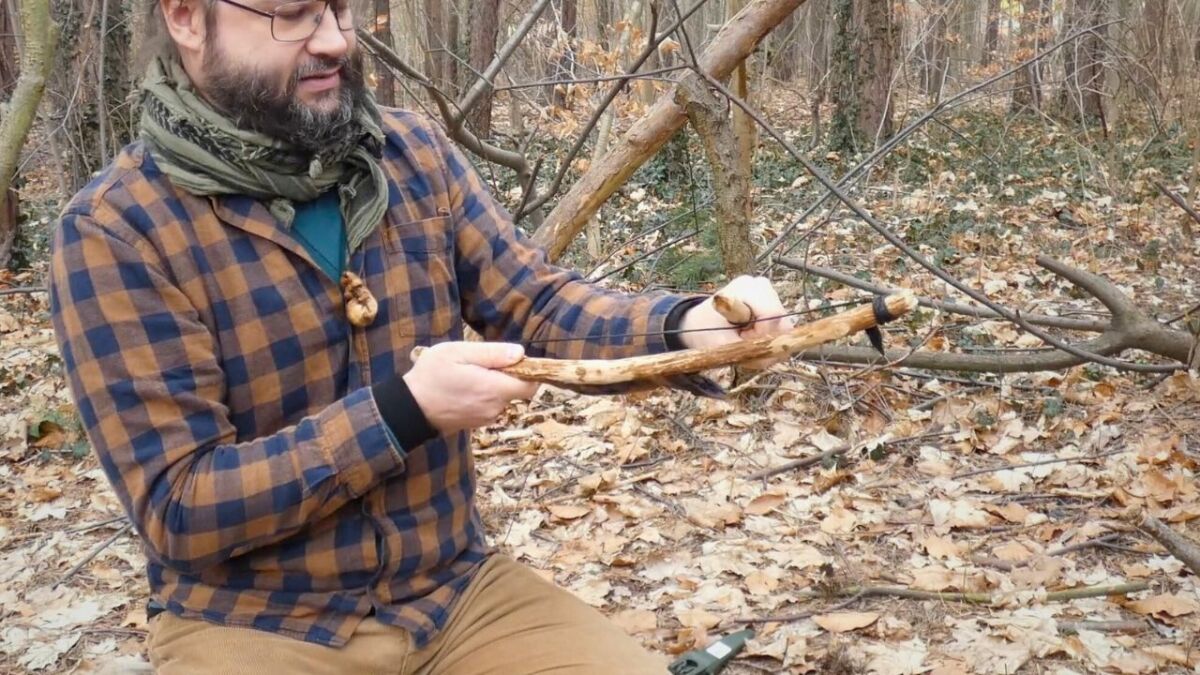
For a smooth rotation, put some green leaf material into the hole of the bearing block. It's like the oil in the joints of an old wooden cart - it makes everything easier.
Some people recommend spit, but in my experience, it actually creates more friction on top.
There are more tips on how to use facial fat as a lubricant. But let's be honest, I have never met anyone who was so greasy (although it is said that there is a lot of it on both sides of the nose).
That's why I'm a big fan of plants, especially grass blades or nettles. Thanks to their silica, they leave a wonderfully smooth film in the bearing block. Try it out and you'll be amazed.
Burn in your set before making a notch
Do not cut the notch first, as the spindle could drift off the hearth board. First, drill the spindle and then cut the notch.
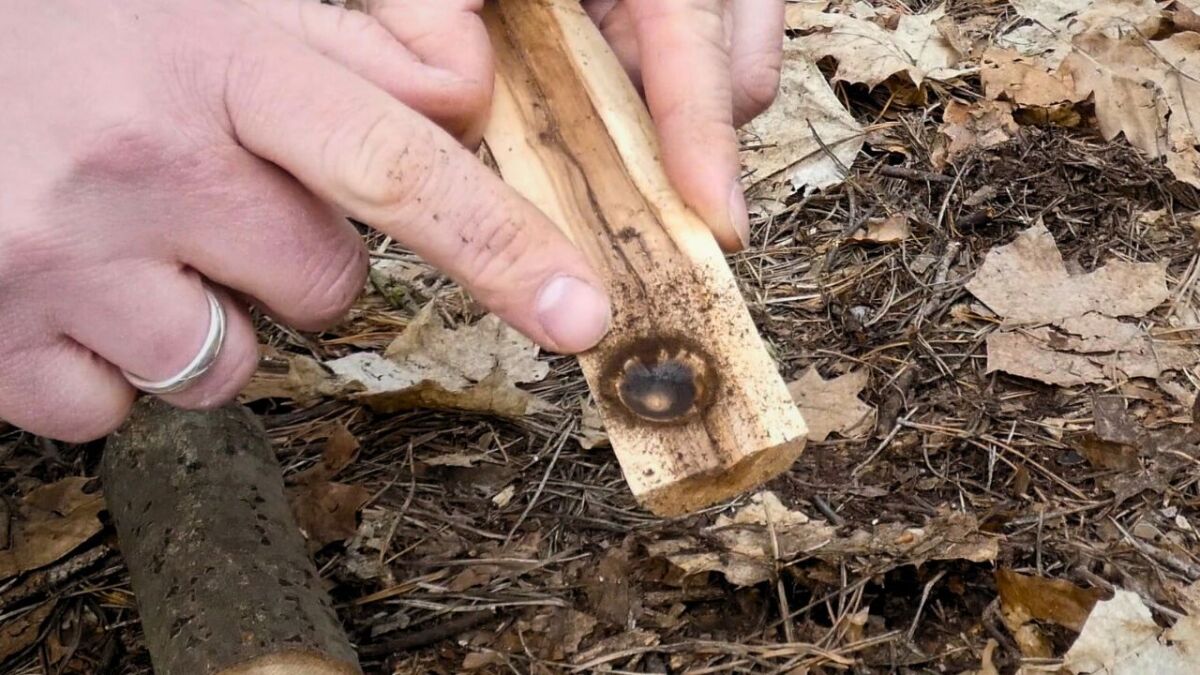
The set is burned when the hole in the hearth board and the whole bottom of the spindle are black.
Not brown, but black.
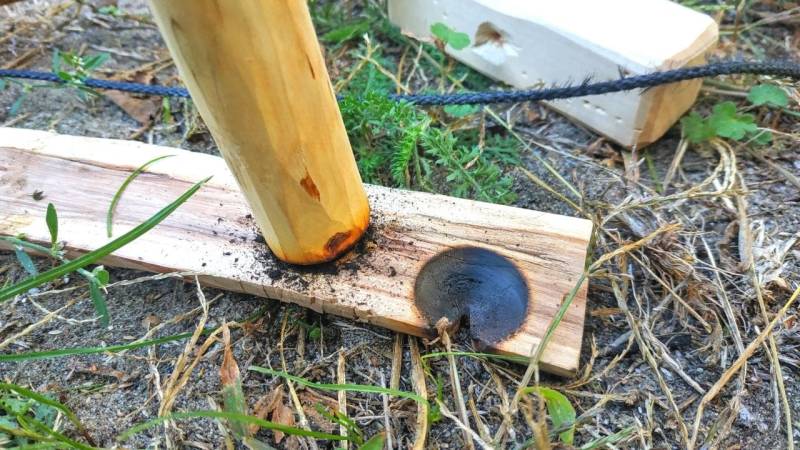
You shouldn't have to exert full force to set up the set. So stay calm and relaxed during this phase.
Carving the Notch
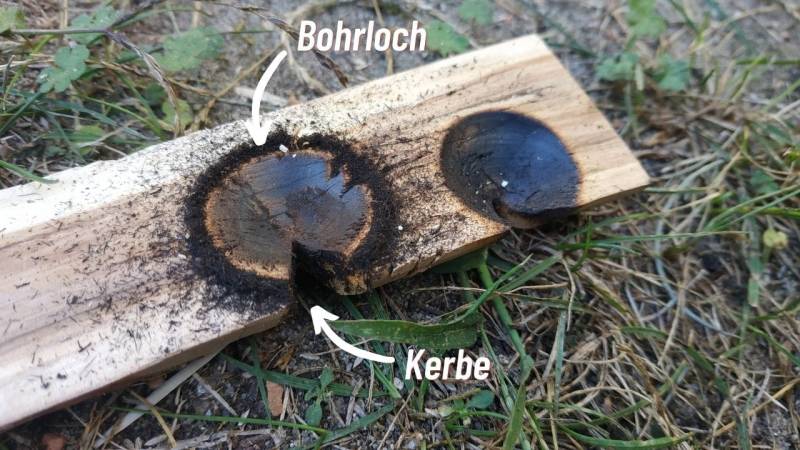
The notch you cut into your hearth board should make up about 1/8 of the drilled circle (45 degrees out of 360).
Imagine you would cut a small cake out of the full circle. The sides of the notch should be smooth (so that the drilling dust does not stick) and meet in the center of the circle.
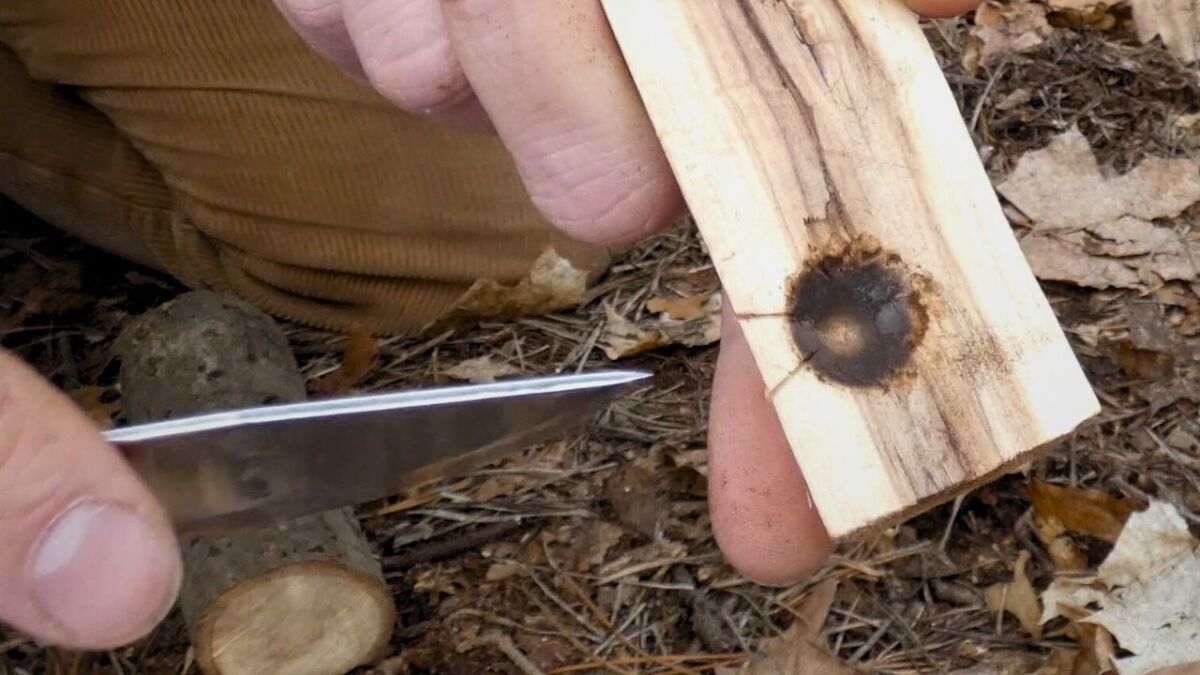
- If the notch is too small, not enough hot dust will fall out.
- If the notch is too large, there is a risk that the spindle will jump out of the groove.
Cut out the notch on the side of the hearth board that is closest to you. This way, you can accurately track how the dust collects in the notch.
Make sure that the notch points away from you when drilling; otherwise you'll end up seeing as much as a mole in sunshine.
Use the entire length of the bow
As soon as you start drilling, start evenly and let both yourself and your bow drill set come to operating temperature. Use the entire length of the bow, not just the middle part.
Keep the bow parallel to the ground
If you hold the bow horizontally to the ground, the string stays in the middle of the spindle, preventing the spindle from jumping out. The movement should come from the shoulder, not the elbow.
Make fire with your bow drill set
Now you are ready to ignite the fire!
Remember to prepare your fireplace and have your tinder nest, kindling (what's the difference?) and larger fuel ready.
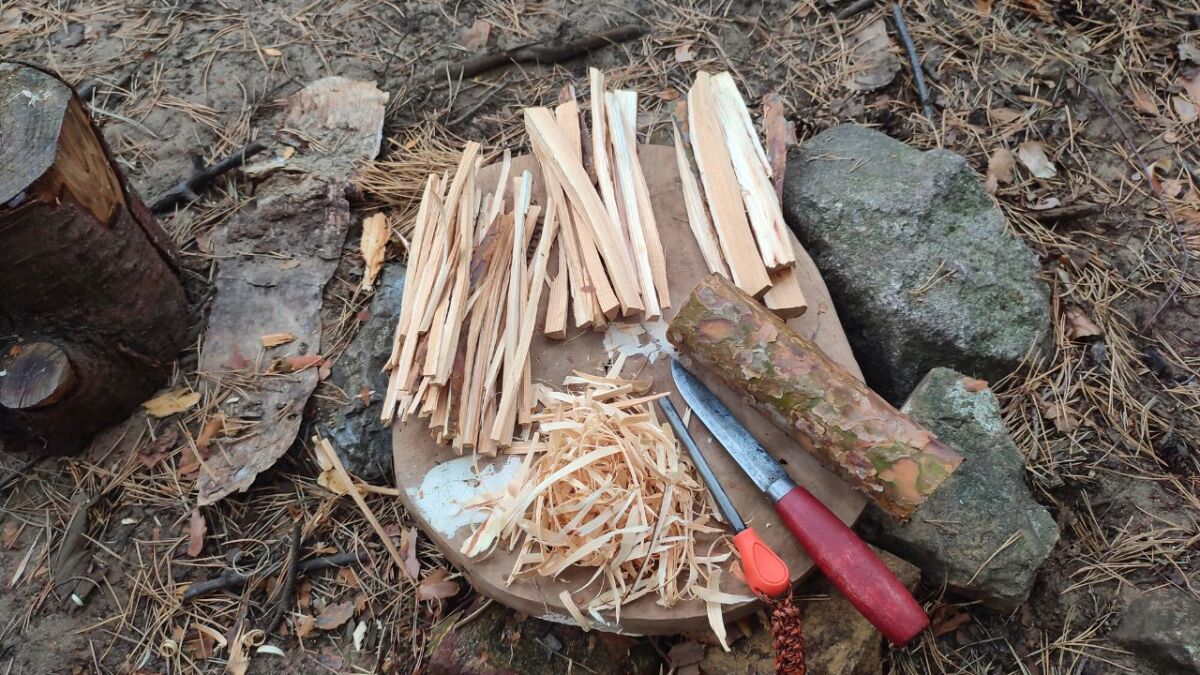
You also need something to catch the drilling dust and hold the embers. A thin piece of wood or bark fits perfectly here (I like to use birchbark).

It's like cooking in the wilderness - all the ingredients should be ready before you start.
Now let's get started:
Make yourself comfortable and find a place where you have enough space. By that, I especially mean space for your arm to perform the drilling movement.
Your posture before drilling should be comfortable. If it is not, you will hardly feel comfortable during intense drilling.
And this can limit your chances of success, similar to an ill-fitting backpack on a long hike.
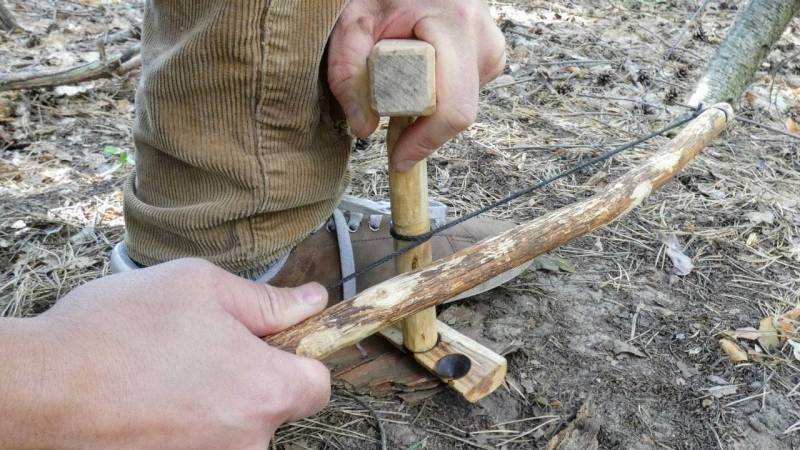
Make sure that the hearth board is securely held with your foot and the forearm holding the pressure piece is clamped against your leg. This will provide the necessary stability for the process.
I mean that your wrist and shin basically merge.
There should be no air in between because with your hand on your leg you fix the drill in a straight position.
I have also seen other techniques - they worked, that's for sure. But one thing all techniques had in common: they fixed the spindle to a maximum.
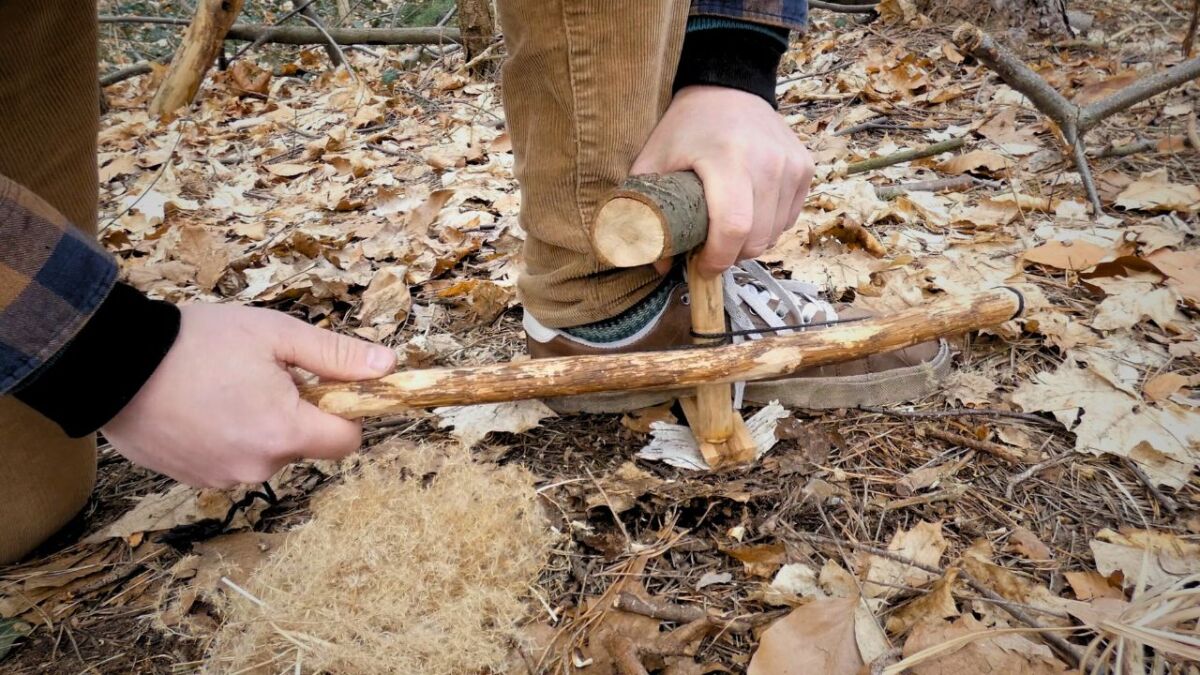
If you fail to keep these things stable, it usually ends in failure.
If the spindle wobbles around, it usually flies out of the hearth board.
Start again in a steady rhythm and warm up. Use the entire length of the cord.
You should have a sense of how much pressure is needed to generate smoke when burning the set.
Long, even drilling that move the bow parallel to the ground should soon cause smoke to rise at the lower end of the spindle.
If that's not the case, press down a little harder.
As soon as you see smoke and everything is running smoothly, continue to use the full length of the bow and accelerate.
As soon as thick, dense smoke emerges from the hearth board - not thin like mist, but thick like fog - ten more full draws are enough to create an ember.
Count down from ten like in a countdown. Give it a few extra spins for good measure if you still have energy.
Treat your ember like a raw egg
Now that you have an ember, take good care of it. Protect it from raindrops or sweat, as you would guard a precious treasure.
If you find it hard to breathe after drilling, be careful not to blow away the ember by accident. It would be a shame if all your hard work gets blown away.
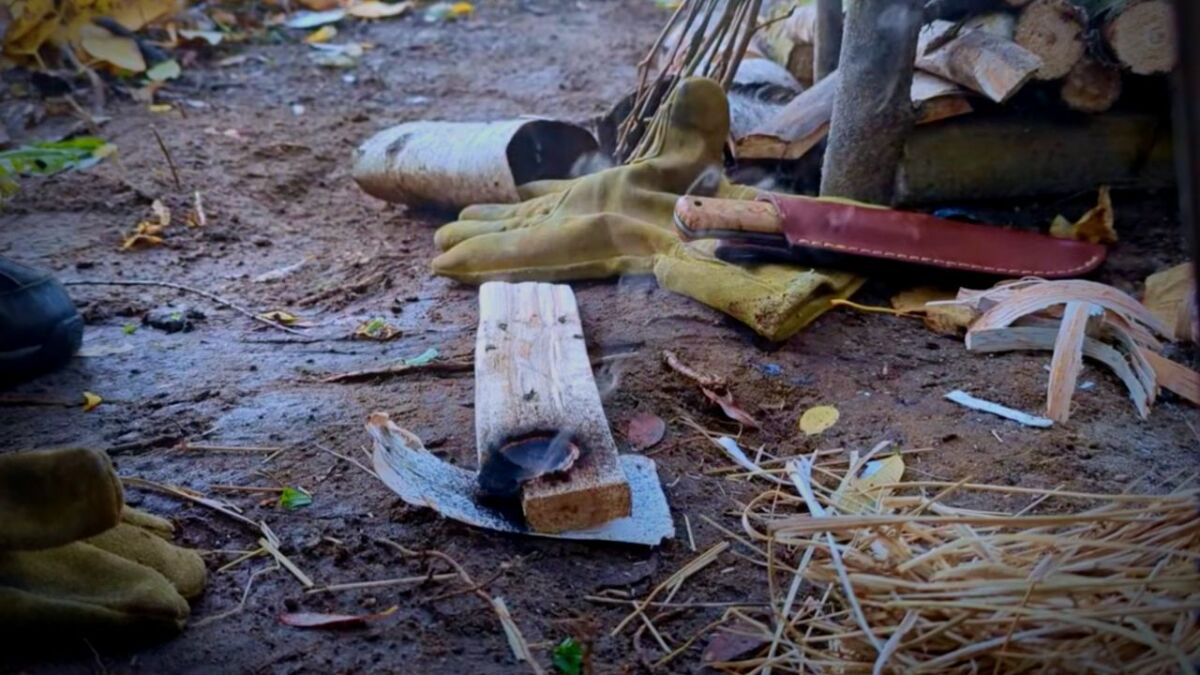
If the ground is dry, and you have a thick, smoldering pile in front of you, you can breathe a sigh of relief for now. Enjoy this moment of triumph.
You now have several minutes, depending on the thickness of the pile of embers. 5 minutes is not uncommon here.
Attention: Do not blow on the embers. I have often seen people blow away the embers. They are still fragile and will become more robust over time once everything is glowing.
If your ember needs more oxygen, gently move and sway it with your free hand. Or you can lightly fan it with your hand.
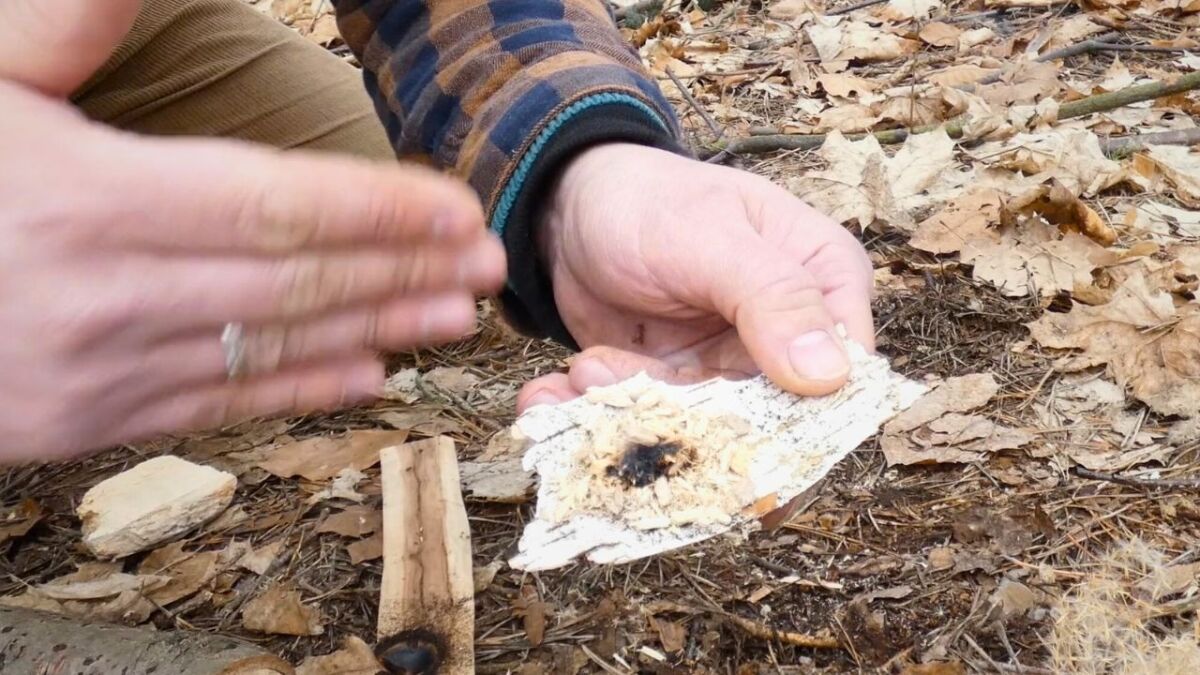
Your ember can crumble if you put it in the tinder too early.
Let the embers cure and ignite before transferring them to your tinder.
Ideally, you now have a thick, fat ember.
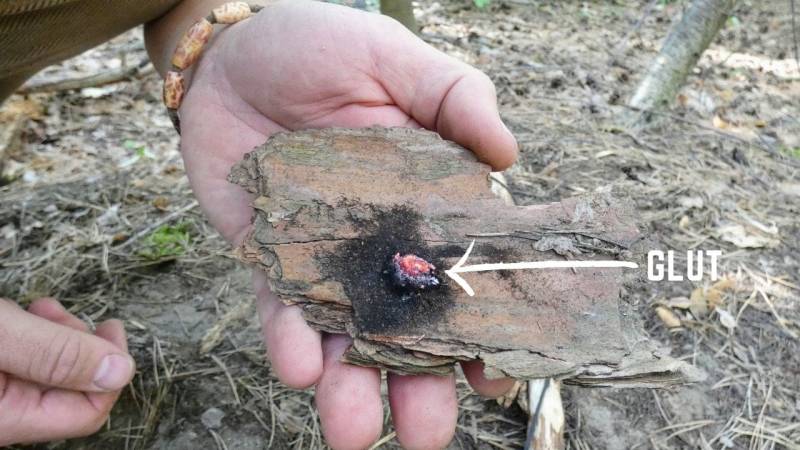
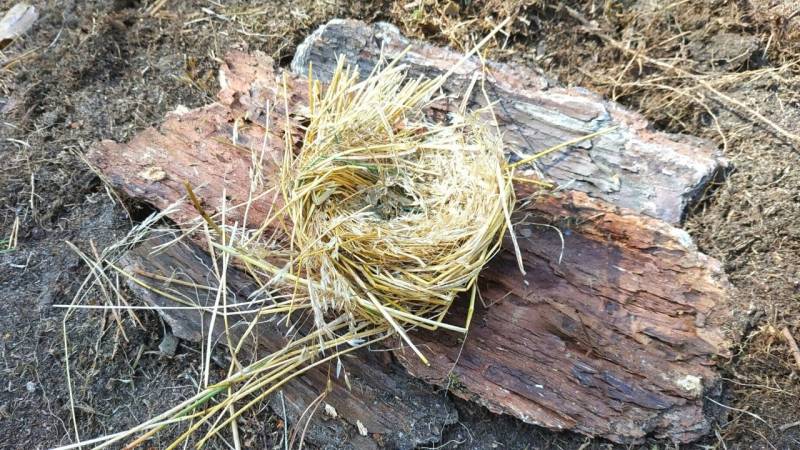
Your tinder nest really looks like a bird's nest
The fact is: Your tinder must be dry.
Remember that a fire is either burning or not. There is no middle ground here.
So also consider this step and create the best driest tinder.
I have seen many people fail in this phase until they realized how important dry and proper tinder is.
Do not bury your ember in the middle of the tinder nest. Instead, place your ember about a third of the way into your tinder bundle. Then gently press the nest together from both sides.
The goal is not to smother the ember, but to bring enough tinder in contact with the ember so that it grows. It's like gardening, you want to give the plant enough room to grow, but not suffocate it.
To ignite the fire, oxygen must be supplied. Blow forcefully into the tinder bundle, but not as strong as blowing out candles.
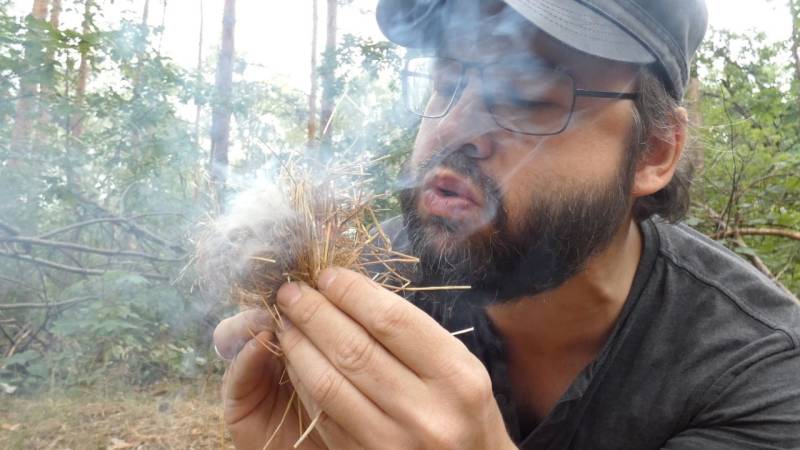
Make sure that your mouth is not too close to the tinder nest when blowing, otherwise too much moisture from your breath will penetrate.
It's a bit like blowing soap bubbles, you need the right technique to make them nice and big.
A distance of about 15-20 cm should be fine. If the center of the tinder nest starts to glow, press everything together a little more to maintain a "critical mass" of heat.
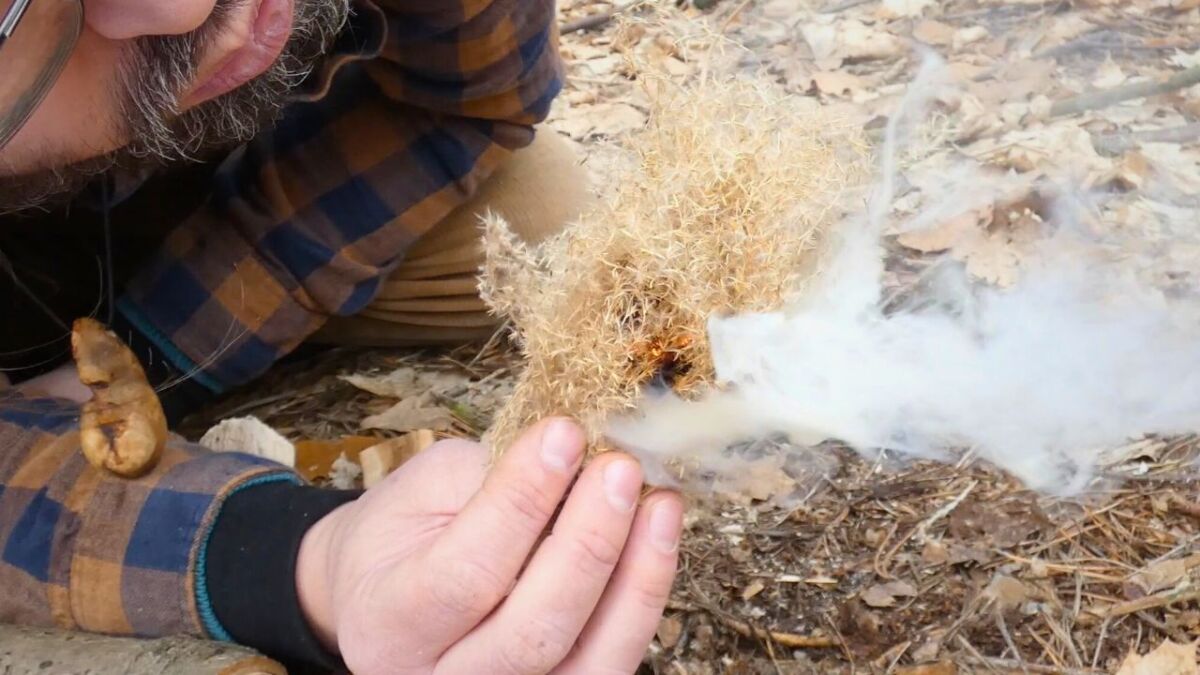
The smoke should increase. Keep blowing.
If you want, you can move the smoking bundle away from your face when inhaling. Thick smoke is a sign that the tinder is about to ignite.
It's a bit like lighting a big bonfire, you have to be patient and wait for the right moment.
If your tinder nest is burning, turn the tinder nest over.
When your tinder nest catches fire, the flames rise upwards, as the laws of physics dictate.
Then you quickly place it in your fire pit and start building your campfire.
If it's burning, it's a bit like the starting shot for a race - as soon as you see the "Go", it starts!
👇 In the video below, I ignite my campfire with a bow drill.
Common reasons why the bow drill fails and their solutions
Here you will find a clear table about various errors and reasons, and how you can fix them.
| Problem | Solution Approach |
|---|---|
| Bad material selection | Wrong wood used or correct wood but too hard or too soft. |
| Bad set carved | The spindle must be cylindrical and smooth. The hearth board should not be too thick or too thin. |
| The bow is too heavy | Get lighter wood. |
| The bow is too long/short | Adjust your bow. |
| Bearing block not securely fixed | Adjust your force and hold the pressure piece firmly. |
| The spindle flies out | Check if the drilling hole is deep enough and if you hold the spindle straight while drilling. Check if the spindle is straight. |
| Not drilled long enough, you break off too early | Consistently continue the drilling process until ember is formed. |
| The spindle is either turned too slowly or too quickly | Find a constant, fast speed to generate enough friction and heat. |
| Not enough pressure | Press down more to create proper smoke. |
| Cord not tight enough | Adjust the cord, try different cord, and insert the spindle correctly. |
| The ember falls apart when you put it in the tinder nest | Take good care of the ember and let it glow, as it will clump together. |
| Damp tinder | Get new tinder or dry it on your body. |
| Not enough tinder | You think you have enough? Gather more tinder. |
| Insufficient contact between ember and tinder | Press the tinder nest together more. |
| Too much contact between ember and tinder | Give the ember some space and loosen up the tinder nest. |
| Blowing too hard or too gently | Find the right strength. |
| High humidity or wind affecting the process | Seek shelter from the wind and ensure all materials are dry. |
| Handling and technique are not optimal | Practice regularly and seek tips from experts if necessary. |
| Wrong adjustment! | Do you really want it straight? Reflect on it again. |
| Be positive | Bad mood, cursing, and complaining won't bring you an ember. You can save that. Take a break instead. |
Do you know, I firmly believe that the key to success in archery lies in your attitude.
You really have to believe that you can do it. 💪
And if you do, why not give it your all?
A glow does not simply appear out of nowhere. You are the one who can ignite it.
Understanding drilling dust and abrasion
Sometimes you create a lot of friction, but no sparks are generated. That can be really annoying and frustrating.
That's why I'm giving you some tips here on how to interpret the wear. Often, the color and texture of the wear already reveal what's going wrong.
| Color | Consistency | Issue |
| Light brown | Dusty | Too slow in speed, not enough pressure applied |
| Light brown | Fluffy | Too slow in speed |
| Dark brown / Black | Fluffy | Perfect |
| Dark brown / Black | Small rolls | Hard to say, sometimes too fast and not enough pressure applied |
| Dark brown / Black | Crispy | Too much pressure applied, speed too fast |
A common mistake of many is to proceed too quickly and with too much pressure. If you fill the notch slowly with fine dust, you will get a fluffy, ignitable pile that is likely to burn as soon as it touches the hot spindle.
Think of dust as your tinder. It should be fine and piled up before you try to ignite it.
A little more speed and pressure in the last ten seconds could be enough. The majority of the time should be focused on carefully filling the notch.
If you work too quickly and with too much pressure, you will get coarser material and the risk that it will burn before it even reaches the notch. I know that all too well. In my case, I couldn't even ignite the abrasion with a lighter.
If you haven't yet generated a fire on your own, I can understand that you might have doubts.
But here is my advice: Don't give up! It takes time and practice, but believe me, the moment will come.
Do you know how long I practiced? One year. Over and over again.
And sporadically, I see that participants manage to do that right on the first day.
Sure, I would have wished for that too. But I gained a lot of experience in that one year and the path was just right.
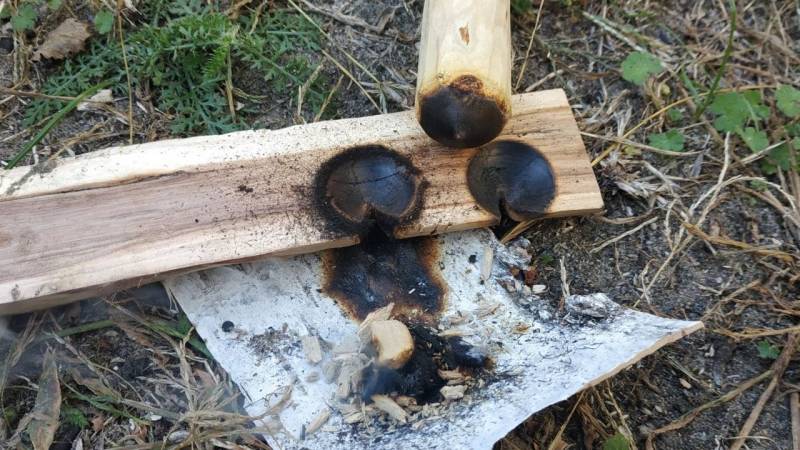
I have a few things here for you that could help:
- What exactly is a bow drill, and how does it work?
- The perfect wood for the bow drill - which one is it?
- Lexicon entry on the bow drill
I'm really looking forward to hearing about your experiences with this technique.
Leave a comment and tell me and others about your experiences, the obstacles you have overcome, and the tips you have in store.
And, have you ever had to rely on archery in a tricky situation?


Author of the guide
Martin Gebhardt
Hey, I'm Martin. On my blog, you will learn the basics and numerous details about living in the wild. I think survival, bushcraft and the good life in nature are the keys to happiness. Find me here on Instagram or on YouTube. You can find more about my mission on the About Me page.
Was this guide helpful?
19 people found this guide helpful.
5.00 out of 5 points (19 Ratings)
Comments (0)
This post may contain affiliate links. So if you click on the links and make a purchase, I will receive a small commission at no additional cost to you. Click here, to learn more about it.


