![Learn this basic knot and you can easily tie four more [with picture guide] Learn this basic knot and you can easily tie four more [with picture guide]](https://survival-kompass.de/img/artikel/einzige-knoten-den-du-kennen-musst.jpg)
Learn this basic knot and you can easily tie four more [with picture guide]
👉 The key facts from this guide
- The Marlin Spike Hitch is a simple and versatile knot that serves as a starting point for many other knots.
- The Running Slip Knot is a loop knot that tightens under load. It can be optimized by tying an overhand knot as a stopper at the end of the rope.
- The Ashley Stopper Knot is a thick stopper knot that prevents a rope from slipping through a hole or eye.
- The Bowline Knot is a simple knot used to form a fixed loop at the end of a rope. It is easy to tie and untie, even after being subjected to a load.
- The Twin Bowline Bend or Double Bowline is a strong connecting knot that joins two ropes in a matter of seconds.
- It is important to practice regularly to master the knots and not forget them.
Imagine being able to tie a basic knot, and from that knot, tie four more knots.
You get securing knots, loops that tighten and fixed loops, as well as a stopper knot and a connecting knot.
It sounds unbelievable, doesn't it?
But the fact is that this type of knot exists, and it can serve as the starting point for many other knots.
I'm talking about the Marlin Spike Hitch, called Marlspiekerschlag in German.
And the best part is, this knot is effortless. It's easier than tying your shoes.
Learn how to tie these five amazing knots in the next few minutes.
Let's begin.
1. The Marlin Spike Hitch - the starting knot
When your paracord is strongly tensioned, you risk hurting yourself when pulling with a tension of at least 30 kg. To avoid this, you tie a Marlin Spike Hitch so that you can grip the rope firmly.
It's advisable that you know how to tie this knot in your sleep. Because it's the starting knot for all the other knots I'm about to show you. If you can tie this, you'll be able to tie the other knots too.
Let me show you how to tie the Marlin Spike Hitch.
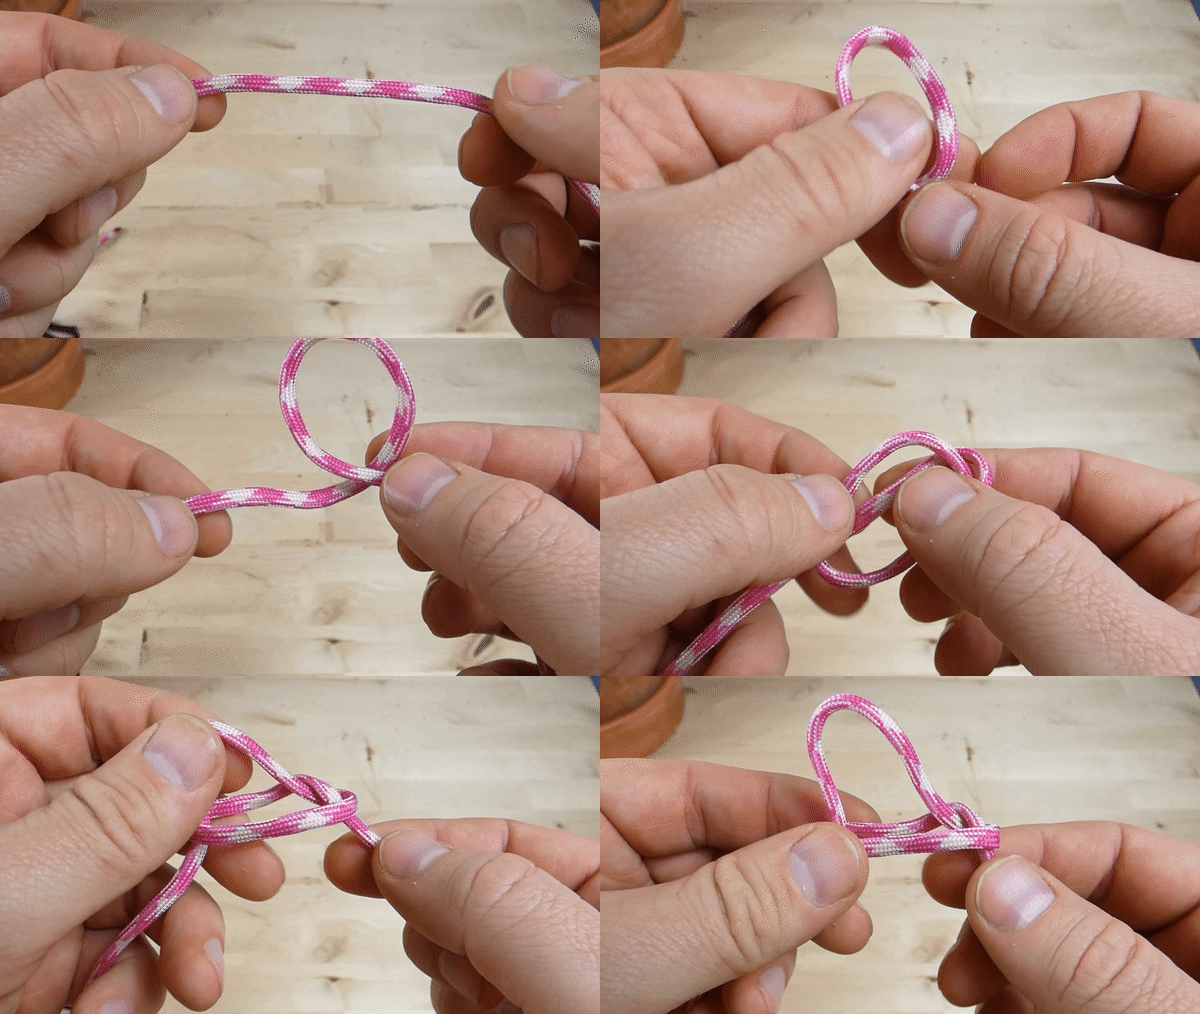
Quick guide: With the rope, make a loop and the end of the rope that needs to be pulled is threaded as a loop through the first loop. You can learn what is meant by a loop here.
But now, step by step.
1. Make a right-hand loop. The left strand is under the right strand.
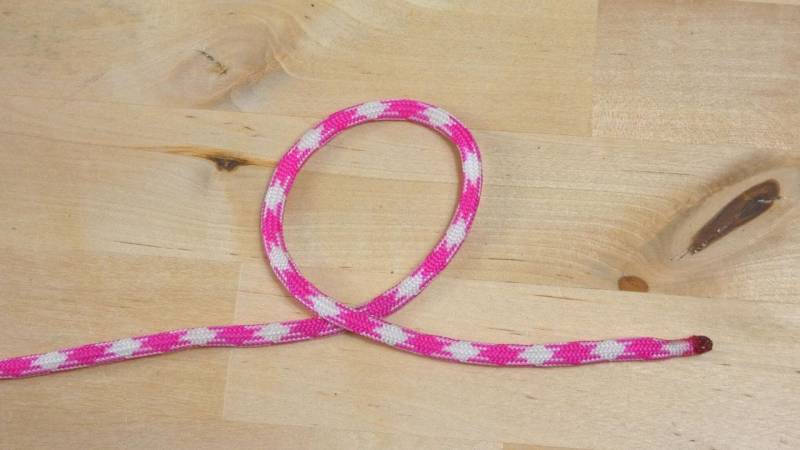
2. Fold the eye to the left.
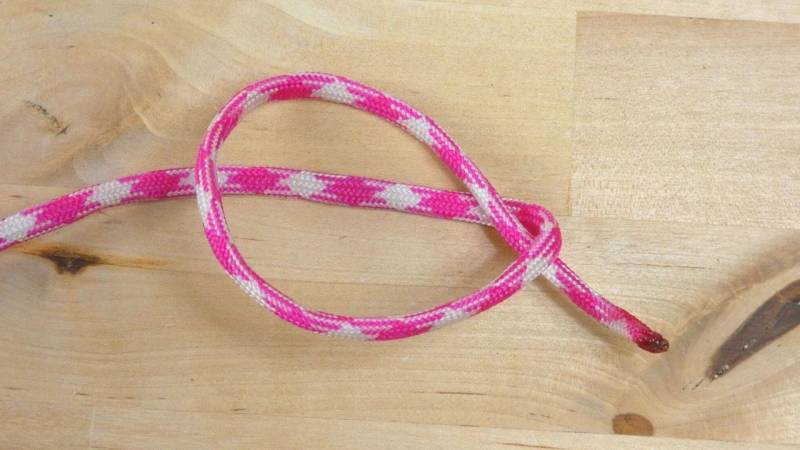
3. Pull out the middle strand.
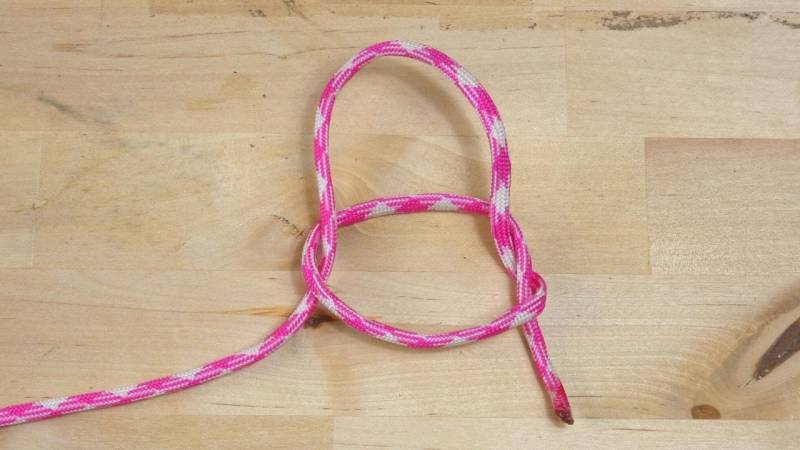
4. Slide the object over the first strand, then under the middle strand, and finally over the last strand. Your Marlin Spike Hitch is finished.
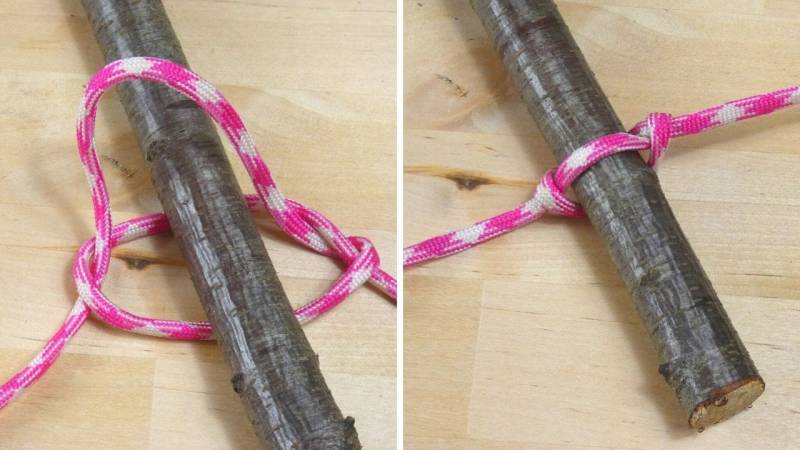
2. The running slip knot - tightens under load
The running slip knot (also called Slip Knot) is a loop knot, and you tie it uncomplicatedly from the Marlin Spike Hitch. It is a knot that tightens under load. It is also called Slipped Overhand Knot, Slip knot or Noose knot.
P.S. A Slip knot is a term for a wide range of knots, and all knots have one thing in common: they slip or slide. Therefore, you can also call the knot a Slip Knot.
The starting knot is the Marlin Spike Hitch, which you learned above.
1. Make a clockwise loop.
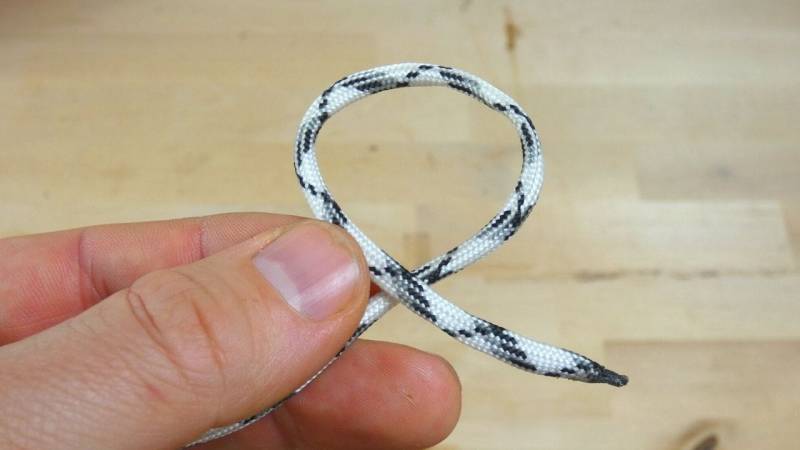
2. Fold the loop to the left.
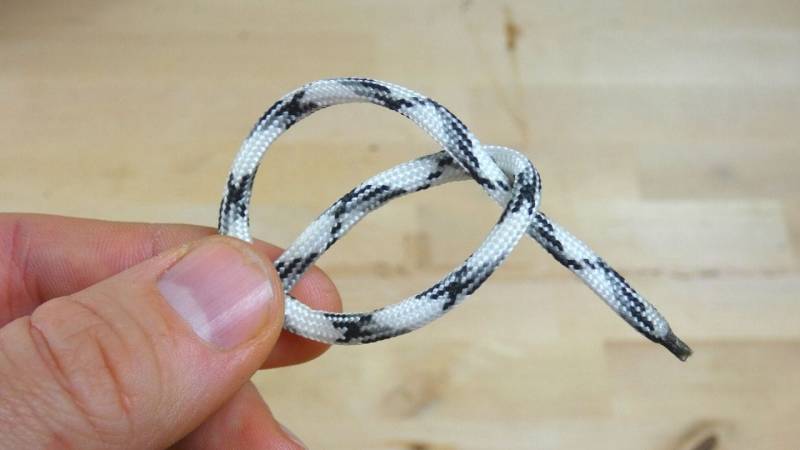
3. Pull out the middle strand upwards.
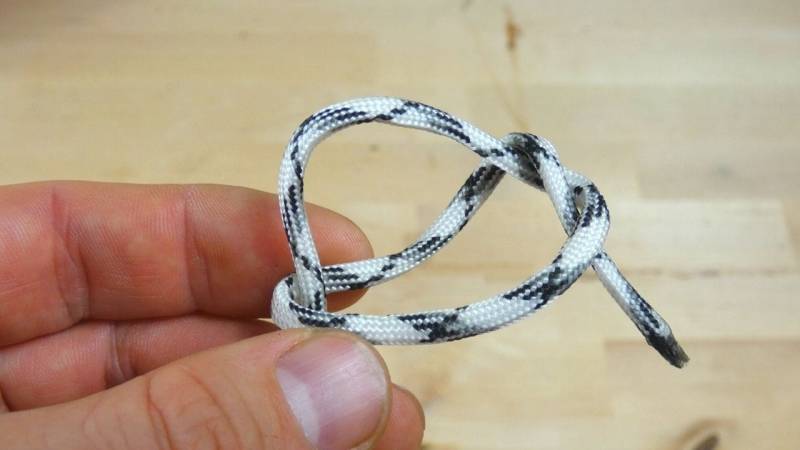
4. Your running Slip Knot is ready.
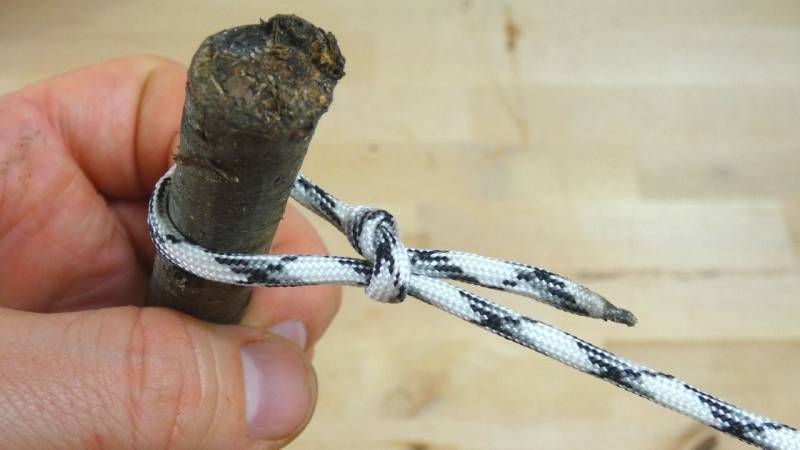
Optimization of the slip knot
The Slip Knot unfortunately has the tendency to come loose under high tension.
You can prevent this with an additional knot and create a genius knot that is very tight.
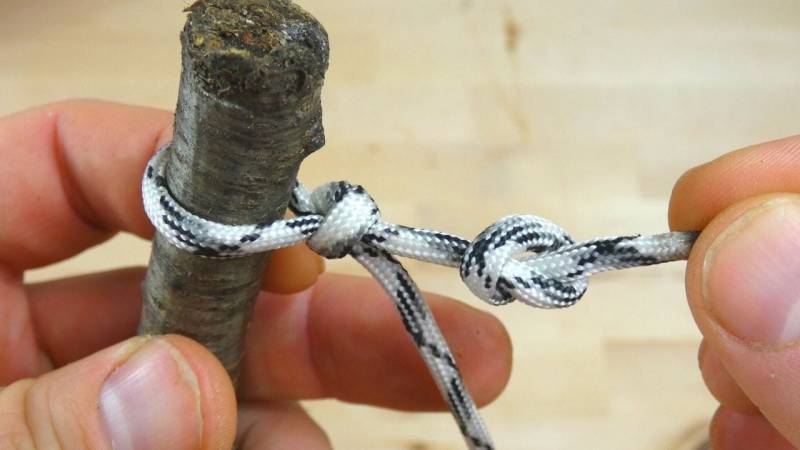
To optimize it, you expand the Slip Knot to form a "department store loop". In angling, the knot is also called a Spool Knot, Arbor Knot and Reel Knot. In American English, it is called the Arbor Knot, Jam Knot or Canadian Jam Knot.
To achieve this, tie an Overhand Knot as a stopper at the end of the rope. The picture shows how it works.
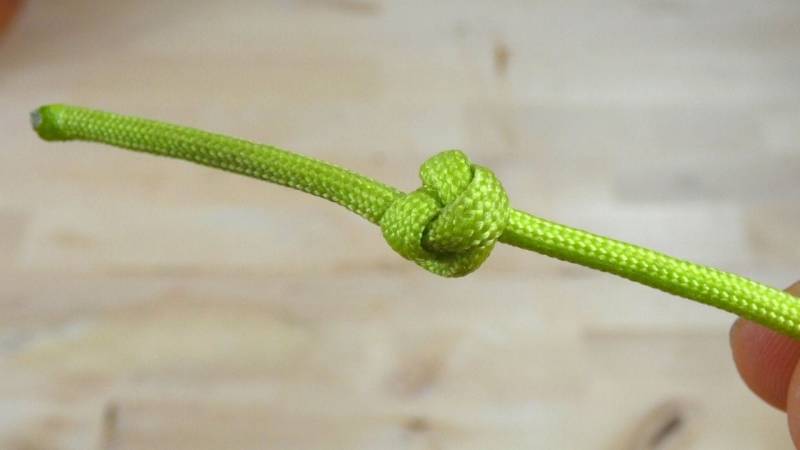
3. The Ashley Stopper Knot
This knot is called the Oysterman's Stopper Knot.
It is a thick stopper knot that prevents a rope from slipping through a hole or eye up to twice its diameter.
As always, we start with the Marlin Spike Hitch and turn it into a Slip Knot.
1. Tie a Slip Knot.
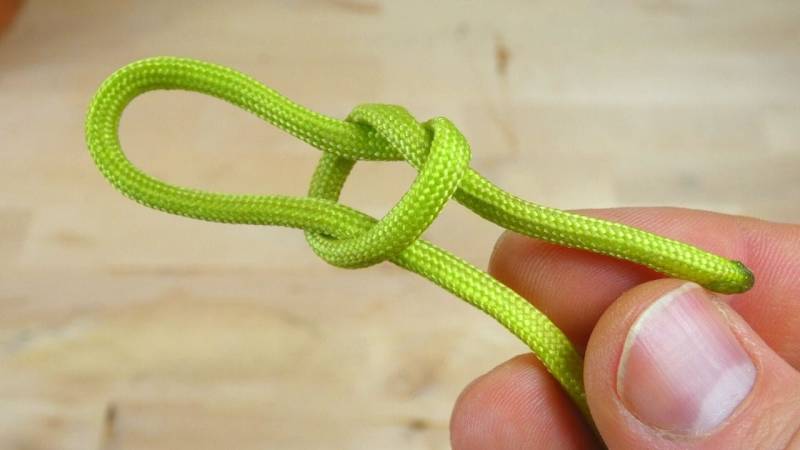
2. Place the end of the rope downwards.
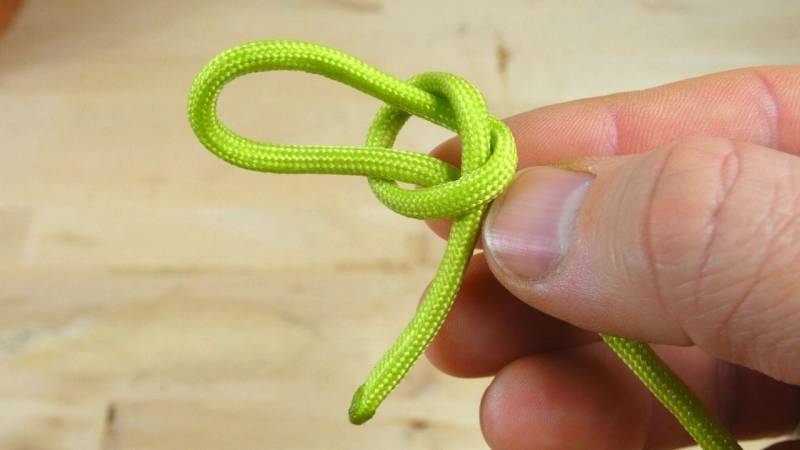
3. Pull the end through the loop.
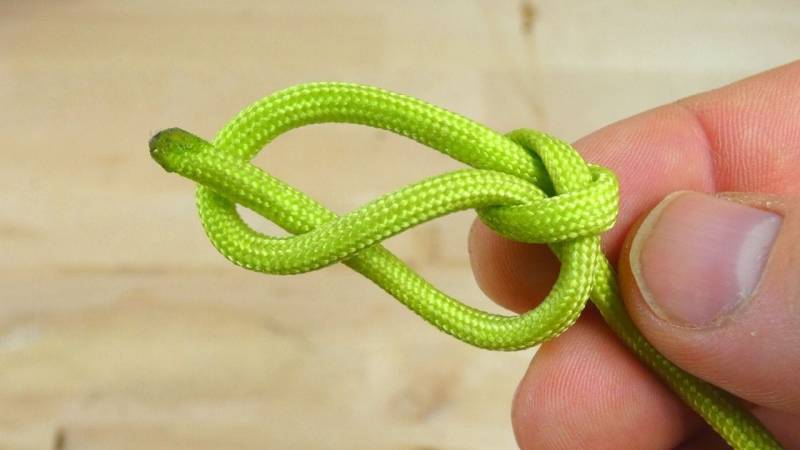
4. Finished, your Stopper Knot is set.
4. The Bowline - The Solid Loop
The Bowline is ingenious, and I love how easy it is to tie. Sailors use it regularly for good reason.
It is an old and simple knot used to form a fixed loop at the end of a rope. It offers the advantage of being both easy to tie and untie. Furthermore, it is particularly easy to untie after being subjected to a load.
The Bowline is called the "King of Knots" because of its importance. It is one of the four basic knots used in navigation.
We start with our basic knot, the Marlin Spike Hitch.
1. Make a right-hand loop.
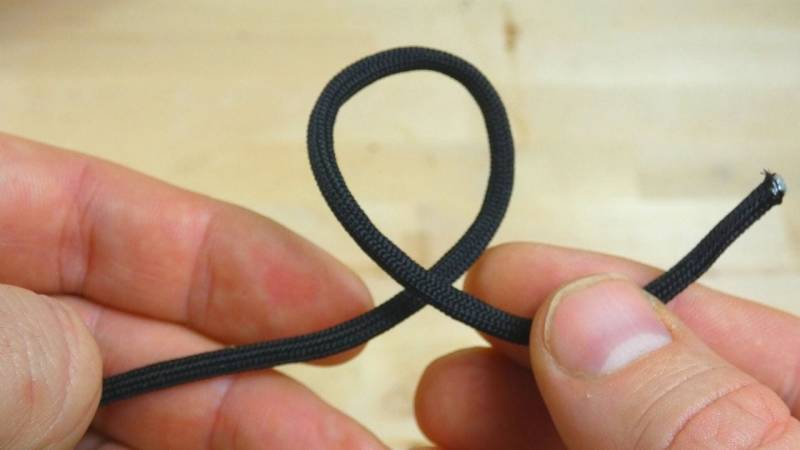
2. Fold the loop to the left.
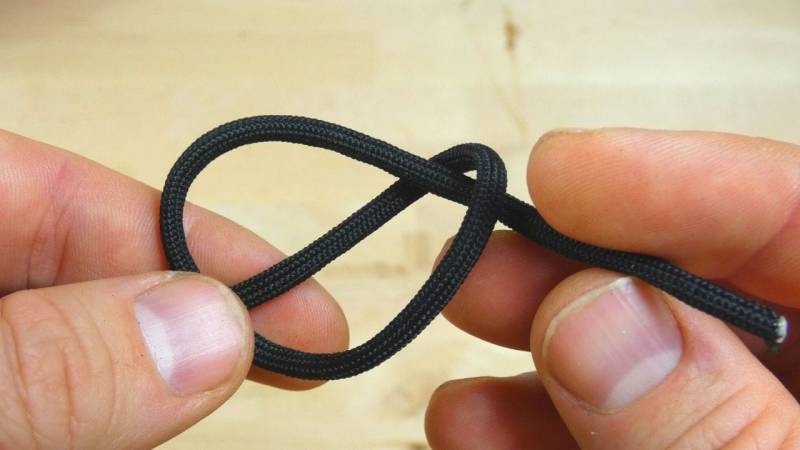
3. Pull the middle strand up, as with a Slip Knot.
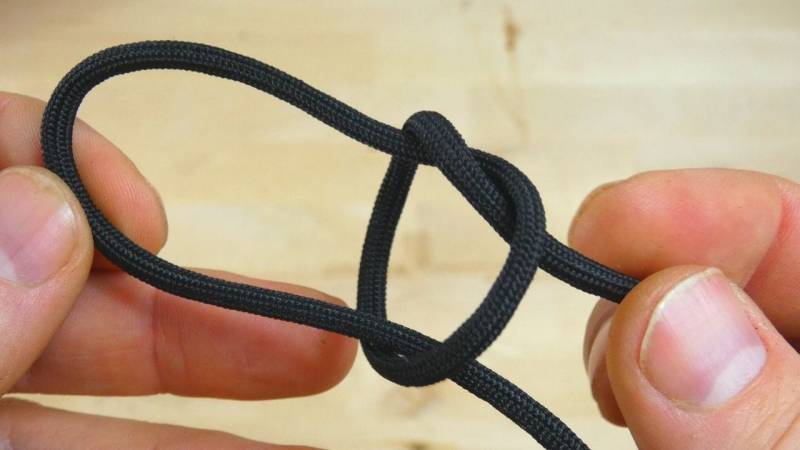
4. For an inner end, thread the end of your rope through the loop from the front. For an outer end, thread the end from the back to the front.
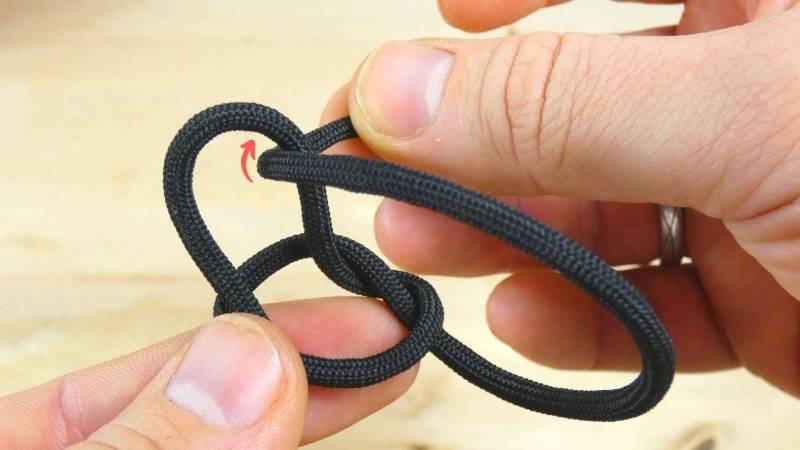
5. Pull on the left end of the rope and on the two upper strands.
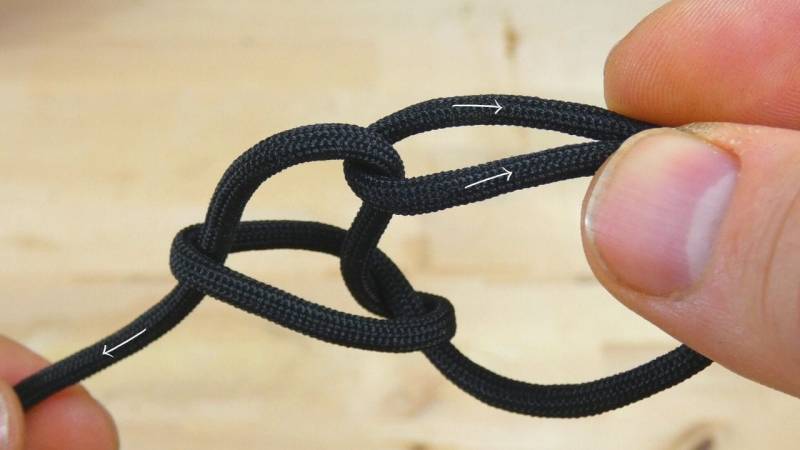
6. Your bowline is ready.
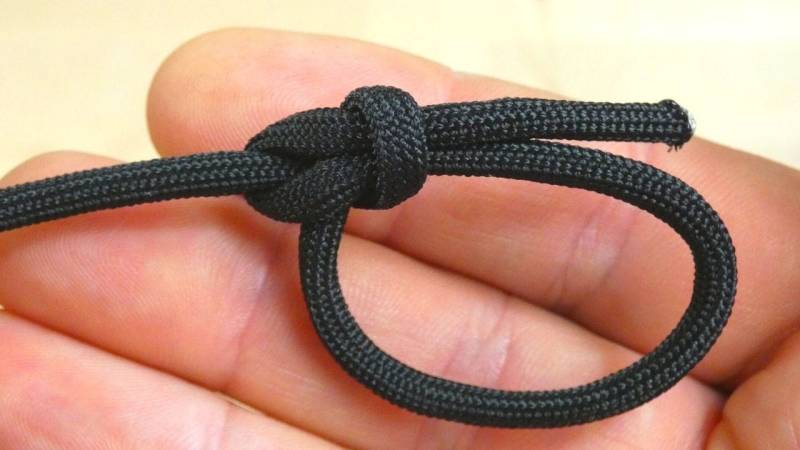
Oh, and by the way: you can tie the bowline with an inner end or an outer end. There is no "right" or "wrong," even though some people insist otherwise.
The Twin Bowline Bend - Connect two ropes in seconds
This type of Bowline is not widespread, but it works brilliantly.
You already know what's coming, right? Exactly, you have to tie our starting node, the Marling Spike Hitch, with both ropes.
The Double Bowline is a connecting knot and it is highly resilient. Once you've got the hang of it, you can tie this knot in 10 seconds, and you'll never want to miss it again.
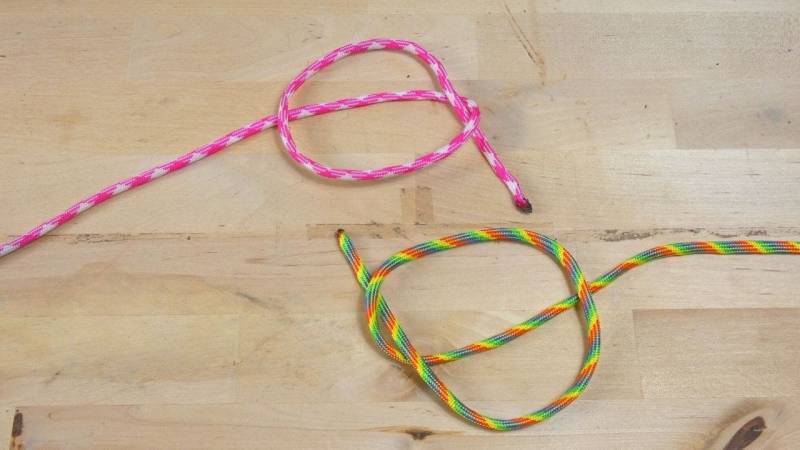
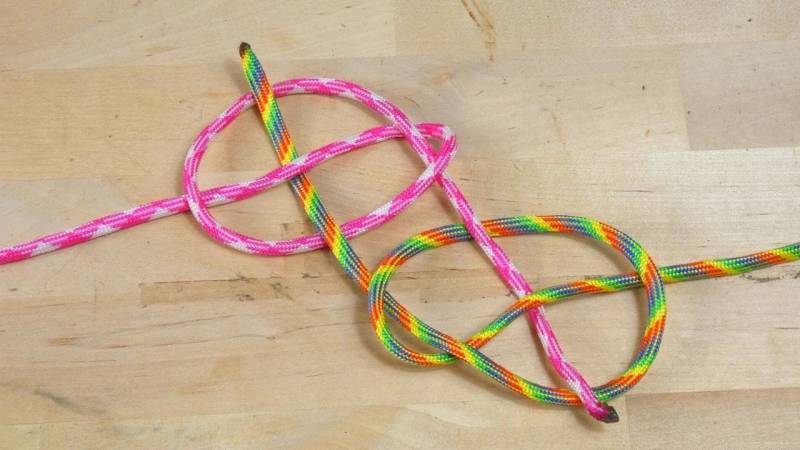
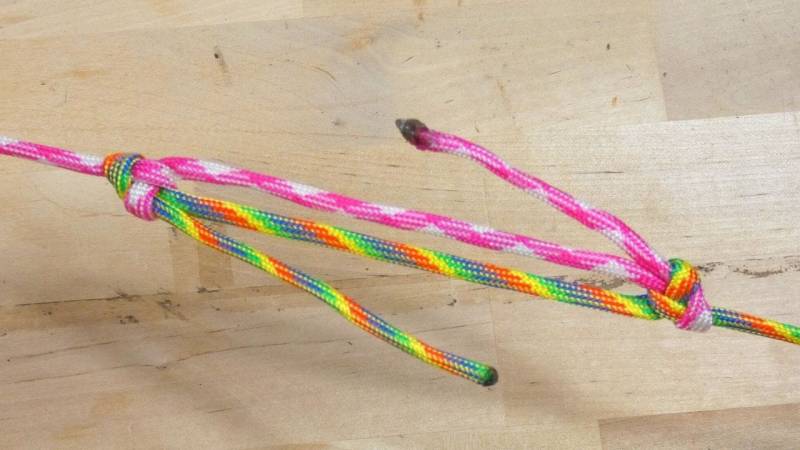
Start with two Marling Spike Hitches. Lay them on a flat surface so that they point in opposite directions. Where you would place an object, thread the opposite free ends through. Pull everything tight and you have your Double Bowline. Pretty cool, isn't it?
Here are the detailed instructions:
1. Create a right-handed loop.
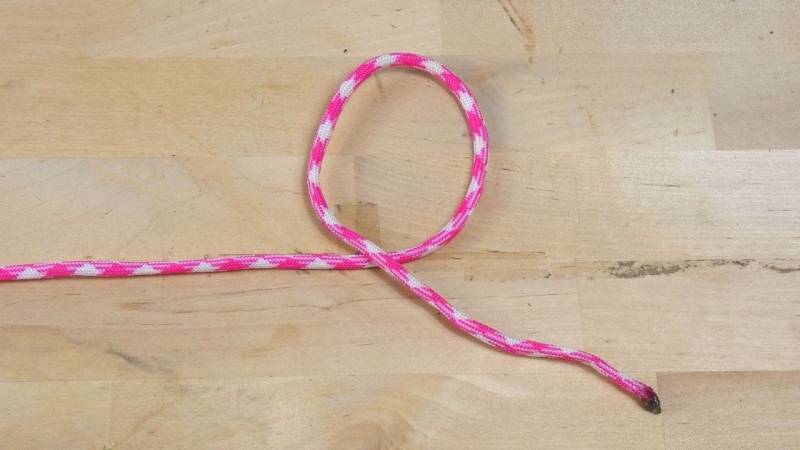
2. Fold the loop to the left.
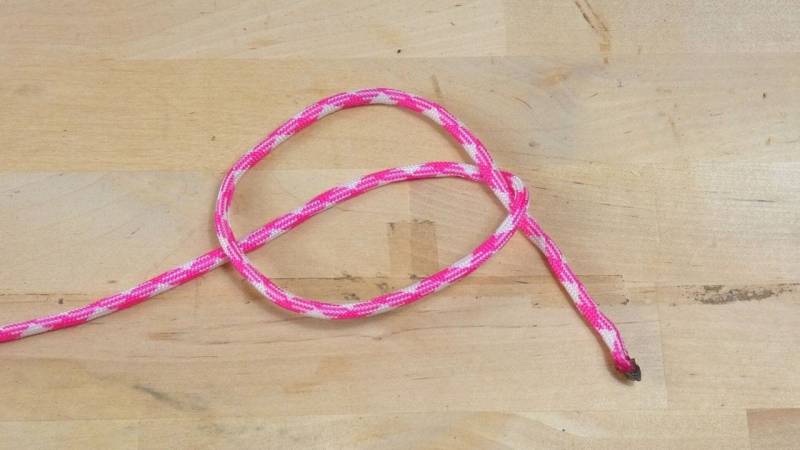
3. Repeat these steps with your second rope.
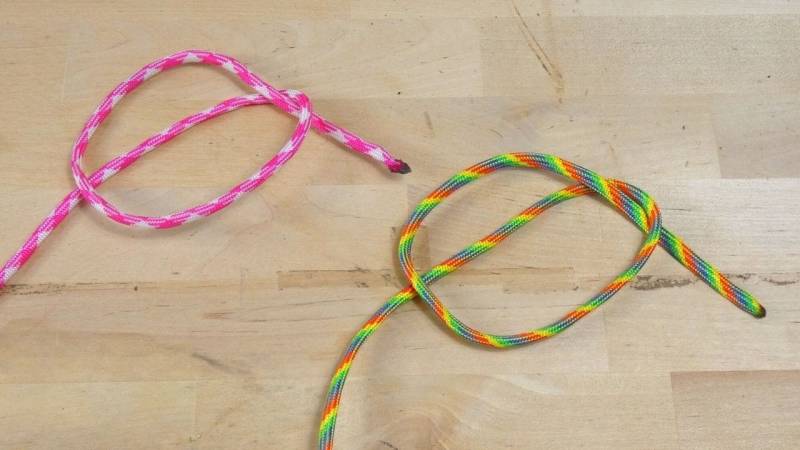
4. Turn your second rope 180 degrees clockwise.
5. Slide the end of each rope under the center strands of the other rope.
6. Then pull everything together. Make sure the ends fold inward.
Practice every week - that's how you master the knots
Alright, we did it.
A simple starting knot and five different knots that are incredibly useful.
I advise you to practice all the knots and when you come into difficulties one day, you will need the knots.
Perhaps you won't be able to succeed with every knot right away, but if you repeat the instructions, you will soon become a master.
For example, I practice my knots every week so that I don't forget them. I always carry a piece of paracord in my pocket for this purpose.
Moreover, read my article about my 6 most popular Bushcraft knots.
And if you want to practice on the go, then I highly recommend the app "Knots 3D". The app is available for Android here and for iPhone here.


Author of the guide
Martin Gebhardt
Hey, I'm Martin. On my blog, you will learn the basics and numerous details about living in the wild. I think survival, bushcraft and the good life in nature are the keys to happiness. Find me here on Instagram or on YouTube. You can find more about my mission on the About Me page.
Was this guide helpful?
60 people found this guide helpful.
5.00 out of 5 points (60 Ratings)
Comments (0)
This post may contain affiliate links. So if you click on the links and make a purchase, I will receive a small commission at no additional cost to you. Click here, to learn more about it.


