What is Brain Tanning for Leather: Definition & Guide for Beginners (Natural Hide Tanning)
👉 The key facts from this guide
- The brain tanning is a traditional method in which animal brains are used for tanning leather.
- You prepare the raw hide by washing, dehairing, and fleshing it.
- Then you massage and knead the cooked brain mass into the leather hide.
- After drying, you smoke the leather to make it durable.
- The brain tanning creates a particularly supple and long-lasting hide.
- It honors an ancient craftsmanship and the resource leather.
Imagine yourself wandering through the forests, and everything you carry, you have created with your hands.
Sounds like a real adventurer's life, doesn't it?
Here comes the problem: Knowledge about ancient crafts like brain tanning is rarer than fresh spring water.
But that's why you're here, right?
I'll show you how to tan leather naturally and organically with brains.
I did it, and it worked. So get ready to experience tradition with your hands.
What is Brain Tanning actually?
Have you ever wondered how people in the past used to make leather so supple without modern chemistry?
Your Method: Brain Tanning - or Natural Hide Tanning.
This is not magic, but solid knowledge that has been passed down through generations. The method is also called "fat and smoke tanning". And the best part: you can learn it too.
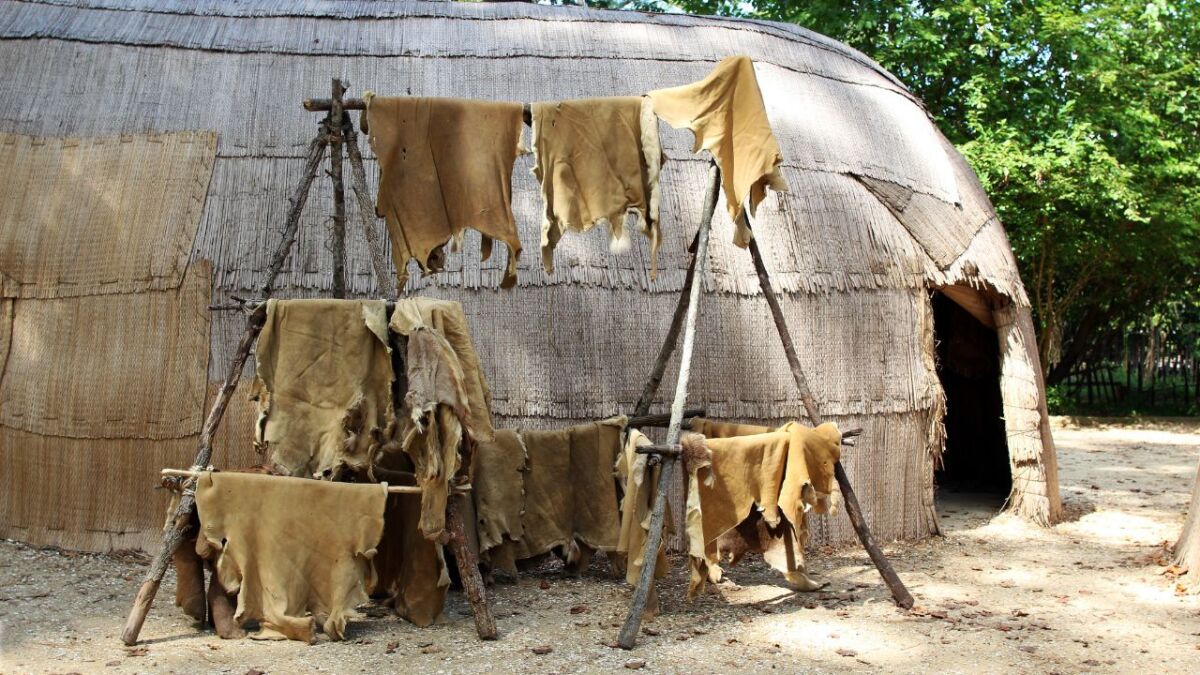
Overall, the types of tanning can be divided into tanning with fats (used in brain tanning), tanning with plants, and tanning with minerals/chemicals.
Good to know: Suede is not buckskin! This is a collective term for types of leather with a rough surface. Suede is sometimes colloquially referred to as natural hide tanning leather, but this is incorrect.
Where does it come from? Brain Tanning is a traditional technique that was perfected by the indigenous peoples of North America. Although it is almost forgotten in modern times, it still carries a deep connection to nature.
For me, Brain Tanning was like opening a secret book of ancient wisdom.
A method as natural as leather itself
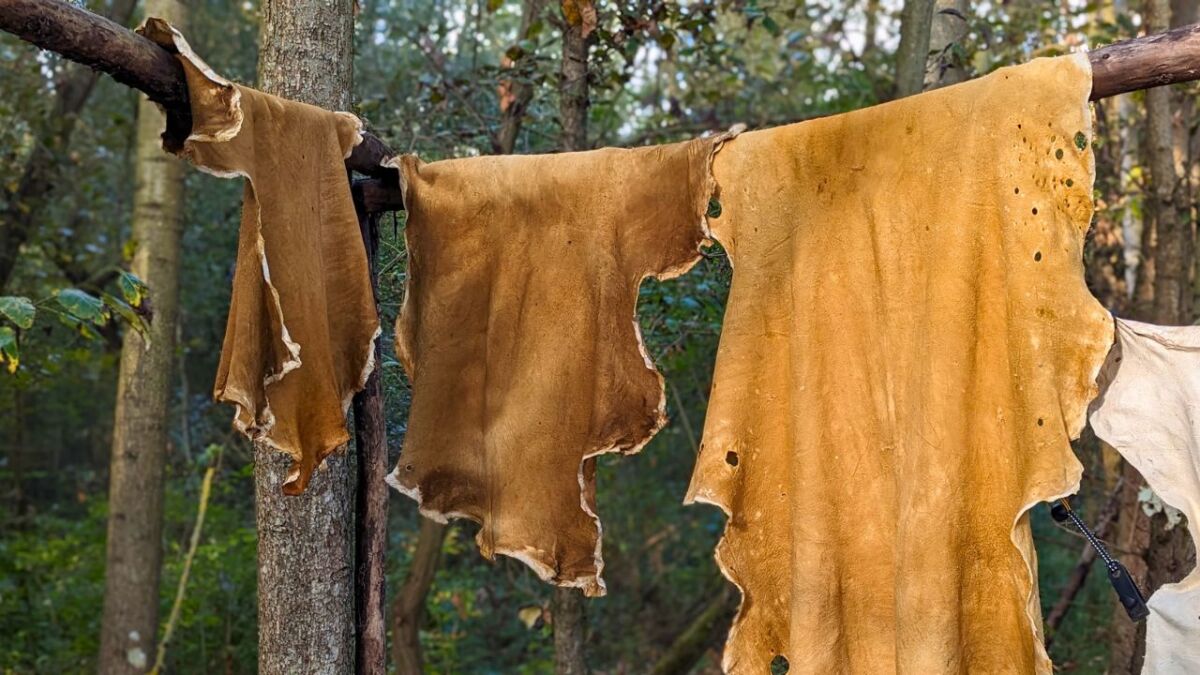
What makes it so special? Well, you use the animal's own brain to transform its skin into a soft leather (buckskin).
A graceful cycle is taking place: Nothing is wasted, everything flows back into the process.
By massaging the brain solution, a leather is created that is unlike any store-bought leather - it is full of character and has a story.
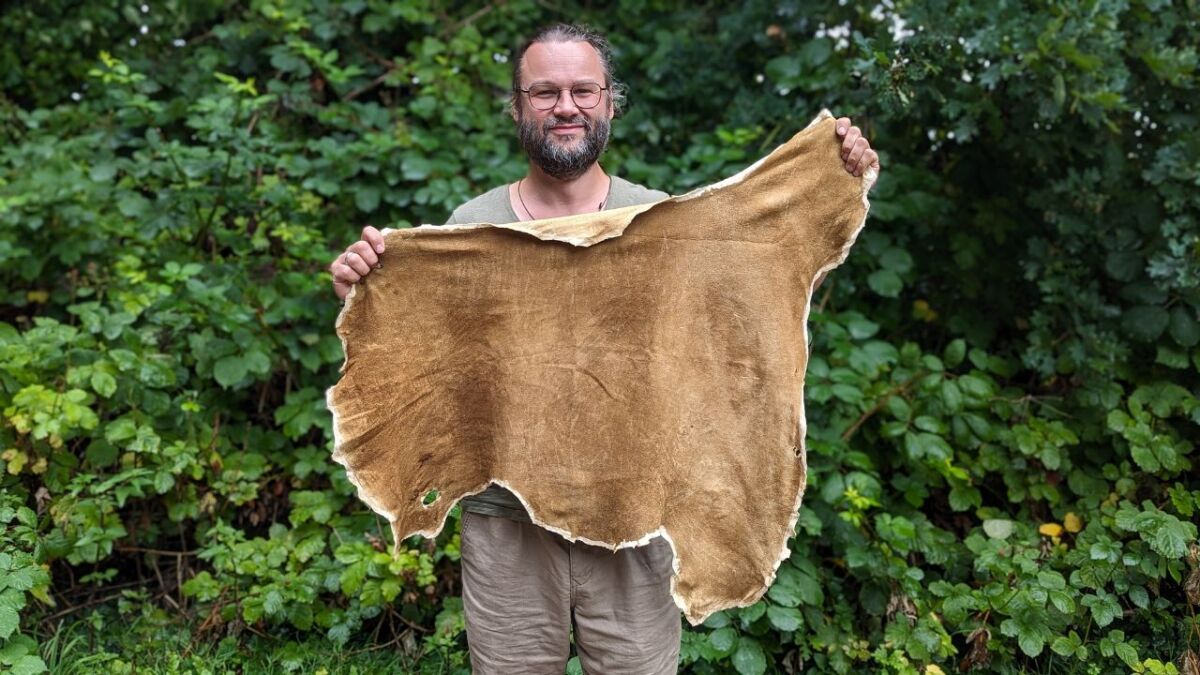
How did our ancestors proceed?
Old knowledge, rediscovered, briefly:
- Cleaning: The rawhide must be thoroughly cleaned. Meat residues, fat, and hair must be removed; otherwise the brain cannot penetrate deep into the layers of the skin.
- Preparation: Cook the brain until it becomes a mushy consistency. Don't worry, this is not about cooking for gourmets, but about preparing the tannin optimally.
- Massaging: Then the mixture is massaged into the skin with patience and strength. I have felt it myself: the more love and energy you put into it, the better your leather will be.
- Drying: The skin is now dried by hand or stretched in a frame, so that no hard spots remain at the end.
- Smoking: Preserving and the actual tanning - burning preserves the leather and keeps insects away.
Why I'm excited - and you will be too
When I first held a piece of skin in my hands and it slowly began to transform, I felt a connection to tradition and nature.
Every step was a sign of respect for the animal and life.
Believe me, once you hold your own brain-tanned leather (buckskin) in your hands, you will feel the difference. It is an experience that shapes you.
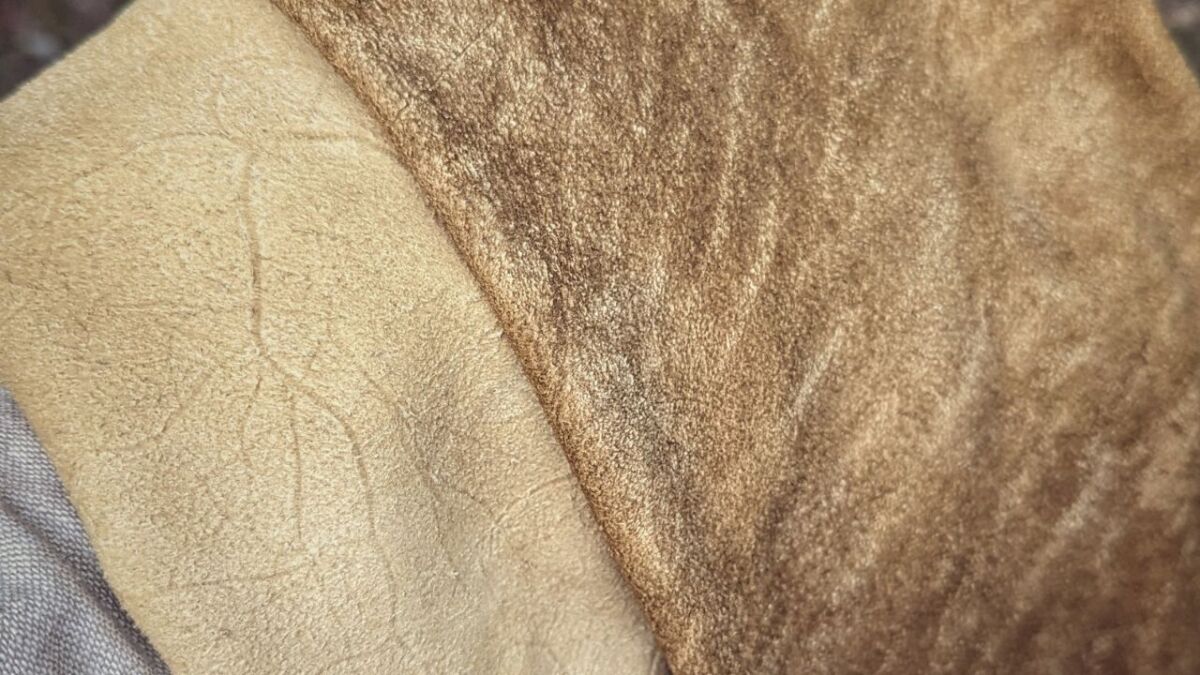
A bridge between the past and the future
Brain Tanning is much more than a craft. It is a cultural heritage that we should preserve and appreciate in the modern world.
Every piece of leather tells a story, about the animal, the nature, and the care of the manufacturer.
I invite you to be part of this story. Let's together revive the knowledge of Brain Tanning and take the practice into a new era.
Before you embark on the adventure of Brain Tanning, let me guide you through the process, step by step.
It is an art form where every step is as important as the final brushstroke of a masterpiece.
Material knowledge in harmony with nature
A good tool and the right materials make the master, don't they?
Before we get our hands dirty, let's gather what we will use to shape our treasures.
Which animal sheds its skin?
The choice of the animal: Whether it's roe deer, fallow deer, red deer or bison - the skin of every mammal has the potential to transform into magnificent leather.
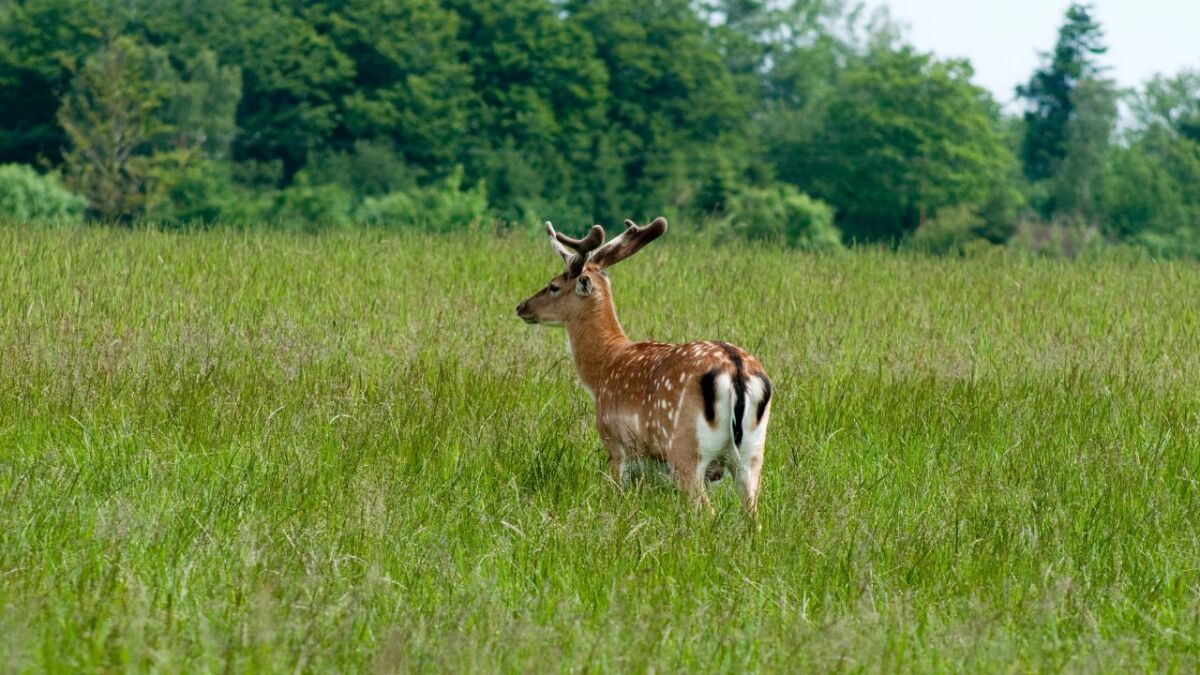
Nature as a tannin storage
You can use the following materials for fat and smoke tanning:
- Brain: Check. The brain not only provides the necessary fats, but also acts as a softener thanks to the emulsifiers it contains.
- Eggs and oils: Is brain a no-go for you? Don't worry! The egg yolks are alternative candidates.
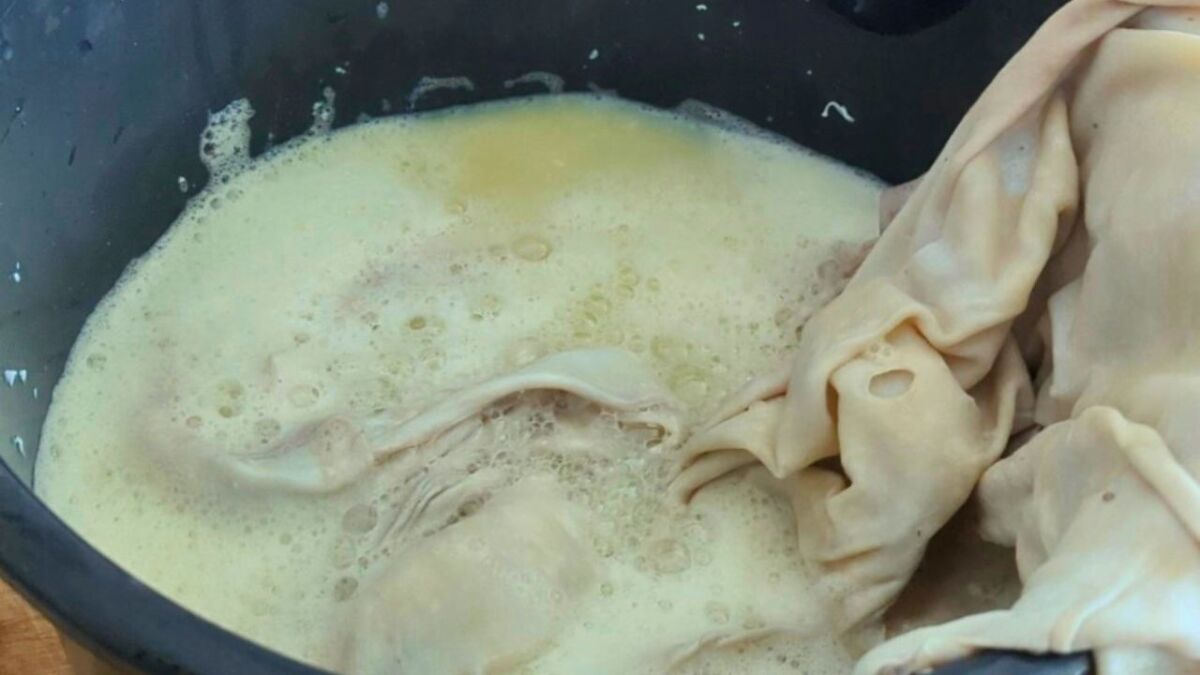
Packing the tool bag
Every outdoor trip needs its equipment. Here's my list for you:
- Scraping tools: Think old-fashioned - a dull knife or spoon will do when fleshing.
- Scraping bench: Somewhere to scrape off the hair and meat residue.
- Containers and pots: Keep everything clean and organized. For cooking the mixture, think big, we don't want to spill.
- Ropes & frames: For stretching and drying the skin.
First-hand experience: The tool and I
When I first picked up a scraper knife, I knew it was going to be tough.
But I also felt a direct connection to our ancestors, to this ancient craft.
The choice of your materials and tools is more than just preparation; it is a ritual in which you express your respect for the process.
Choose wisely and carefully, as every decision will be reflected in the quality of your leather goods.
Are you ready to pack your bag and embark on the adventure of brain exploration?
The Essence of Brain Extraction: A Chemistry Excursion
Did you know that there is a whole world of chemical wonders behind tanning?
Unpack your microscope, we're taking a little excursion into the world of molecules!
Fat and Proteins - The Invisible Architects
The role of fats: They are the backbone of our tanning process. Fats envelop every fiber, providing suppleness and flexibility. Imagine the fats flowing through the pores of the rawhide, leaving behind a wonderfully soft material.
Fats fill the spaces between the fibers and ensure that our leather not only feels soft, but also full and firm.
Imagine emulsifiers as the interpreters between water and fat - they allow these two opposites to combine. The brain provides us with these natural helpers that ensure an even and consistent tanning process.
Tradition meets modernity: While modern methods often rely on chemicals, our tried and true brain tanning remains natural. Don't worry, even though it may smell a little – the product is incomparable and a tribute to nature.
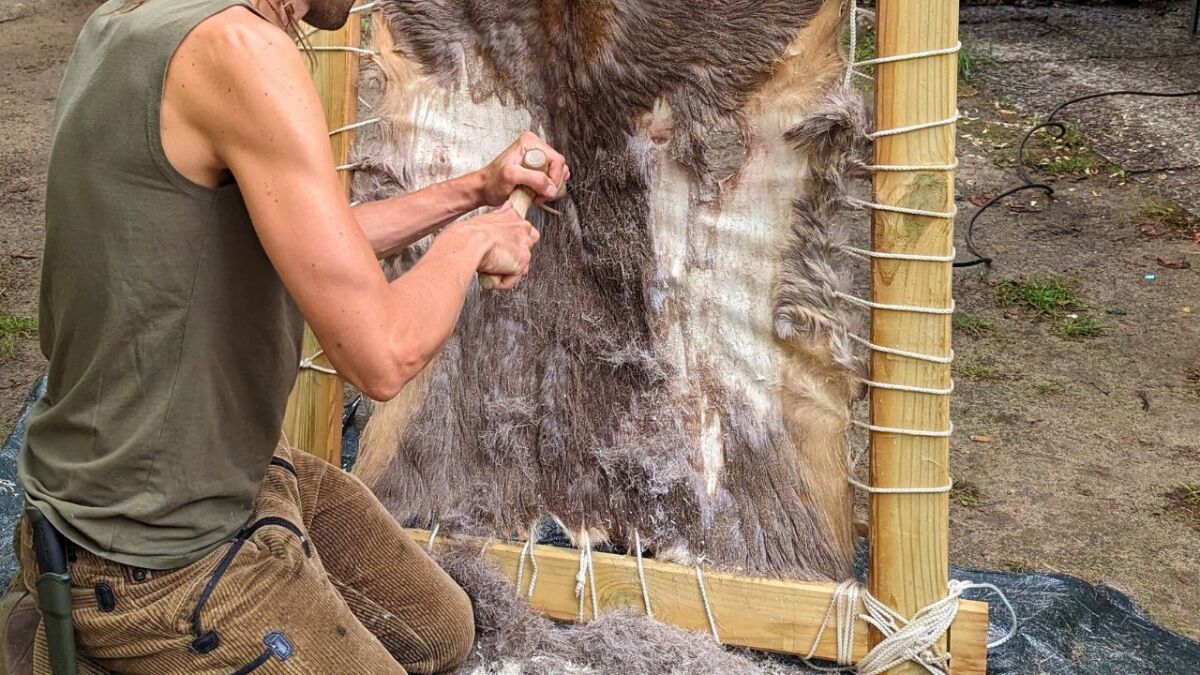
My Chemical Adventure
I admit, when I started studying neuroscience, I didn't realize how deeply I would dive into chemistry. But it's fascinating!
With each step of the tanning process, you discover the interaction of natural substances, and your respect for the rawhide and the tanning process grows.
Learning, experimenting, marveling - that's the Brain Tanning. An ancient craft where chemistry becomes your ally as long as you want to honor nature and tradition.
My step-by-step guide will now show you how to get your own buckskin. Note: The guide is not intended for tanning hides with fur.
1. Wash and Ash
The prerequisite is that you have fresh skin. Either directly from the butcher / hunter or you had one in stock.
First, you look at the skin: Is everything okay with it or is there a 20 cm hole in the middle? If that's the case, I don't recommend starting with such a skin.
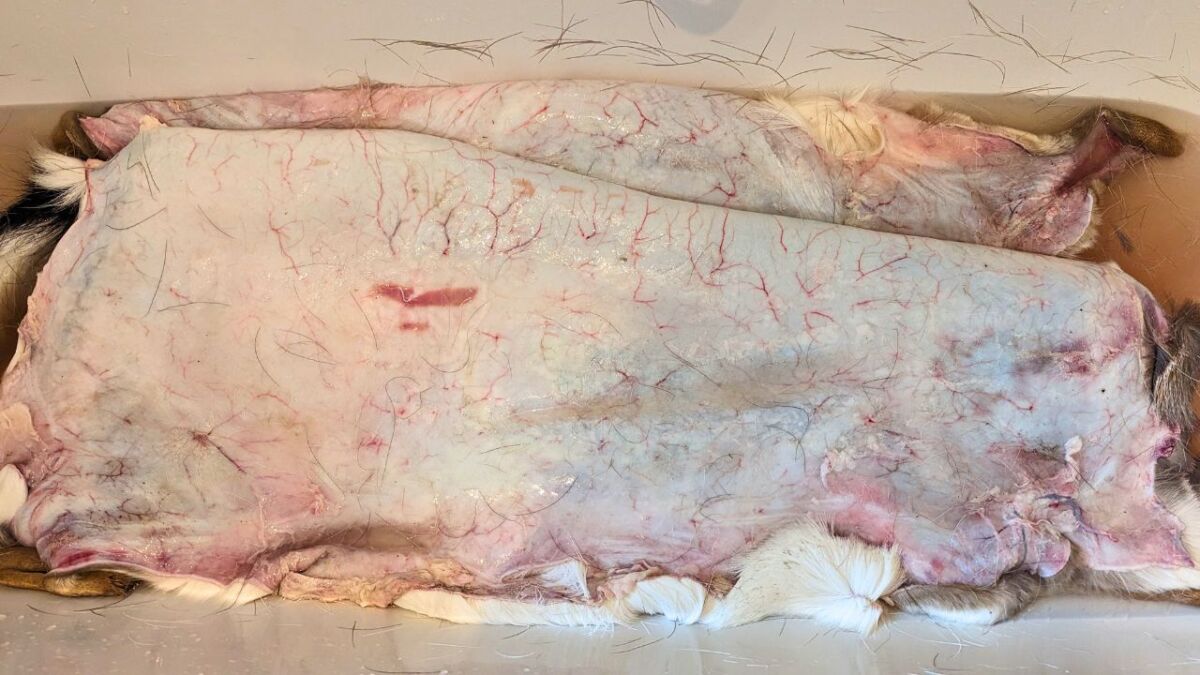
To be honest, I had many bad skins at the beginning and also used them because I wanted to start so badly.
Today, I wouldn't use a perforated skin for Buckskin anymore - the effort for the result is simply too high.
You don't need to wash the skin very much, it can basically move on to the next step right away.
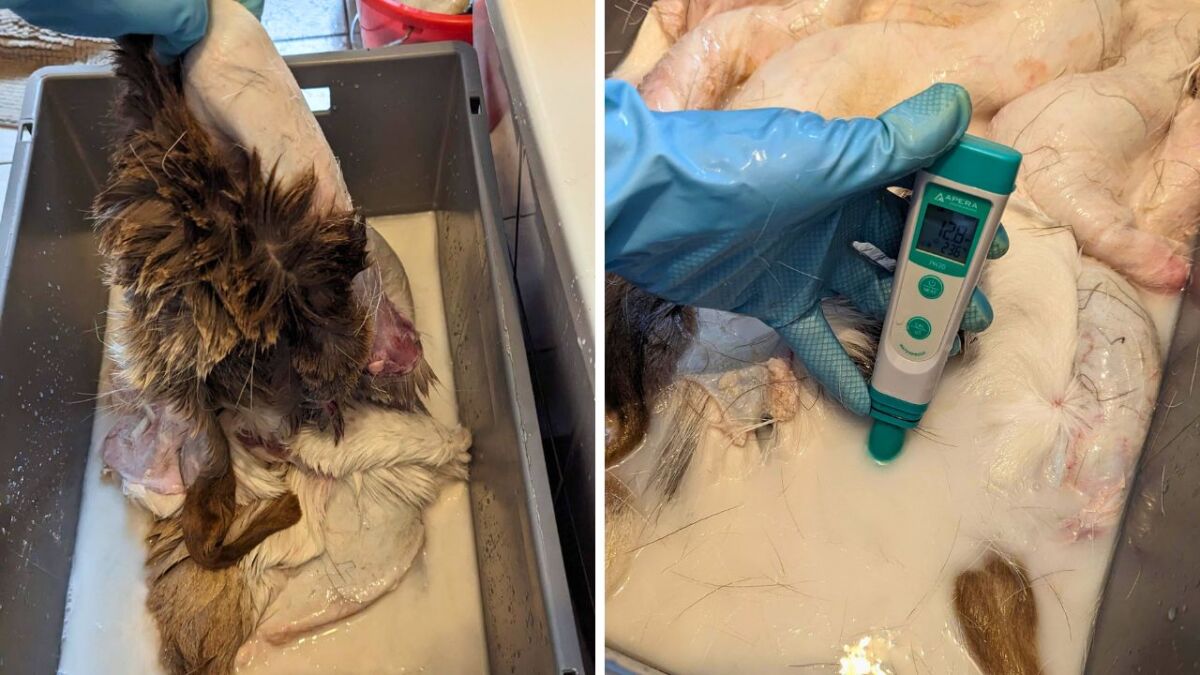
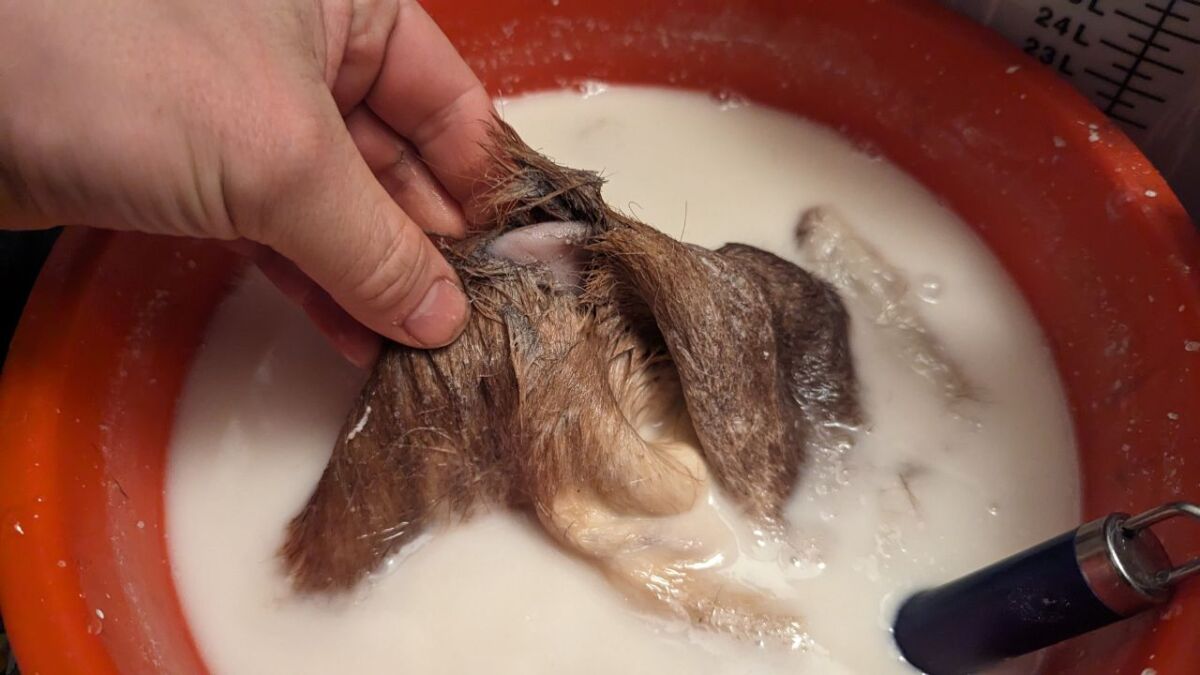
Ashing, Acidifying, Chalking or Rotting - That's How the Hair Comes Off
There are four methods to remove hair:
- Ashing: This strongly alkaline solution loosens the skin and hair. Use white ash from the campfire for this.
- Vinegar: The acidic solution lowers the pH value, causing the skin to swell and the hair to fall out almost on its own.
- Liming: Also a strongly alkaline solution, and it works great with slaked lime (calcium hydroxide).
- Rotting: Also known as controlled decay (by bacteria). It can smell a bit, but it works well. Here, you need to keep an eye on the condition of the skin so that it doesn't decay too much.
Attention, wear rubber gloves when handling strong alkaline solutions!
2. Fleshing and Depilation
Come along to the second stage of brain preparation, which requires a lot of finesse - defleshing and depilation.
A Journey into the Structure of Mammalian Skin
I don't want to go into too much detail, but it will help you understand where we're heading later on.
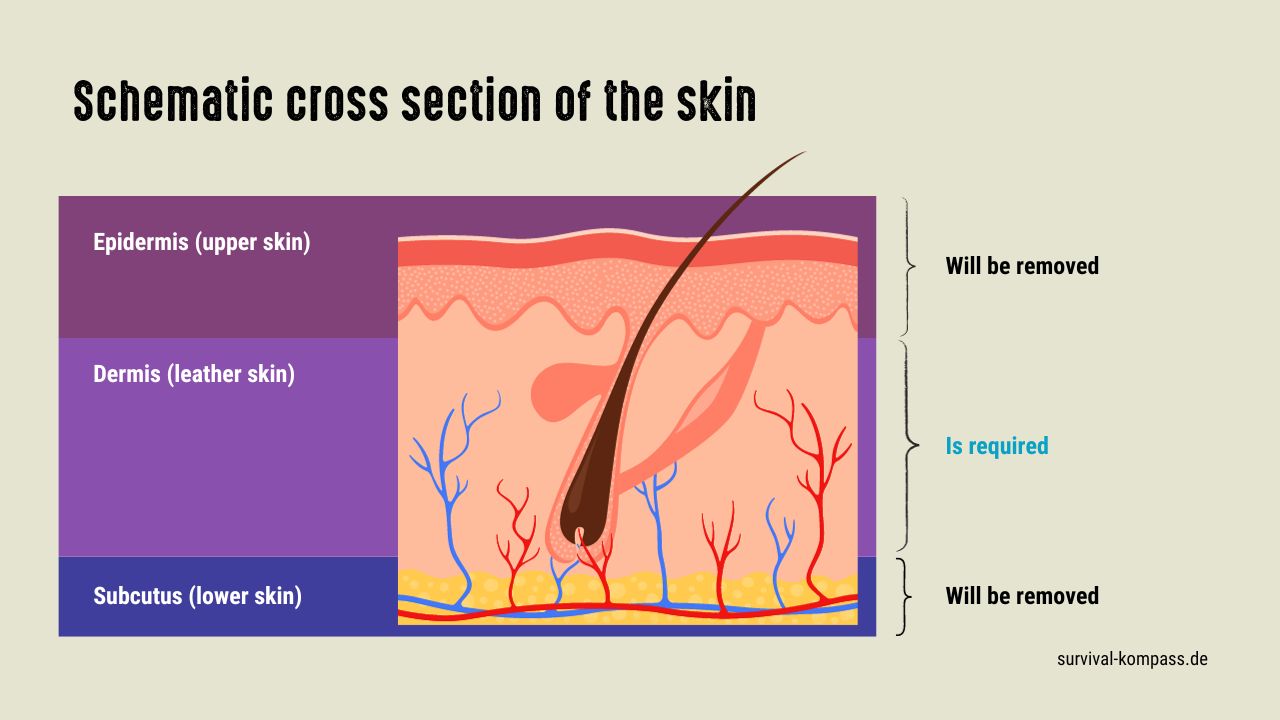
So is a skin built from the outside to the inside (simplified representation):
- Upper Skin (Epidermis)
- Leather skin (Dermis)
- Lower Skin (Subcutus)
Here in the picture you can see exactly what needs to be removed: Epidermis and Subcutus.
Fleshing
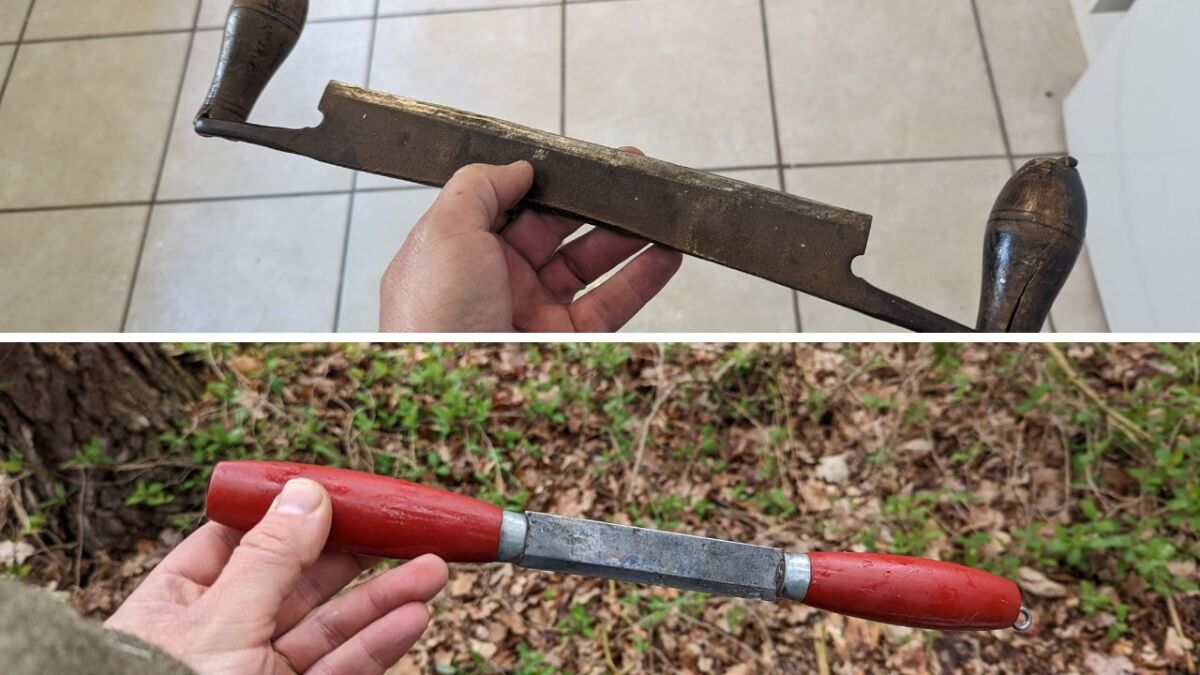
Well, grab your scraping tool - things are getting serious. You don't need high-tech cutlery; a simple but effective tool is all you need.
Important: Your fleshing knife must be dull to not damage the rawhide.
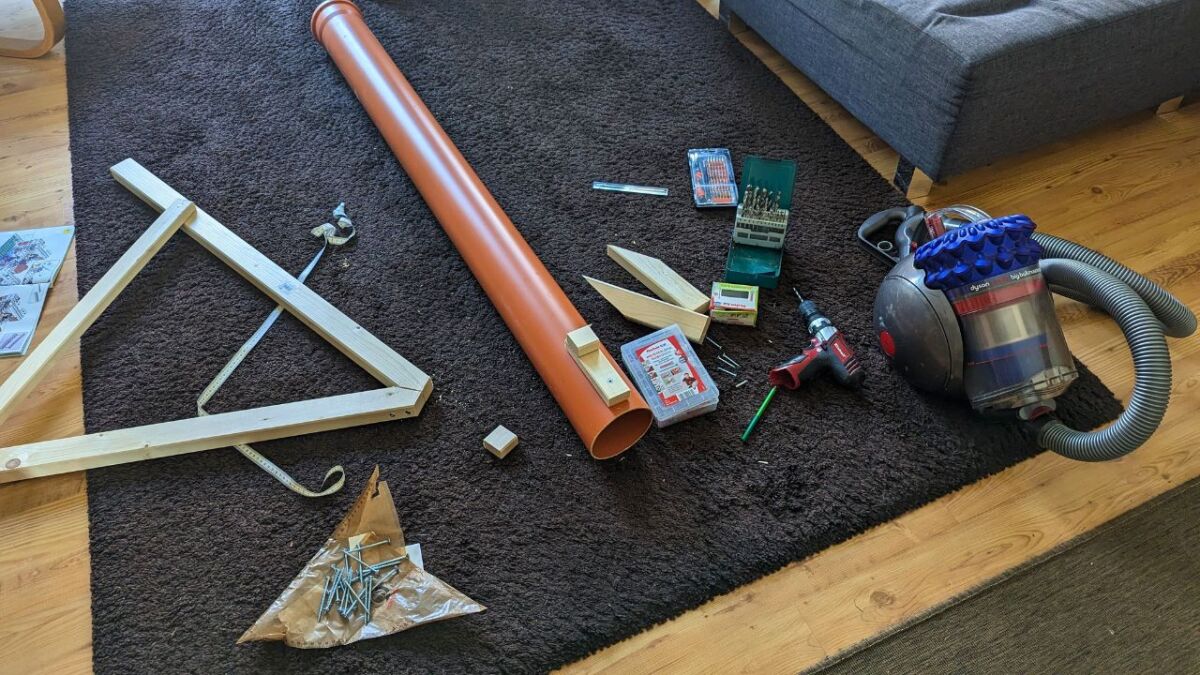
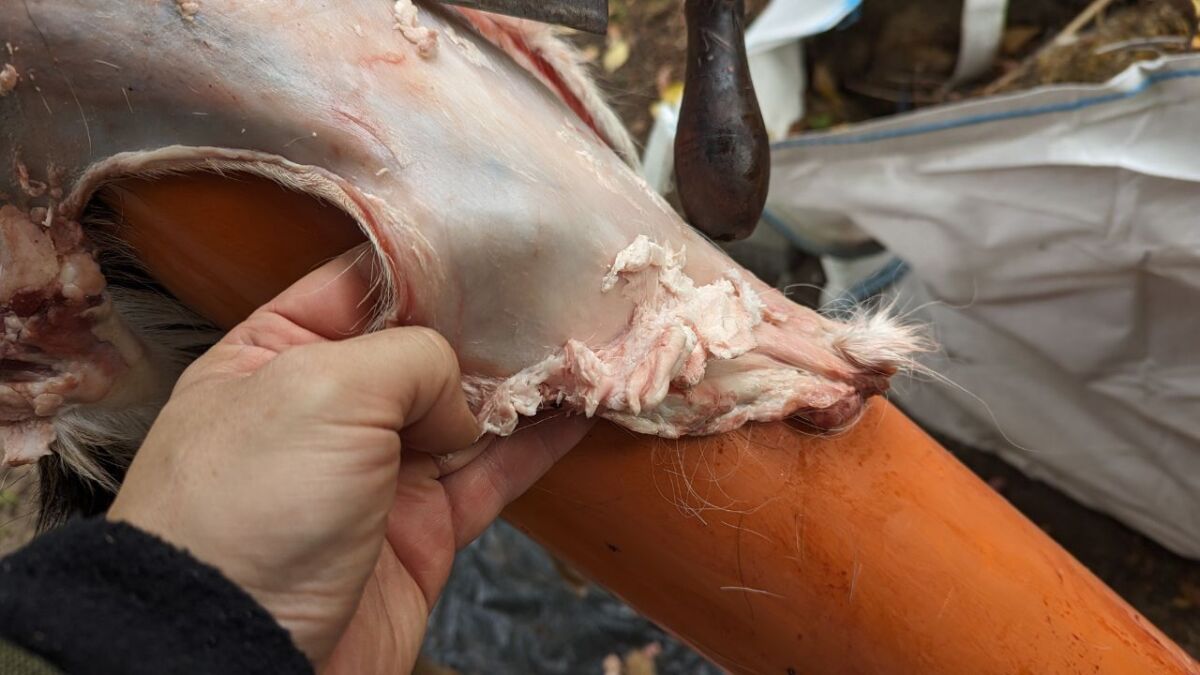
I built myself a Fleshing Beam from a drain pipe.
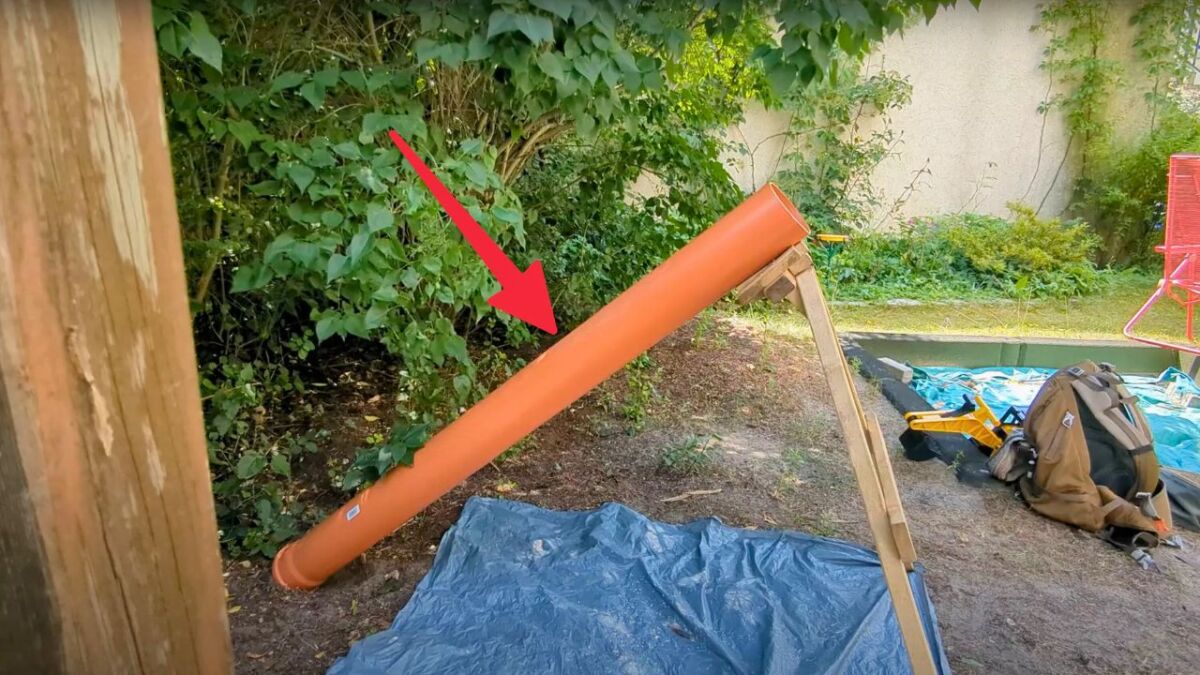
The process of fleshing
1. Remove hair: It starts with pressure and movement. Place the scraping tool and gently press to remove the hair. If the previous solution worked, the hair should come off quite easily.
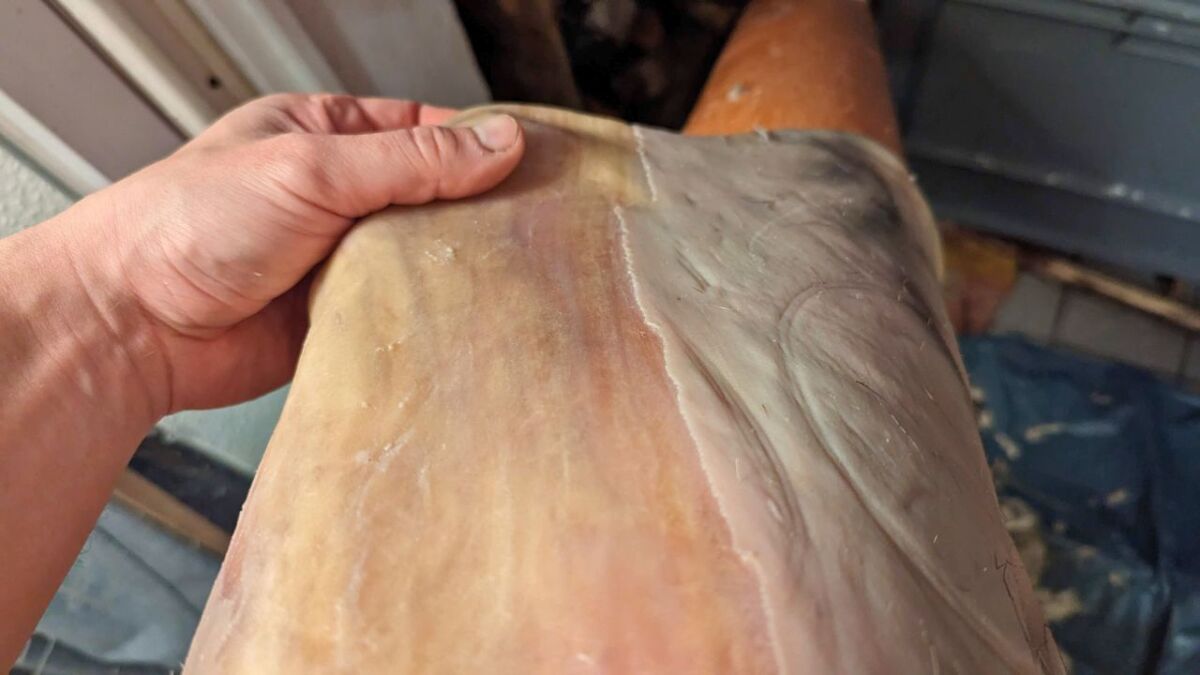
2. Remove epidermis: For this, you need more pressure to remove the epidermis. If you leave it on, you will get smooth leather (less stretchable, water-repellent).
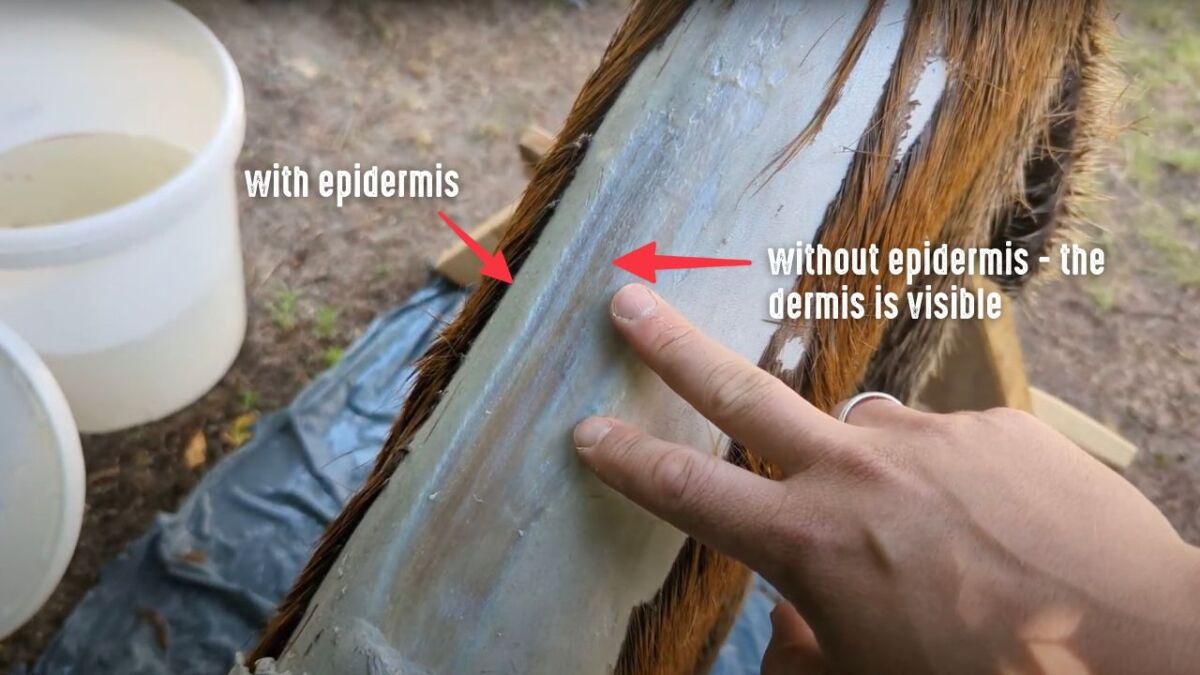
Here is another image of the dermis (left) and the epidermis (right)
3. Remove meat and membrane: Turn the skin and remove meat, fat, and membrane. This can be very time-consuming.
Here is a video:
Tips from my workshop
Here are some tips from me that I noticed while fleshing:
- Patience: Take it slow and methodical, there is no need to rush.
- Vary pressure: Feel the skin and adjust your pressure accordingly to avoid injuries.
- Systematic approach: Work in sections and leave nothing to chance.
The intricacies and pitfalls
What can go wrong? Beware of overconfidence that leads to holes and cracks. The corners and edges also require special attention.
For me, fleshing is meditation and art at the same time. It is the moment when you carefully prepare the material. When you remove the last piece of flesh or the last outer skin and the pure leather skin lies before you, you know that the journey is not far anymore.
Get ready for the ritual, immerse yourself in the essence of leather craftsmanship, and experience the proud feeling when the work is done. Ready to wield the scraper?
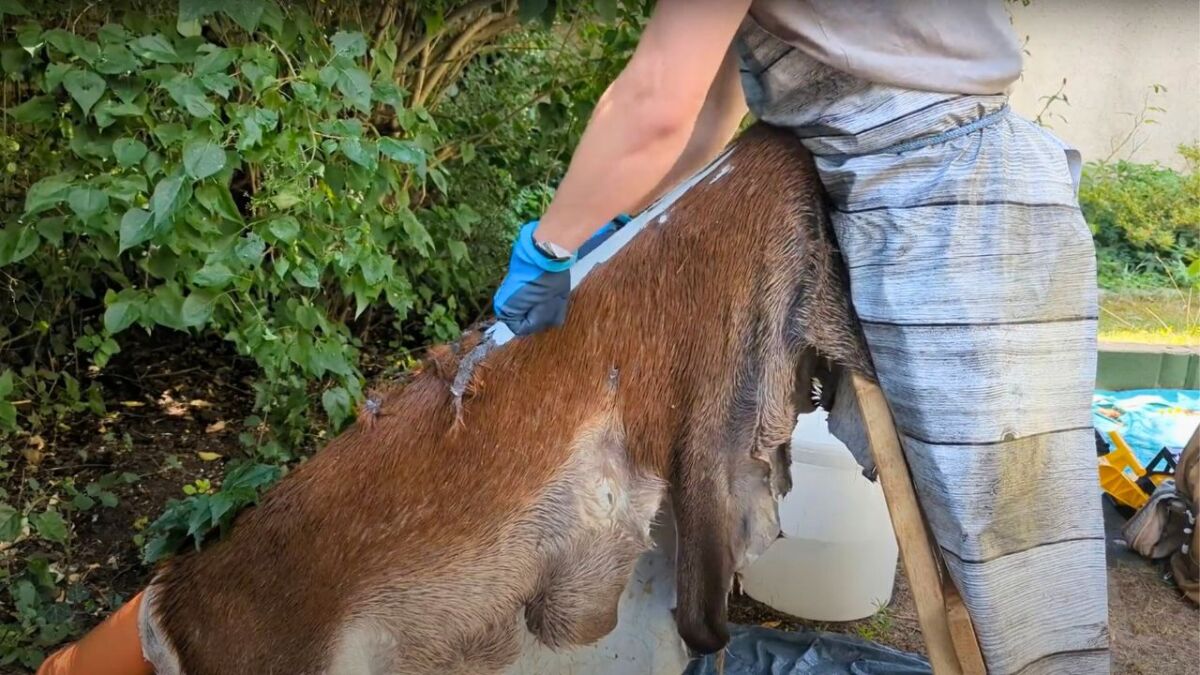
What are you doing afterward?
If the skin was in ash or in lime, you have to neutralize it again. It is still too swollen afterward.
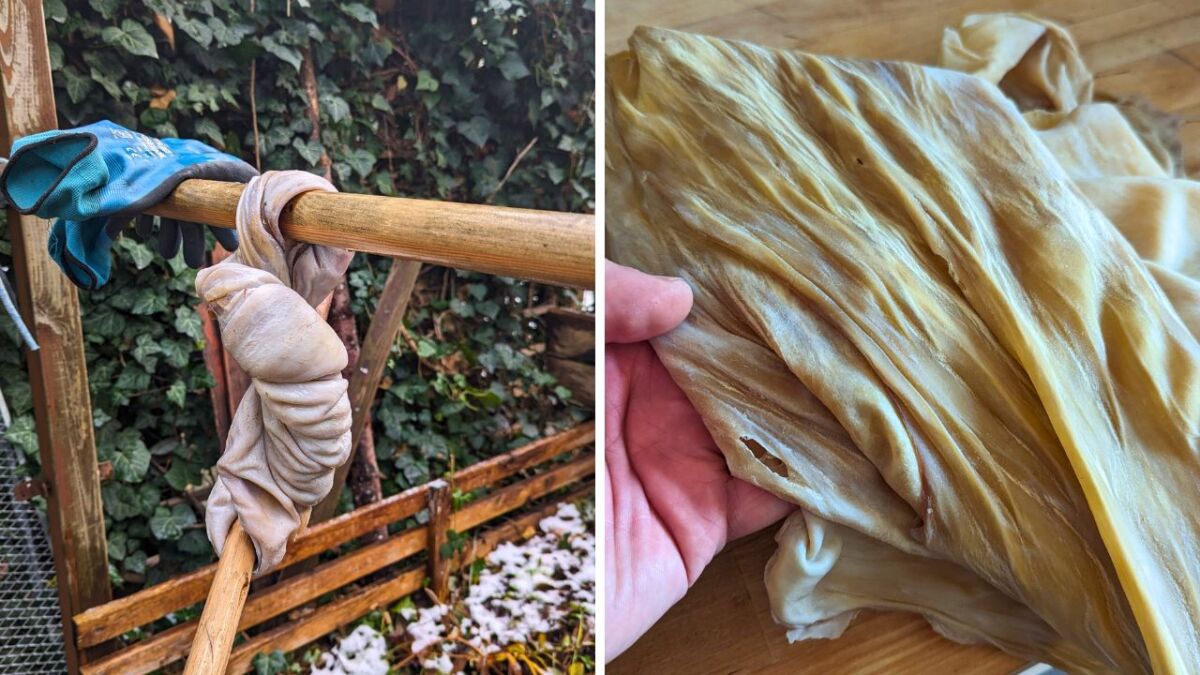
If you have a stream in front of your door, you hang them in there. Otherwise, you soak them in clear cold water for 2–3 days and change the water a few times a day.
Afterward, you have to wring out the skin.
Build yourself a wringing station
You need a pole and a thick branch. Then you lay the skin over the pole and roll it up.
Then squeeze firmly to let the water escape.
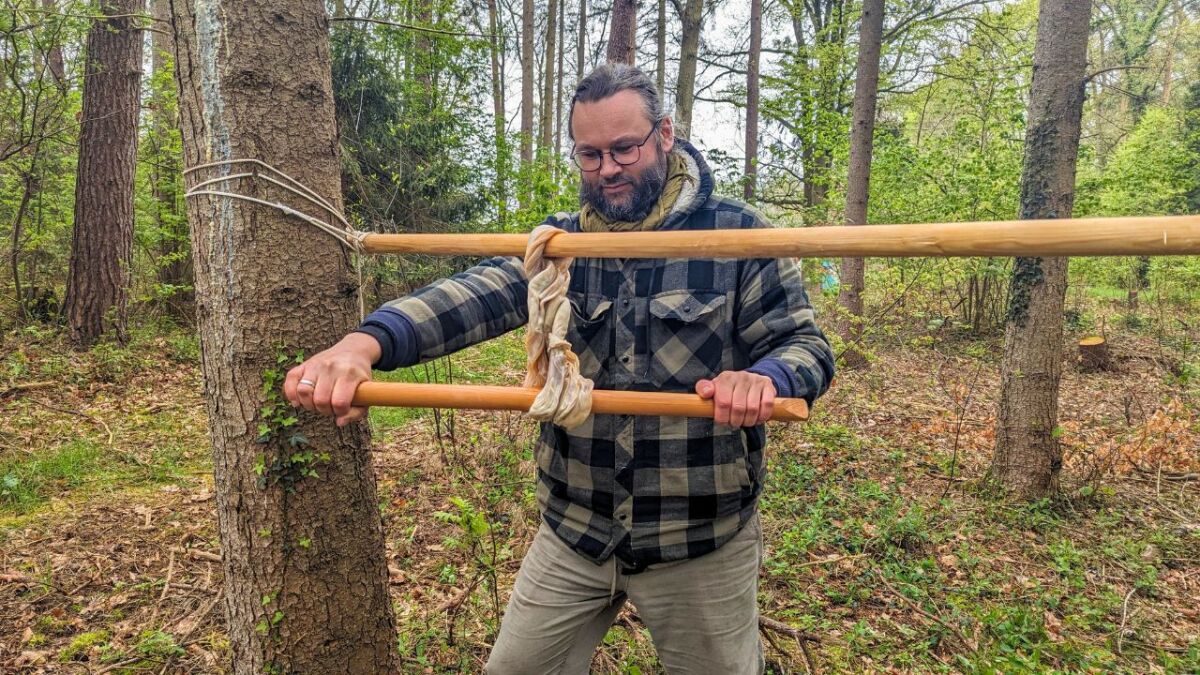
This is what the skin ideally looks like:
3. The Heart of Brain Tanning: The Use of Brains
After we have fought through the scraping, we reach the core of brainwashing. It may feel strange, but it is the moment where many things come together.
Maybe you're thinking now, "Wait a minute – how do I prepare this brain now?".
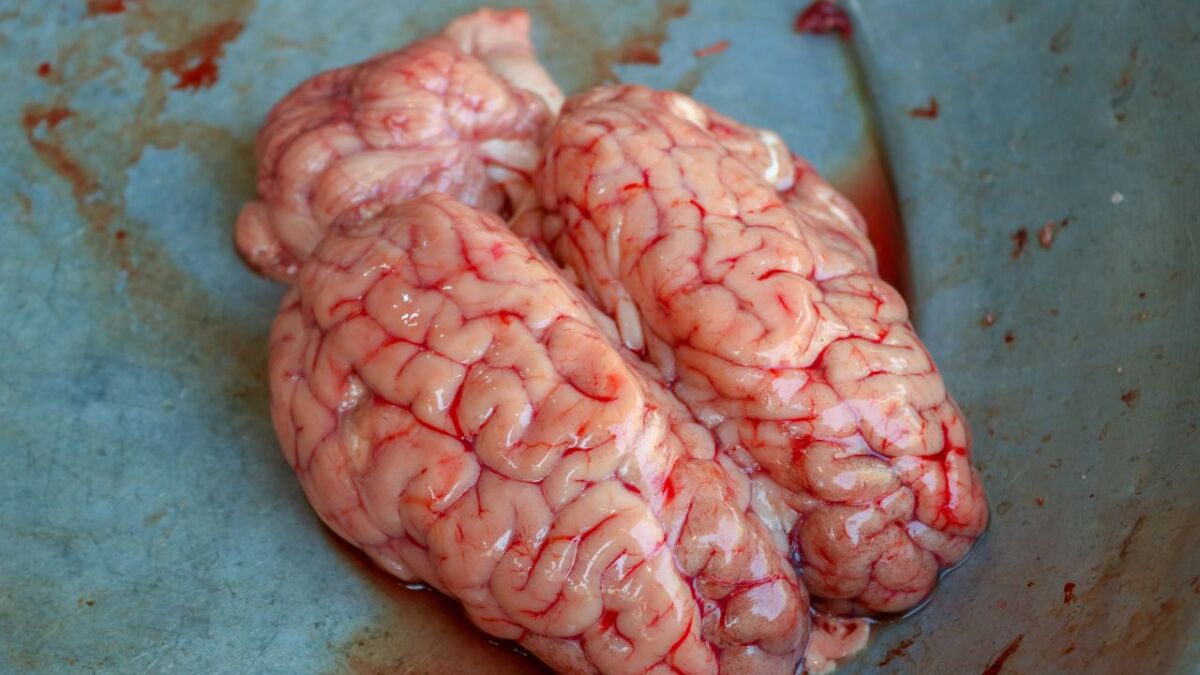
Here are the steps I have taken, and they will be worth their weight in gold for you too:
- The ingredients: Get the brain from the butcher or, if you have hunted the animal yourself, use your own.
- The cooking: Chop it up and cook it. You can't overcook it, the more pasty, the better.
Instead of brain, egg yolk can also be used as an emulsion. Here are the measurements:
- Deer: 6–8 egg yolks, 4 tbsp finely grated core soap, 3 tbsp sunflower oil
- Fallow deer: 16 egg yolks, 8 tbsp finely grated core soap, 6 tbsp sunflower oil
- Red deer: 22 egg yolks, 12 tbsp finely grated core soap, 9 tbsp sunflower oil
The core soap and sunflower oil are optional. Instead of sunflower oil, you can also use olive oil.
Then it gets serious. Take your skin and place it in the brain or the egg solution and massage it everywhere.
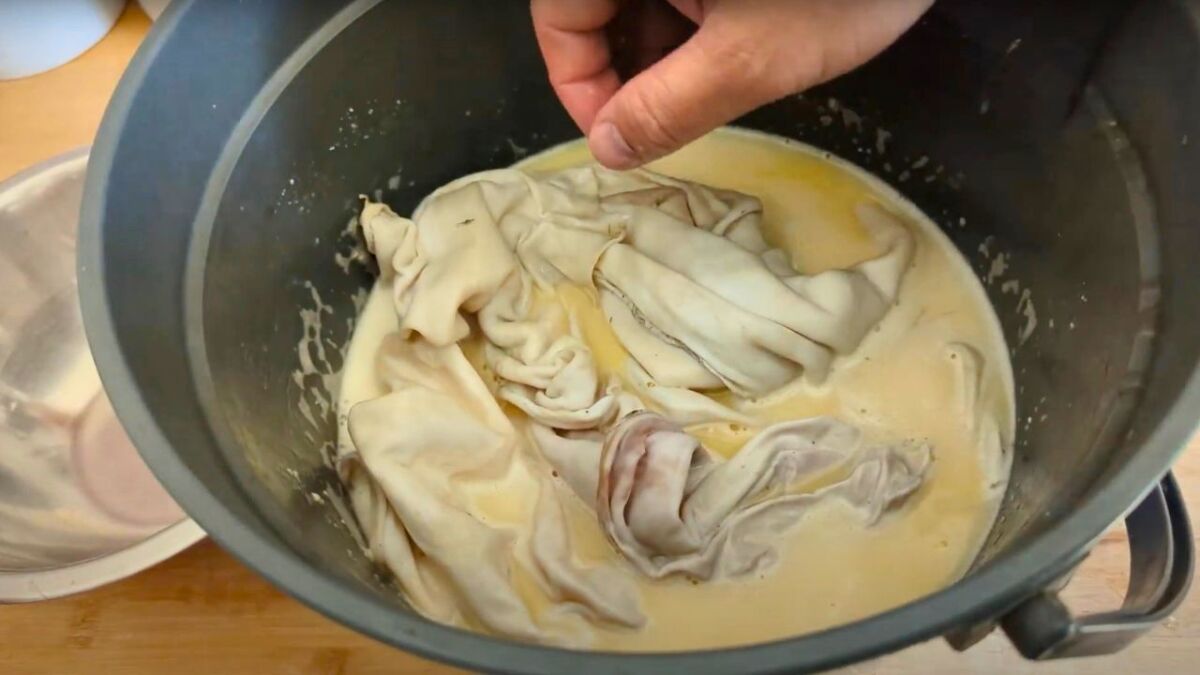
I treated the leather like a tired muscle that needs to relax. This is the moment when you literally work the softness into the skin.
A tip from me: Heat helps! A warmed solution is easier to handle and absorbs better into the leather. But never too hot!
Ok, your skin is now in the solution:
- Let the skin rest. Preferably for 10 to 30 minutes, it needs to soak up the brain or egg solution.
- Then remove the skin and wring it out again at the wringing station.
- Afterward, spread the remaining liquid on the tanning frame.
Repeat steps 1 to 3 several times:
- Roe deer: 2 to 3 times
- Fallow deer: 3 to 4 times
- Red deer: 4 to 6 times
My personal mantra: Massage, wring, stretch, repeat
I can tell you, it's work that gets under your skin.
The repetition, the feeling of the solution becoming one with the leather - all of this gives you the feeling of truly creating something real, tangible.
Step by step, you will notice that the skin becomes more stretchable and softer after wringing.
So, are you ready to work with brain? To feel how you learn from nature, in this ancient dance of life to new life?
Read also
The most common stitching patterns for sewing buckskin - Learn which sewing techniques and stitches are best suited for soft buckskin - I'll show you 5 common hand stitches from natural crafts.
3. Drying: The crowning achievement
Now that the leather has been saturated with brain or egg yolk, we are approaching the end of a journey - the drying and finishing. This is the part that seals your work.
Your skin should now be wrung out in front of you. If you find any holes at this stage, sew them up.
There are now two methods on how you can dry your skin:
- Hand drying - worth it in hot weather and warm wind or if you need more time
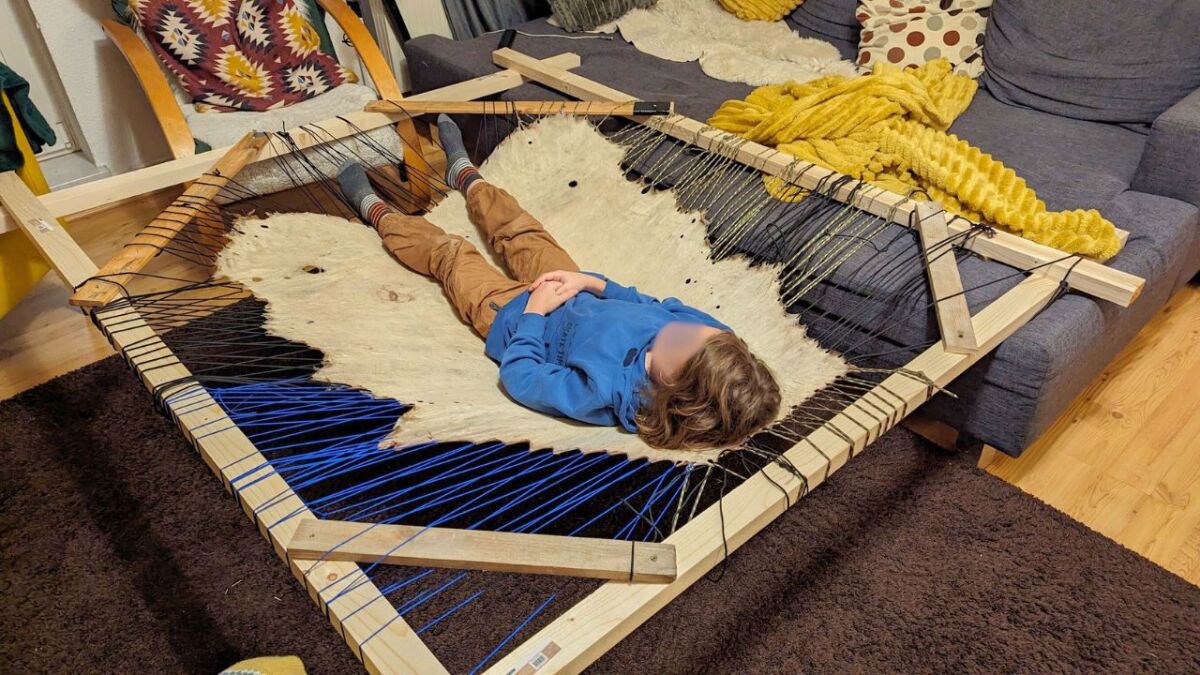
- Frame drying - worth it in winter and for big hides
Drying your buckskin by hand
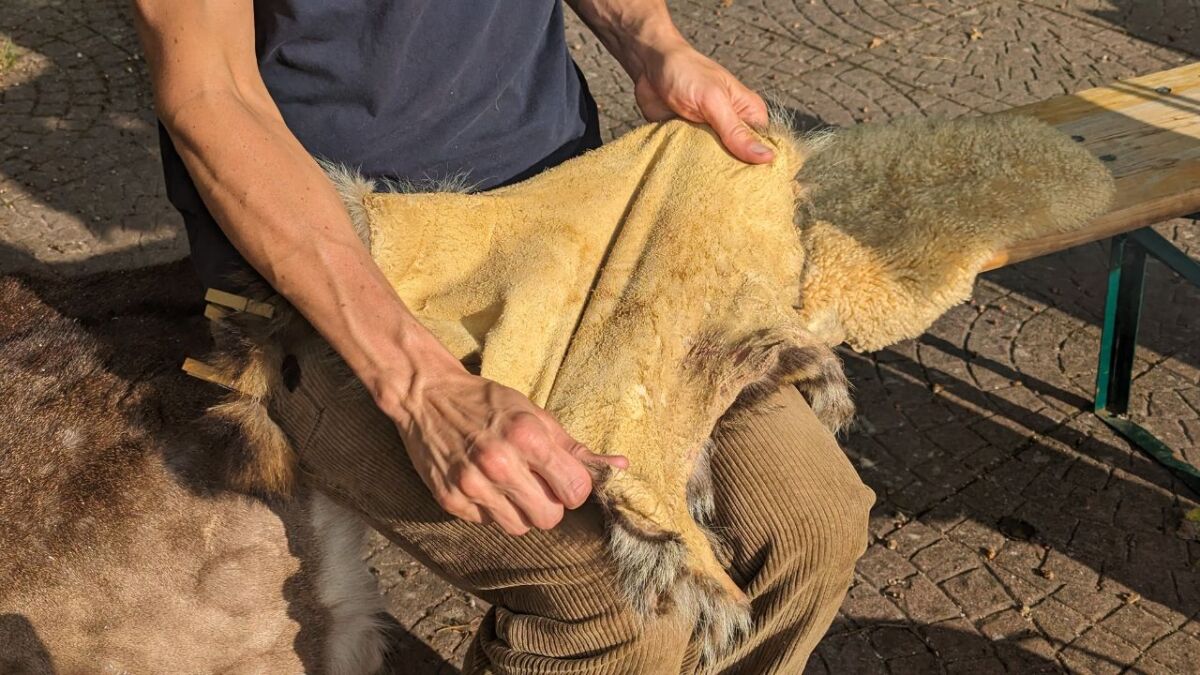
A uniform, slow drying is crucial in both cases. Let me tell you how I do it:
- Air drying: Find a well-ventilated place. No radiators, no direct sunlight permanently.
- Continuous care: While drying, I massage and stretch the skin repeatedly to maintain flexibility. It's like the daily morning routine - essential.
- I stretch the skin in all directions: diagonal, horizontal, vertical
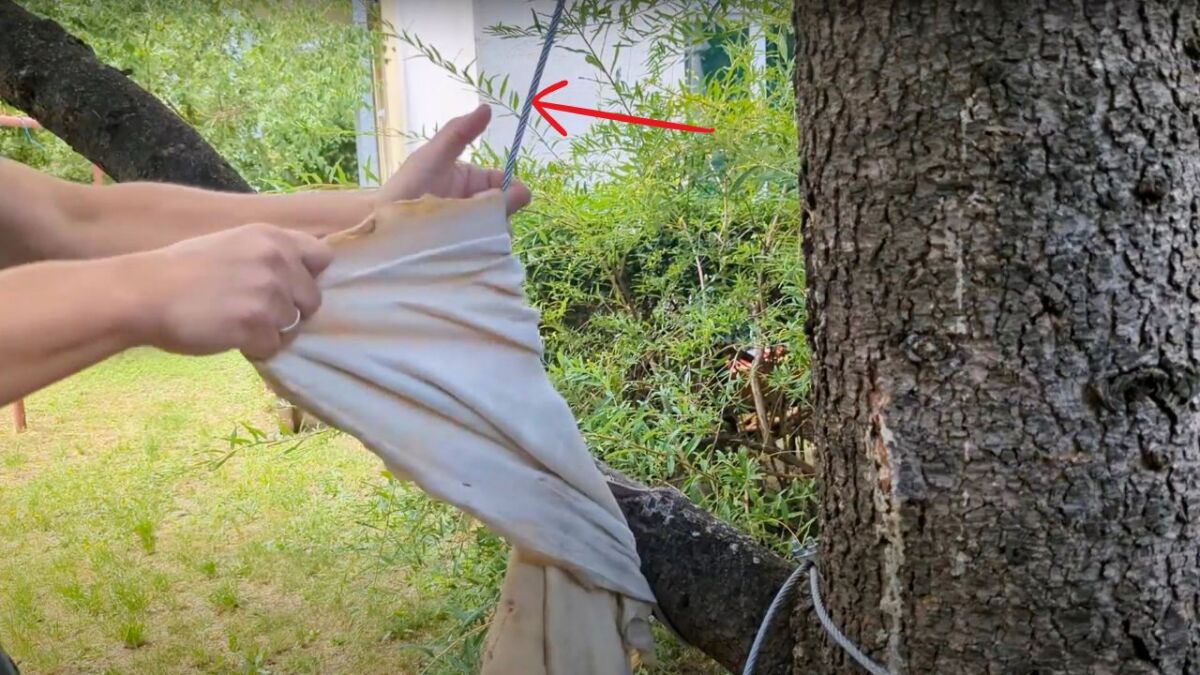
- I stretch the skin with my knees, chairs, wire rope
- Patience: Bring endurance - sometimes it takes 2 hours, sometimes 8.
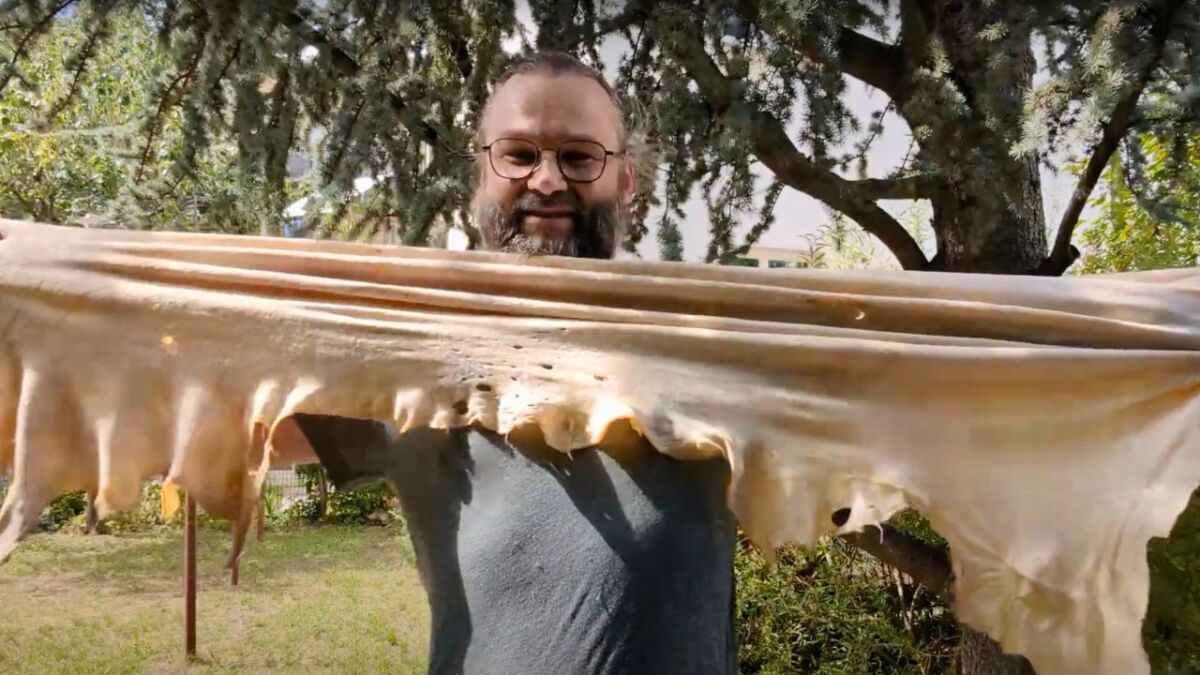
A wire rope is also very useful in this process. You rub your hide over the wire rope and it becomes soft and also dries due to the friction heat.
Stretching Your Buckskin by Frame
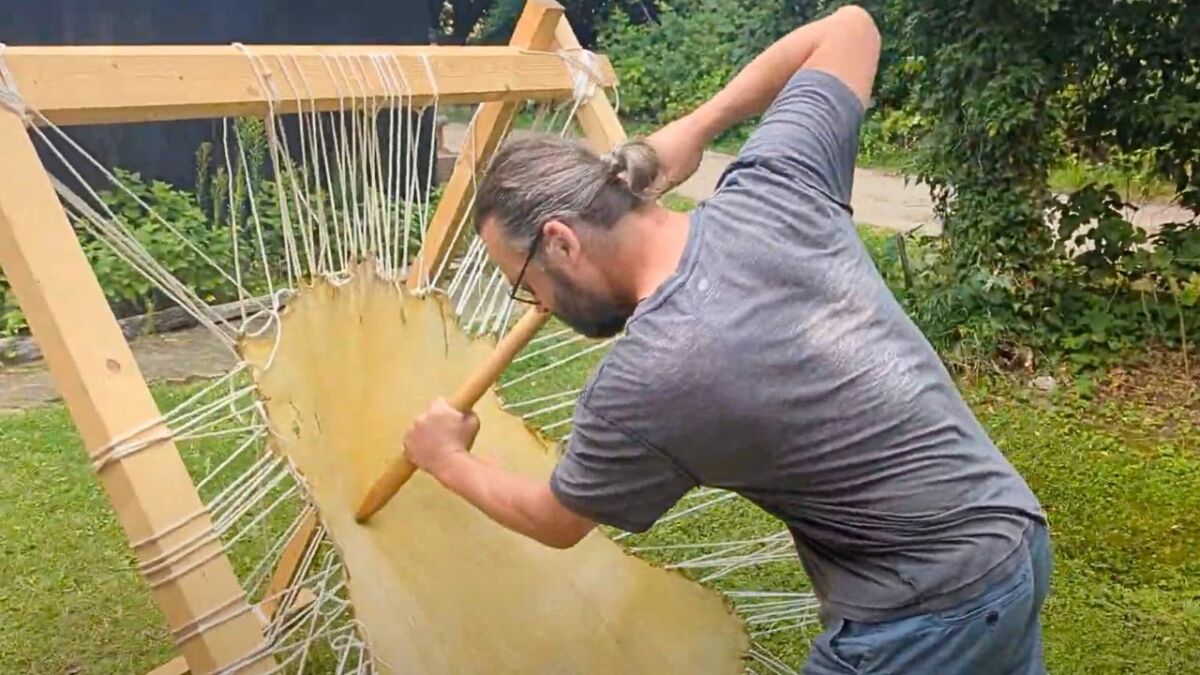
If you have a frame, you can also stretch your hide here. You will need a rounded stick for this. Work deep into the leather to keep it supple.
Don't worry about durability, your hide can handle a lot!
Like a science and yet so instinctive
It's an exciting moment when you dry your leather. It slowly reveals itself in all its glory, just waiting to step out into the world.
Trust me, the time and patience you invest here pays off in every inch of the final product.
Are you ready to put on the finishing touches, smoke the leather? Then let's take the final steps and complete the masterpiece!
4. Smoke preservation: The eternal life for leather
The journey of brain tanning doesn't end with drying. No, there is still a secret - the smoking process. An ancient method that not only makes your leather more durable, but also adds character.
Traditional Smoking - An Experience for the Senses
Smoking is pure magic. It is the moment when the rawhide takes on its true identity. Here's how you proceed:
- Building a smoke station: A metal bucket, clothespins, and something to stuff.
- The right smoke: Use wood shavings or Punk Wood (rotten wood). Dense and cooled smoke should rise so that the leather does not sizzle but gets a soul.
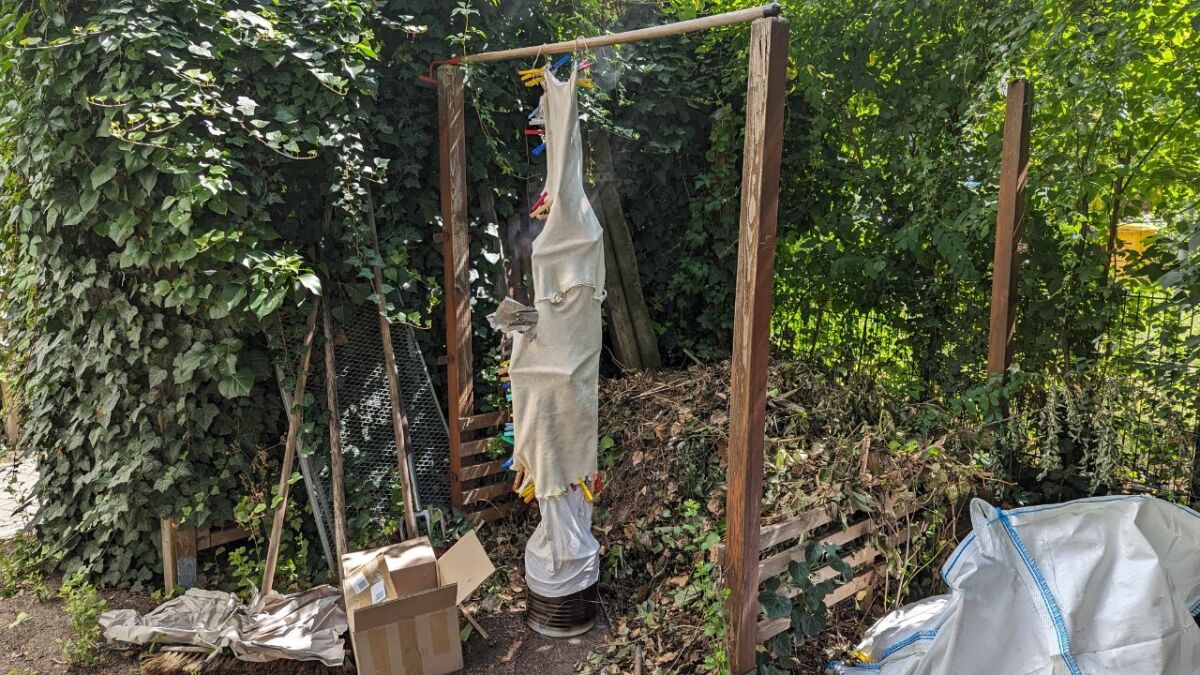
How to proceed:
- Clamp the dry hide together with clips to form a bag. There is an opening at the bottom. You can also glue it together with wood glue or sew it together (a sewing machine works too).
- Let the bucket smoke with Punk Wood - no open flame!
- Then hang your leather bag over it.
- Wait for one to two hours.
- Repeat the process for the other side. Turn the smoke bag inside out and smoke it again.
P. S. Always add enough punk wood to create a lot of smoke. Additionally, you should plug the holes where smoke escapes.
The Beauty of the Process
Why smoke? Not just to keep the leather soft. It also gives it a natural water-repellent character and a distinctive color shade.
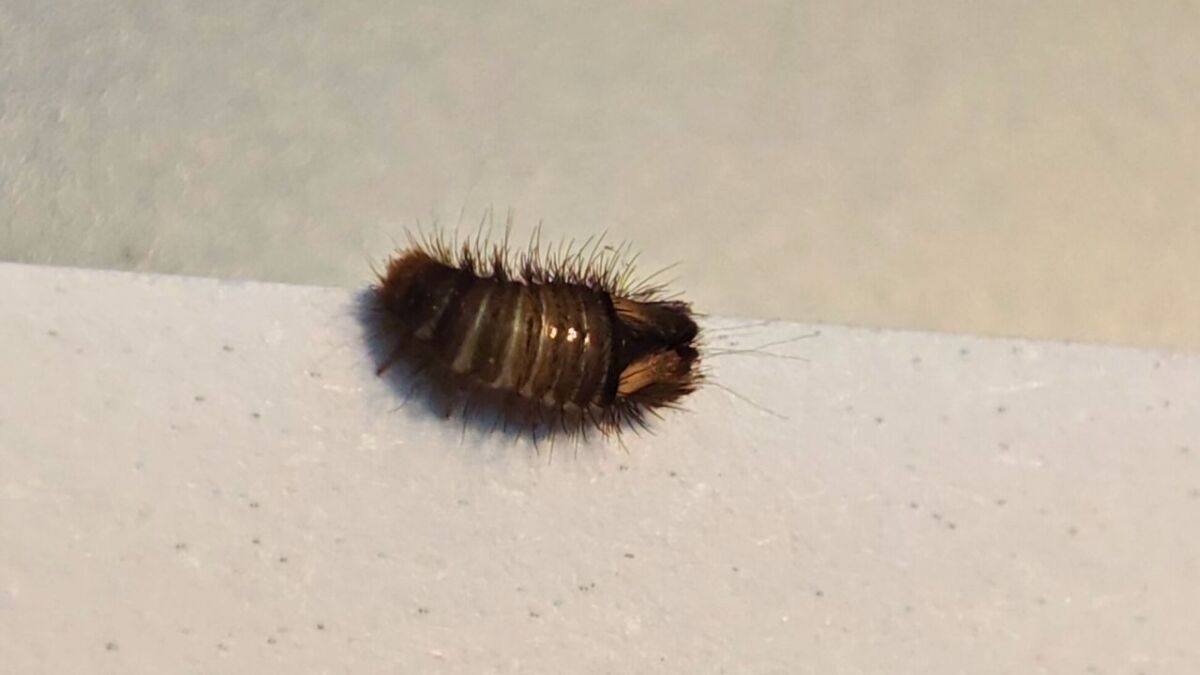
Furthermore, the ingredients of the smoke protect your buckskin from insects such as moths and dermistid beetles larvae.
I still remember the first time I performed this ritual. The smell of burning wood, the gentle embrace of leather through the smoke. It felt like I was breathing life into my masterpiece, giving it a soul.
Patience is the key: Smoking leather takes time. Let the smoke slowly penetrate. Watch as the skin takes on deep colors, as it becomes richer - in beauty and durability.
Handmade to Perfection
Smoking is the ultimate step in traditional tanning. After that, you're almost done. It transforms your work into an artifact that can last for generations.
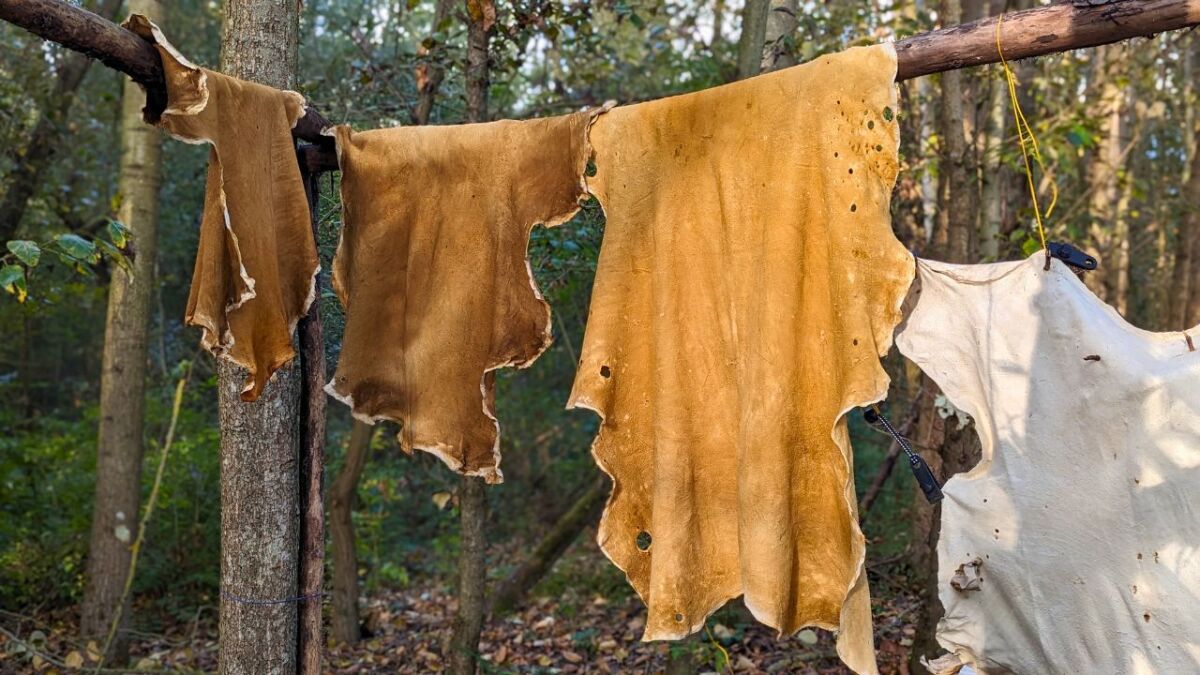
👉 Now you just have to wash your leather. With my step-by-step guide, you can achieve gentle cleaning.
Are you ready to go through smoke and embers to not only protect your leather, but give it a lasting legacy? Let's ignite the fire and watch the smoke rise. Your leather will thank you!
Answers from the Tanning Workshop: Frequently Asked Questions
After all the experiences with smoking and brain tanning, I'm sure you have some questions, just like I did back then. I'll address the most common ones here and give you my tried and tested answers.
From my conversations with other tanning enthusiasts and my experience, here are the top questions:
-
"How long do I have to let the brain solution soak?" Depending on the thickness of the skin, about 10 to 30 minutes before wringing it out. Trust your instinct, the leather will show you when it's saturated.
-
"Can I use any brain?" Every mammal brain has similar properties. It is usually sufficient to use the brain of the animal you are tanning.
-
"Why does the leather smell so strong after tanning and smoking?" The smell is the spirit of the fire and tanning. It will weaken over time and with wearing the leather.
-
"Is brain-tanned leather as durable as commercially tanned leather?" If done well and properly cared for, absolutely! It can even be more durable because it doesn't contain harmful chemicals.
My Answers from Practice
I have learned that the best answer is not found in books or manuals, but in practice itself. Tanning teaches us humility, patience, and listening to the subtle hints of nature.
However, I would like to recommend to you the book by Matt Richards "Deerskins into Buckskins: How to Tan with Brains, Soap or Eggs". It is rich with information and contains everything you need to successfully produce buckskin.
My Vision as a Leather Craftsman
When I smoked my first piece of leather, I saw a bridge between the past and the future
I believe that we are on the threshold of a new era where we will appreciate and utilize old knowledge again.
The work with the hand, the work with animal skins, and the garments that are created as a result are priceless.
A vision of the future in which craftsmanship not only remains preserved, but also finds its solid place in schools, workshops, and wilderness education.
When buying leather, people are not just purchasing a leather product, but they want to experience the whole story behind it.
Are you ready to be part of this movement?
To perfect and pass on your craftsmanship, preserving the wisdom of nature?
Then be proud, passionate guardian of these ancient tanning methods and join me in the circle of those who honor the natural craft of life.
More interesting guides for you:
- Buckskin Care: How to properly wash and maintain buckskin
- The most common sewing patterns for buckskin
- Why I use leather and wool as equipment - my reasons

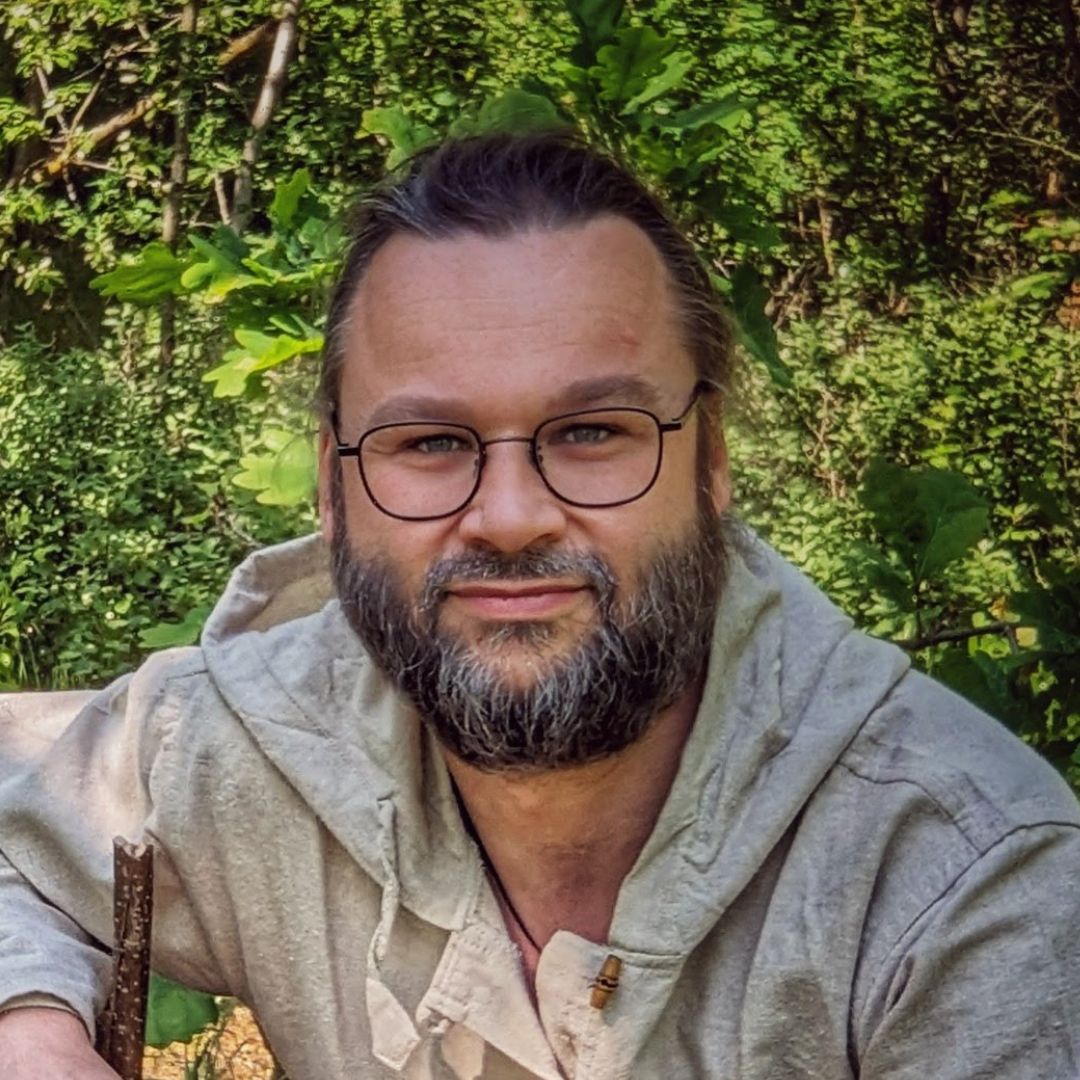
Author of the guide
Martin Gebhardt
Hey, I'm Martin. On my blog, you will learn the basics and numerous details about living in the wild. I think survival, bushcraft and the good life in nature are the keys to happiness. Find me here on Instagram or on YouTube. You can find more about my mission on the About Me page.
Was this guide helpful?
19 people found this guide helpful.
5.00 out of 5 points (19 Ratings)
Comments (0)
This post may contain affiliate links. So if you click on the links and make a purchase, I will receive a small commission at no additional cost to you. Click here, to learn more about it.


