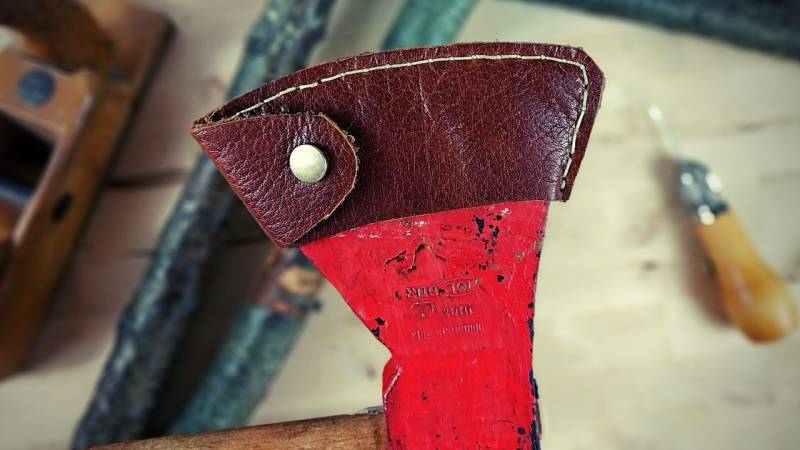
Sew your own axe leather sheath - even if you have never worked with leather before
👉 The key facts from this guide
- Materials and tools: You will need leather, a sewing awl, paper, pencil, snap buttons, scissors, a lighter, and of course, your axe. Choose a hard leather with a thickness of 2 to 4 mm.
- Create a pattern: Draw the axe blade on a sheet of paper and add a seam allowance of 1 cm at the top and right side. Moreover, draw the flap that will close the axe sheath.
- Cut out leather pieces: Transfer the pattern onto your leather and cut out two pieces - one with the flap and one without.
- Sew leather pieces together: Sew the right and top sides of the leather pieces together. Start at the bottom right and work your way up. Use a sewing awl and make sure the thread is running in the groove of the needle.
- Close seam and attach snap buttons: Close the seam by sewing a stitch back into the second-to-last hole and cutting the thread. Knot the threads together and melt them with a lighter. Then attach the snap buttons.
Wouldn't it be great if you could make your own axe leather sheath? According to your preference and your favorite type of leather? And as a beginner in less than 60 minutes?
Indeed, it is possible if you follow a guide and inform yourself before starting to implement the project.
The good news? It's easier than you think, and I'll show you the instructions step by step in the next 5 minutes.
MYOG - Make your own gear
Do you know what MYOG is? It stands for "Make your own gear", so create your own equipment. And I am a giant advocate of it.
It's not just fun, but it satisfies me immensely because I construct things independently and constantly learn.
Long ago, I had an old axe in the basement. I received it as a gift during a move. It was from the GDR era. The axe head weighs 1 kilogram.
After sharpening and the first positive impression, I realized: I don't have an axe sheath for the tool.
Since I have implemented some projects in leather working, I set to work on making my own axe leather sheath for this good piece.
I am now sharing this guide with you, and you can use it to make your own axe leather sheath.
Let's start with what you need in terms of materials and tools.
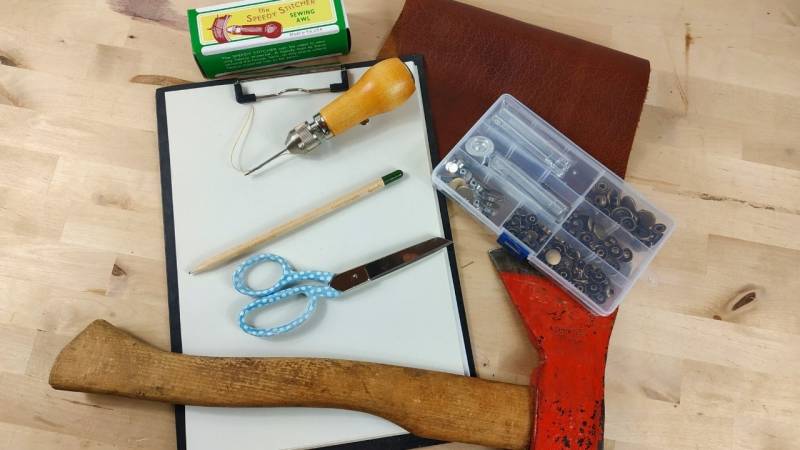
The material and tools for an axe leather sheath
Here is the translation of the text:
Tools:
- Speedy Stitcher Sewing Awl
- Piece of paper
- Pencil
- Snap Fasteners
- Scissors
- Lighter
- Your axe
Material:
- Leather (affordable leather scraps or this high-quality leather)
Another note about leather
Do not use too soft leather - hard leather is better. Furthermore, your leather should be 2-4 mm thick. The affordable leather scraps are really top-quality goods and I have ordered a lot of them. However, the pieces are usually quite soft. Unfortunately, you cannot influence which leather pieces are sent there.
I love the high-quality leather. It is very durable, quite hard, and looks great with the pull-up effect. However, the pieces are not cheap.
If you have all the material together, let's get started.
Step 1: Create a pattern
Place your axe on the sheet of paper and trace the blade of the axe.
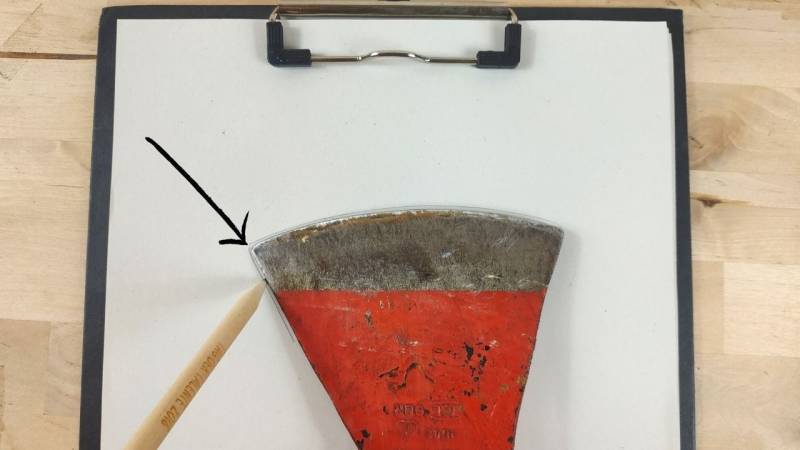
Then add a seam allowance of 1 cm at the top and right. You can still trim the leather at the end.
In addition, you draw your tab, with which you close the axe sheath.
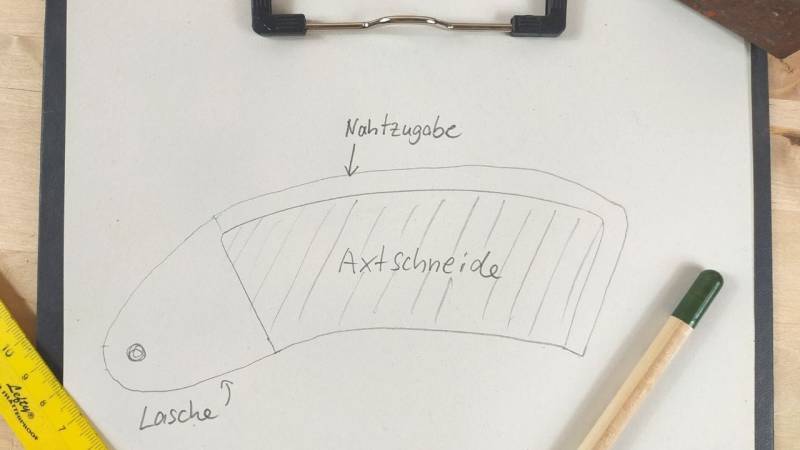
Then cut out your pattern.
P. S. And don't worry, it doesn't have to be all straight and precise down to the micro-millimeter.
Step 2: Cut out leather pieces
Now transfer the pattern onto your chosen leather. You will need two pieces for the axe sheath. One piece of leather with the flap to close the leather sheath and one piece of leather without a flap.
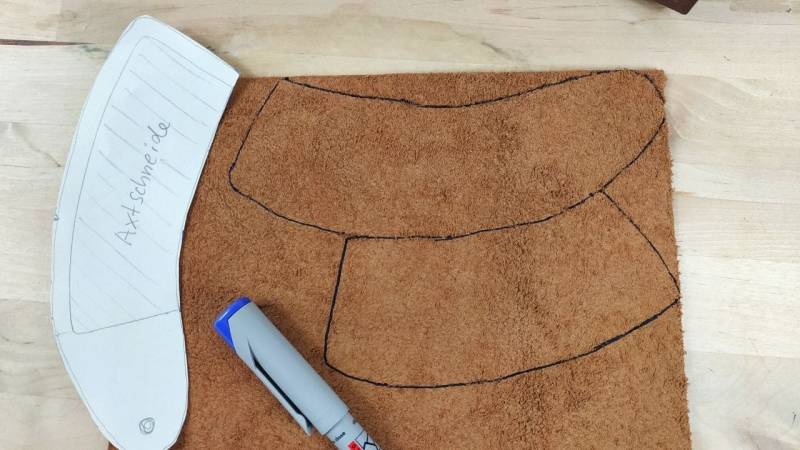
Then cut out your leather pieces.
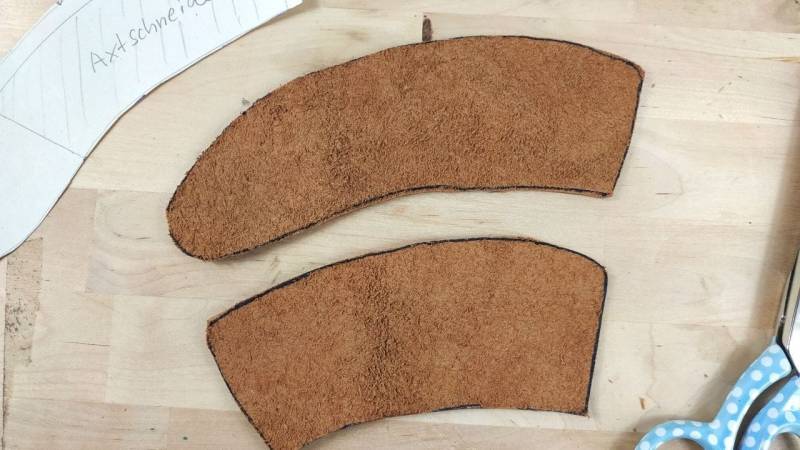
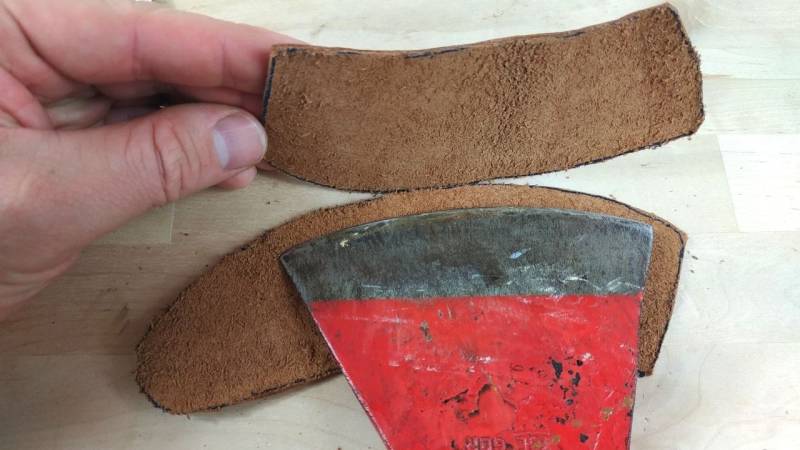
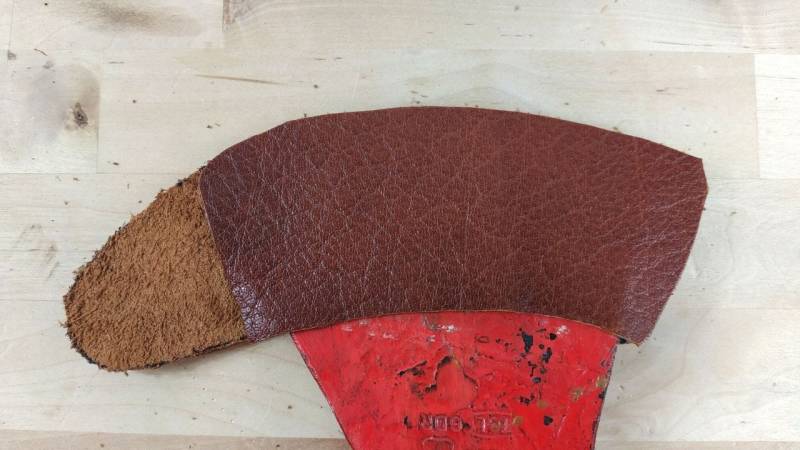
Step 3: Sewing leather pieces together
Now let's move on to sewing. You sew the right side and the top side together - that's it!
Prepare your sewing needle now. Thread the needle with a length that is three times as long as your desired stitch.
Here is an important point to note: One side of the needle of the sewing awl has a groove. The thread coming from the sewing awl runs through this groove.
Make sure you assemble the thread, needle, and sewing awl correctly.
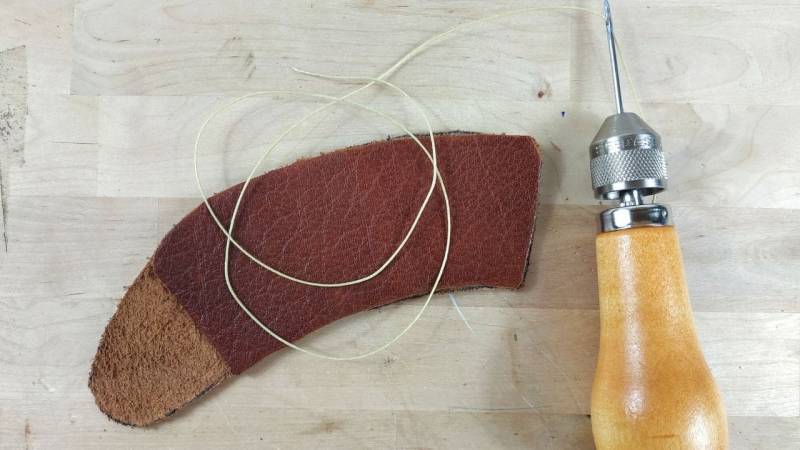
Start with the first stitch by inserting the needle through the bottom right of the leather. The first stitch is executed differently than all subsequent stitches.
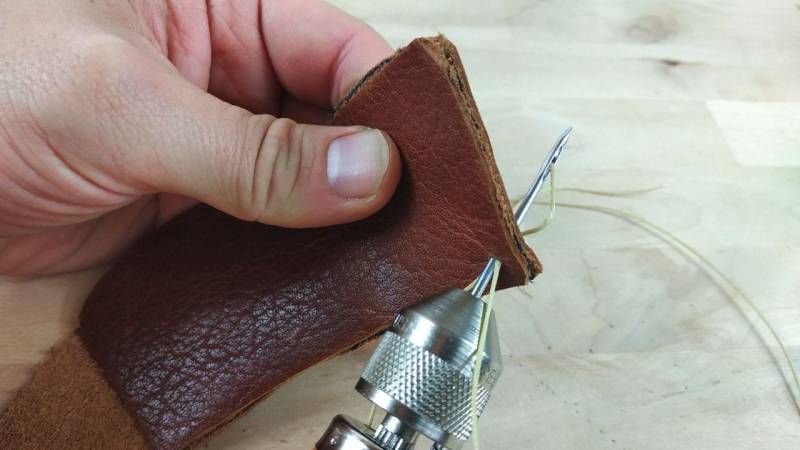
Then you pull the needle back slightly, creating a loop.
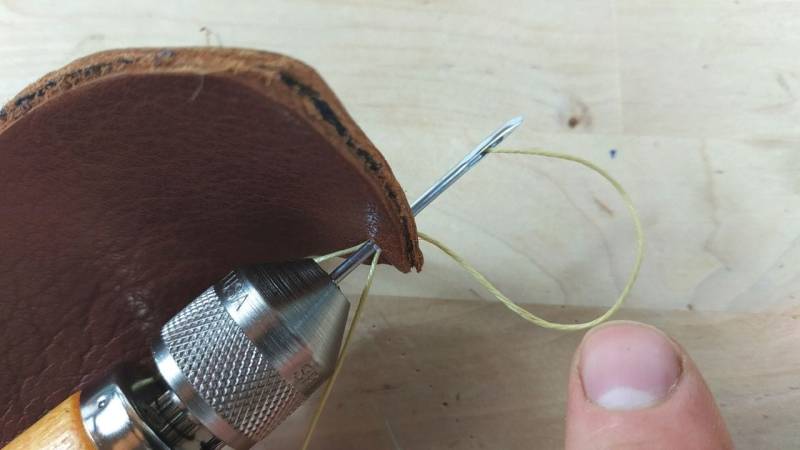
Then pull on the loop to thread the remaining thread completely. The image below shows what it should look like.
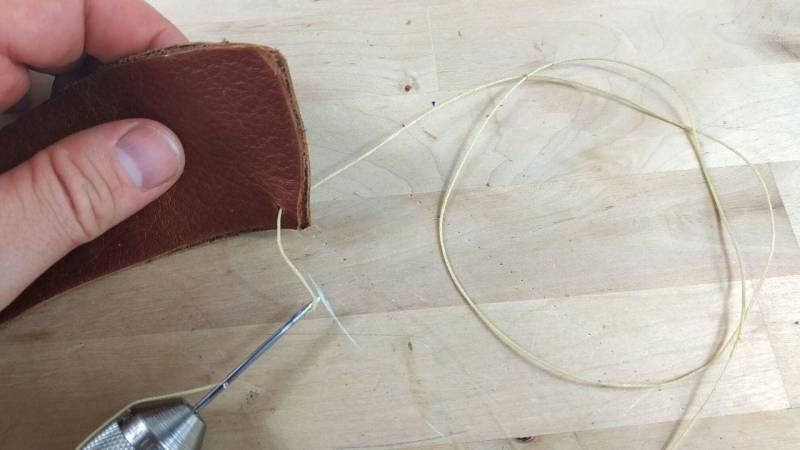
This was the first stitch. Now you continue with the second stitch.
Find the spot for the second stitch, approximately 0.5 to 1 cm away from the first stitch.
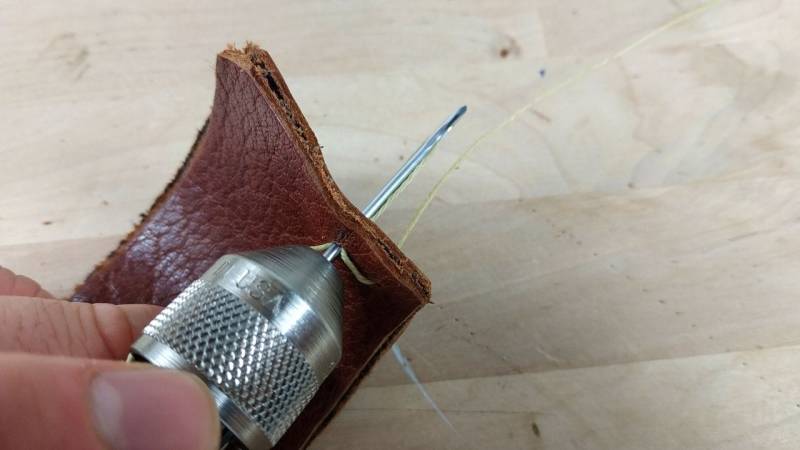
Pull the needle back slightly to create a loop. Now insert the remaining thread through this loop.
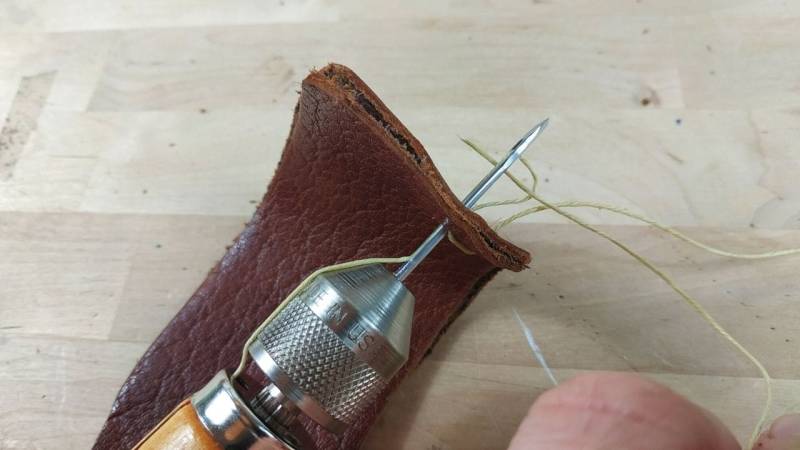
Then pull the needle out of the hole towards you and your second stitch is done. Secure the seam a bit so that no loose threads are visible. Pull both threads together a bit on both sides.
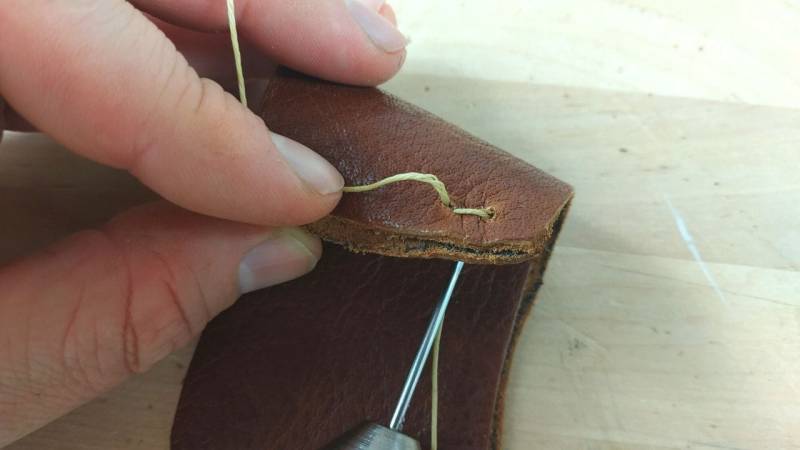
Keep sewing like this and in the end, your axe leather sheath will be stitched together.
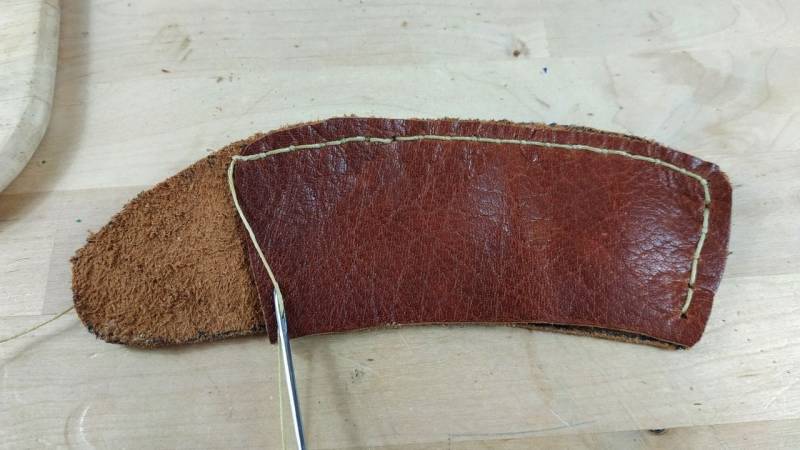
Step 4: Closing the Seam
With this method, the seam can be wonderfully closed. Proceed as follows:
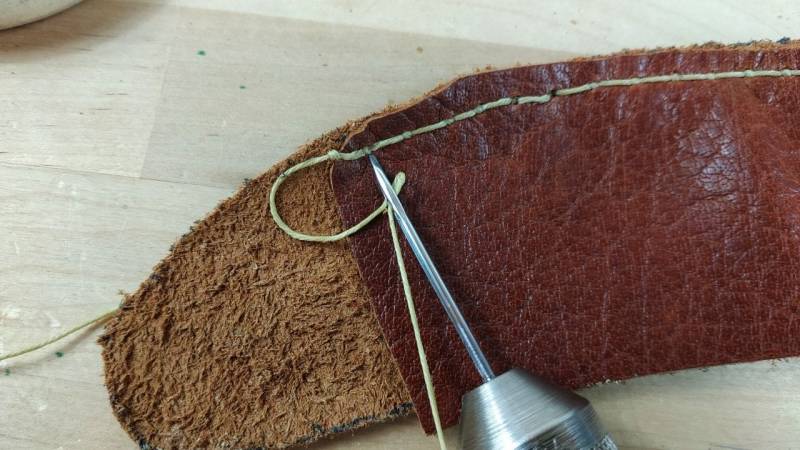
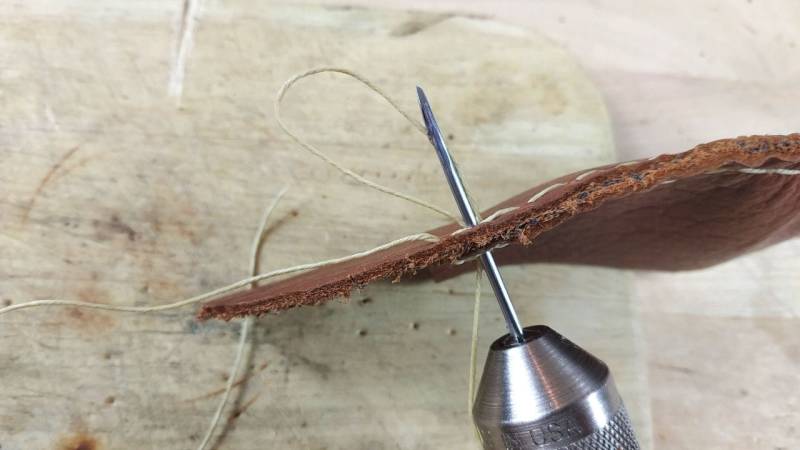
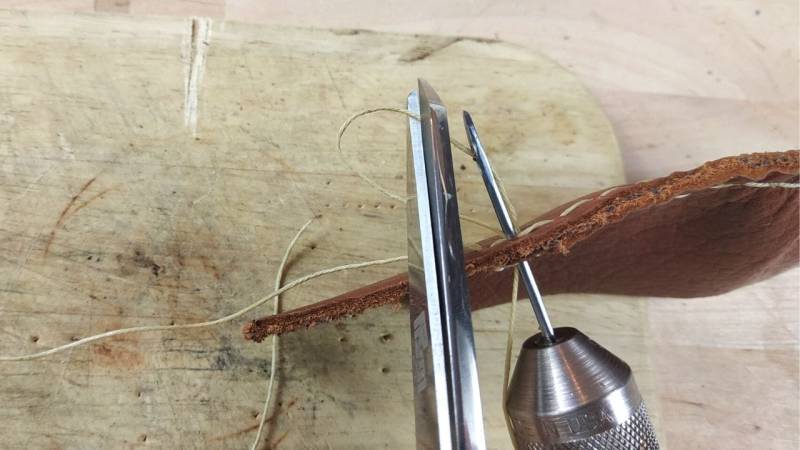
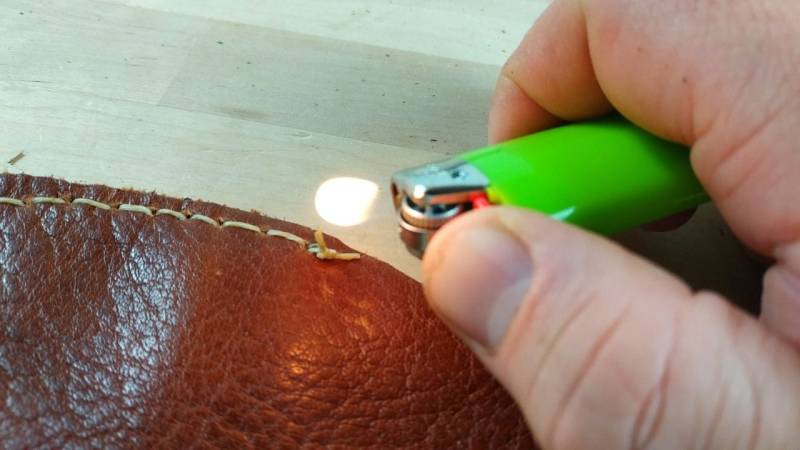
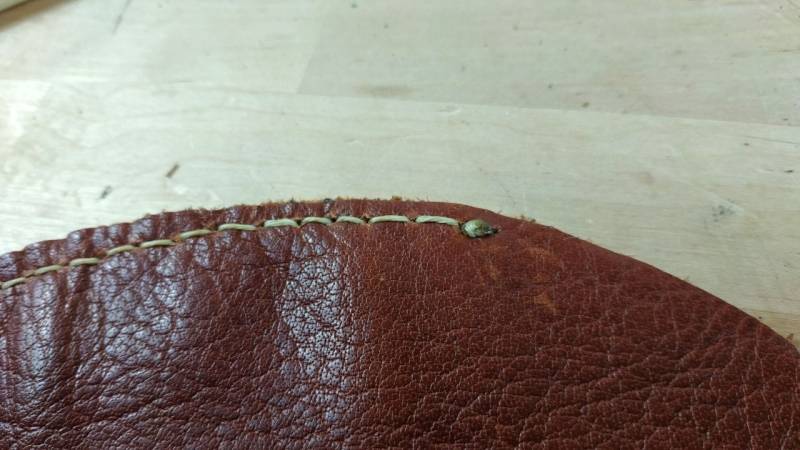
Step 5: Attach snap buttons
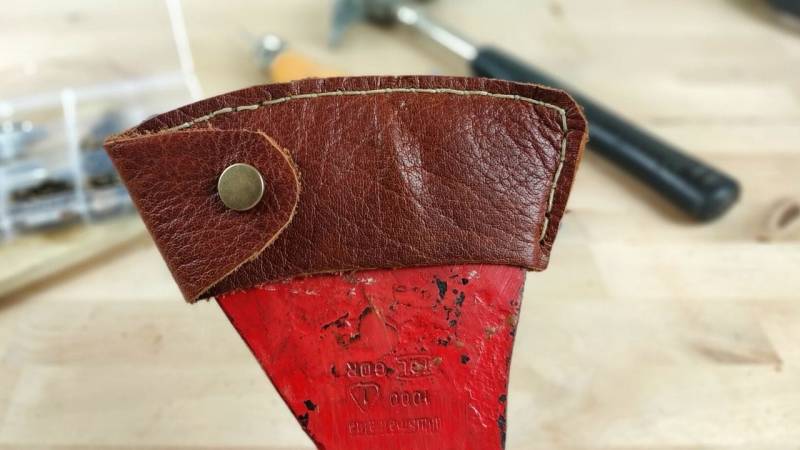
Sewn together, your axe leather sheath already looks great.
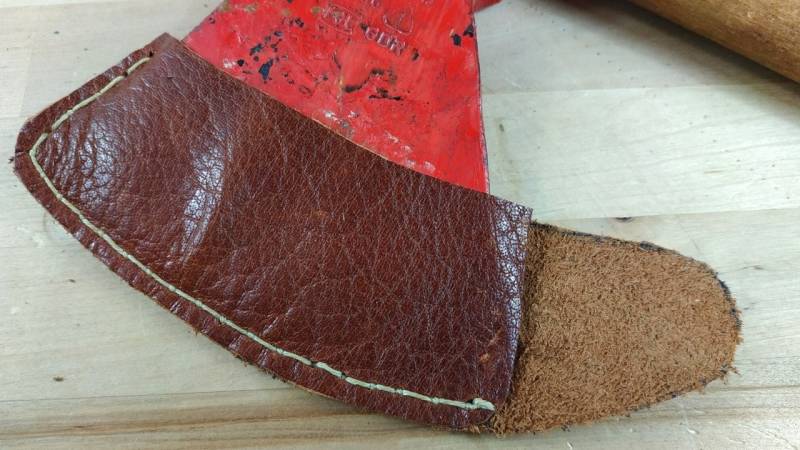
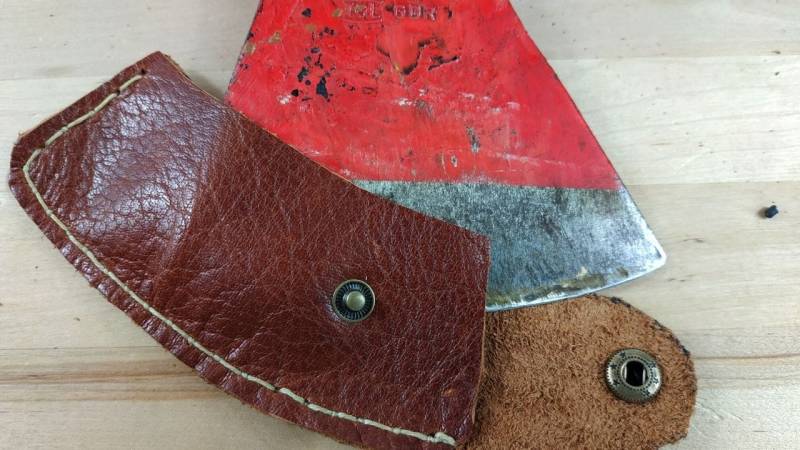
Now attach the snap buttons. You can find instructions on how to do this with your snap buttons.
Read also
The most common stitch patterns for sewing for buckskin – Discover which seam techniques and stitches are best suited for soft buckskin - I will show you 5 common hand stitches from natural crafting.
Done - your own axe leather sheath is finished
Pat yourself on the back. You did it. Your (maybe first) MYOG project is finished.
Possibly, the leather sheath may not look like mine. But that's not a problem. Your enemy in such projects is your demand for perfection.
Put perfection aside. The most important thing is that you start. This way you gather experiences and become better and better.
Optimize your leather sheath
There are a few more tricks I want to share with you:
- cut uneven edges with a sharp pair of scissors or round off the corners
- smooth the edges of the leather by running a rounded object firmly along the edges
- use leather grease to maintain your axe sheath (or animal fat)
If you're looking for more MYOG projects, then check out my list of Bushcraft ideas. Whether it's a leather bag, Bushcraft chair, Roycraft carrying frame, and so on – there's definitely something for you.


Author of the guide
Martin Gebhardt
Hey, I'm Martin. On my blog, you will learn the basics and numerous details about living in the wild. I think survival, bushcraft and the good life in nature are the keys to happiness. Find me here on Instagram or on YouTube. You can find more about my mission on the About Me page.
Since this is a gear guide, here ...
🤝8 reasons to trust my recommendation
-
Practical Experience: I have tested most of the products I recommend under extreme conditions myself.
-
Independence: As a wilderness mentor, I am not tied to any specific brands - this means my recommendations are unbiased.
-
Expertise: My many years of experience allow me to understand the intricacies and details of various products that a layperson might overlook.
-
Target group understanding: I understand the needs and challenges of outdoor enthusiasts, from beginners to seasoned experts.
-
Quality focus: I attach great importance to quality and longevity. These are characteristics that are crucial in the wild.
-
Clear communication: I try to explain the pros and cons of each product clearly and understandably so that you can make an informed decision.
-
Currentness: I always keep my guides up to date and adapt them to new findings or products.
-
Community Feedback: I work in wilderness schools, teach courses myself, attend courses and am active in various outdoor and survival communities and therefore integrate the feedback and experiences of others into my recommendations.
So when I introduce the best survival knives or flashlights, you can be sure that every recommendation is based on solid experience and extensive knowledge.
Was this guide helpful?
24 people found this guide helpful.
5.00 out of 5 points (24 Ratings)
Comments (0)
This post may contain affiliate links. So if you click on the links and make a purchase, I will receive a small commission at no additional cost to you. Click here, to learn more about it.


