How to build a tripod for Bushcraft and Survival (+Video)
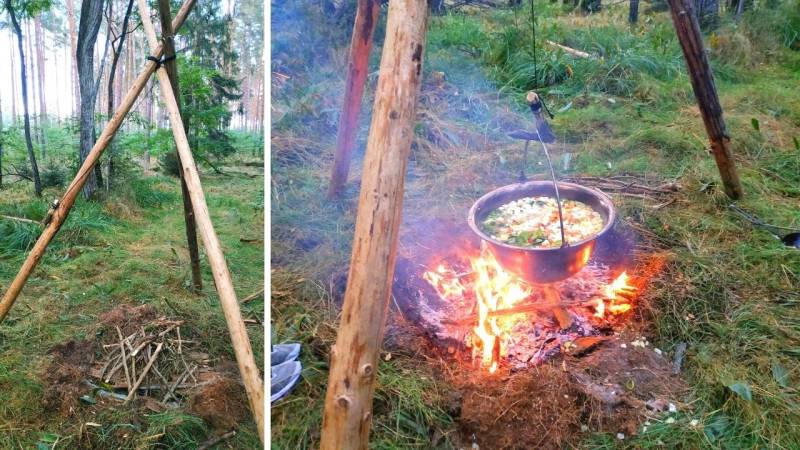
The versatile tripod - here's how to build it! In this guide (+video) you will learn how to quickly construct this fundamental bushcraft structure.

From Martin Gebhardt. Check out my “About me” page.
👉 The key facts from this guide
- You need three equally long branches, some Paracord or a rope, and a knife to build a tripod.
- Place the branches as close together as possible where you want to tie them together.
- Tie a bowline knot around the first branch and then weave the branches together alternately until you think it is stable enough.
- After weaving the branches 3 to 5 times, wrap the gaps between the branches twice and then knot the end of your cord.
- Place the tripod so that it stands stable. The further apart you place the branches, the more stable the construction will be.
- The tripod is versatile. You can use it for cooking and sitting or use it for shelter, tables, and clothes racks.
The tripod is THE fundamental Bushcraft structure.
Let me make it brief:
It is extremely advisable that you can build the structure yourself.
Now you will learn how to build a tripod.
With this knowledge, you can build structures for cooking and sitting or use them for shelter, tables, and clothes racks.
These are the things you need for materials and tools:
- Find three equally long branches
- Take some paracord or any string
- Get your knife ready
Note: Keep in mind that the height decreases when you set up the tripod.
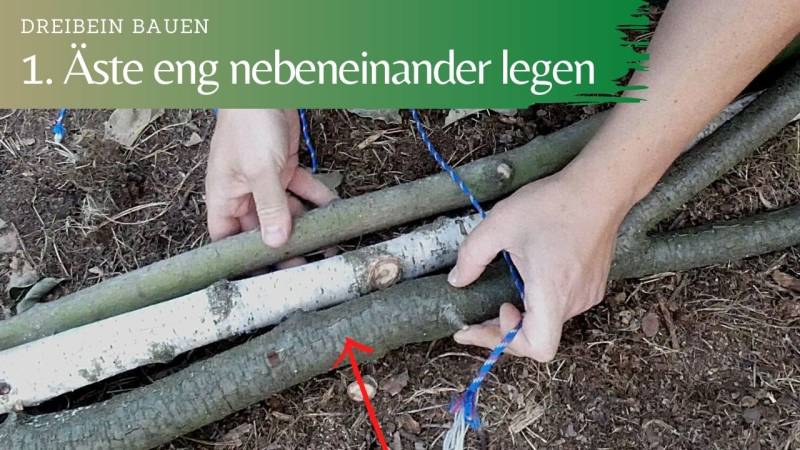
Step 1: Lay the branches next to each other
Place the branches as close together as possible at the point where you want to tie them together.
It is important that the spaces between the branches are small and the branches are next to each other.
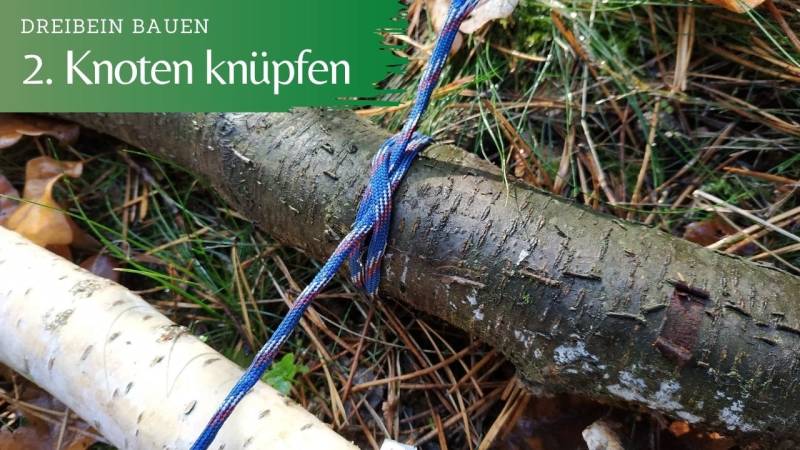
Step 2: The first knot
Tie a sheet bend over the first branch. In my article "6 significant knots for Bushcraft and Survival" you can learn the essential knots.
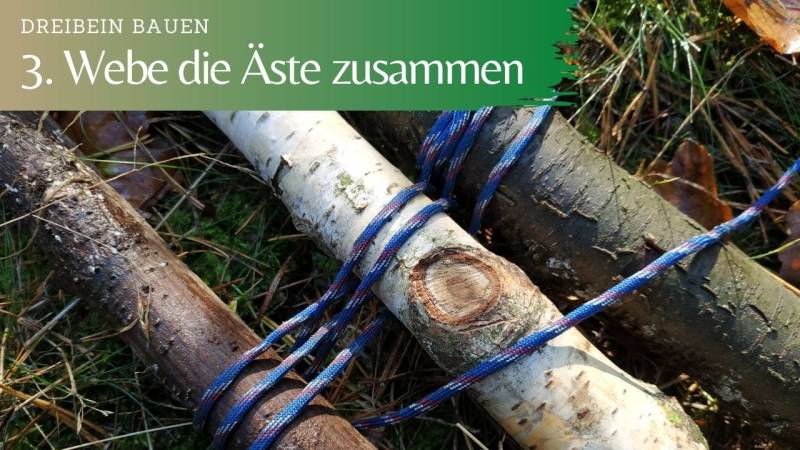
Step 3: Weave the branches together alternately
Do this three to five times until you think it's enough and stable.
When doing this step, you must alternately lay your string under and then over the branch. Tighten everything well.
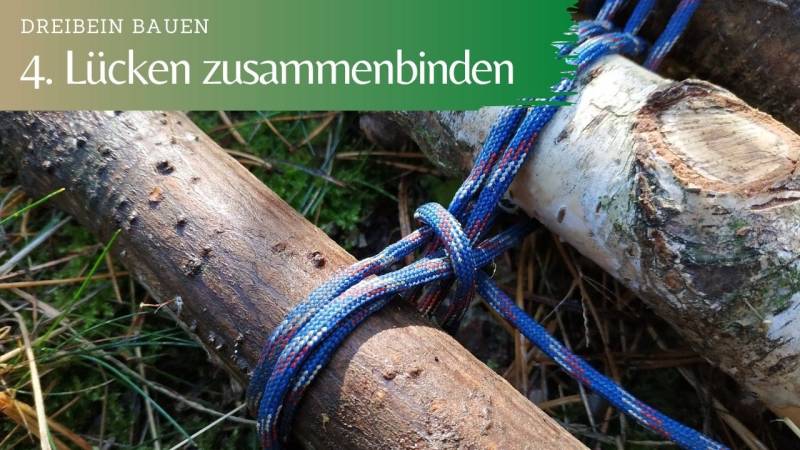
Step 4: Tie the gaps together
After weaving the branches 3–5 times, wrap the gaps between the branches twice.
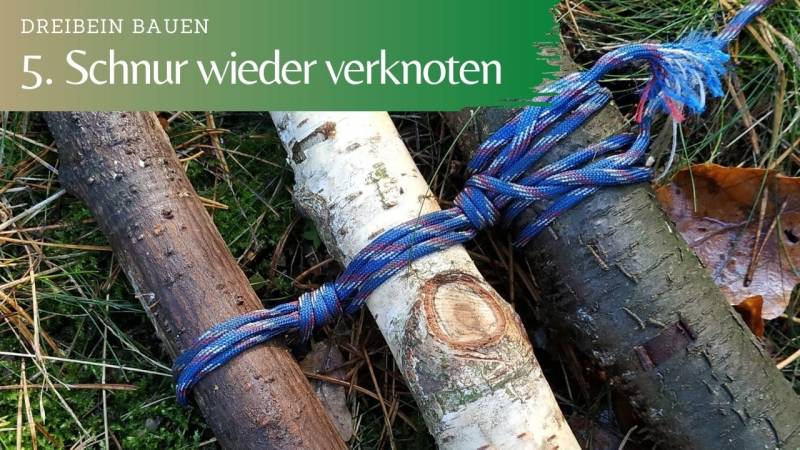
Step 5: Tie the string again
Once all gaps are tied, knot the end of your string.
Step 6: You're done
Now place the tripod so that it stands stably. The further apart you position the branches, the more stable the construction becomes.
The video on the tripod
In the video, I show you exactly how to build your own tripod.
Watch. Do it yourself. Learn something.
Conclusion: The tripod is incredibly versatile
I love the tripod because it is so versatile.
You can even hang a hammock between two tripods and are not dependent on trees.
My tip for you: Go out and build your own tripod right away.
How do you like the instruction? Do you also build a tripod from time to time?
Are you looking for your next bushcraft project? Then build


Author of the guide
Martin Gebhardt
Hey, I'm Martin. On my blog, you will learn the basics and numerous details about living in the wild. I think survival, bushcraft and the good life in nature are the keys to happiness. Find me here on Instagram or on YouTube. You can find more about my mission on the About Me page.
Was this guide helpful?
31 people found this guide helpful.
4.88 out of 5 points (32 Ratings)
Comments (0)
This post may contain affiliate links. So if you click on the links and make a purchase, I will receive a small commission at no additional cost to you. Click here, to learn more about it.


