How to Build a Wooden Hammer for Bushcraft & Survival (+Video)
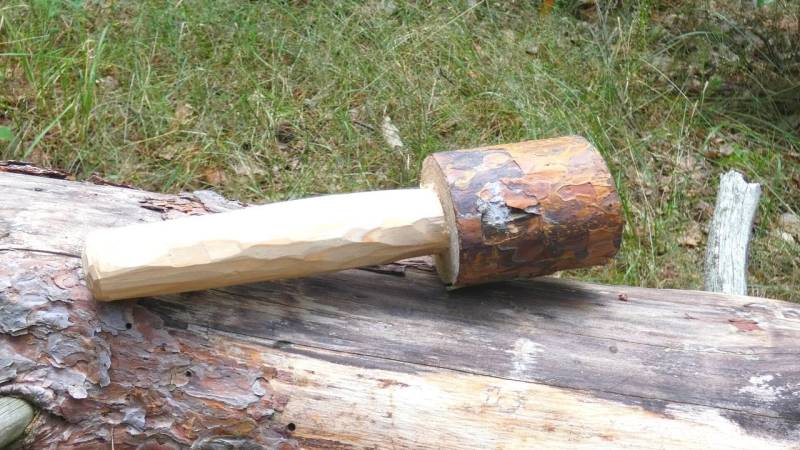
A bushcraft wooden hammer is useful, and it's incredibly fun to work with. You can find out how to build one yourself in this picture guide.

From Martin Gebhardt. Check out my “About me” page.
👉 The key facts from this guide
- Search for a thick branch in the forest that is at least 30 cm long and 8-10 cm in diameter to build your wooden hammer.
- Saw a "stop cut" around the tree trunk to shape the head of the hammer. Leave the middle of the tree trunk untouched.
- Shape the handle by cutting or chiseling away excess wood. The "stop cut" prevents accidentally splitting off the head of the hammer.
- Improve the handle by removing rough edges or splinters. A final layer of linseed oil or beeswax protects the wood and keeps your wooden hammer functional for years.
- A bushcraft wooden hammer can be quickly made. As a beginner, plan for about 15 to 30 minutes. Experienced Bushcrafters need about 10 minutes.
- The wooden hammer is a versatile tool in the camp. You can use it for splitting wood, driving in connections, stakes, and wedges, scoring wood, felling a tree with a knife, and scaring away wild boars.
I still remember the musty garden shed of my grandparents very well.
My grandpa had all his tools hanging on the wall there, and there were also two wooden hammers hanging. He used them regularly.
Eventually, I was allowed to use them too, and I imitated my grandpa's work. As a child, it was a huge joy for me to hammer with them.
And it still is today. As a Bushcrafter, I believe that the wooden hammer belongs in every bushcraft camp.
My goal today is to show you how to make a wooden hammer for yourself or as a gift.
The bushcraft wooden hammer is a versatile tool in the camp
Let's get straight to the point: I love my wooden hammers. I don't know why, but maybe there's an "I-like-to-hammer gene". ;-)
You need it, for example, for:
- Batoning (splitting wood, see my tutorial)
- Hammering connections together
- Driving in tent pegs
- Driving in wedges to split large logs
- Cutting notches into wood (here's my tutorial on notches)
- Felling a tree with a knife
- Scaring away wild boars
Such a wooden hammer is not only useful, it’s also really fun to work with.
While a wooden hammer can be made as big as you can find tree trunks, the following instructions show a hammer suitable for medium to light hammering.
The video on the bushcraft wooden hammer
Step 1: Finding a wooden block
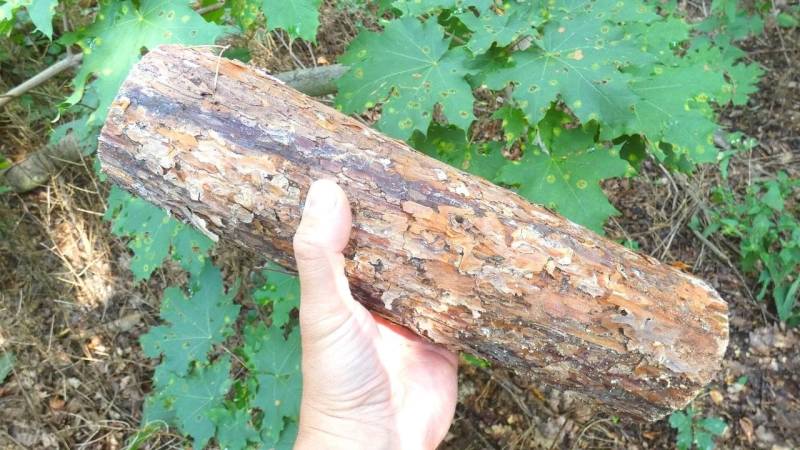
Go into the forest and find a thick branch. Then saw it to size.
My recommendations are:
- at least 30 centimeters long
- at least 8 to 10 cm in diameter
Please do not cut down live trees for your projects unless you are in a survival situation. According to German law, you are not allowed to cut down live trees (of course, there are exceptions). In my guide "Can I collect branches and wood in the forest?" you can find all the information.
Step 2: Sawing a "Stop Cut"
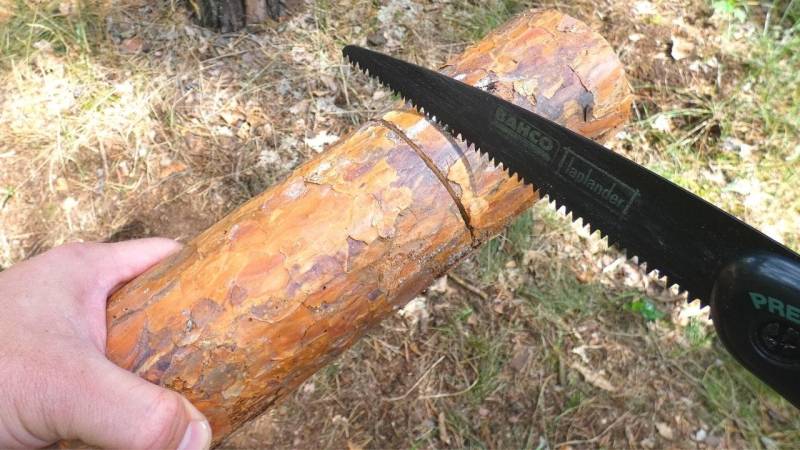
The second step is to saw a so-called "stop cut" to form the head of the hammer.
Saw around the tree trunk once, leaving the center of the tree trunk untouched (I usually saw 1.5 to 2 cm deep). The lower area ultimately creates the handle of the hammer.
Step 3: Shaping the handle
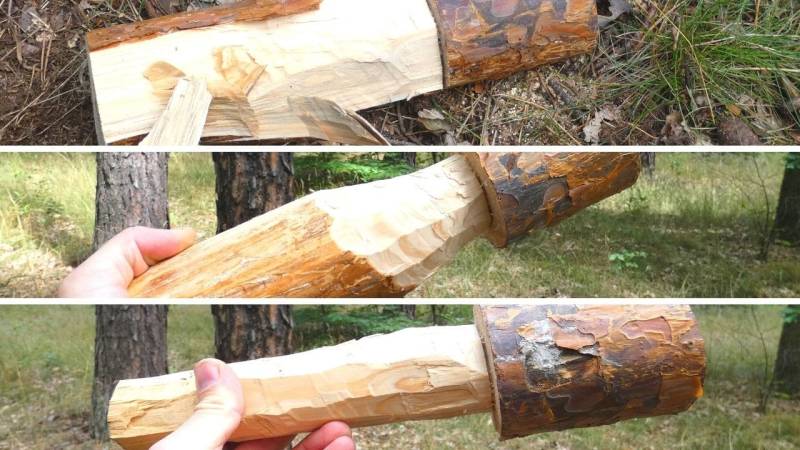
The excess wood from the handle is now cut off or chipped away in this step.
Please note that the removed wood is gone. Once removed, it's removed. Start by removing less wood than you may think is necessary. This is particularly important if this is your first hammer.
The "stop-cut" prevents you from accidentally splitting the head of the hammer.
Step 4: Improve the handle
Once the handle approaches your desired diameter, remove rough edges or splinters.
A final layer of linseed oil or beeswax protects the wood and keeps your wood hammer functional for years to come.
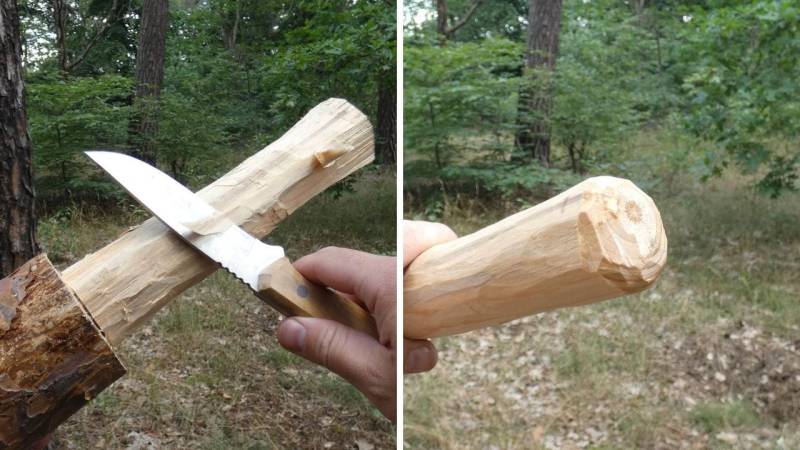
Already finished?
Yes, of course. A bushcraft wood hammer is quickly made. As a beginner, you should plan about 15 to 30 minutes. Experienced bushcrafters need about 10 minutes.
But: Don't stress. Haste is never a good friend in the woods.
Try to enjoy the project. The time in the woods, the peace, and the great result in the end.

Summary
The wood hammer is a great tool that reminds me not all Gifts need to be bought. Some of the best tools are self-made.
Looking for more building projects for your camp?
- Build a tripod - a very useful construction
- Build a small table
- Build a fishing spear


Author of the guide
Martin Gebhardt
Hey, I'm Martin. On my blog, you will learn the basics and numerous details about living in the wild. I think survival, bushcraft and the good life in nature are the keys to happiness. Find me here on Instagram or on YouTube. You can find more about my mission on the About Me page.
Was this guide helpful?
11 people found this guide helpful.
5.00 out of 5 points (11 Ratings)
Comments (0)
This post may contain affiliate links. So if you click on the links and make a purchase, I will receive a small commission at no additional cost to you. Click here, to learn more about it.


