![Build your own survival water filter [Survival Basics] Build your own survival water filter [Survival Basics]](https://survival-kompass.de/img/artikel/anleitung-survival-wasserfilter-selbst-bauen.jpg)
Build your own survival water filter [Survival Basics]
👉 The key facts from this guide
- Materials: You need a vessel, sand, fabric, cellulose, and charcoal.
- Construction: The vessel is filled with the materials in layers, with each layer separated by fabric.
- Function: Water is poured into the vessel and flows through the layers, filtering out dirt and bacteria.
- Alternatives: Alternatively, a seepage pit or fabric filter can be used.
- Water disinfection: The filtered water should always be boiled to kill all germs and bacteria.
- Tips: To improve the taste of the water, oxygen can be added by beating the water or pouring it from one vessel to another.
You surely know: water is vital.
If you have ever experienced real thirst, you know what I mean.
The water found and collected from a puddle, a pond, or a stream is not drinkable in its pure form.
You can expect bacteria, viruses, and impurities. Therefore, you must filter your water.
I have never suffered from thirst and do not want to experience it either. To ensure we are all well-prepared for it, today you will learn how to build a simple water filter.
Moreover, I will also show you two other ways to filter water at the end.
Why do you need to purify water?
Alone in the wilderness. You are plagued by thirst.
Finally, you see a small stream. Magnificent!
And in an absolute emergency, you will drink any water. I assure you.
And you will take care of the health consequences afterward.
The consequences can be severe, such as diseases like typhoid or chemical poisoning.
In areas with many people, it is particularly dangerous because the water is usually dirty.
Examples:
- If you are in a village with a large river, you can consider the water drinkable
- If you are in a large city with a river, the water is guaranteed to be undrinkable
However, clear water from a large river is not always a proof that it's clean. Dangerous chemical compositions are not visible.
As a comparison: a muddy rain puddle in the forest is more drinkable than the largest German rivers, such as the Rhine, the Elbe or the Oder.
Therefore, I recommend always treating water beforehand! I will now show you how to build your own water filter in just a few steps.
The container filter - filtering water with sand, charcoal, fabric, and cellulose
As the name suggests, you need a container.
Use a sleek and tall container, such as a plastic bottle or a bamboo tube. It is best to hang the container and place a collecting vessel underneath.
Cut out the bottom of the plastic bottle to create a large opening. Drill a small hole in the lid. The hole should be small enough for the water to drip out.
At the large opening, you fill in the dirty water. The water then flows through the respective layers of the filter, leaving behind the dirt particles.
It ideally stays in the filter longer until it has completely seeped through.
Here you can see the structure of the plastic bottle:
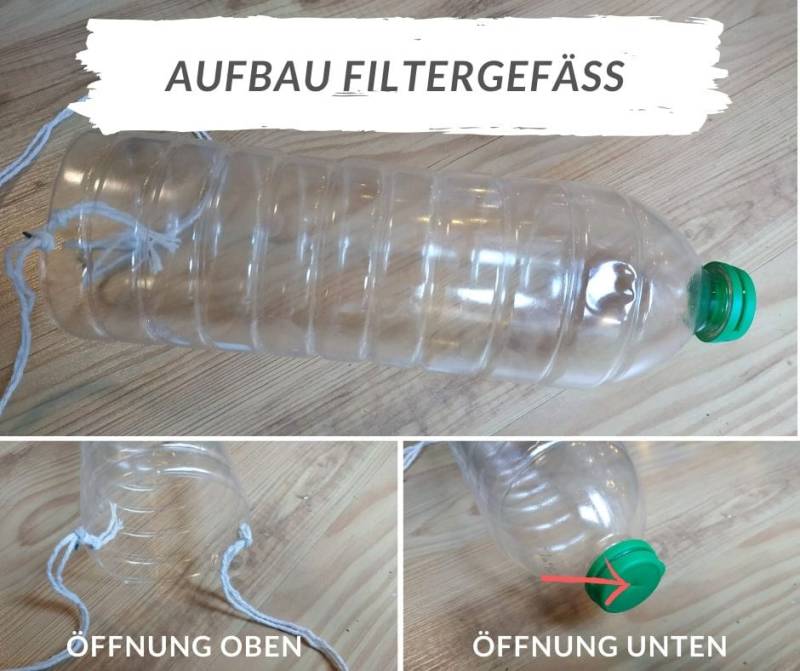
The bottle has a rope at the top so that you can hang it up.
Equipping the water filter with the filter material
What material do you need:
- Sand: removes dirt/particles
- It can be found in nature
- Fabric: removes dirt/particles
- from your clothing
- Cellulose: removes dirt/particles
- from tampons, cotton, tissues, or gauze
- Charcoal, powdered: kills bacteria through chemical cleaning
- from charred wood from your campfire
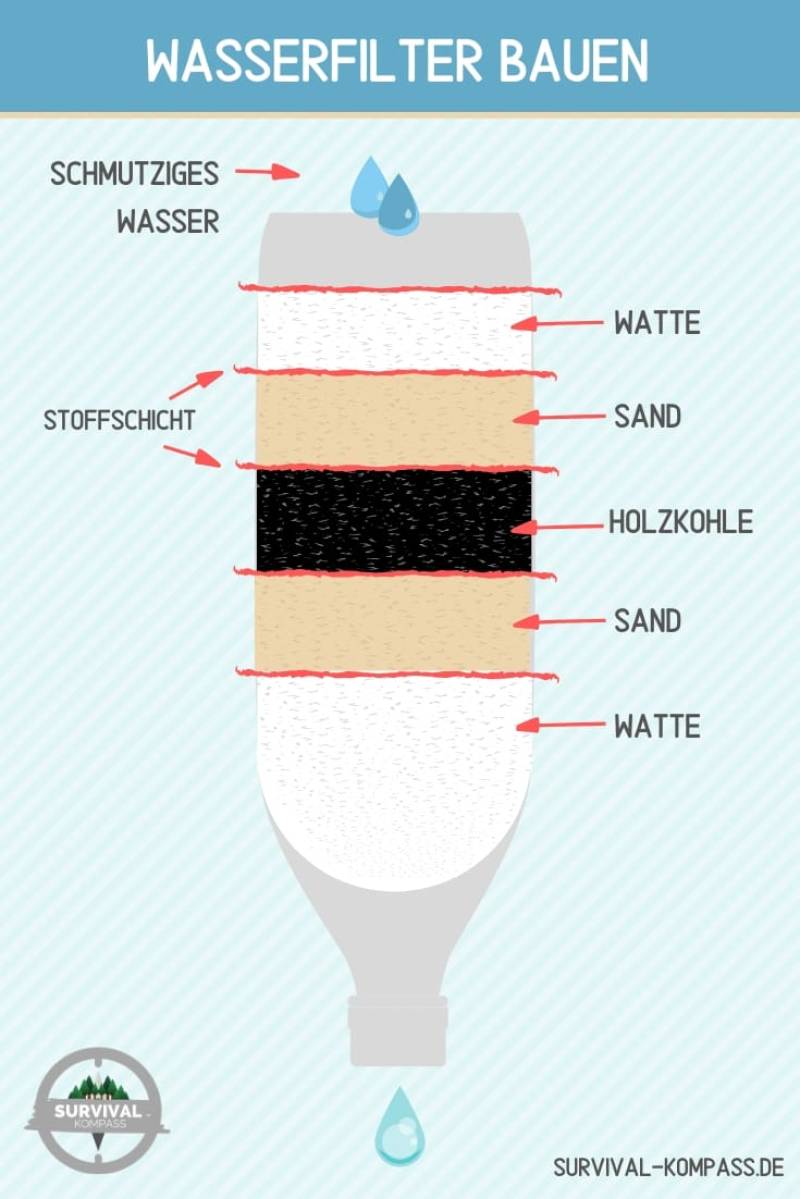
You fill the material from bottom to top. You separate the layers with a piece of paper or fabric.
- Thin layer of fabric
- Cellulose
- Thin layer of fabric
- Sand
- Thin layer of fabric
- Charcoal
- Thin layer of fabric
- Sand
- Thin layer of fabric
- Cellulose
You can see the structure even more clearly in the image:
If you have built everything correctly, hang the filter (e.g., on a tripod) and pour the murky water into it.
After a while, it will drip out.
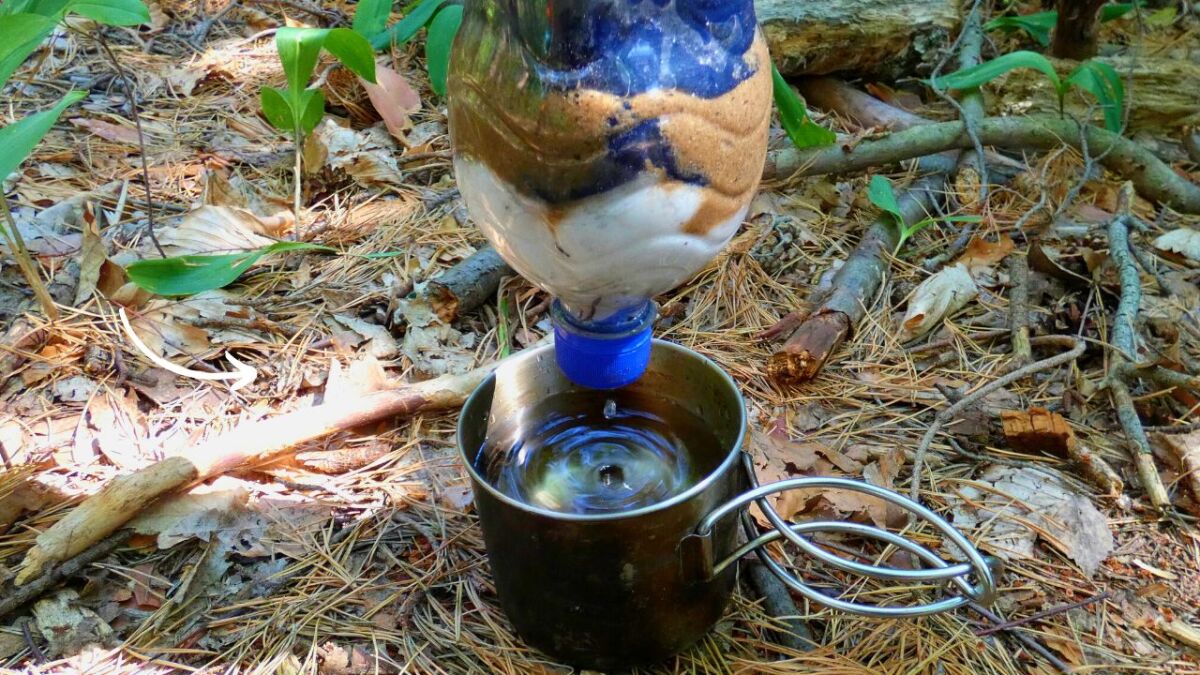
You collect the clean water in a container.
Look how clear it is!
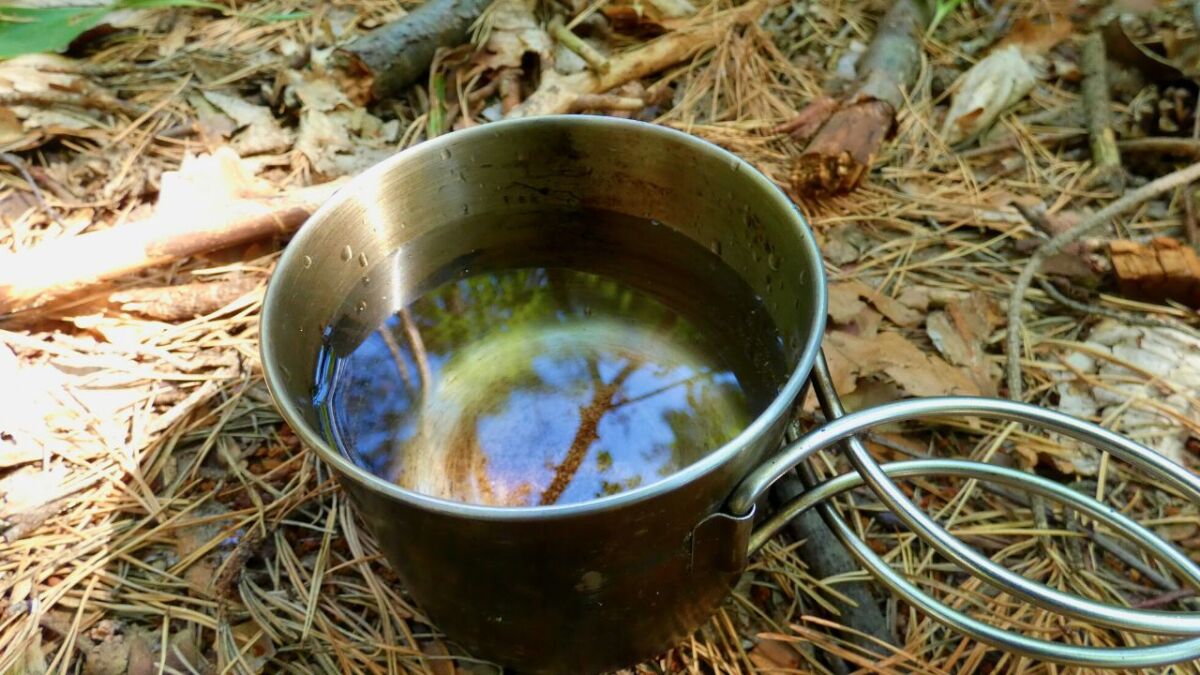
And in the end, I'll show you the difference between before and after again. Take a look at how clear the water is at the end.
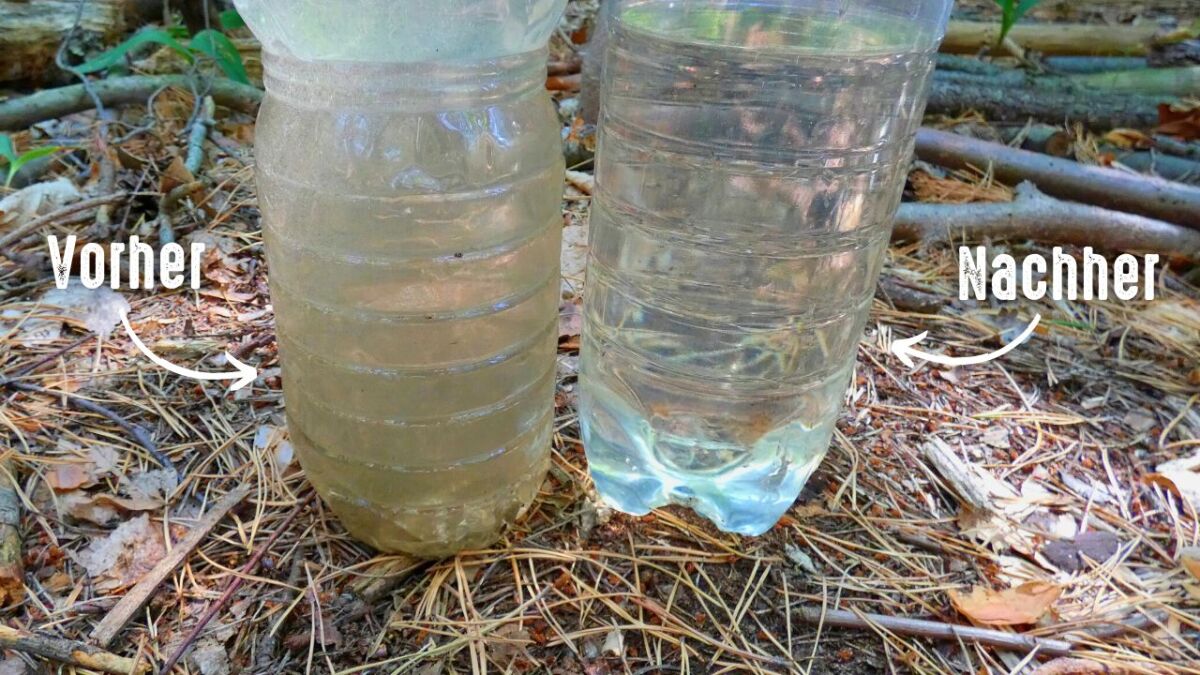
Note: Be sure to boil the filtered water to kill all germs and bacteria.
Also read
The 7 enemies to beware of when facing a survival situation – Which enemies should you be aware of when facing a survival situation? Learn how to avoid these survival mistakes and survive.
Alternatives to the container filter
There are filters that are even easier to make than the container filter. I'll show you which ones they are.
The Leach Pit / Sand Pit
A simple filter that is especially suitable for bushcrafting. All you need is a body of fresh water nearby, such as a river or lake.
Here are the instructions:
- Dig a hole at a distance of one to two meters from the body of water.
- Dig deep enough so that the hole is deeper than the water level of the body of water.
- Over time, water will seep through the earth into your pit.
- Carefully scoop out the first water and pour it away (it will still be too muddy and dirty).
- Let the water rest and see if it becomes clearer.
- Afterward, you can drink it.
But be careful, the seepage pit only filters out suspended particles through the earth and sand. This method does not provide protection against chemical contamination, and you cannot remove salt from saltwater with it (here is my guide to desalting seawater).
The Fabric Filter as a Water Filter
If you don't have any other materials, you surely have a trouser leg or a sleeve with you.
With this fabric, you can filter your water and remove suspended particles.
Just make sure the fabric is tightly woven. The more dirt particles you filter out, the better.
Water Purification
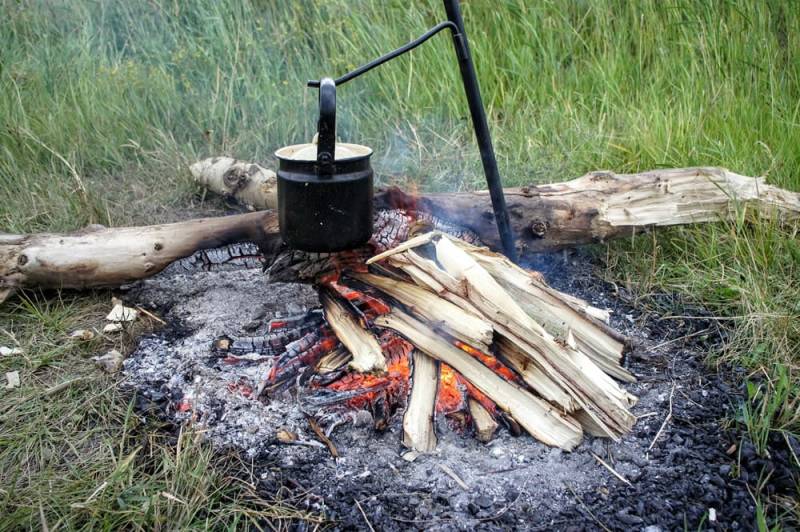
All filters have one thing in common: you must boil the water after filtering it.
One minute at 70 degrees is enough to kill common bacteria and parasites.
Even if the water looks clear and smells good after filtering, there may still be bacteria in it. You can't see or taste them.
Boiling is a safer method. Control yourself and start a fire, even if you're extremely thirsty. This will keep you from getting diarrhea and vomiting.
If you don't have a pot, there are alternative ways to boil water.
Here are some of my guides on fire:
- How to start a fire? [in 10 steps to success]
- How to quickly and easily start a fire with a fire steel
- What is a bow drill, and how does it work?
Tricks and Tips for Filtered Water
Enhance your water even more for better taste and health benefits.
Add Oxygen
Filtered, boiled, and stagnant water doesn't taste good. It no longer contains oxygen.
You can noticeably improve the taste by adding oxygen to the water.
You can do this through these techniques:
- Hit the water with a stick or a rod
- Pour the water multiple times from one container to another
Is boiled water distilled water?
After filtering and boiling, you have boiled water - not distilled water.
Boiled water is not the same as distilled water. Water that has been boiled still contains minerals and trace elements.
In distilled water, electrolytes, minerals, and trace elements are missing. These include important substances such as sodium, potassium, calcium, and magnesium.
Speaking of distilled water: The rumor that distilled water is toxic persists stubbornly, but it is false.
In general, it is not a problem to drink distilled water for several days.
How to add minerals back into distilled water is explained in the article "How to Mineralize Distilled Water?".
Is It Dangerous to Drink Boiled Water?
No, it is not harmful to drink only boiled water.
Summary
To remove impurities, you should always filter your water. A simple water filter that you can build yourself in nature can help you with this.
Be sure to kill bacteria and parasites. To achieve this, you must boil the water for at least one minute at 70 degrees.
As a result, you will have drinkable water, which you should ideally supplement with minerals and trace elements.
How did you like the tutorial? Have you already built such a water filter yourself?
Or are you now eager to try it out yourself? Share your opinion with me and we can exchange ideas.


Author of the guide
Martin Gebhardt
Hey, I'm Martin. On my blog, you will learn the basics and numerous details about living in the wild. I think survival, bushcraft and the good life in nature are the keys to happiness. Find me here on Instagram or on YouTube. You can find more about my mission on the About Me page.
Was this guide helpful?
104 people found this guide helpful.
4.92 out of 5 points (106 Ratings)
Comments (0)
This post may contain affiliate links. So if you click on the links and make a purchase, I will receive a small commission at no additional cost to you. Click here, to learn more about it.


