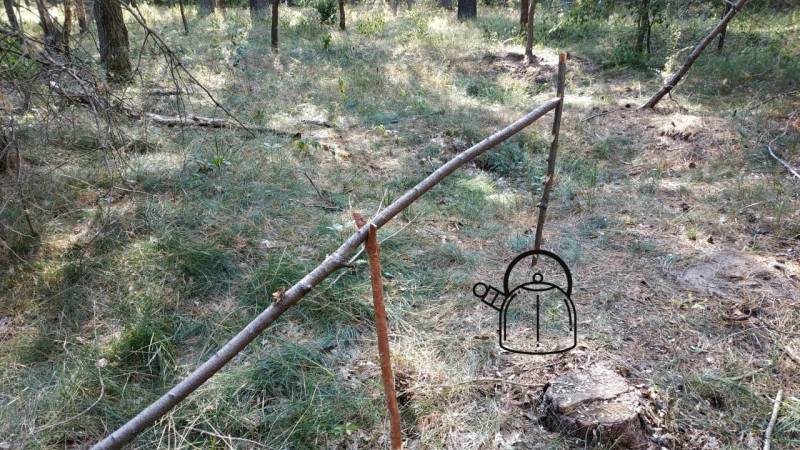
How to build a pot hanger (+video)
👉 The key facts from this guide
- A variable pot hanger is a useful tool for optimal cooking in your bushcraft camp.
- It allows you to control the heat supply and ensures even heating of your cooking pot.
- For the construction of the pot hanger, you need a long stick, a small stick with handle notches, and optionally a forked branch to support the long stick. The tools required are a knife and an axe.
- The heat supply during cooking can be regulated by the different handle notches. With practice, you can set up your pot hanger in about 10 minutes.
Bushcraft also means culinary skills.
So that you can cook optimally in your camp, today you will learn how to make a variable pot hanger.
Why a pot hanger makes sense
The best way to cook is over a fire and not in or near the fire.
This offers the advantage that the heat comes from all sides, and you can control the heat supply. Even if you only place your pot on the edge of the fire, there is no even heating.
With a pot hanger, you can adjust the required heat supply as you need it. The pot hanger works like a normal stove. Whether hot, medium or lukewarm - everything is possible.
With this, you are optimally equipped in your bushcraft camp and can prepare delicious food.
The video about hanging pots
Watch the video about the pot hanger here. There you will learn all the details that are in the article.
What you need in terms of materials and tools
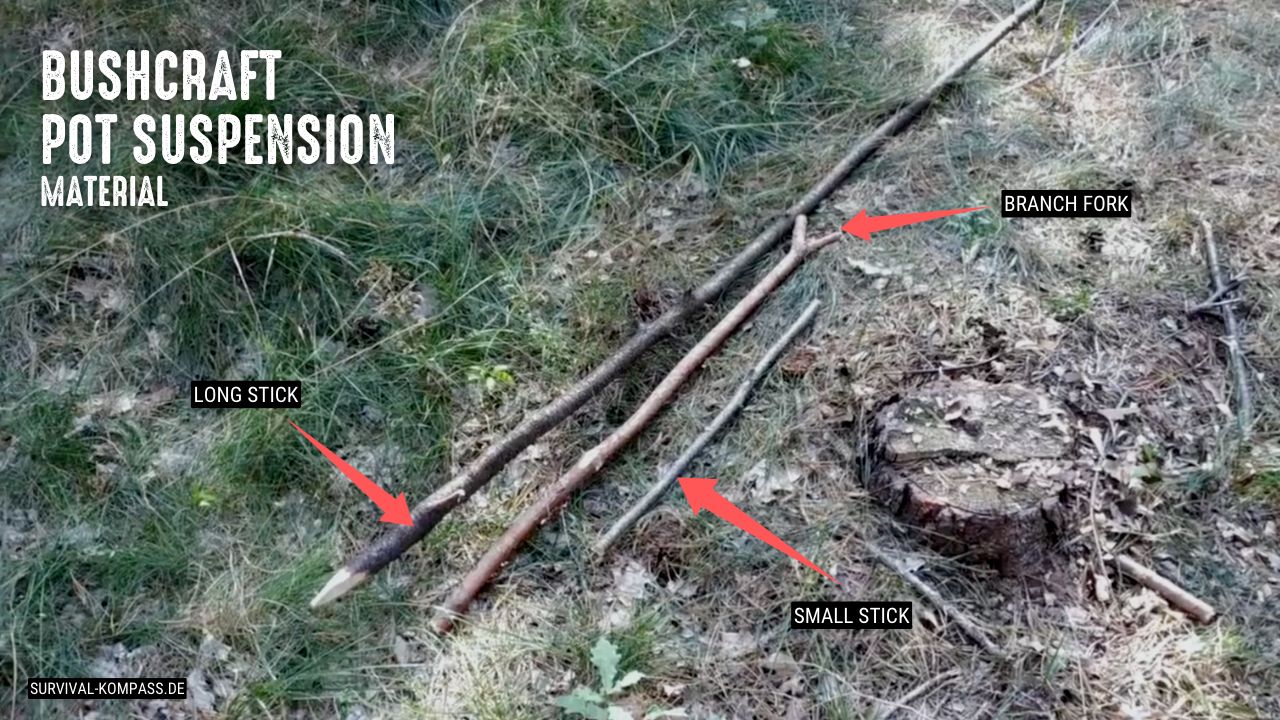
You will need the following materials:
- a long stick, on which the small stick hangs
- a small stick with handle notches, where the pot will hang later
- a branch fork for supporting the long stick (optional)
You will need the following tools:
- Knife
- Axe
Do you have everything ready? Let's get started!
How the structure works
I will now briefly and concisely describe how you set everything up.
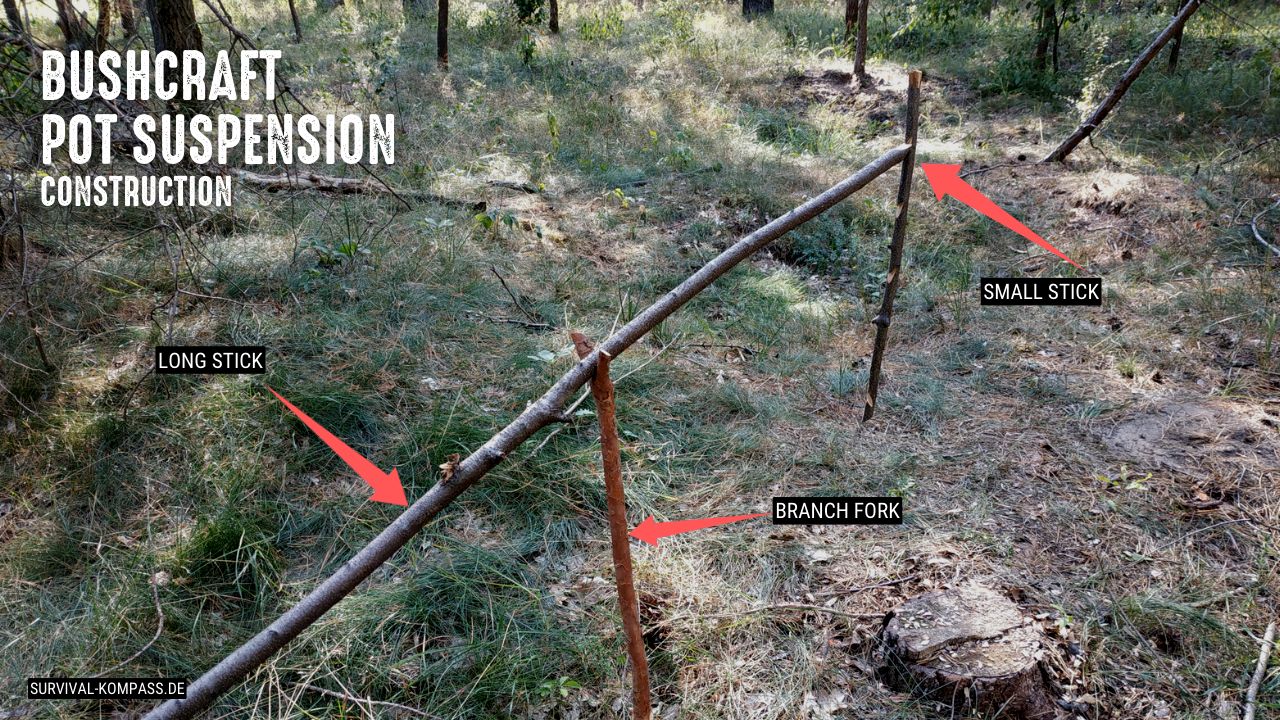
Long Stick
The long stick is sharpened at the bottom and then driven into the ground.
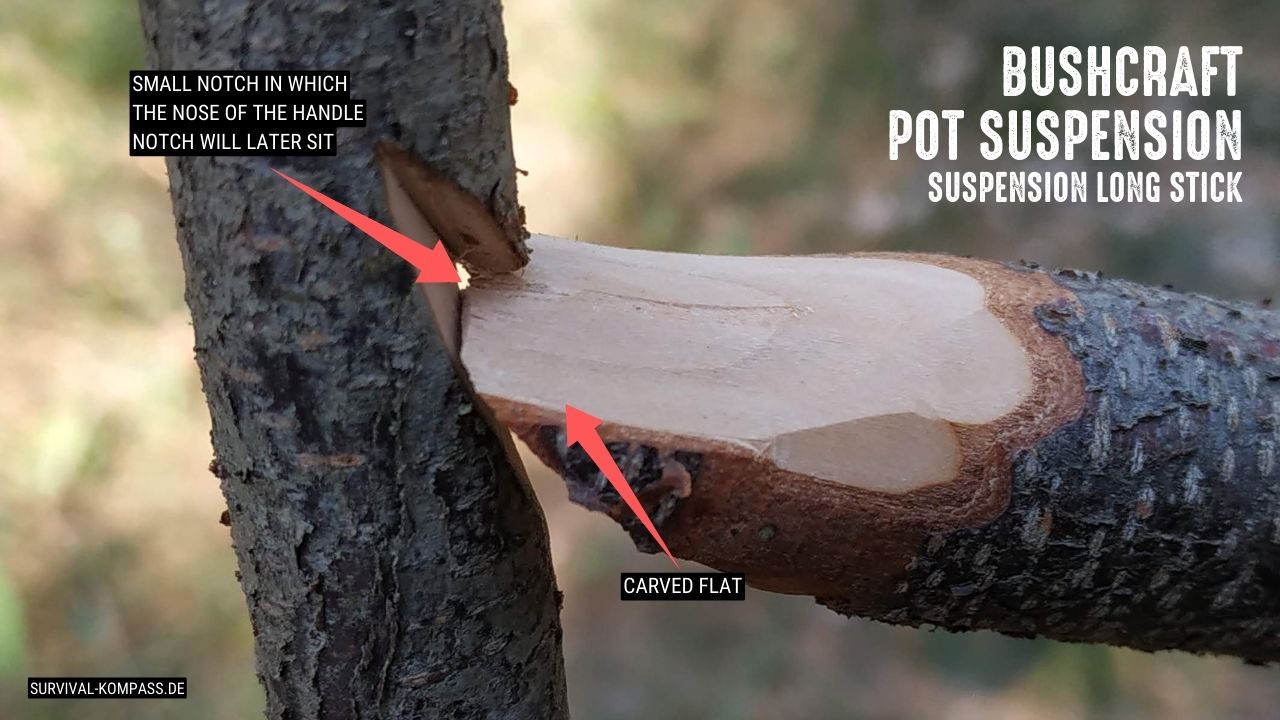
Above, you carve a flat suspension with a small notch.
Then the handle notches of the small stick are hooked into this notch.
Here you can see the flat suspension with the notch:
Branch Fork
You also sharpen the forked end of the branch and use it to support the long stick.
If you hang heavy pots on your pot hanger, the branch fork makes sense.
But you can also leave them out, then you just have to ram the long stick deep enough into the ground.
Small Stick
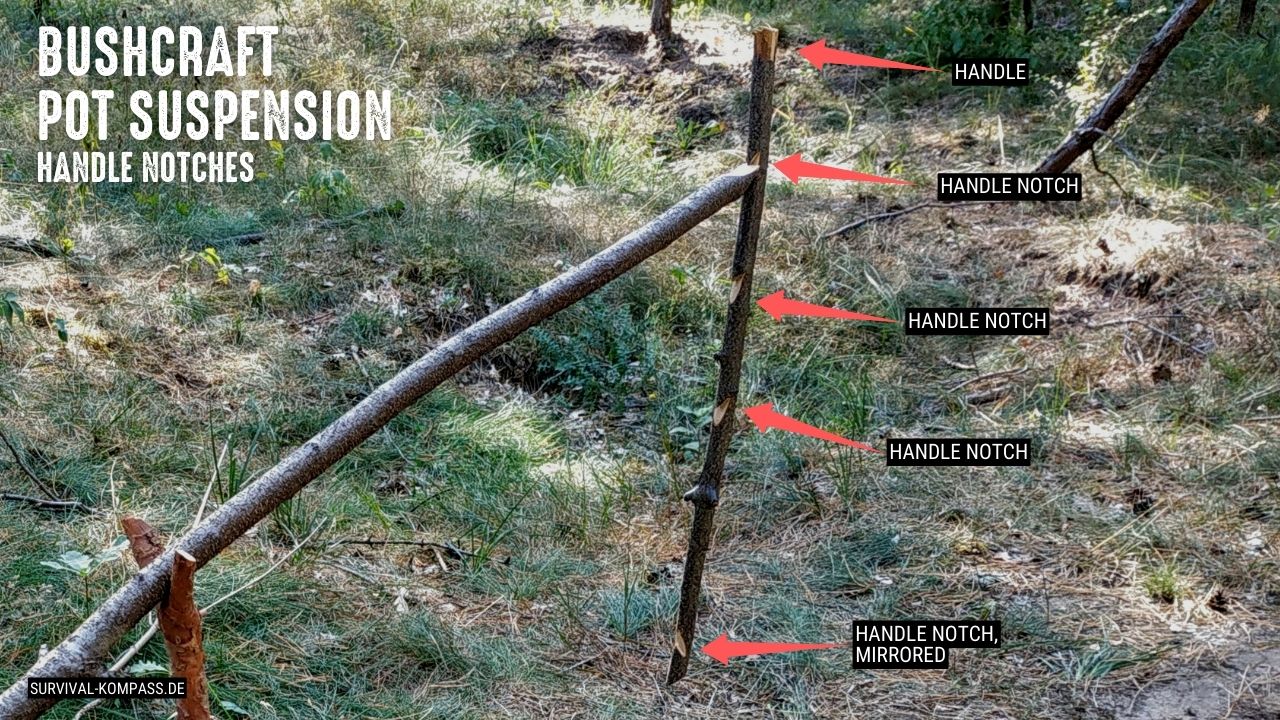
The small stick serves as a hanger.
Several handle notches are carved there, depending on how often the height needs to be adjusted.
Make sure that there is still some material left from the stick at the top. Then you have a handle that is well suited for adjusting the height.
At the very bottom, you carve a mirror-reversed handle notch so that the handle of your cooking pot can be hung.
If you want to know how to carve handle notches, then check out my video or read my article "The 4 most important notches for Bushcrafting".
This is what the little stick looks like:
At the end, everything looks like this:
Summary
The pot hanger is a great tool for preparing food or boiling water.
You regulate the heat supply through the different handle notches.
And now go out and build your own pot hanger!
Here again, practice makes perfect.
If you are skilled at it, you can build your pot hanger in 10 minutes.
How did you like the instructions? Were they understandable?
Have you ever made a pot holder yourself? What did you do differently?
As an alternative to the pot hanger, you can build yourself a tripod.


Author of the guide
Martin Gebhardt
Hey, I'm Martin. On my blog, you will learn the basics and numerous details about living in the wild. I think survival, bushcraft and the good life in nature are the keys to happiness. Find me here on Instagram or on YouTube. You can find more about my mission on the About Me page.
Was this guide helpful?
13 people found this guide helpful.
5.00 out of 5 points (13 Ratings)
Comments (0)
This post may contain affiliate links. So if you click on the links and make a purchase, I will receive a small commission at no additional cost to you. Click here, to learn more about it.


