The 4 most important notches for bushcrafting
👉 The key facts from this guide
- Notches made of wood are essential for bushcraft and survival. There are four basic notches that you must master: half-round notch, V-notch, log cabin notch, and handle notch.
- The 7-notch / half-round notch is useful for tightening your tarp or for building traps. It is made by making a straight cut and removing the material at a 45-degree angle.
- The V-notch is mainly used for toggle sticks. It is made by making two 45-degree angle cuts that form a V shape.
- The log cabin notch is primarily used in construction. It is made by making two vertical cuts and removing the material in between.
- The handle notch is practical for hanging cooking utensils. There are two methods for making it: the "X-method" and a method based on the half-round notch.
- Practice makes perfect. With enough practice, you will be able to carve each of these notches in a matter of seconds.
For Bushcrafting or your survival training, you need notches.
There are four basic notches that you must master.
Today I will show you which ones they are, how to make them and what you use them for.
The 4 most important notches
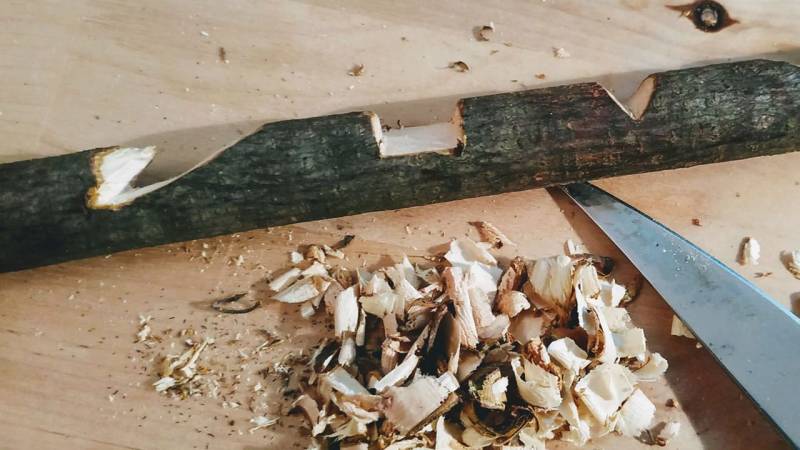
The four most important notches are sufficient. This will keep you on the safe side, as these four types of notches cover almost all situations.
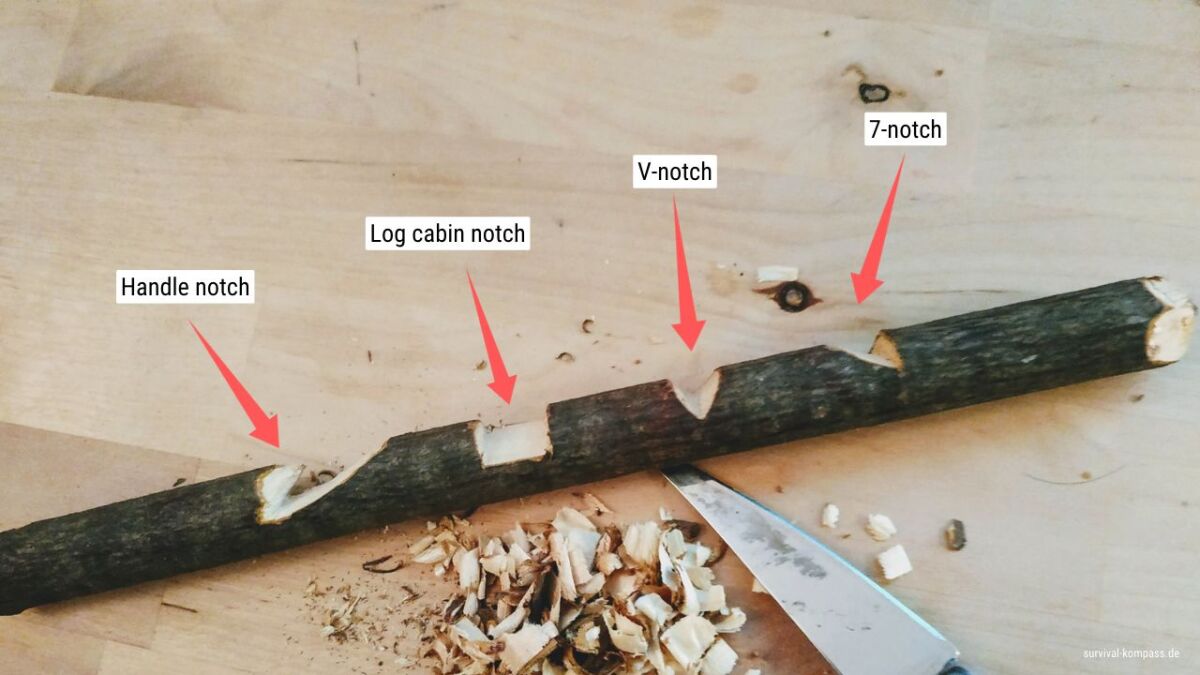
These are the following notches:
- 7-notch
- V-notch
- Log cabin notch
- Handle notch
Below in the infographic, I have marked all the types for you. You must be eager to start now, right?
But one thing at a time. Read through or watch my video on how these notches are made.
The video about the four notches can be found directly here. This will give you a comprehensive overview in a short amount of time.
7-notch
7-notches are useful for tensioning your tarp or for building a deadfall trap.
To create this notch, you cut a straight cut into your material. This cut is about 1/3 as deep as the material.
Then you remove the material about 2.5 - 3 cm away from the first cut. You do this at a 45-degree angle towards the straight cut.
Depending on the size of the notch, you can do this with your regular knife or with a smaller carving knife.
Removing the wood is best done with the knee lever handle, at least that's been my experience.
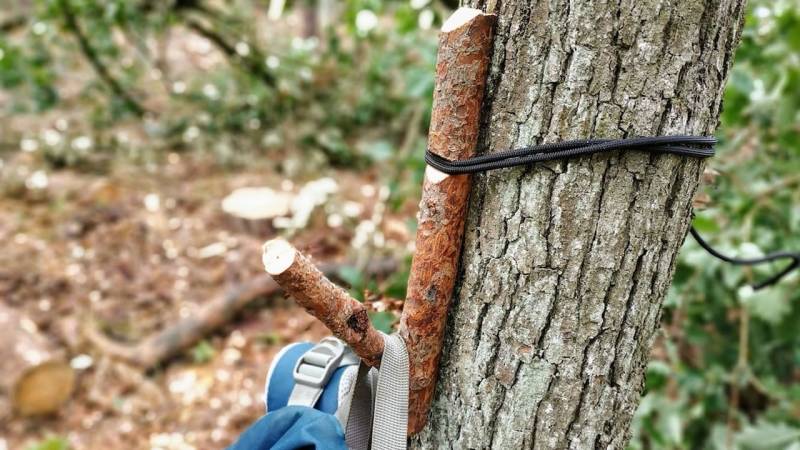
For example, I used the 7-notch to attach a hook (here's the video).
V-notch
You mainly use the V-notch for toggle sticks - such as tarp ropes or pot hangers.
A toggle is a small wooden stick that hangs on a rope. With it, you can wonderfully hang things up.
At the point of the notch, the rope is attached and no longer slips.
To create the notch, angle your knife at 45 degrees and strike it about 1/3 to 1/2 of the diameter of the wood.
Afterward, you start on the other side of the notch and repeat the process. This will create the V-shape.
Never drive notches deeper than 1/3 of the material diameter if they are intended to bear a high load.
Cabin Notching
This notch is mainly used in construction. This can be a pack frame or a log cabin.
Make a vertical cut in the material and then a second vertical cut - depending on how wide you want your notch to be.
Make the cuts deep enough so that the desired material fits in later.
Then remove the material between the two cuts.
Handle notch
The handle notch is practical for hanging cooking utensils.
There are several ways to make these. I will introduce you to two of them.
Option 1: The most common method of production is the "X method".
At first, it all sounds a bit confusing, but once you get the hang of it, you'll be able to make them quickly.
The most important thing is that you make the cuts diagonally from the top. This creates the undercut tip!
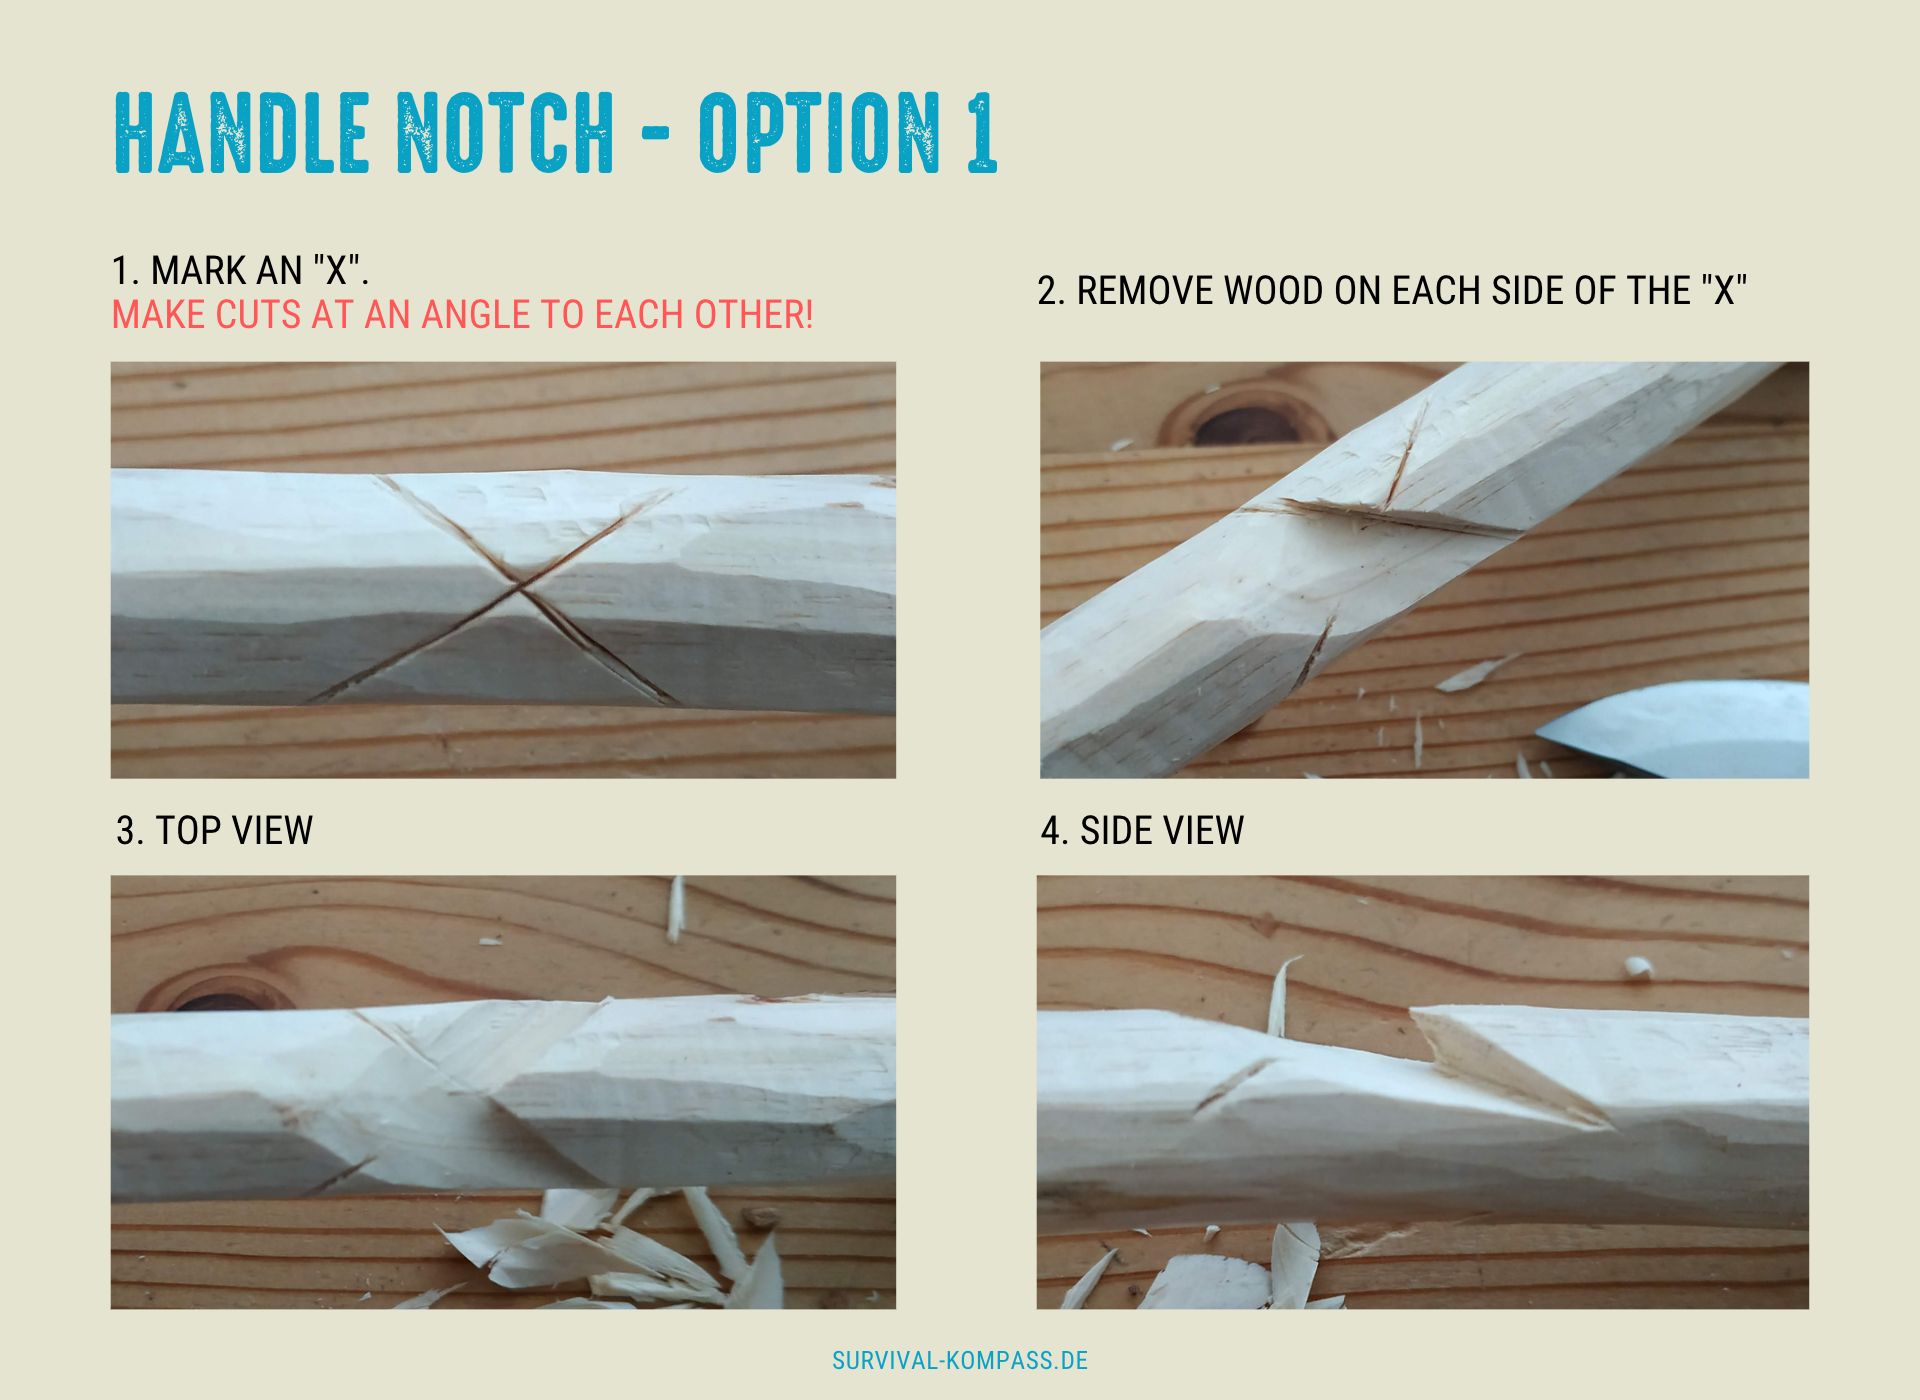
My video on how to make the handle notch using the "X-method" will surely support you in learning:
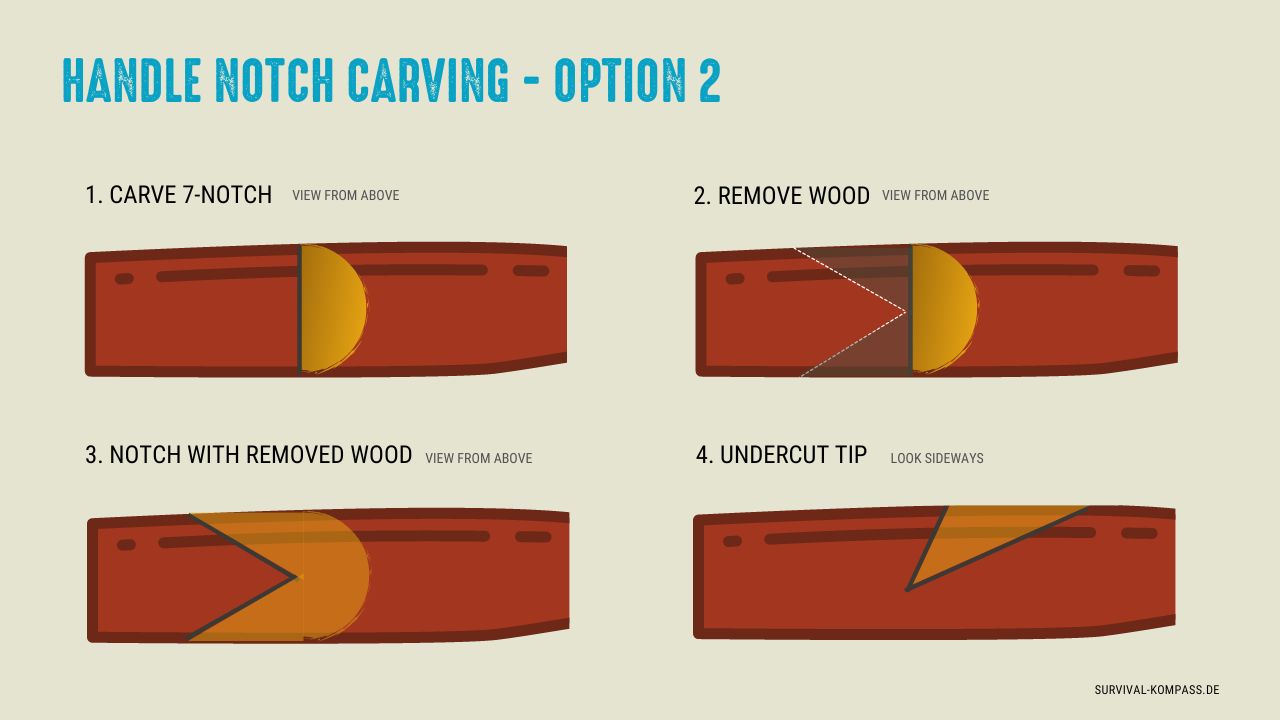
Option 2 for creating the handle notch:
It is basically a 7-notch with an extension.
First, create the 7-notch. Then, remove some wood from the sides where the cut is straight.
Afterward, you hollow out the lower part. The infographic shows you again how it works.
Summary
You will always need notches. For your pot, the tarp, a hook.
Practice the four presented and most essential notches over and over again, and you will become more confident in handling them.
At the end, you will be able to carve each individual notch in just a few seconds.
And now I am interested in your opinion!
Which notch do you carve the most? Which one has proven itself to you?
Share your opinion with me in the comments!

Sources for the guide
Dave Canterbury: Bushcraft 101 - Überleben in der Wildnis / Der ultimative Survival Praxisführer, Anaconda (hier kaufen)

Author of the guide
Martin Gebhardt
Hey, I'm Martin. On my blog, you will learn the basics and numerous details about living in the wild. I think survival, bushcraft and the good life in nature are the keys to happiness. Find me here on Instagram or on YouTube. You can find more about my mission on the About Me page.
Was this guide helpful?
24 people found this guide helpful.
5.00 out of 5 points (24 Ratings)
Comments (0)
This post may contain affiliate links. So if you click on the links and make a purchase, I will receive a small commission at no additional cost to you. Click here, to learn more about it.


