Carving wooden spoons: how to start and what you need (basics)
👉 The key facts from this guide
- To carve a wooden spoon, you need a carving knife and a paring knife. A good carving knife is handy and has a small, narrow tip to achieve beautiful curves and notches.
- A hatchet or a compact axe is essential to roughly shape your workpiece and create a blank.
- Soft wood such as lime wood, maple wood, Swiss stone pine wood, chestnut wood, or poplar wood is particularly suitable for carving, especially for beginners.
- Hard wood such as larch wood, birch wood, oak wood, ash wood, elm wood, olive wood, pear wood, or almond wood is more difficult to carve, but also suitable.
- A wooden block serves as a base on which the axe can strike without damaging the blade.
- Sandpaper is needed to smooth out the wood texture of your carvings.
- After your spoon or carving is finished, you must oil it well to protect it from moisture. Olive oil from the supermarket is good if you want to use the spoons for food preparation.
Bushcraft is crafting.
And carving is part of crafting.
Since you also cook in the wilderness, spoons are useful tools.
And what is better than self-carved spoons?
Today I will show you what you need to get started with carving and learn how to carve.
The essential tools for your first wooden spoon carving adventure
Spoon carving with just a knife is possible, but a challenge. It is easier if you use the right tools.
You only need two types of knives at the beginning:
- Carving knife
- Paring knife
You can recognize a good carving knife by its handiness. Additionally, you need a special carving knife because its tip is small and narrow.
This makes it possible to achieve great curves and notches. You won't be able to do this with a large knife.
If you want to carve spoons and bowls, you require a hook knife.
Below in the picture, you can see the carving knife and the peeling knife:
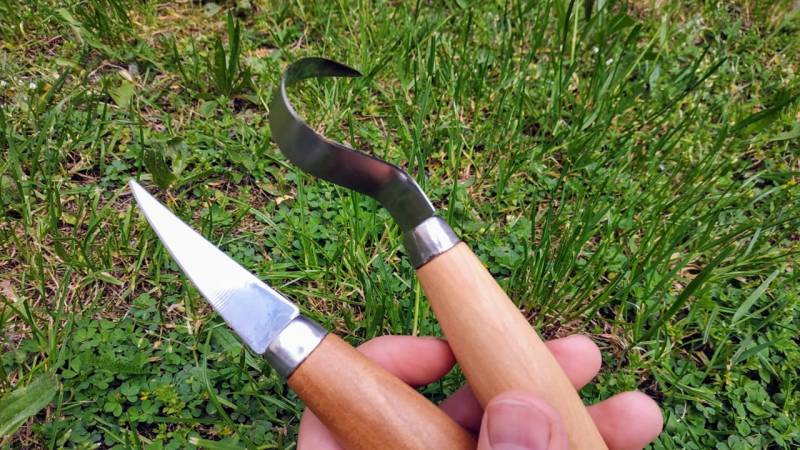
But beware: there are models of peeling knives where both sides are sharpened.
I recommend a paring knife with only one sharp side. This way, you can apply pressure with your thumb on the blunt side. This is often necessary.
The starter set from BeaverCraft is a good beginning. The price-performance ratio for both knives is great. Take a look at the reviews on Amazon – the knives speak for themselves.
- Spoon Carving Set: get a sloyd knife + a hook knife + eBooks "5 Easy steps to sharpen hook knife" and "How to sharpen the woodcarving knife", "How to prevent the knives from the rust".
- Wood Carving Set Premium Quality: no worries about the quality and durability, we produce long-lasting and thought through woodworking tools on the market. We take care of all woodcarvers' needs.
- Spoon Carving Tool Included: BeaverCraft wood carving accessory such as hook knife, also called a kuksa knife, will help you with all rounded edges carving such as spoons, bowls and so on.
- Wood Carving Kit Easy to Use: adjust to all carving tools blades and handles easily from the very first day of wood carving. The spoon knife set fits beginners as well as professional’s demands
- Spoon Carving Tool Set Made in Europe: the instruments have been created for the needs of amateurs and professional woodcarvers. They’re made with love in Europe (Ukraine).
$29.99
View ProductIf you are looking for more quality, I recommend knives from Morakniv. They are pricier, but more durable and incredibly sharp.
I have been testing the knives for a long time.

Amazon
Offer
Data updated 9 hours ago
Morakniv 164 Right-Handed Stainless Steel Hook Knife With Leather Sheath For Wood Carving
- WOOD CARVING KNIFE: Our carving knife can be pulled over a surface that needs to be hollowed out; This wood carving and whittling knife is ideal for crafting spoons, bowls, and cups, as well as other types of detailed relief carving
- PREMIUM BLADE: 2.2-inch knife blade with open 0.5-inch radius curve is made of Swedish 12C27 stainless steel, a material known for its razor sharpness, high hardness, exceptional toughness, and excellent corrosion resistance
- DURABLE WOOD HANDLE: Curved knife features a barrel-shaped ergonomic handle made from oiled Scandinavian birch wood that is both comfortable to hold and carefully balanced
- PROTECTIVE LEATHER SHEATH: Made of vegetable-tanned Swedish leather, the included sheath protects both the user from cuts and the edge of the work knife from dulling surfaces
- SPECIFICATIONS: Blade length: 2.2 inches (55 mm), blade thickness: 0.08 inches (2 mm), total length: 6.7 inches (170 mm), net weight with sheath: 4 ounces (117 g)
$35.37
List Price: $49.99
Your faithful companion in the forest: The right axe for carving
First, you need to roughly process your workpiece to create a blank.
You'd better do that with a hatchet or a compact axe (Read here what the differences are). This way, you'll quickly get rid of unnecessary wood.
Therefore, a hatchet or an axe is indispensable.
In the picture, a blank that was shaped with the axe.
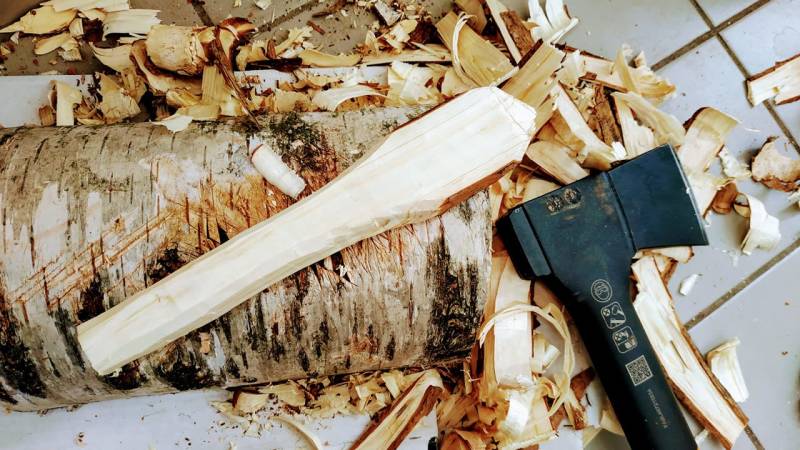
It is much more exhausting if you don't have an axe and have to remove the unnecessary wood with a knife.
A compact and small axe is suitable for this.
As illustrated by the picture below, I use the Fiskars X7 axe. It is a versatile tool and can also be used for carving work.
I have described the axe in more detail in my other article "The 3 Best Survival Axes". Check it out if you are generally looking for a good axe for bushcraft and survival.
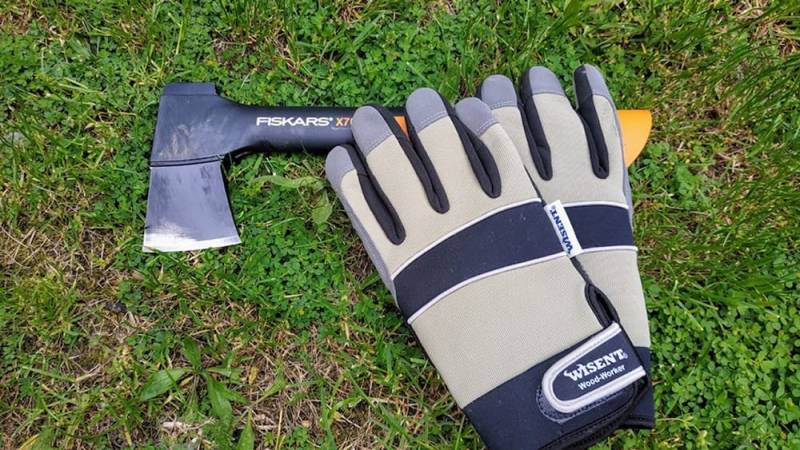
The Fiskars X7 is approximately 36 cm long. For comparison: the forearm of an adult is also about that long.
For woodworking and carving, I do not recommend a longer axe. A longer and larger axe is too heavy for continuous use.
So that I can quickly and effectively process smaller pieces of wood, I also ordered the Fiskars X5. It is only 23 cm long and good for woodworking. Additionally, it has a balanced price-performance ratio.
1015617 Hacha De Rajar x5-0, 5 kg
- Camping hatchet (total length: 23 cm) for splitting small logs, cutting branches up to 3 cm in diameter and cutting small wood for the fireplace, stove, barbecue or campfire, also suitable for carving, camping, hiking, bush craft, survival and outdoor activities
- Very sharp blade in hardened steel with coating, Ideal balance between head and handle for maximum swing power
- Ultra-lightweight, durable handle made of ultra-lightweight, weather-resistant fibreglass reinforced plastic, Handle moulded directly onto the tool head for greater safety, Firm and comfortable grip thanks to innovative handle tip with flared finger guard for optimum finger protection
- Made in Finland, Long life product, Easy to sharpen the blade with a blade sharpener (available as part number: 1000601), Storage case included for safe transport
- Contents: 1x Fiskars Camping Axe XXS X5, Storage and Transport Case Included, Length: 23 cm, Weight: 560 g, Material: High Steel/Fibreglass Reinforced Plastic, Colour: Black/Orange, 1015617
$64.39
View ProductBeginner tip: Get yourself another pair of gloves, as they protect you when chopping with the axe. And if you are not yet practiced with the axe, chop slower and more deliberately. Also, position your legs and feet so that they are not in the flight path if you slip.
From Tree to Spoon: The Best Types of Wood for Your Carving Art
"Spoon carving which wood?" That is a common question from beginners.
At first, I didn't care what kind of wood I had. At least I could start carving.
But now I make sure that it is not, for example, beech. I still have an unfinished spoon here that is made of beech wood. The wood of the beech is damn hard and it is really exhausting.
Gentle Woods for Beginners: Your Entry Materials
Best to take:
- Linden wood
- Maple wood
- Swiss pine wood
- Chestnut wood
- Poplar wood
These types of wood are all soft and carving is easier with them. Therefore, soft woods are perfect for beginners.
You can recognize softwood by the fact that the annual rings are far apart compared to hardwood. There, the annual rings are close together.
Also read: Which wood for carving? The best types of wood and their properties
For experienced carvers: Challenging woods with character
Carving hard wood is more strenuous. It is equally recommended for advanced users with calluses on their fingers.
Suitable for:
- Larch wood
- Birch wood
- Oak wood
- Ash wood
- Elm wood
- Olive wood
- Pear wood
- Almond wood
- Beech wood
Below in the picture, you can see birch wood that I found in the forest. The chance of finding free birch wood or pine wood is quite high in our local forests.
But beware: Never cut down a tree or injure living trees. Nature lovers don't do that and it is illegal.
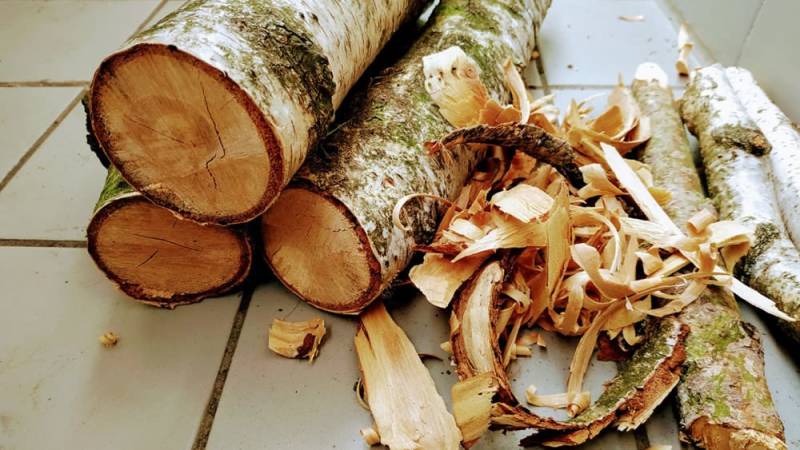
Young and fresh wood is better suited for carving. Therefore, make sure not to use 100-year-old wood that has been dried for 20 years for your first attempts.
If you can't find suitable wood, you can also order it.
Even better is if you know a forester or someone from a sawmill.
Then you will surely quickly get good wood and already know in advance which trees will be felled.
Your Carving Toolkit: Essential Helpers for Perfect Results
You still need the following materials:
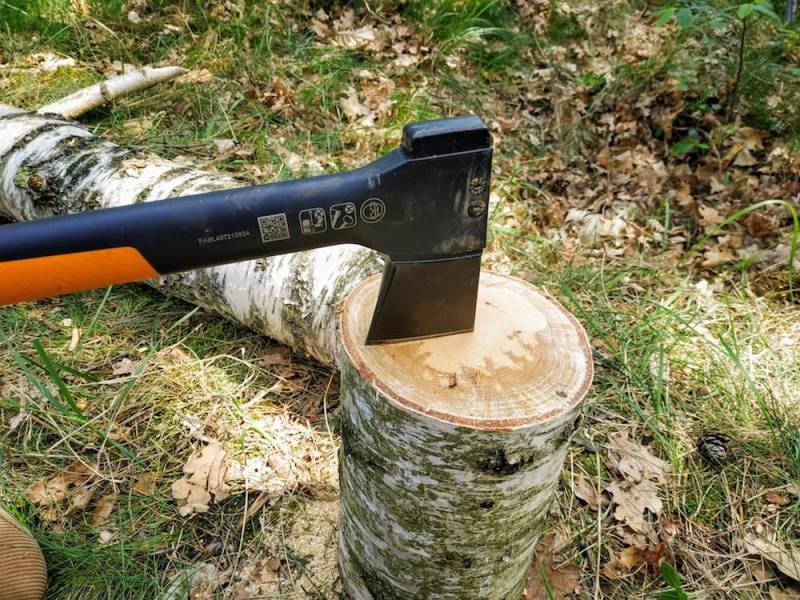
a wooden block
This is ideal for working on the piece of wood with the axe at the beginning.
You need a surface where the axe can strike without damaging the blade.
Sandpaper
Get sandpaper from the hardware store or from Amazon, such as a hand sanding block or a sanding sponge.
You need it to smooth the wood grain of your carvings later.
Only this way will your carving piece feel soft and smooth.
Oil for Preservation
When your spoon or carving piece is finished, you need to oil it well.
This protects it from moisture.
I use olive oil from the supermarket for my spoons. The advantage is that there are no problems when I prepare food with the spoons.
For carvings that do not come into contact with food, you can use special wood oil.
Carving Wooden Spoons: Your Step-by-Step Guide
Carving a spoon is quite simple. Start as soon as you feel like it.
How does it work?
- Wood Selection: Choose a piece of poplar, basswood, or maple. These soft woods are ideal for beginners and can be shaped like clay in skilled hands.
- Rough Shaping: Draw the spoon on your board. Then take your axe and remove all excess wood. Remember: safety first - your feet are not wooden blocks!
- Handle Shaping: Use the carving knife to shape the handle. The goal is to make it as smooth as if it had been polished by a beaver.
- Spoon Head Contouring: Mark the shape of the spoon head. It should be large enough to hold a decent portion of forest mushroom soup, but not so large that you could scoop out a pond with it.
- Hollowing the Spoon Bowl: Now it's time to use the hook knife. Hollow out the bowl carefully, as if you were creating a miniature landscape.
- Finishing Touches: Smooth all surfaces carefully with the carving knife. The transition from the handle to the bowl can be smooth or angular.
- Sanding Process: Work your way through the sandpaper from coarse to fine. It's like a massage for your spoon - it will thank you with a shine.
- Oil Treatment: Soak your spoon in oil. It protects the wood and makes it glow like an autumn forest in the evening sun.
- Drying and Admiration: Give your masterpiece a night's rest. The next morning, you will not only hold a spoon in your hand but a piece of forest magic.
Furthermore, many great people on YouTube show the process, so it's best to watch the video below.
The man in the video carves a spoon out of wood without many words. Perfect for studying the techniques closely.
Don't expect your first spoon to look exactly like in the video. That's normal. :-)
Your handle can also be round. Or your spoon bowl might be smaller.
It's important that you start!
I started carving because I really wanted to. At the very beginning, even without a carving knife and without a peeling knife. Simple kitchen knives had to suffice.
But don't do that, it's really exhausting, and the knives are not suitable for carving.
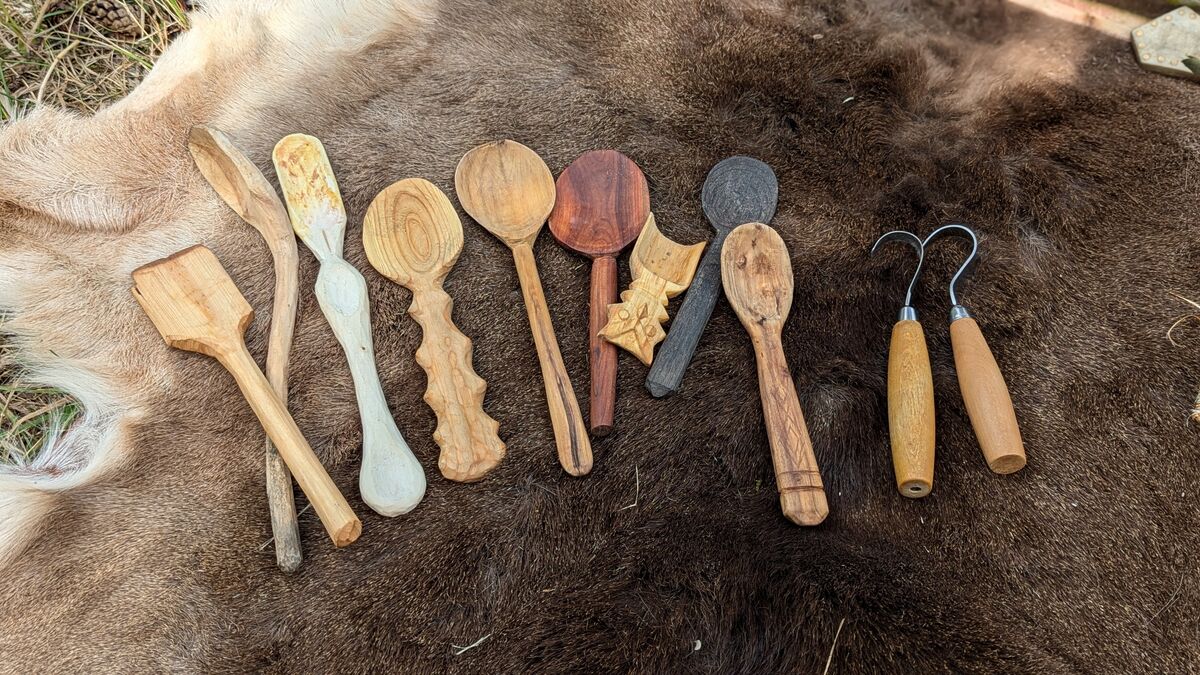
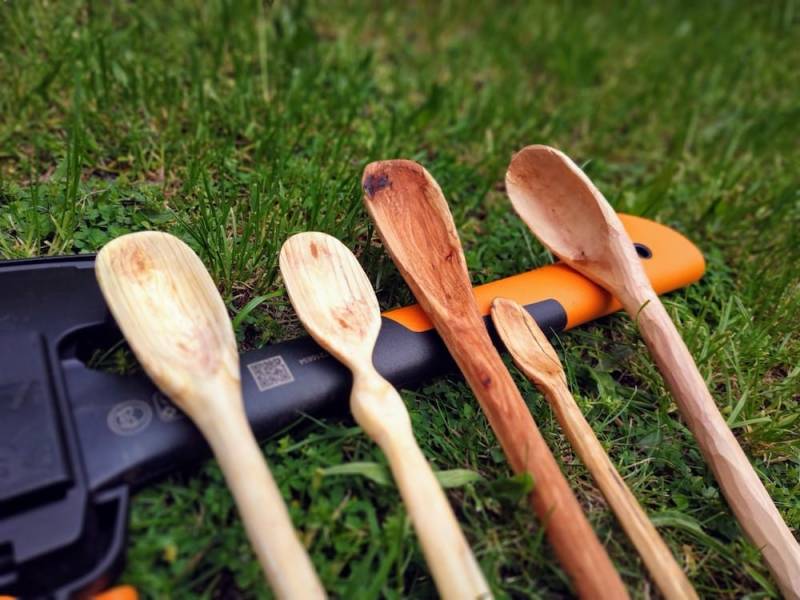
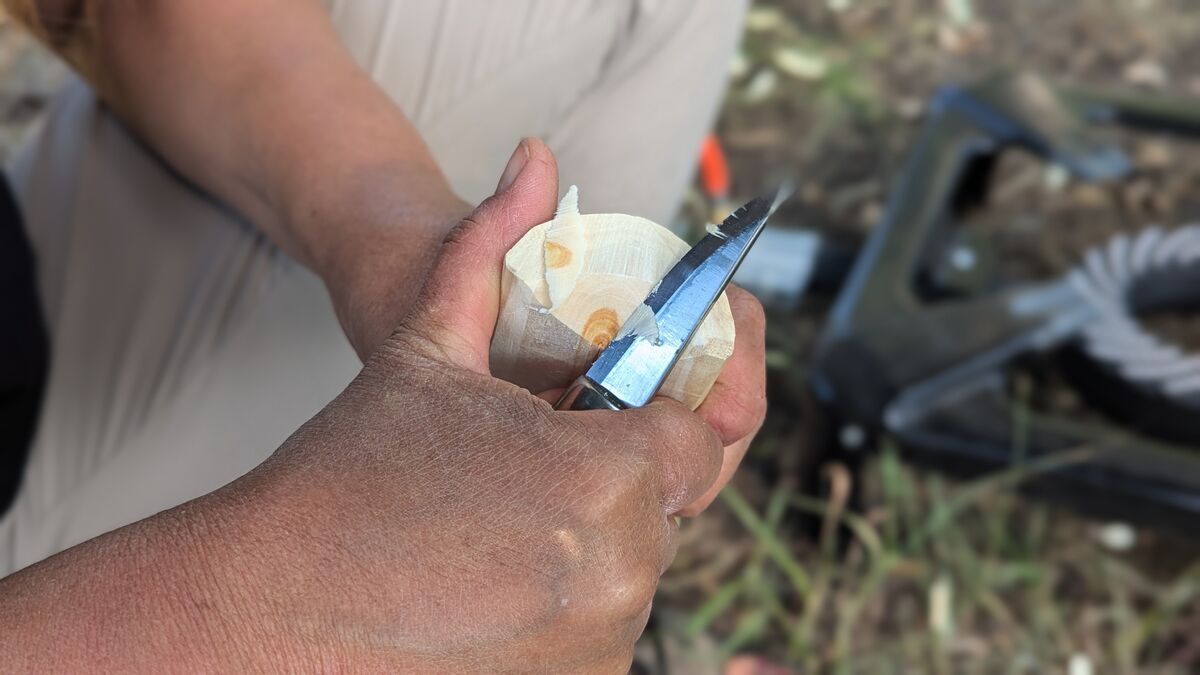
Here you can see current results with carving knives:
Spoon Shapes and Their Uses - Find Your Perfect Forest Companion
Carving wooden spoons is a popular option because they are very practical in the outdoor kitchen.
Every shape has its charm and utility in the forest. Experiment with different designs and find out which one best suits your outdoor cooking style.
Remember: Every hand-carved spoon tells its story.
- The classic tablespoon: Your all-rounder for every meal. With a round, oval, and flat bowl and a straight handle.
- The serving spoon: Larger than the tablespoon with a deeper bowl. Perfect for serving stews or rice.
- The ladle: With a deep round and deep bowl and a long handle. Ideal for soups and stirring in the kettle over the campfire.
- The salt and pepper spoon: Small and delicate. Well-suited for the home kitchen if you have salt and pepper shakers.
- The salad spoon: Wide and flat with slightly raised edges. Perfect for mixing salads.
- The stirring spoon: With a long handle and flat bowl. Making your own cooking spoon is a great way to expand your outdoor cooking gear.
- The butter spoon: Small with a pointed bowl. Ideal for scooping butter or other soft foods from containers.
Common Mistakes in Spoon Carving and How to Avoid Them
Carving for beginners can be challenging, but with the right guidance and some practice, you will quickly make progress.
Since I have been carving spoons for a long time, either alone or in groups, I have identified mistakes that happened to me at the beginning or that I also see in beginners:
- Working too quickly: Take your time! Fast carving often leads to injuries and messy results. Work slowly and with focus.
- Dull tools: Sharp knives are safer and more effective. Sharpen your tools regularly and before each project. Read here: Why is a sharp knife safer than a dull knife?
- Wrong wood selection: Avoid wood that is too hard or brittle at the beginning. Stick to soft woods until you have more experience.
- Uneven thickness: Pay special attention to an even thickness, especially in the spoon bowl. Thin spots can break later.
- Incorrect grain direction: Always carve with or across the grain, never against it. This prevents splintering and cracks.
- Neglecting safety: Wear gloves and cut away from your body. Your fingers will thank you!
- Excessive sanding: Too much sanding can destroy the natural wood structure. Find the right balance between smooth and characterful.
So? Have you now gotten the urge to start carving?
What will you tackle first? A spoon? A figure? A bowl?
Write it to other readers in the comments and let's share experiences!
And if you prefer a detailed video tutorial with all my tricks, then check out the Wildimpuls distance learning course – there I show you these skills step by step.


Author of the guide
Martin Gebhardt
Hey, I'm Martin. On my blog, you will learn the basics and numerous details about living in the wild. I think survival, bushcraft and the good life in nature are the keys to happiness. Find me here on Instagram or on YouTube. You can find more about my mission on the About Me page.
Was this guide helpful?
57 people found this guide helpful.
4.93 out of 5 points (58 Ratings)
Comments (0)
This post may contain affiliate links. So if you click on the links and make a purchase, I will receive a small commission at no additional cost to you. Click here, to learn more about it.


