7 ways to find food in the wilderness for survival
👉 The key facts from this guide
- Focus on finding edible plants and avoid poisonous lookalikes. Wild nuts and common fruits are particularly nutritious.
- Insects are a plentiful and protein-rich source of food. Avoid brightly colored, oddly smelling, or hairy insects, as well as those that can transmit diseases.
- Learning to make primitive ropes is useful for acquiring food, as they can be used to make weapons, hang food, or build traps.
- Making primitive weapons, such as blades, spears, stone axes, and bows, can help you hunt animals for food.
- Learning fishing techniques, such as spearfishing, netting, or trapping, can be an efficient way to acquire food.
- It is important to abide by applicable laws and species protection regulations, as many of the mentioned techniques should only be applied in extreme survival situations.
In a survival situation in the wilderness, it is crucial to obtain some form of food within the first few days.
Otherwise, your energy to perform important tasks such as constructing a shelter or collecting water will dwindle.
Therefore, today, I want to give you seven important survival skills on how to procure food in the wilderness.
I will organize all of these skills so that we start with the skill that requires the least amount of energy and dexterity.
For some skills, you will immediately receive food, while for others, we will look at skills that indirectly lead to food.
Finding Food in the Wilderness – 7 Skills to Learn:
- Focus on finding edible plants
- Look for insects
- Learn how to make ropes to obtain food
- Acquire the knowledge to create primitive weapons
- Learn how to fish with primitive tools
- Acquire the skill to build and set traps
- Become a competent hunter
You will now learn in detail how to acquire these skills to quickly take in calories.
Let's begin:
Important Disclaimer Regarding Laws
Please adhere to all applicable laws when performing any activities, especially when catching animals, whether insects, mice, or large mammals. Familiarize yourself with conservation and hunting regulations in your country. Many of my tips are only intended for extreme emergencies where survival is at stake. Furthermore, please read my disclaimer.
Great, now that we've got the bureaucratic stuff out of the way, let's get down to business.
1. First, focus on plants
One thing is certain: plants don't bite, you don't have to catch them, and you can eat them immediately. Brilliant, right?
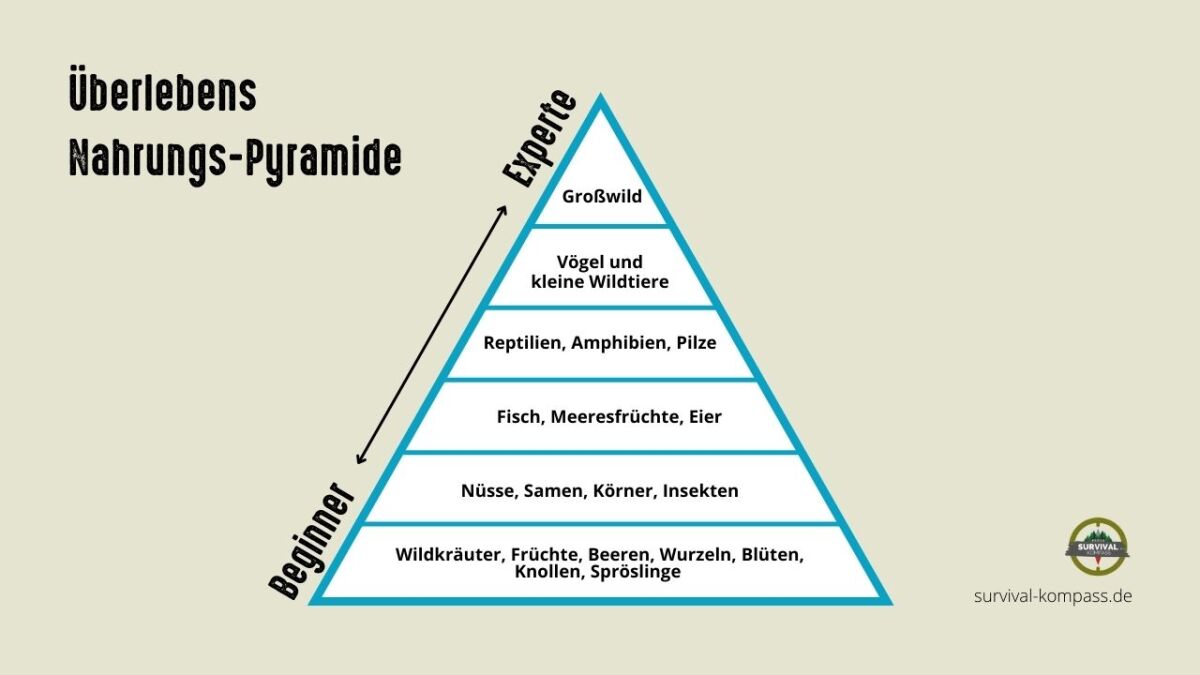
This is also demonstrated by the survival food pyramid:
However, you should be knowledgeable about plants. Especially the ones you need to avoid, which are poisonous look-alikes.
Did you know: On average, plants provide 15 to 20 kcal per 100 grams. It may not seem like much, but it's enough to survive in an emergency.

And plants aren't just grasses and leaves. There is a wealth of survival foods to be found, such as fruits, nuts, roots, and leaves from trees.
It's best to acquire knowledge about wild nuts and common fruits. With these two food sources available, you will need almost nothing else.
Nuts (like hazelnuts, walnuts, chestnuts) provide important fats and proteins - which you need for your muscle mass. Fruits provide carbohydrates in the form of fructose.
If you can't find nuts or fruits, berries can be another great source of nutrition.

These berries should be avoided:
- Deadly Nightshade
- Yew
- Dogwood
- Lords and Ladies
- Elderberries (raw)
- European Holly
- Ivy
- Red-berried Elder
- Twisted-stalk
Edible berries include:
- Gooseberries
- Raspberries
- Strawberries
- Blueberries
- Blackberries
- Redcurrants
- Cranberries
- Elderberries (cooked)
There are many more wild plants that can be eaten. In my comprehensive guide "Edible plants: This emergency food is found in the woods", I show you the most important plants, berries, nuts, trees, and roots with pictures.
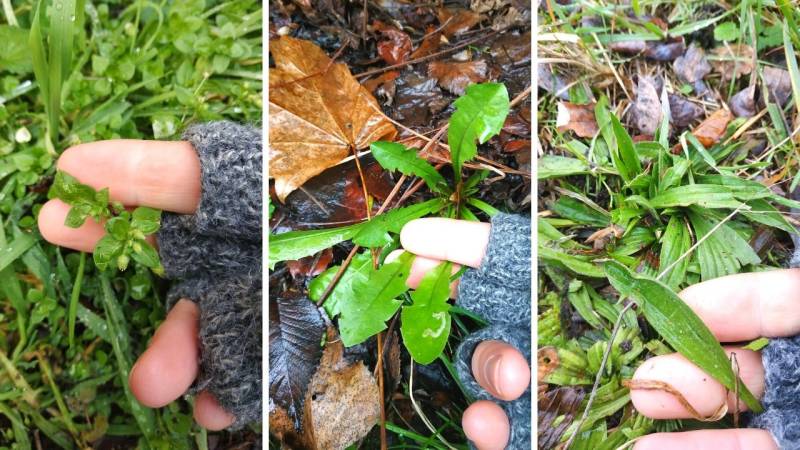
If you haven't read my guide and still want to try unknown plants, then do the edibility test.
The survival edibility test
When you come across a plant in the wilderness, you often can't be 100% sure that it's edible. But if you need food urgently, you might not want to pass it by.
- Step 1: Divide the plant into different parts – roots, stems, leaves, buds, flowers, fruits etc. Many plants are toxic or lethal in one part, while another part may only make you ill or even completely edible. By dividing the plant into parts, you can test each one to see if it is safe to eat. However, if one part turns out to be poisonous, you will probably avoid the whole plant.
- Step 2: Now you take a smell test. Many poisonous plants emit a strong and unpleasant smell that immediately lets you know that the plant is toxic. It's best to cut the individual parts to get more smell. If you don't smell a strong odor, proceed to step 3.
- Step 3: Place the plant piece on your skin. The inner elbow or wrist are good places to see if the plant is toxic upon contact. Place the plant there for a few minutes to see if you have a reaction such as burning, itching, rash or numbness. If any of these effects occur, remove the plant from your skin immediately. Wash the affected area well and thoroughly. You can assume that the plant is not to be used.
- Step 4: If the plant passes the skin test, prepare a small amount to eat. Eating the plant raw is a somewhat risky method, while cooking is often safer. Before you put anything in your mouth, perform another contact test. Place the cooked plant on your lips for a few minutes and check the contact test for any side effects. If the test is also positive, put the plant in your mouth and chew it a bit, but do not swallow anything yet! Keep the chewed food in your mouth for fifteen seconds. If it tastes bitter or soapy, spit out the plant immediately and rinse your mouth with water.
- Step 5: If there is no reaction while chewing, wait fifteen minutes and monitor yourself for reactions. If everything seems okay, you can take a sip test. Then wait a few hours to see if you have digestive problems or other problems. If not, this part of the plant is likely safe to eat, and you can test another part of the plant. If your body reacts to the food test, do not eat anymore. If it gets worse, put your finger in your throat and vomit the food sample.
Kindly note that the test should only be performed in an actual life-or-death survival situation. So take this opportunity to learn which plants are edible and which are not.
Here are my guides for learning:
- Learn about 11 deadly poisonous plants that are almost identical to edible wild plants
- Edible plants: this emergency food can be found in the forest (list + pictures)
- What are lichens, and why can they be used as emergency food?
- Can you eat tree bark to survive?
2. Look for insects
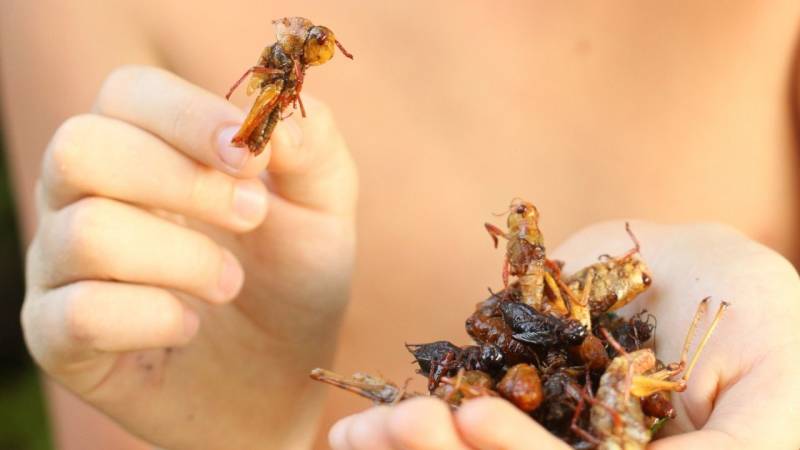
If food supplies are extremely scarce, and you don't know anything about plants, you'll probably have to resort to insects.
The good news is that they are abundant, very few are poisonous, and they are a great source of protein for survival.
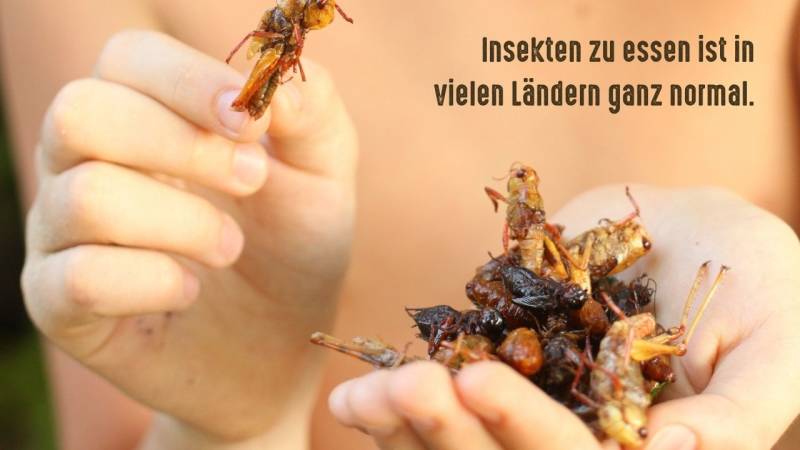
However, there are exceptions to every rule. Here are some general guidelines to determine which insects are edible:
- If insects are brightly colored, stay away. This applies to many animal species; the deadliest animals are often the most beautiful.
- If insects smell funny, pass them by. However, there are exceptions – including the stink bug, which is edible despite its smell.
- Avoid hairy beetles and those that bite or sting.
- Beware of insects that can transmit diseases (mosquitoes, ticks, flies, etc.).
Which insects are edible?
Insects that are safe to eat:
- Grilling
- Locusts
- Caterpillars
- Ants
- Insect larvae
- Honey bees
- Termites
When properly cooked, scorpions and tarantulas are also excellent sources of protein.
However, I prefer locusts and in my guide, I will show you how to catch and prepare them.
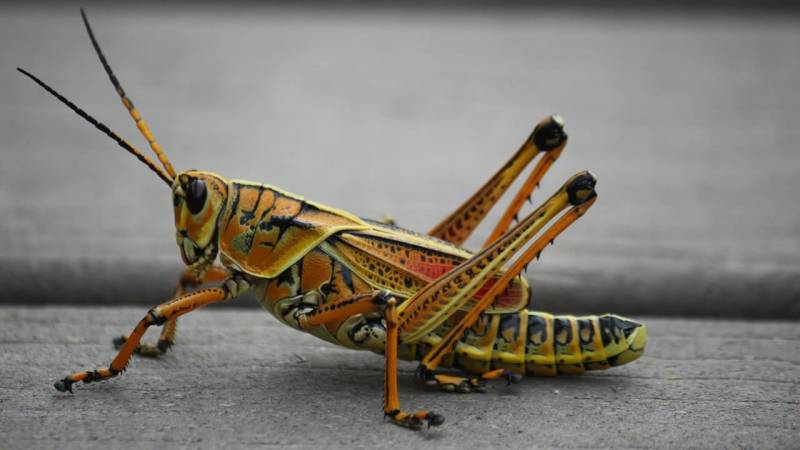
Preparing Insects
Only amateurs who have not done their research eat live insects.
When preparing insects, you should always cook, roast or grill them.
Just as you should never eat raw meat, insects can also contain parasites and bacteria.
And not only will you protect yourself from diseases, a grilled locust just tastes better.
Warning: I am not encouraging you to kill, catch or eat insects. This article is only for theoretical purposes in a survival situation. Most insects are protected by law in Germany, and fines of up to €50,000 can be imposed. Always respect the applicable laws.
Read my article "Survival Basics: Eating Insects" as well. There, I will show you how to easily catch, breed and prepare insects.
3. Learn how to make ropes to obtain food
Before we dive into more complicated survival methods, I want to show you an important skill that is very useful in obtaining food. I mean the production of primitive ropes.
This skill is so important that it is at the top of my list of 19 survival skills. When it comes to procuring food, there are countless uses for ropes.
You need ropes to make weapons, hang food, or build traps.
With the skill of making ropes, you make a leap from gatherer to hunter.
How to make a simple rope
First, you need the right material: plant fibers that are tear-resistant. Here are some plants that are good:
- Fibers from the stem
- Stinging Nettles
- Hemp
- Flax
- Leaves
- Bulrushes
- Yucca
- Agave
- Douglas Iris
- Inner bark (bast)
- Willow
- Maple
- Linden
- Cedar
You can process fibers and leaves immediately, but drying them first is better. Inner bark, however, is difficult to come by.
However, bast is really great. If you've ever worked with bast in your life, you know what I mean. Bast is strong and can be twisted perfectly to create ropes.
In my Wildimpuls program (in German), I show in detail in a module how you can make bast from lime bark and twist ropes from it.
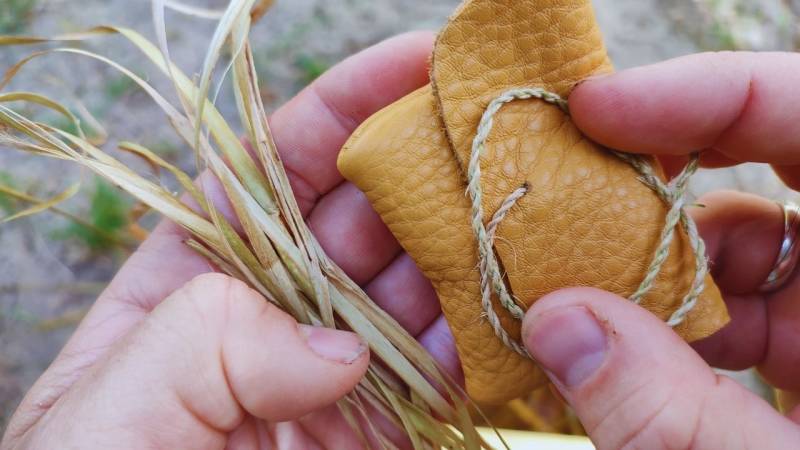
Now let's talk about the twisting technique:
- Take at least four fibers (if they are very thin, take more) and knot them all together at one end
- Divide the four fibers into 2 x 2 fibers
- Now twist two fibers together clockwise
- Do the same with the other two fibers
- Twist these two twisted 2 x 2 fibers together counterclockwise
- Repeat this technique over and over again
Here's a graphic to illustrate:

4. Learn how to make primitive weapons
Using tools and weapons distinguishes humans from animals. Therefore, making a weapon is the first thing many survivalists do when they find themselves in a survival situation.
Let's start with the easiest and work our way up to the most difficult weapons.
Making a blade
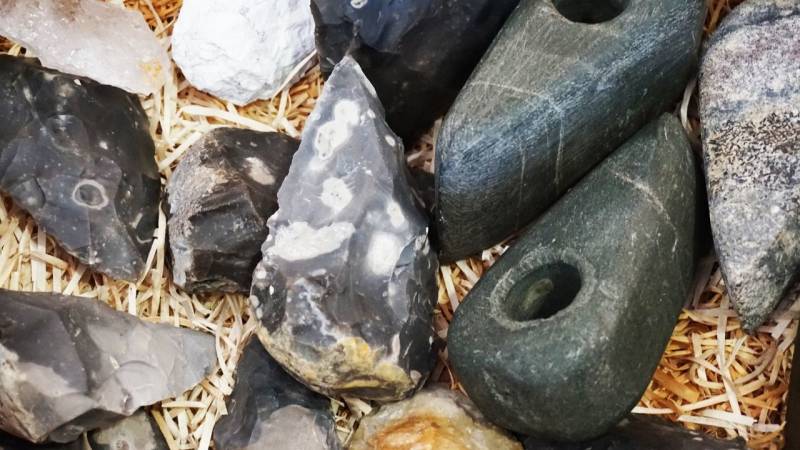
Having some form of blade is essential. If you don't have a knife, axe, or machete, you should make yourself a blade.
I recommend learning how to make a primitive blade. Even if you don't attach it to a handle, this survival blade can be very useful.
A hard river stone that's a little bigger than your hand will work. Even better if it's flint. There are, however, many rocks that will work – as long as they're not too soft.
Making a spear
Making a primitive spear is relatively easy.
Find a straight branch that is about 2.5 meters high and 5-7 cm in diameter. If it's not possible for you to cut down a small tree, you'll have to settle for a long branch that lies on the ground. If you have a knife, you can also cut down small trees with it (in the Wildimpuls program, I'll show you how).
Sharpen the tip with your blade or a primitive knife. Even better: divide the tip into four ends and sharpen them.
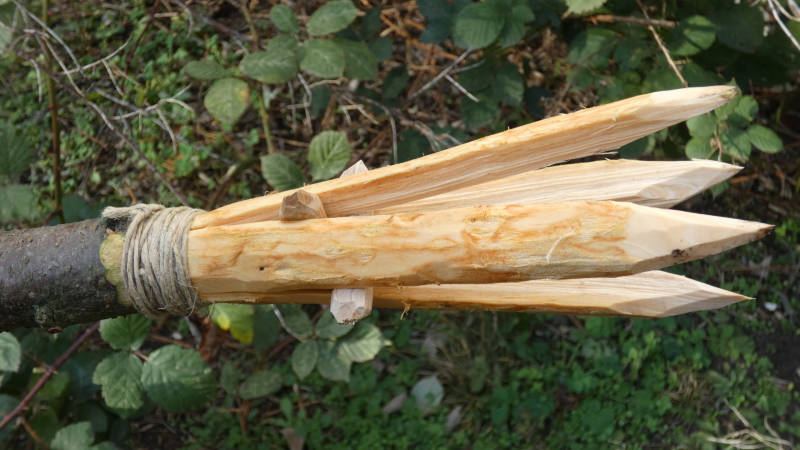
Then put the tips into the fire to harden them sufficiently. Now you have a survival weapon to spear animals and fish.
Alternatively, if you have good ropes, you can shape stone or animal bones into a tip, sharpen them and attach them to the end of your spear.
Reading recommendation: Can I eat raw fish in a survival situation? And if not, what are the alternatives?
Creating a Stone Axe
Now you may already have a blade, and it can be transformed into a stone axe.
To achieve this, split a thick branch and insert the blade at the top. Tie the split back together with a rope at the bottom so that it doesn't split further. Finally, connect the blade to the branch with a rope.
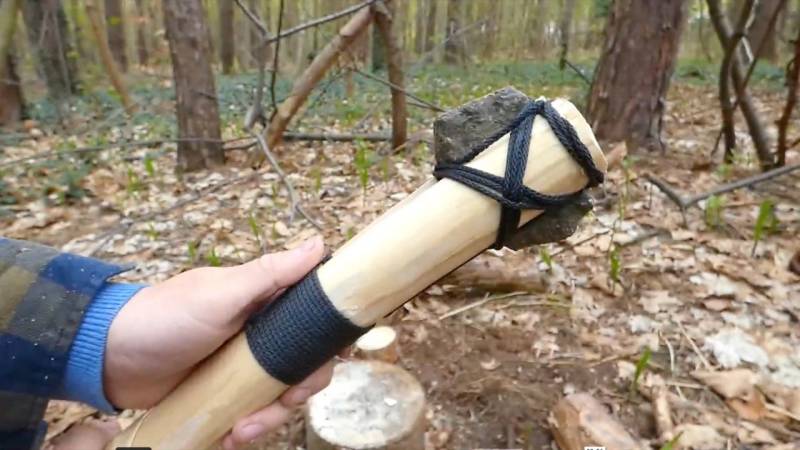
For even more details on how to build your own spear and stone axe, I'll show you in the Wildimpuls program.
Making a Slingshot
If you have access to some kind of rubber band, you can quickly build a slingshot. Stretch the rubber band between a forked stick. Pebbles are your ammunition. Practice a bit and you'll quickly get the hang of it.
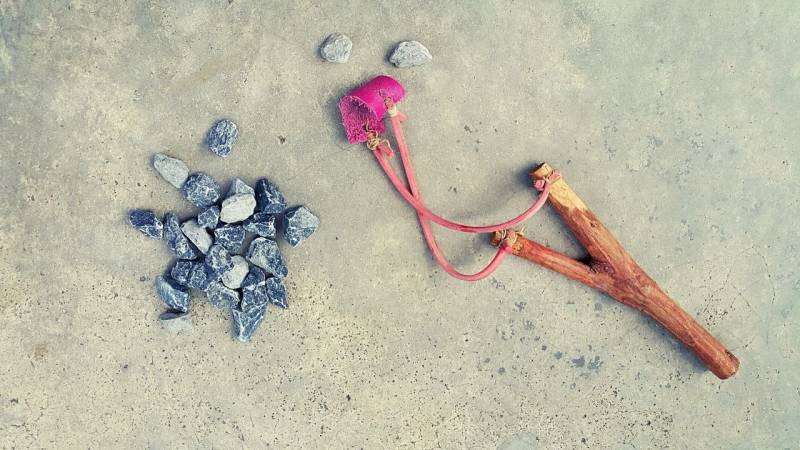
Making a Bow and Arrows
Now it gets more complicated. While it's unlikely that you'll have the time, materials, and energy to build a bow and arrows in the wilderness, it's an excellent survival skill if you're living in the wild long term.
Only build a bow when you're out of danger and have set up camp.
I've read stories in newspapers of people who got lost. One man built himself a bow and starved to death in the process. And what did they find when they found him? All sorts of edible plants were growing next to him. A tragedy.
So make sure you only build a bow if you're experienced in survival situations. You also need a good bushcraft knife for it (Check out my top list for bushcraft knives here).
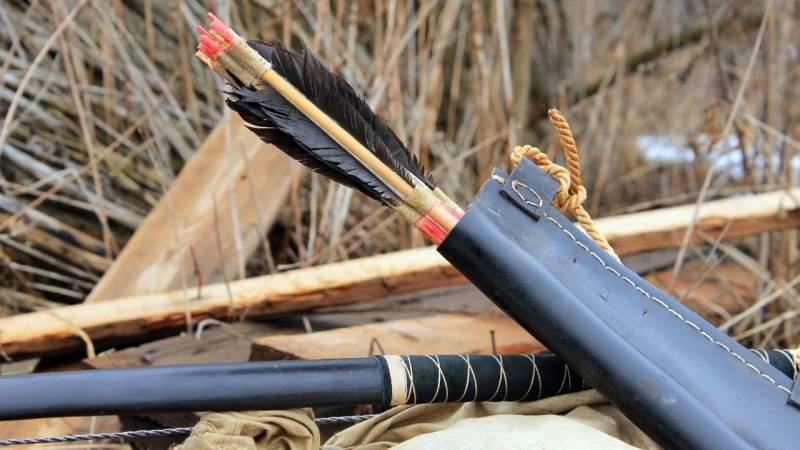
Here's my 10-step process for making a simple arrow and bow:
- Find the right wood - you need to find a long piece of wood, about as long as you are. It must be dry, without any additional twists, branches, or knots. The best types are maple, yew, hornbeam, elder, ash, larch, elm, hickory, locust, Osage, or hazel. Birch, beech or oak also work, but break more easily or are too soft.
- Find the natural curve of the wood - you can find it by gently bending it and working along this curve. Find the natural curve of the bow and don't fight against it. You want the bow to bend along its natural curve.
- Mark the handle - about 15 cm long, right in the middle of the wood.
- Carve the bow - remove enough material that you can bend the bow well. But don't remove too much, or it will break.
- Add notches to attach the bow string. Use a v-notch and put it on both sides of the bow, about 3-4 cm away from the end.
- Choose your bow string - use a thin rope, hemp cord, twine, or fishing line for the bow string.
- String the bow - Tie your bow string to the bow so that it is under tension. The cord should not be loose.
- Test the bend - To do this, pull on the cord and check whether the bow bends. If it doesn't bend, you'll need to remove more wood. If the bow bends too easily, you may need to shorten the bow.
- Make an arrow - Making arrows requires just as much skill. Start anyway and don't worry about the feathers at the end. You won't hit anything at great distances anyway. Put a small core on the blunt end and you're ready to go.
- Test your bow - Insert the arrow, string the bow, and shoot it at a target. But be sure that no one is nearby and could be injured. Depending on how well you shoot, you'll find out if you need to optimize your bow.
Read also
The 7 Enemies When You’re in a Survival Situation - What enemies should you watch out for when in a survival situation? Learn how to avoid these survival mistakes and survive.
5. Learn How to Fish with Primitive Tools
Fishing is a great way to obtain food, so you should definitely learn the basic techniques.
Because when it comes to fishing, just like building traps, you use little energy to get a good amount of food. It's GENIUS for survival.
Fishing with a Spear
Of course, the spear you have already made is good for this task. You must make a multipronged spear for fishing – so your chances of hitting the fish increase.
To catch fish with a spear, you hide as much as possible near the water's edge or even wait in the water. Once you've spotted a fish nearby, quickly thrust the spear into the water at the fish.
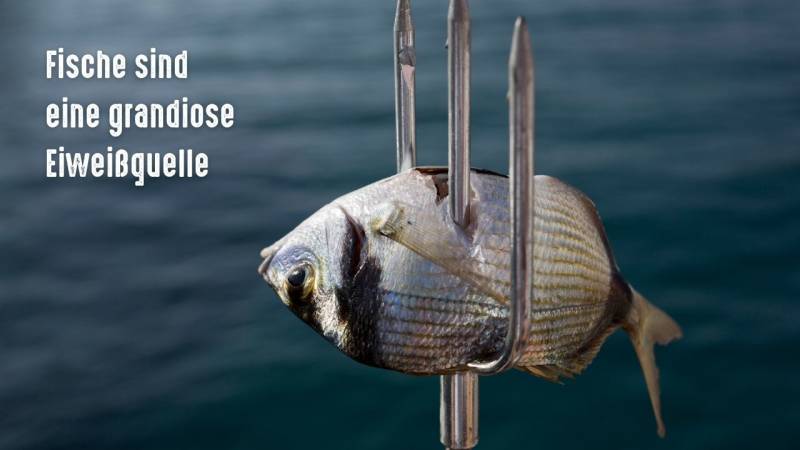
But you should practice the technique beforehand, as at the beginning you will probably not hit anything at all.
Fishing with a Net
If you want to fish with a net, you'll need enough rope to tie one. I've already shown you how to make ropes above.
Then, knot the ropes together in a row to create a net pattern. When deciding on the size of the holes in the net, make sure they are not too large, or the fish will swim through them.
Fishing with a Trap
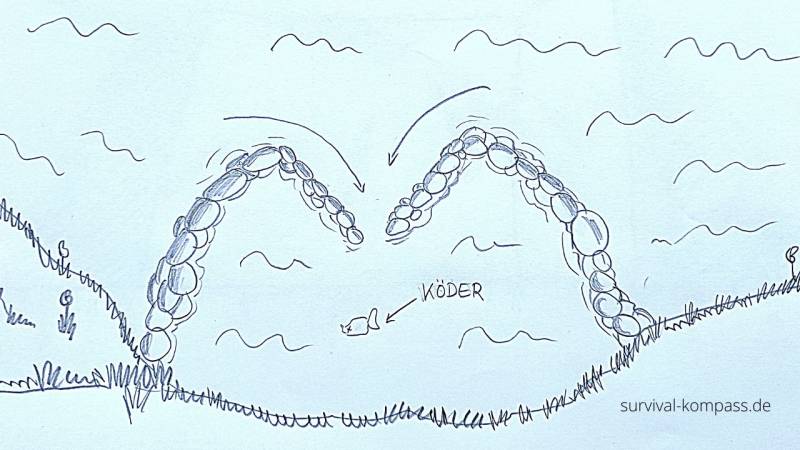
Alternatively, you can also build a fish trap. To accomplish this, find a shallower area and surround it with stones. Build an entrance that narrows inward to a circle at one point.
Place some bait in the water and wait to see if fish, crabs, or crayfish gather. Due to the narrow exit, your catch will have a difficult time escaping.
Fishing with a Rod
If you have a fishing hook and line, that's fantastic. But what if you don't?
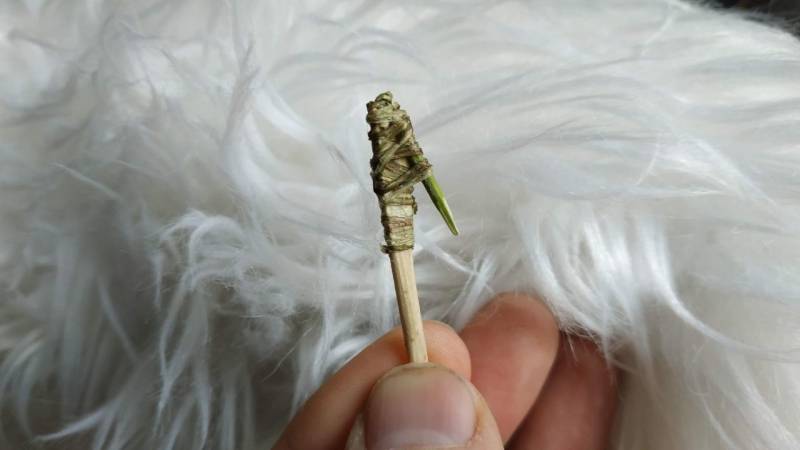
Then you can build your own fishing hook. Bones, thorns, or metal from a soda can all make great materials.
You can spin a fine cord from stinging nettle fibers or bark as your fishing line. The bobber keeps your hook at the right height, and you can use a piece of driftwood that floats on the water.
You can use all sorts of bait, even a red-glowing rose hip will attract perch. Of course, worms, beetles, and flies are better bait.
Ice Fishing
Ice fishing is another great way to get protein in the winter. However, it can be dangerous if you don't follow the proper safety precautions and use the right tools.
Once your fishing gear is ready, the first thing you should do is make sure the ice is safe to walk on.
The easiest way to determine whether it is safe to walk on ice is by its color. Clear/blue ice is almost always safe to walk on and often completely opaque white ice, although not quite as strong as blue ice.
Never step on dark or gray ice, as it usually means it is melting. Also remember that the first frost is usually not enough to freeze the ice thick enough.
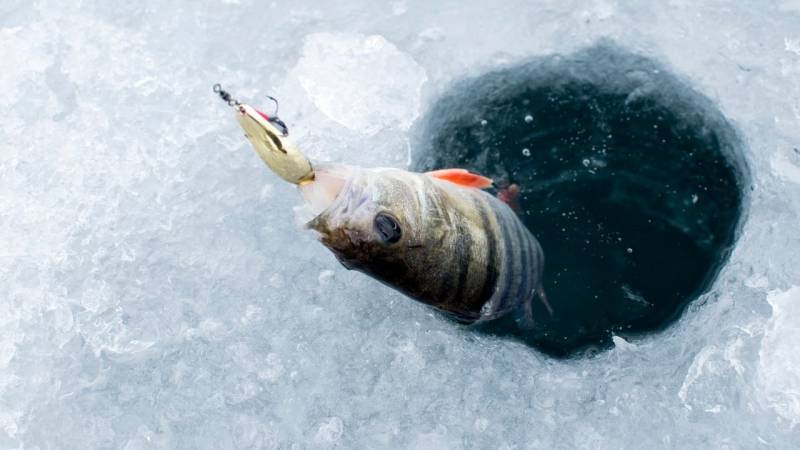
After checking the ice, go towards the middle of the water. Use your spear or a bone or stone knife to drill a hole in the ice. If you hear strange noises while doing so, leave the ice. Then you hold your fishing rod in the drilled hole.
Reading tip: 5 fishing techniques for your survival tool kit - how to catch fish without modern equipment
6. Learn how to build and set traps
In the wilderness, protein is vital to survival, and you need to find a way to acquire it without too much effort.
This is where traps come in, mainly to catch small animals. Trap setting is one of the basic skills every survivalist should master.
With the topic of "primitive traps," entire books can be written, but here I want to show you the most important information.
Attention: The information about traps is only to be used in a survival situation. In Germany, you are not allowed to build traps, pursue or even catch animals. If you set traps, secure the area with signs in case people pass by. Also read "Can I hunt animals and build traps? (in Germany)".
Now I will show you three traps that are easy to build.
Loop as a trap:
Take some paracord, wire or your primitive rope and tie a loop (here's a video for my favorite knot).
Attach one end to a tree or branch and hang the loop at head height, depending on what kind of animal you want to catch. If the animal goes through, the rope will tighten around its neck.
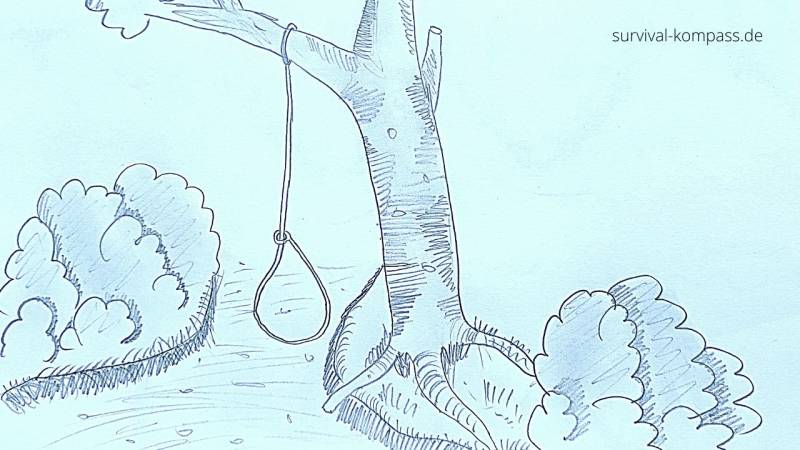
Figure 4 Deadfall Trap:
A figure 4 deadfall trap is a trap where you use a heavy object, such as a log or a stone. The stone is set up with the help of a branch construction so that it crashes down when triggered.
You mainly use figure 4 deadfall traps for small animals like mice, squirrels, or rats.
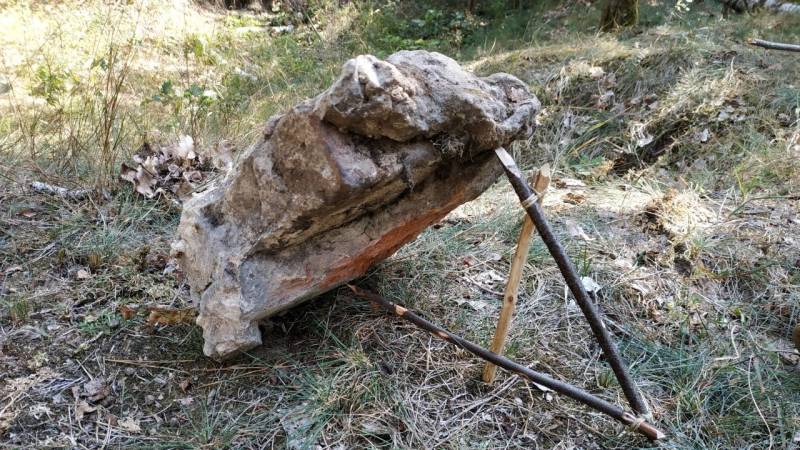
If you want to know exactly how to build such a trap, then read my article "Survival trapping: how to build a simple deadfall trap".
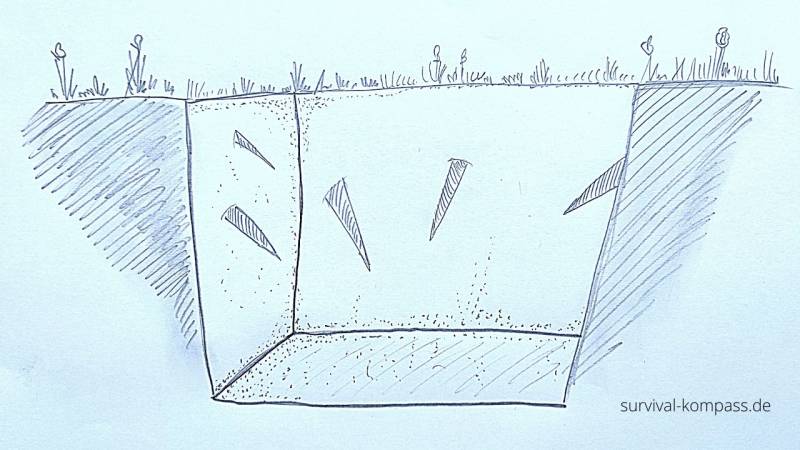
Pitfall trap
Dig a deep hole where your prey cannot escape. Improve this pitfall trap by filling it with water, building conical walls, and sticking pointed stakes into the ground.
Where and how to place animal traps
Ideally, you should place the traps on animal paths, feeding areas, water sources, and burrows. Force the animals to walk in the direction of your trap using guide fences. Try to change as little as possible in the environment. Check your trap at least once a day.
And it's clear that: the more traps you set, the more prey you'll catch.
7. Become a Skilled Hunter
Hunting animals is one of the most difficult methods you can use. Especially when you are only equipped with a spear or a bow with arrows.
If you have never had anything to do with hunting, I do not recommend these methods in a survival situation.
You will only waste a lot of energy and come back empty-handed.
Killing animals is already difficult, but first you have to find them. Animals are true masters at avoiding humans. To track down an animal, you have to move silently and strategically.
Animal tracking
Occasionally, you may find yourself lying in a ditch or sitting in a tree and nothing is happening. Then you have to start tracking (Read here more about this topic) the animals.
People used to constantly read tracks. For a long time, people forgot this knowledge, but now tracking is becoming increasingly popular.
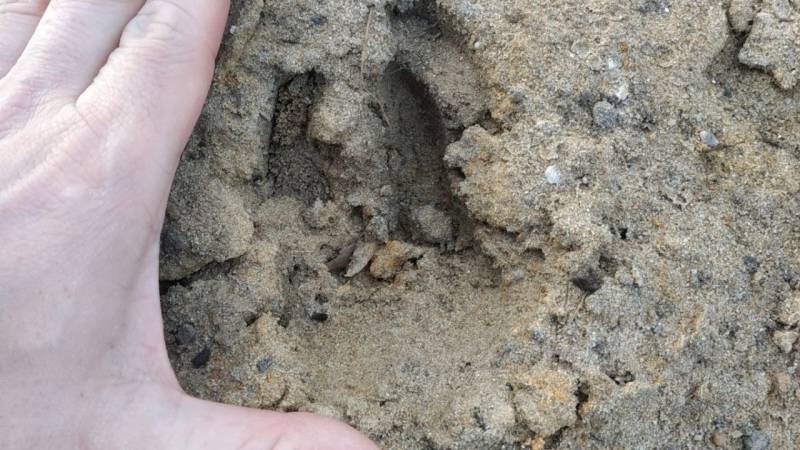
Here are a few techniques to be more successful:
- The best time of day to track wild animals is early morning or late afternoon/early evening.
- Identify the animal you are tracking. Examine the track mark (footprint) closely and use your knowledge to identify the animal (Read here more about tracks in the snow). It makes a difference if you are tracking a wild boar or a roe deer (roe deer hear well but don't see well, wild boars are more dangerous, etc.).
- Follow the track marks as long as possible. Also look for broken branches, animal paths, bites, and any other types of "disturbances" in nature.
- Track quietly through the forest.
If you are keen to learn more about tracking, read my comprehensive guide with many example images: "Learning to Track for Beginners".
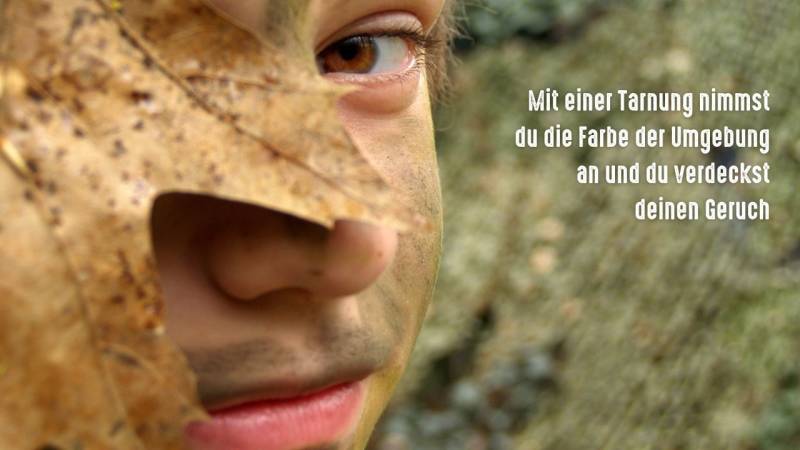
Camouflage
Camouflaging can be very useful. Here are a few techniques:
- First, you should get some mud. Use this to cover your entire body. This will hide your smell and at the same time blend in with the color of your surroundings.
- Once you are covered in mud, and it is still wet, add fresh leaves, grass, and twigs. Avoid using old branches and leaves, as they may rustle when you move.
- Try to hunt against the wind, as this will cover your smell. For example, a wolf can smell you from a distance of 2000 meters.
Catching bigger animals
To catch large game, you need at least a bow, a rifle, or a correspondingly large trap.
If it is possible for you to catch and store large game, you can survive in the wilderness for a long time with the abundance of meat.
You just have to think about how to preserve the meat. You can dry, smoke, or salt it, among other methods.
Read also
The 11 best plant-based protein sources for emergencies (meat alternatives) - If you don't have meat available in an emergency, fortunately there are also plant-based protein sources that are a suitable alternative.
Final thoughts
Food will be vital for your survival. With my seven tips listed above, you are now better prepared for an emergency.
Look, this is how I started:
- I started looking at different plants in my environment (read here).
- Then I learned how to catch and prepare insects (read here).
- Later on, I added trap building to my skill set, which gives me a chance to catch larger animals (read here).
And again, it shows how important it is to be able to make ropes, primitive tools, and weapons for survival situations or for bushcraft living.
I wish you lots of fun practicing.


Author of the guide
Martin Gebhardt
Hey, I'm Martin. On my blog, you will learn the basics and numerous details about living in the wild. I think survival, bushcraft and the good life in nature are the keys to happiness. Find me here on Instagram or on YouTube. You can find more about my mission on the About Me page.
Was this guide helpful?
29 people found this guide helpful.
5.00 out of 5 points (29 Ratings)
Comments (0)
This post may contain affiliate links. So if you click on the links and make a purchase, I will receive a small commission at no additional cost to you. Click here, to learn more about it.


