19 Survival skills you need to know (Top Survival Skills)
If you know and practice these 19 survival skills, you are more likely to survive an extreme situation. Feel safer and stronger with these tips and tricks.

From Martin Gebhardt. Check out my “About me” page.
👉 The key facts from this guide
- Building a Fire: One of the most important survival skills is the ability to start a fire without matches or a lighter. It is recommended to always carry three different types of ignition methods on hikes.
- Managing Panic: In an emergency, it is significant to remain calm and think logically. The rule S.T.O.P. (Stop, Think, Observe, Plan) can help with this.
- Building a Shelter: A shelter provides protection from weather, cold, and animals. Recommended types include a "Lean-To-Shelter" or a "Debris Hut".
- Building Traps: Traps can help procure food by catching animals. They work passively and require little material.
- Building a Fishing Spear: A self-made spear can be an effective method for catching fish, which are a good source of protein.
- Finding Edible Insects: Insects can be a good source of food, as they are rich in protein and fats. However, it is essential to know which insects are edible and how to prepare them properly.
The more you know, the more likely you are to survive an extreme situation.
Below, we will take a look at 19 survival skills that can save your life.
By the end of the article, you will feel safer and stronger.
Let's get started.
No. 1: Make a fire
Making fire without matches or a lighter is one of the most difficult tasks there is.
I have many lessons to learn with the bow drill.
But just because it's difficult doesn't mean it's impossible. That's why I'm a fan of practicing the techniques repeatedly. Only then will you really feel safe.
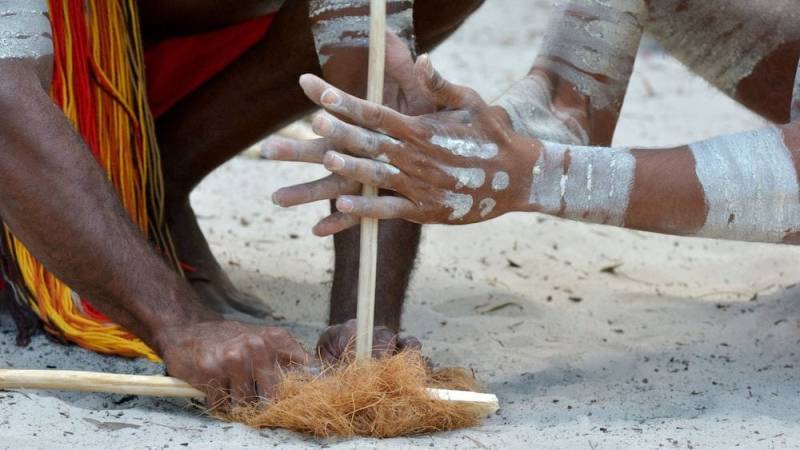
My first recommendation is: always bring three different types of ignition methods on your hikes. So, matches, lighter, and firesteel. Or a flint and steel or a fire pump instead of the firesteel.
Practice igniting a fire with these methods. Yes, many people don't even know how to build a fire with matches. Take it slow.
And if you have mastered the above ignition methods, then take on the challenge of bow drilling.
You should also become familiar with the many types of kindling. With the right kindling, you can ignite a fire in no time.
Here are my guides that will teach you a lot step by step.
- How to quickly and easily start a fire with a firesteel (instructions + video)
- What is a fire pump? [Making a fire with the knowledge of our ancestors]
- How do I start a fire? [10 steps to success]
- Survival basics: collecting and making your own kindling [22 examples]
No. 2: Dealing with Panic
Do you know what the first mistake is that people make when they get lost in the wild?
I'll tell you: They panic.
It's understandable, no question about it.
But helplessness and frustration can freeze people like a concrete pillar.

That's why it's important to understand on a psychological level what an emergency means.
I'll tell you: You've taken on half the challenge if you can deal with panic and fear.
Because in a panic, you don't think logically and rationally.
Therefore, learn the basic idea: S.T.O.P.
S.T.O.P. stands for the English words STOP, THINK, OBSERVE, and PLAN.
So, in German:
- S TOP: Stop! Take a moment of rest before you act.
- T HINK: Think about what to do. Develop a strategy.
- O BSERVE: Observe what surrounds you. What helps you? What risks are there?
- P LAN: Execute your strategy.
And then look at what you've done and learn from it.
Make this rule your principle. It helps you even in everyday life, at work or in your relationship with your partner.
You make the best possible decision because you've taken the time to decide.
People who remain calm and composed simply achieve better results.
No. 3: Building a Shelter
Let me put it this way: You must be able to build a shelter.
The weather, cold, and animals are immensely tough on you. Your own "four walls" also build your morale and give you a secure feeling.
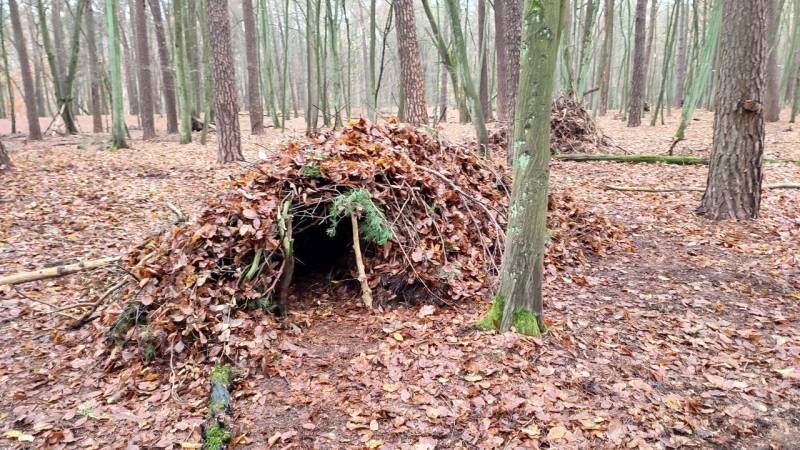
I recommend building a "Lean-To Shelter". Even beginners can do that. Even better is a Debris Hut if you don't have a fire.
Either both sides are closed or only one side is covered.
When built correctly, these shelters are actually incredibly robust.
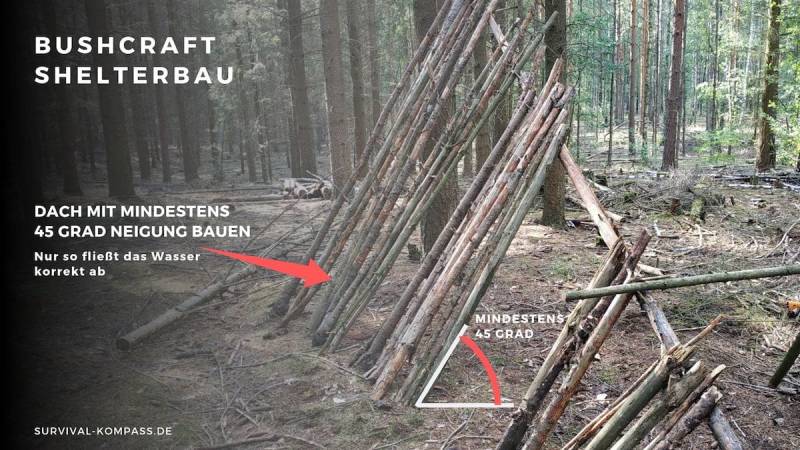
Procedure:
- As demonstrated by the image below, the first step is to lean a thick and long stick against a solid object such as a rock or a tree.
- Then fill the gap with smaller sticks and twigs.
- When building the roof, it's important to maintain a slope of at least 45 degrees (it can be more).
- Only with a slanted roof can water drain properly. Flatter roofs let rain through.
- Finally, cover everything with moss or leaves.
- Place the cover material from bottom to top. The new top layer covers 1/3 of the underlying layer.
Attention: If you want your shelter to be insulated, it needs to be built much tighter and smaller.
Here's an example of a wilderness survival shelter where you can stay warm even without a fire. I slept in it in October with a sleeping bag and camping mat.
Here are two more tips for your shelter:
- Cover the floor with a layer of leaves, grass, branches, twigs, or pine needles. The layer should be at least 10 centimeters high to protect you from the cold ground.
- In winter, when it's freezing, it's better to build a snow cave.
I highly recommend these two detailed guides for building your shelter:
No. 4: Building a Trap
The topic of food is important, so you should be able to build traps.
Traps have a magnificent effect: they work for you in passive mode.
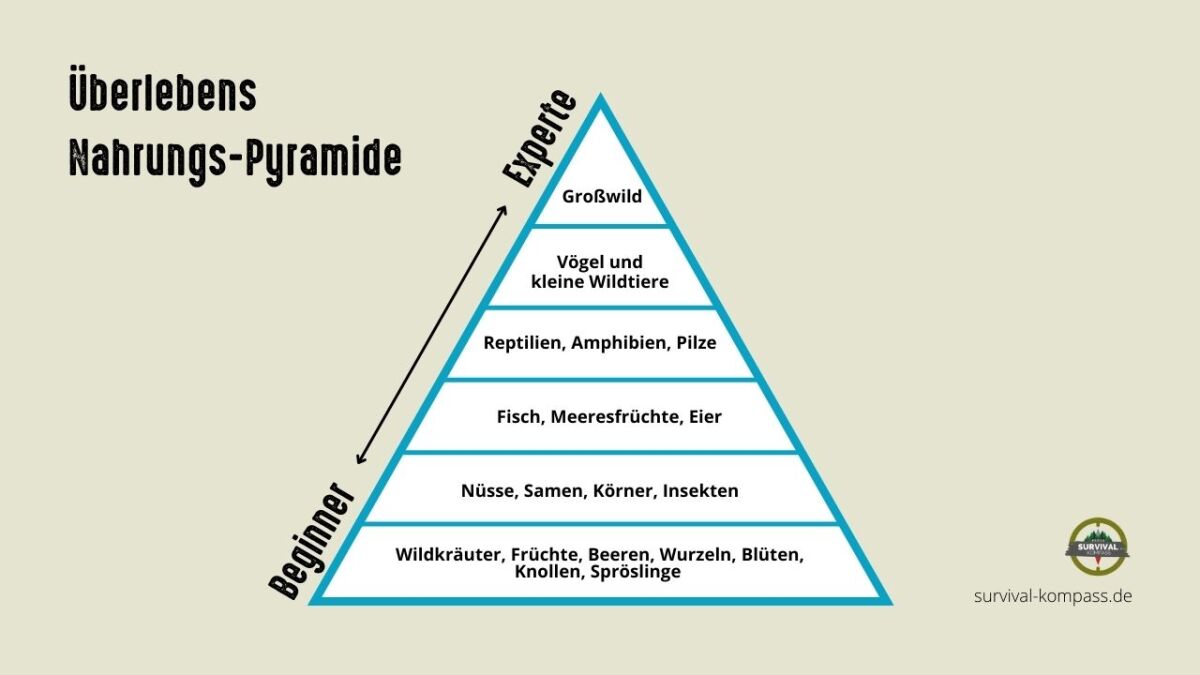
Unlike spear fishing or insect hunting, you only need to place the traps and devote your time to other important tasks.
I recommend practicing various kill traps. A stone crashes down on the animal, triggered by a mechanism.
Similar to the fish spear, traps are easy to build and require little material.
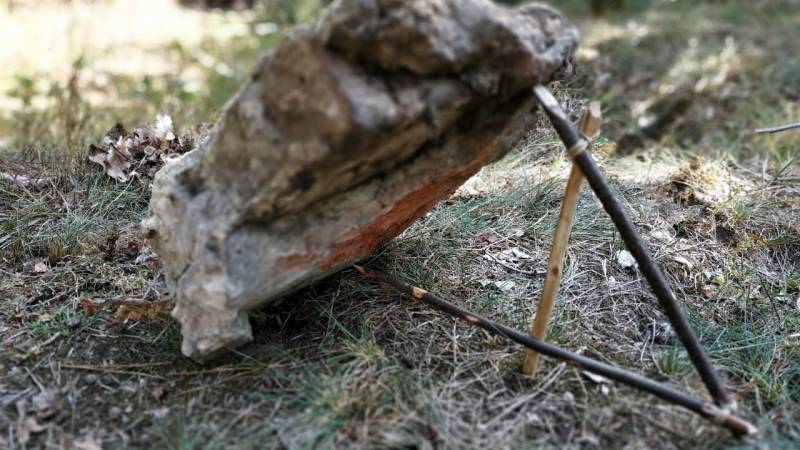
Let's take a look at how to create one:
- Find three sticks and a heavy stone
- Carve notches into the sticks
- Hold the stone up while placing the sticks
Once everything is in place, place a bait to lure an animal under the stone. For example, you can use fish guts, insects, worms, or things with bright colors.
In my article "Survival trap building: how to build a simple manslaughter trap", I show you exactly (picture by picture and in the video) how to make a trap.
No. 5: Building a Spear for Fishing
Let's imagine that you are really in an emergency and urgently need something to eat.
Catching larger animals will not work without much effort or a gun. But there are fish - usually in all streams and lakes.
A fish is rich in protein, so it's full of energy. You can fry, roast, or cook it.
And you don't even need a fishing rod because from now on, you will be able to build a spear. Sneak up to a body of water and then wait for fish in one spot.
Especially good are streams where a lot of water is mixed up, since trout love it that way because the water contains so much oxygen.
But calm spots on the bank where the ground hangs over the water are also an excellent hiding place for fish (they rest there).
The method of building a spear is really ingenious because you have also built a weapon to protect you against wild animals.
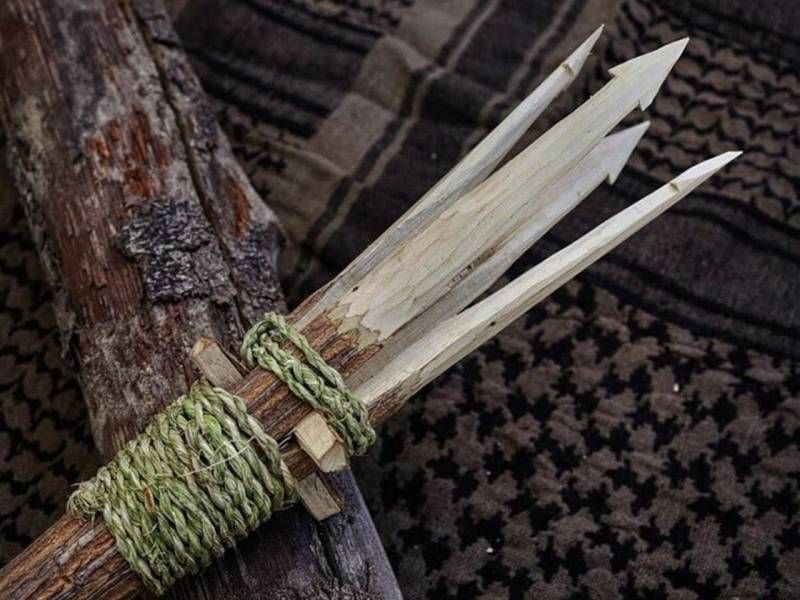
How to build a fish spear:
- Find a long stick
- Then with a knife, separate the end of the stick into four individual prongs
- Split the four prongs, using small pieces of wood
If you want to know step-by-step how to build a fishing spear, I recommend my easy-to-understand e-book.
No. 6: Finding Edible Insects
Imagine this: you are alone in the woods. What would you eat besides plants?
There's no way you can hunt wild animals. By the time you catch a wild boar, it would have already impaled you.
So, you have no choice: you have to look for insects.
As gross as it sounds at first, in other countries it's completely normal. People in those countries eat insects like we eat bread every day in Germany. Even our ancestors used to eat the little critters regularly.

Eating insects is like biting into a power bar. Full of protein and fat – pure energy, just when you need it most.
However, not all insects are edible and there are tricks to preparing them.
Let's take a look at what you need to consider.
Avoid insects:
- that can sting
- that are hairy
- that have bright colors
- that can transmit diseases (mosquitoes, ticks, flies, etc.)
These are the best insects in German forests and meadows:
- Crickets
- Grasshoppers
- Caterpillars
- Ants
- Beetles
- Insect larvae
- Honey bees
To prepare insects, I strongly recommend that you do not eat them raw. This will keep parasites at bay. Always cook, fry or roast your insects.
Do you want to learn more and educate yourself on the topic? Then read my article "Survival Basics: Eating Insects (Preparation, Catching, Breeding)". There I will show you how to catch insects and why you have to remove the legs and wings before eating them.
In my comprehensive guide to grasshoppers, you will also learn how to catch and prepare them correctly.
No. 7: Sending a distress signal
If you're lost in the wilderness, two principles apply:
- Stay alive as long as possible.
- Make yourself noticeable, someone is likely looking for you.
You need to know how to create a distress signal. Otherwise, it's unlikely that the search party will find you.
There are three important methods:
- Build a large "SOS" or "X" out of stones or logs on the ground. It's visible from above and is a universal distress signal.
- Send a Morse code signal with a flashlight, mirror, or whistle. The international SOS Morse code is: · · · − − − · · ·, three short, three long, three short.
- Like any initial or unanswered transmission, the call – here, SOS – should be sent three times in a row (so · · · − − − · · · · · · − − − · · · · · · − − − · · ·)
- Build a signal fire and burn heavily sooting material. That means material that contains petroleum, such as plastic or rubber.
- If you have a flare gun or signal fire, use it only when you suspect other people are nearby (you usually only have one chance).
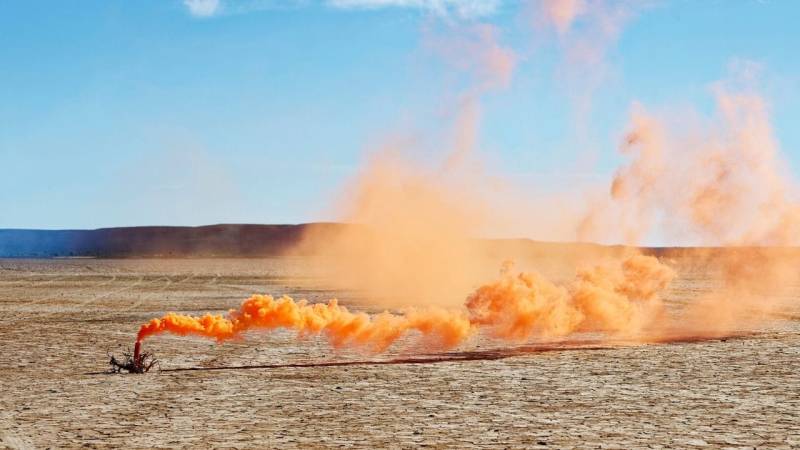
Reading tip: 3 primitive signals to make you noticeable in an emergency
No. 8: Making a rope
Making a rope is essential. You need it for many purposes, such as building a shelter or constructing traps.
Unfortunately, many hikers pack all sorts of unnecessary stuff in their backpacks but forget to bring a rope or cord.
Making a rope is not difficult; our ancestors did it thousands of years ago.
All you need are plant fibers.
Here's what you need:
- Find plants that consist mostly of fibers that are easy to remove (nettles, inner bark of dead trees).
- In exceptional cases, you can use other materials such as strips of plastic bags, paper, or even toilet paper.
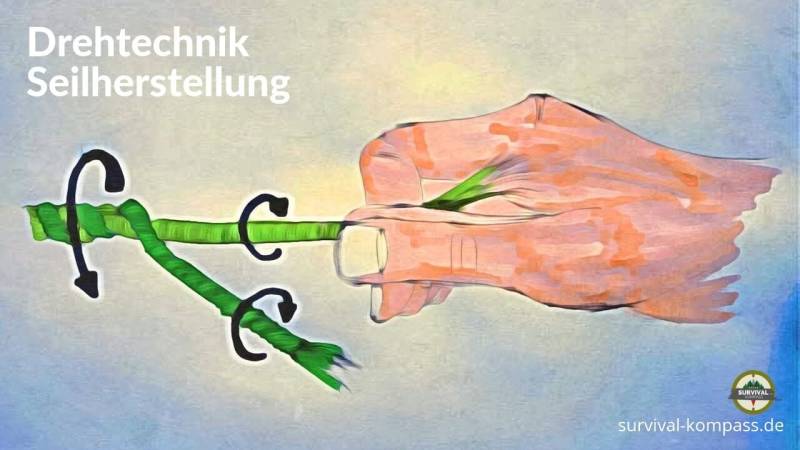
Here's how to twist your rope:
- The first twist goes clockwise (the two smaller ropes).
- The second twist must be counterclockwise (the two ropes are twisted together).
- So, the most important thing is to always alternate twisting and keep the fibers/ropes under tension.
Here's a graphic that illustrates the technique:
In my article "How to Make Your Own Ropes (Picture Guide + Video)", I explain exactly how to twist a rope. Be sure to check it out if you are keen to learn more about rope making.
No. 9: Thawing cold feet
Especially in winter, cold feet and limbs can be a big problem.
Your feet freeze when they are exposed to the icy ground for a long time. The skin freezes, then the tissue underneath.
At this point, you must start warming up your feet again. If you don't, the skin can be damaged.
Severe frostbite is characterized as follows:
- You experience numbness in the affected area
- White spots appear on the skin
- Black spots may appear on the skin in cases of severe frostbite
- The affected area becomes hard
If frostbite is severe, it is highly likely that the foot will need to be amputated.
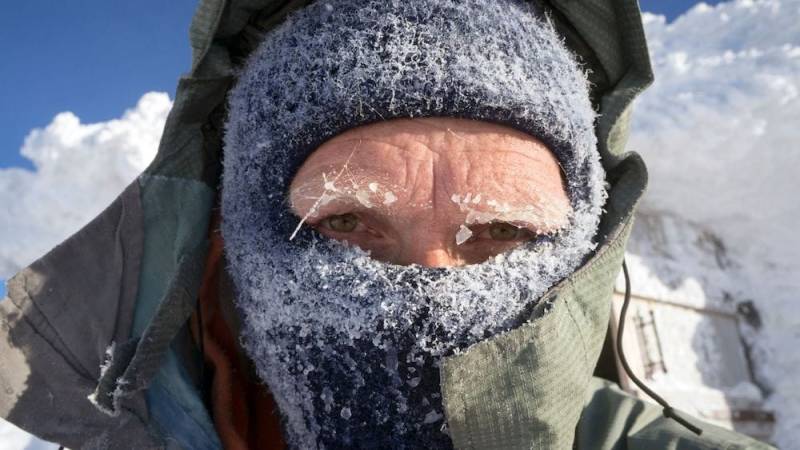
To prevent your feet from freezing, swing your leg back and forth like a pendulum. Gradually, you will regain feeling in the area.
Then seek first aid, shelter, and a fire. Do not continue walking.
Never massage or rub frozen tissue. Furthermore, do not thaw frozen limbs over a fire or in hot water. Warm water is fine, though.
Recommended reading: "Survival in Winter – These Tips are Important for the Cold".
No. 10: Measuring the distance traveled
It is wise to know how far you have walked.
How far are you from civilization? How many kilometers have you walked in a day?
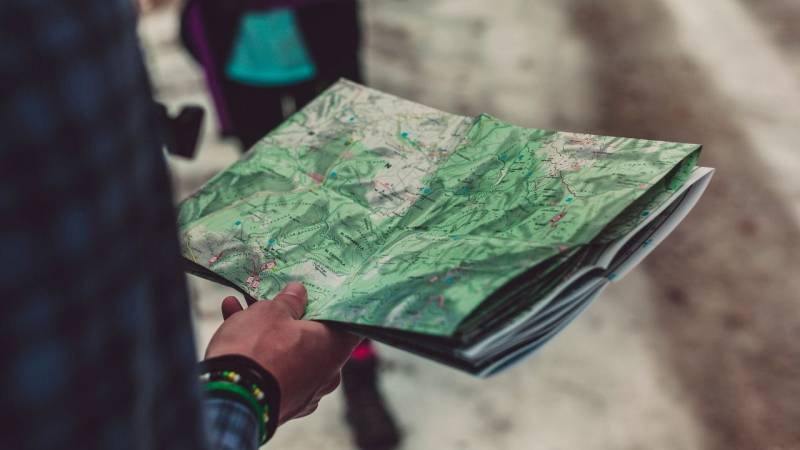
Without a GPS device, map, and compass, there is a wonderful way to measure the distance you have traveled.
All you need is a watch.
I recommend the following calculation, even though it is not exact to the detail. The method is just one of many ways.
How to do it, method 1:
- On average, a human walks about 3 to 5 kilometers per hour (5 km/h is quite fast)
- So if you have walked for 4 hours at 4 km/h, you have covered exactly 16 kilometers (without breaks, on flat terrain)
- If the terrain is uneven or densely wooded, you will walk slower
Method 2, without a clock:
- A step is usually between 71 and 75 centimeters long
- Count your steps and calculate the distance covered
- 2000 steps therefore mean 2000 × 0.75 meters: 1500 meters
No. 11: Determining cardinal directions
Knowing North leads to finding all other cardinal directions.
Knowing the cardinal directions can help you navigate – for example, to the nearest city.
This is incredibly useful if you have a map, but no compass.
With this method, you only need your analog watch:
- Take your analog watch and hold it flat
- Point the hour hand towards the sun
- South lies in the middle between the hour hand and 12 o'clock
- North lies in the opposite direction at 180 degrees
You might be thinking: That's imprecise!
The method isn't one hundred percent accurate, but it comes pretty close.
I assure you, it is pretty accurate.
Don't believe me? Then try it out. Go outside as soon as the sun shines and check the method.
This is one of the most important survival skills you need to possess.

Note: This measurement only works in the Northern Hemisphere. For the Southern Hemisphere, do the following:
- Align the 12 on your watch in the direction of the sun
- The north is located in the middle between 12 o'clock and the hour hand
P. S. During daylight saving time, use 1 o'clock instead of 12 o'clock on your watch.
Here's my reading recommendation for the ingenious shadow stick method (even more accurate): "How to Determine the Directions with the Shadow". And also check out my basic guide: "11 Methods for Navigation and Orientation Without Compass".
No. 12: Stop a bleeding
Imagine you are alone in the woods. You forgot your first aid kit today.
And then the dilemma: You cut yourself deeply.
Even if you hopefully never have to use this technique, it will help you from bleeding to death.
Here's how to create a bandage from nature:
- Find dried moss as quickly as possible. Moss, like peat moss, is soft and bushy.
- If you can't find moss (usually only found in swamps and bogs), take another dry moss.
- Moss absorbs and also has an antibacterial effect.
- Press the moss firmly against the wound and wait until the wound stops bleeding.
- Then seek medical attention as soon as possible.
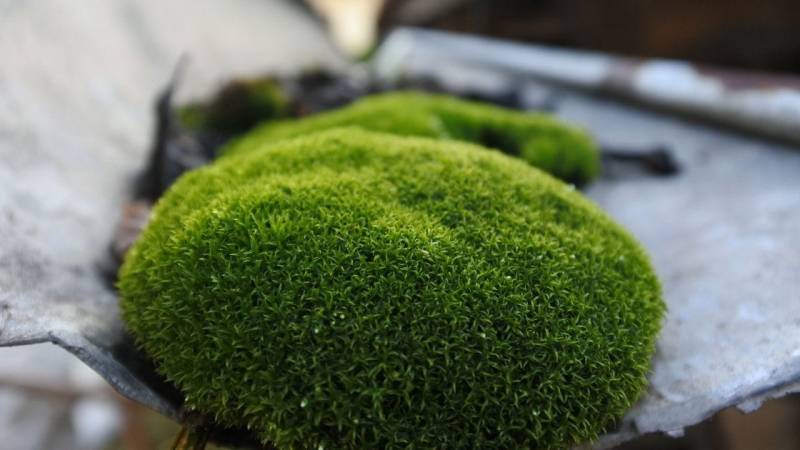
Did you know that soldiers in World War I already used this method?
Read also
The 7 enemies if you are in a survival situation - Which enemies do you have to watch out for when you are in a survival situation? Find out how to avoid these survival mistakes and survive.
No. 13: Escaping insect bites
Do you know that feeling in summer? Buzzing everywhere and a mosquito constantly in front of your nose.
In midsummer, you can't stand being in the forest at twilight for long.
Here in Germany, it is still harmless. In other countries, mosquitoes transmit diseases such as malaria.
Furthermore, bites from certain beetles can be painful and lead to infections.
The goal is to avoid getting bitten by as few insects as possible.
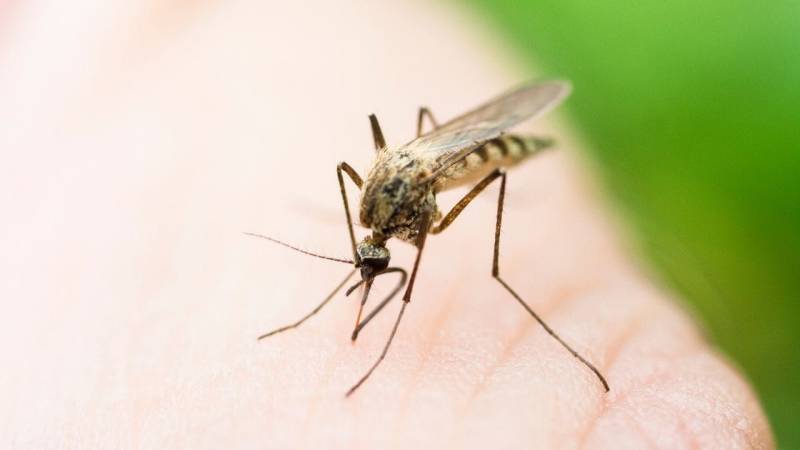
This can help you:
- Find a windy spot - this makes it difficult for insects to bite you.
- Cover your exposed skin with mud and dirt - this prevents any stingers from getting through (read the entire guide here).
- Avoid dark, wet, and sweaty clothing - this attracts mosquitoes.
- Use pieces of birchbark as protection against insects.
If you take birchbark directly from the tree and rub it on yourself, the protection against insects is not very high.
However, there is a wonderful method to make effective insect repellent.
You need birch tar oil, which is obtained from birch tar. The best type of birch for this is the silver birch.
This is how you repel insects: Let 2 drops of birch tar oil evaporate in 1 tablespoon of water (for example, in a fragrance lamp).
You can read more about birchbark here: "Birch bark: the survival wonder [application examples]".
No. 14: Splint a Broken Arm
Have you ever broken your arm? Yes? Then you know how painful it is. And if not, I wish you never will.
If you break your arm and go to the hospital immediately, it's no big deal.
But if it happens to you in the wild, you are challenged.
Build your shelter with one arm. Or start a fire with just one hand. This significantly limits you, so you'll have to brace your arm.
Here's what you can do: If you have a sleeping pad with you, wrap it around your arm. Then tighten everything together.
No sleeping pad? Take sticks, put them on both sides of your arm and support it that way. But, I assure you, even with a brace, you won't be jumping around joyfully like in some action movies.
Tip: Take painkillers immediately. Preferably, during the shock phase. When your adrenaline wears off, it will hurt terribly.
No. 15: Estimate the Length of Daylight
When it gets dark and night falls, you're stuck without light.
Therefore, it is essential to know when the sun sets.
Because at night, you won't start a fire, build a shelter, or even find water.
You may not have a watch on you. Or you may be in a time zone where you don't know the time of sunset.
So, you have to estimate how much daylight you have left.
Here's how:
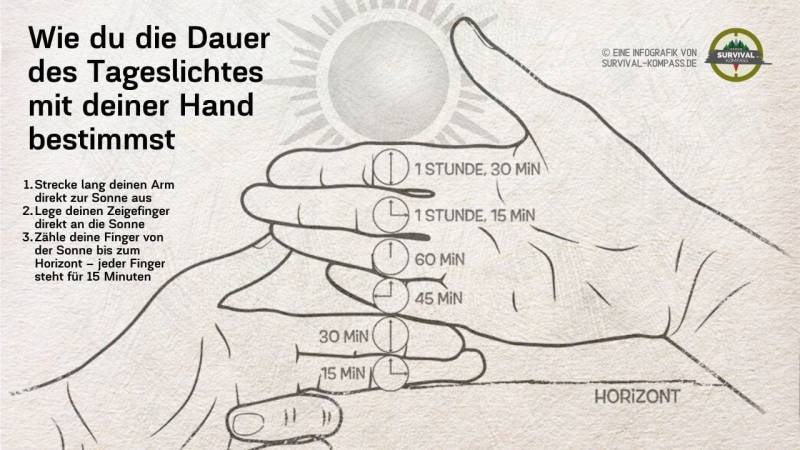
- Stretch your arm out straight towards the sun
- Place your index finger on the bottom part of the sun
- Count your fingers from the sun to the horizon
- Each finger represents 15 minutes of daylight
- If there is still space to the horizon, use your other hand as well
Here is an image that illustrates the method:
No. 16: Know your water requirements
You're not dumb, I know that. So, you also know that water is vital.
Unfortunately, most people who are lost in the wilderness end up dying of thirst.
And finding water is anything but easy, so you need to tackle it first.
What makes the situation so dangerous: Many people don't know how much water they consume.
You lose water through:
- Breathing
- Sweating
- Urinating
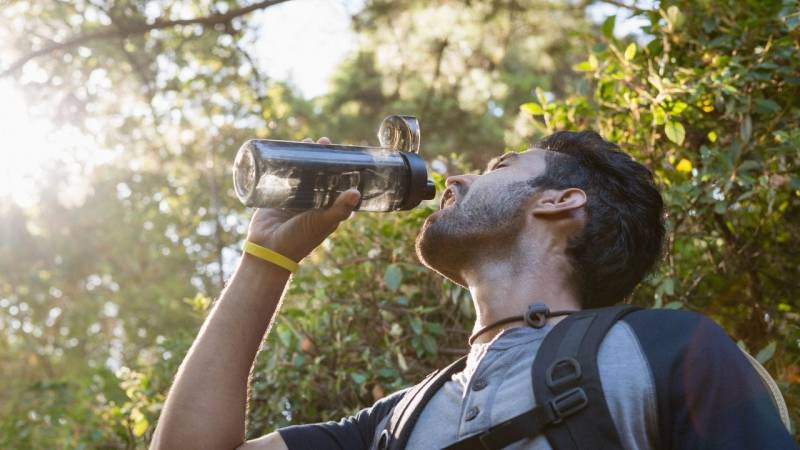
So, how do you estimate your water requirements?
In Germany, it's quite simple. An average person loses about 1.5 liters every 24 hours.
However, if you're physically exerting yourself, the day is particularly hot, or you're even in the desert, you'll lose a lot more water.
In extreme situations, you can lose up to one liter per hour.
So plan well for your water needs and prepare early to find it.
In my article "Survival: the ultimate Water-Guide" you will learn everything about finding, collecting and filtering water.
No. 17: Building a solar still
A solar still is a great invention. And I am convinced that everyone should be able to build one.
And by everyone, I don't just mean bushcrafters and survivalists, but also hikers and trekking enthusiasts.
Why? Because you never know when you will be in a survival situation.
As mentioned above, most people die because they have died of thirst.
The problem: You can't just drink from a stream, lake, or pond. It is very likely that you will upset your stomach.
Collecting water is one of the most important points on your survival list.
My tip: Build a solar still.
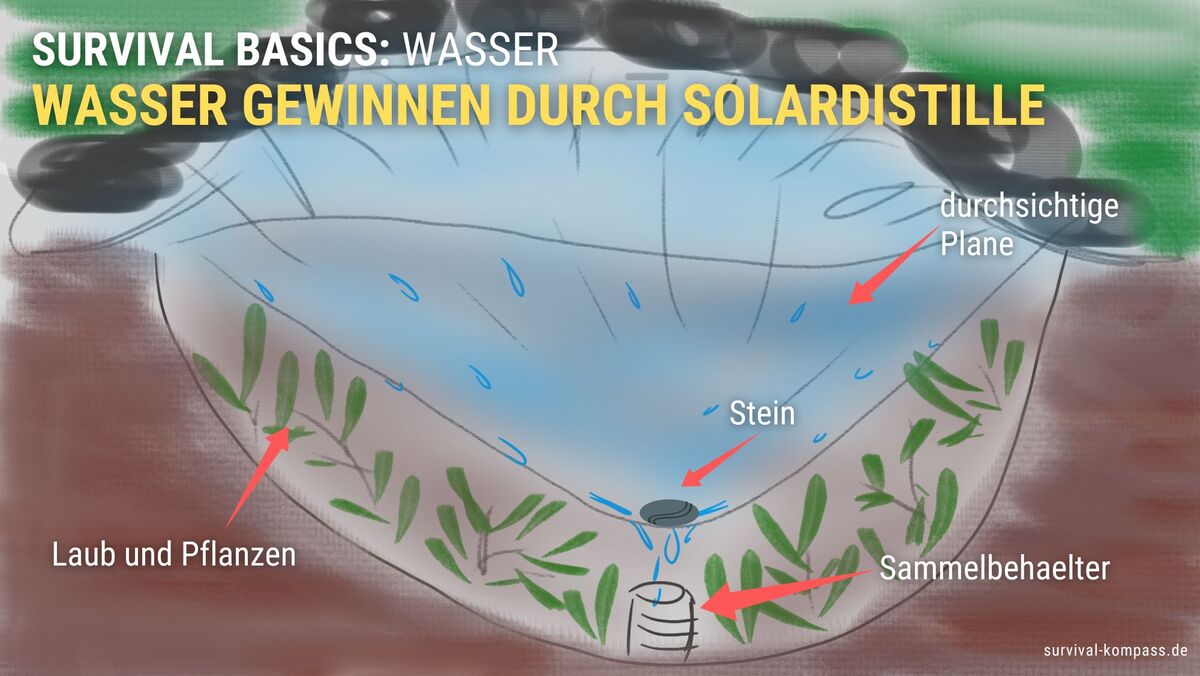
This is how it works:
- Dig a hole about 20–30 centimeters deep
- Place a container in the middle of the hole
- Put everything that is wet in the hole: plants, leaves, foliage - you can even pee in it
- Then stretch a plastic sheet over the hole (as airtight as possible)
- Put a stone exactly over your container to create a depression
From now on, your water will evaporate, drip onto the plastic sheet, cool down and drip into your container.
The water is absolutely drinkable. You don't have to worry about contamination.
This method is one of the most important survival skills when collecting water in the wild.
Here is an infographic about the solar still:
No. 18: Know Edible Plants
If your traps fail, and you can't find water with fish, you only have one option: find edible plants.
If you know which plants are edible, you have an advantage.
Green plants are found all over the world – except in deserts.
You can find edible herbs all year round. For example:
- Dandelions
- Wild leeks
- Watercress
- Sorrel
- Dead nettles
- Stinging nettles
- Chickweed
- Rose hips
- Thistle
These plants provide important nutrients such as vitamins, minerals, and trace elements that give you new energy.
If you can't find greenery, you can also rely on tree buds.
Recommendation: Read my article on edibility testing for plants. This way you can check if a plant is edible.

No. 19: Think positively!
Your attitude is, in my opinion, the most important thing. If you approach something in a bad mood, it is very likely to fail.
If I could choose a partner: I would take someone who is full of energy, thinks positively, and is interested in finding a solution.
Do you know what kind of people survive most often in the wilderness?
It's the "yes"-sayers. They are the ones who never give up. They constantly say to themselves, "I can do this!".
And such an attitude not only helps you to move forward in the wilderness, but in life as a whole.
Here's a reading tip where I also write about a positive attitude: "How to deal with panic in emergencies".

How to train these 19 survival skills
There are two things you need to do to be able to perform a skill permanently (especially basic Survival Techniques).
- Learn (understand the theory)
- Practice (put the theory into practice)
That's it.
If you do both correctly, you will master all the skills.
However, if you only learn and do not practice, you can explain how someone survives - but you will fail when it comes to it.
So grab my article and pick something. Internalize the technique or read more articles on my blog on the topic.
And then go out into nature and practice.
If you would rather not do it alone, come to the Wildimpuls program (in German).
I wish you a lot of success.
What do you think of my selection? Would you add or omit any skills or techniques?
Write to me in the comments.
Also read: 28 survival skills modern humans have forgotten (and that you can learn again)


Author of the guide
Martin Gebhardt
Hey, I'm Martin. On my blog, you will learn the basics and numerous details about living in the wild. I think survival, bushcraft and the good life in nature are the keys to happiness. Find me here on Instagram or on YouTube. You can find more about my mission on the About Me page.
Was this guide helpful?
32 people found this guide helpful.
5.00 out of 5 points (32 Ratings)
Comments (0)
This post may contain affiliate links. So if you click on the links and make a purchase, I will receive a small commission at no additional cost to you. Click here, to learn more about it.


