


7 DIY Gift Ideas with a Forest Vibe
Free 35 Survival Hacks you'll love!
You will get 35 easy-to-implement survival hacks so that you don't have to stand aimlessly in the forest from tomorrow when things get tough. Take your skills to the next level!
DOWNLOAD HERE FOR FREE👉 The key facts from this guide
- Seven gift ideas that combine natural materials, craftsmanship, and time: leaf bookmarks, greeting cards with leaf prints, rosehip tea, resin salve, a hand-carved spatula, a leather pouch, and a birch-bark container.
- Varying levels of difficulty: paper crafts for beginners; tea and salve, which require careful preparation; and wood carving or bark-working for more in-depth nature-based crafting.
- Not everything comes from the forest. You will also need items like leather, paper, paint, wax, or string. The personal value comes from your own hands and the time you invest.
- Plan ahead: leaves need to be pressed, rosehips must be dried, and woodworking projects often require several stages of work.
- Gather responsibly: collect only small amounts, do not harm living trees, and ensure that any wood or bark is sourced from a permitted location.
- Nothing has to be perfect. What truly matters is that the recipient realizes: someone took the time to create this just for me.
A few weeks ago, I was out collecting leaves with my children.
Vibrant red. Lemon yellow. Rusty orange. Not a single leaf looked like any other.
And then, during a virtual campfire, a Wildimpuls participant shared that she laminates her autumn leaves and gives them away as Christmas bookmarks.
Ever since, that idea hasn't left my head.
Because what is it that we actually give as gifts?
Yet another item that disappears into a closet? Something ordered in a rush, unwrapped in seconds, and quickly forgotten?
Or something someone holds in their hands and realizes: someone took the time for me.
A leaf bookmark brings back memories of a walk. A printed card carries a personal note. A hand-carved wooden spatula keeps someone company in the kitchen.
I have put together seven ideas for you. Some take just a single afternoon, others a few quiet evenings. Part of the materials and plenty of inspiration come directly from nature. You supply the rest: your hands and your time.
And honestly: these ideas aren't just for Christmas. They work just as well for birthdays, as a small thoughtful gift, or as a hands-on crafting afternoon spent together.
The Seven Ideas at a Glance
The time estimates are rough guides. Foraging, shopping, practice, and finishing touches may add extra time.
| Gift | Effort | Prep Time to Note | Best Suited For |
|---|---|---|---|
| Leaf Bookmark | Easy | Leaves must be pressed and dried first | Avid readers |
| Greeting Cards with Leaf Prints | Easy, great with kids | Allow paint to dry | Personal greetings |
| Rose Hip Tea in a Jar | Easy, but requires care | Deseeding and thorough drying | Tea lovers |
| Resin Salve | More preparation | Only follow a tested recipe | Anyone who appreciates homemade goods |
| Hand-Carved Spatula | More demanding | Several working stages | Home cooks |
| Leather Pouch | Manageable | Sourcing suitable leather | Small everyday keepsakes |
| Birch Bark Box | Moderate to advanced | Material from permitted sources | Fans of traditional bushcraft crafts |
Foraging with Respect
Before you set out, a few ground rules:
- Take only small amounts. Leave plenty behind for wildlife, decomposition, and natural cycles.
- Never harm living trees. Do not harvest resin by scoring bark, and never strip bark from a standing trunk.
- Respect protected areas and private property. Nature reserves, national parks, and private grounds are strictly off-limits.
- Wood and bark are special cases. The traditional foraging rule under Section 39 (3) of the German Federal Nature Conservation Act (BNatSchG) permits the careful gathering of small quantities of certain wild materials for personal use. It does not provide blanket permission for harvesting timber or substantial pieces of bark. Always verify the source with the landowner or relevant authority.
- Only use materials for kitchen projects that have been positively identified and deemed food-safe.
Learn more: The Hand Bouquet Rule: What You Are Allowed to Forage in Germany and Can I Collect Branches and Wood in the Forest?
1. Leaf Bookmark: A Piece of Autumn Between the Pages
The idea where it all began.
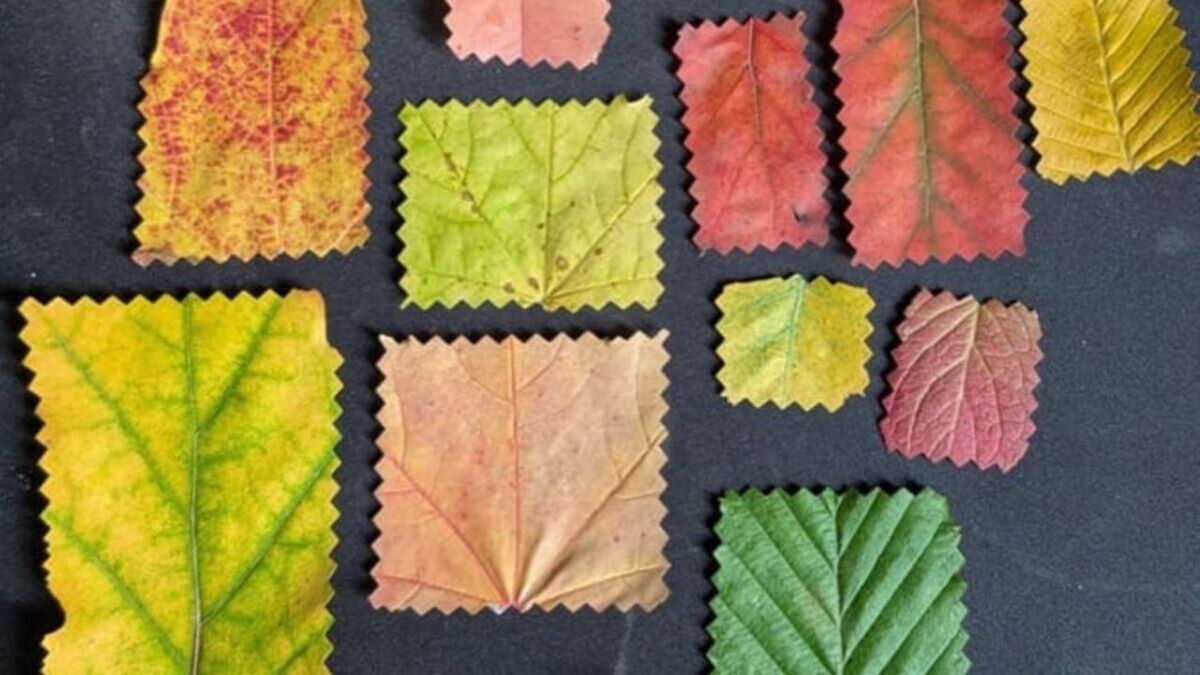
Dry colorful leaves, trim them to shape, and laminate them. Just like that, an autumn find turns into a bookmark that reminds someone of a walk in the woods with every reading break.
What you need:
- Foraged leaves
- Absorbent paper
- A flower press or a heavy, weighted book
- Scissors
- Laminating pouches and, if available, a laminator
- Optional: thin cardstock backing, a ribbon
How to do it:
- Select your leaves. Pick clean, intact leaves. Thin foliage is far easier to work with than thick specimens with heavy stems.
- Press and dry. Place between absorbent paper and weigh down until completely dry. This is the crucial step: moisture must never be sealed inside laminating film.
- Arrange. Position a single leaf or a neat arrangement in bookmark format, mounting it on a strip of cardstock if desired.
- Laminate. Follow the instructions for your laminator or self-adhesive pouches.
- Cut to size. Leave a sealed laminate border around all edges. If you want to punch a hole for a ribbon, only punch through the outer clear margin.
The personal touch: Write on the back which tree the leaf came from, when you found it, or add a short note. Tucked into a book, it makes a wonderfully thoughtful gift.
Good to know: Colors naturally shift and fade over time. That is simply part of the charm.
You can skip the plastic: If you prefer to avoid plastic entirely, glue the pressed leaf directly onto sturdy cardstock. It offers a different feel than sealed lamination, but looks just as lovely.
If you also want to identify which leaf belongs to which tree while out gathering: How to Tell Norway Maple, Sycamore, and Field Maple Apart
2. Greeting Cards with Leaf Prints: Every Leaf Leaves Its Own Mark
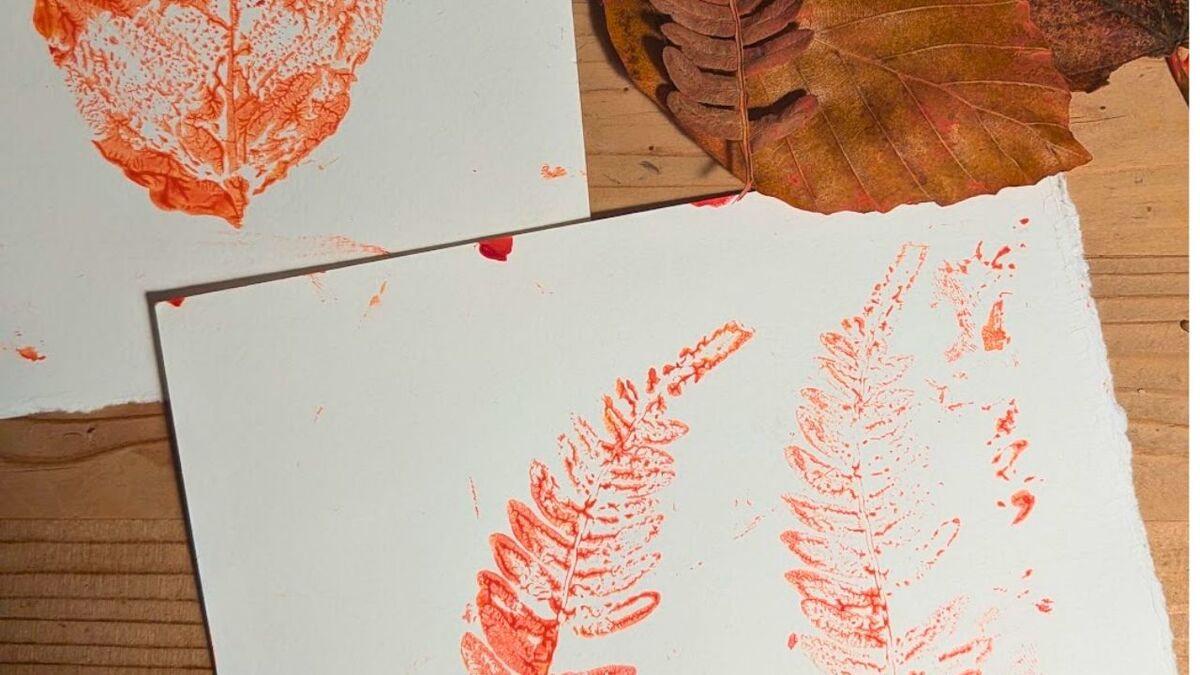
You don't need any drawing skills for this project. The leaf veins, natural contours, and subtle imperfections handle the design work for you.
Coat a leaf with paint, press it onto paper, and you're done. It's a wonderful project to do with kids, too.
Best of all: a hand-printed card works as a standalone keepsake or as the perfect companion to any of the other ideas in this guide.
What you need:
- Leaves with pronounced veins (fern fronds work great too)
- Cardstock or blank folded cards
- Craft paint (non-toxic and age-appropriate for children)
- A paintbrush or small foam roller
- Work surface cover, scrap paper, and water for clean-up
How to do it:
- Clean the leaf and pat it dry.
- Apply a thin layer of paint to one side. The underside of the leaf often yields better results because the vein network stands out more prominently.
- Test it on scrap paper first.
- Place the leaf paint-side down onto the card, cover with a sheet of scrap paper, and press down evenly.
- Carefully lift the leaf off and let the print dry thoroughly.
- Write your personal message only once the ink has fully dried.
Common pitfalls:
- Too much paint obscures the fine vein structures.
- Slipping produces a blurred double impression.
- Always make your first test print on a trial sheet.
Design ideas: A single prominent leaf centered on the card, a small cluster, or a repeating border print. In the magazine linked above, the Lower Saxony State Forestry Service also demonstrates how to print custom wrapping paper using natural materials—a great way to tie the whole gift package together.
3. Rose Hip Tea in a Jar: A Little Winter Supply to Gift
A lovely gift for any tea enthusiast, carrying a story of mindful foraging and careful processing.
What you need:
- Positively identified, blemish-free rose hips
- A sharp knife and a clean cutting board
- A drying setup (dehydrator or an oven set to a low temperature)
- A clean, dry glass jar and a label

How to do it:
- Prepare. Remove stems and remnants of the blossom, then rinse the fruit.
- Halve and deseed. Carefully scrape out the seeds and the fine hairs. This requires patience, but it is well worth it, as the bristly hairs can irritate your mouth and throat. (You can leave them intact if you prefer, but you will need to brew the finished tea through a fine paper filter.)
- Gently dry. Keep temperatures below 40 °C (104 °F). This gentle drying temperature is recommended by the Environment Agency Austria. Drying duration depends on your equipment, ambient humidity, and fruit size. Erring on the side of caution is best.
- Let cool. Only transfer the rose hips into the jar once they are completely dried and cooled. Trapped residual moisture will lead to mold.
- Label. Add the contents and date of preparation to your label.
Brewing guide for the label: The Environment Agency Austria suggests steeping six dried fruit halves in 250 ml of boiling water for ten minutes, then straining. You can write these instructions directly onto the gift tag.
Storage: Store in a cool, dry, and dark location.
An honest note on vitamin C: Fresh rose hips are packed with vitamin C. However, how much of it survives drying, storage, and boiling water varies considerably. It remains a comforting, beautiful handmade tea regardless, though I wouldn't market it as a medicinal cure.
- Everything on harvesting and recipes: Rose Hips: How to Harvest and Process Nature's Vitamin C Powerhouses
- What else you can gather late in the year: What Can I Forage in Autumn?
4. Resin Salve: Woodland Craft in a Small Tin
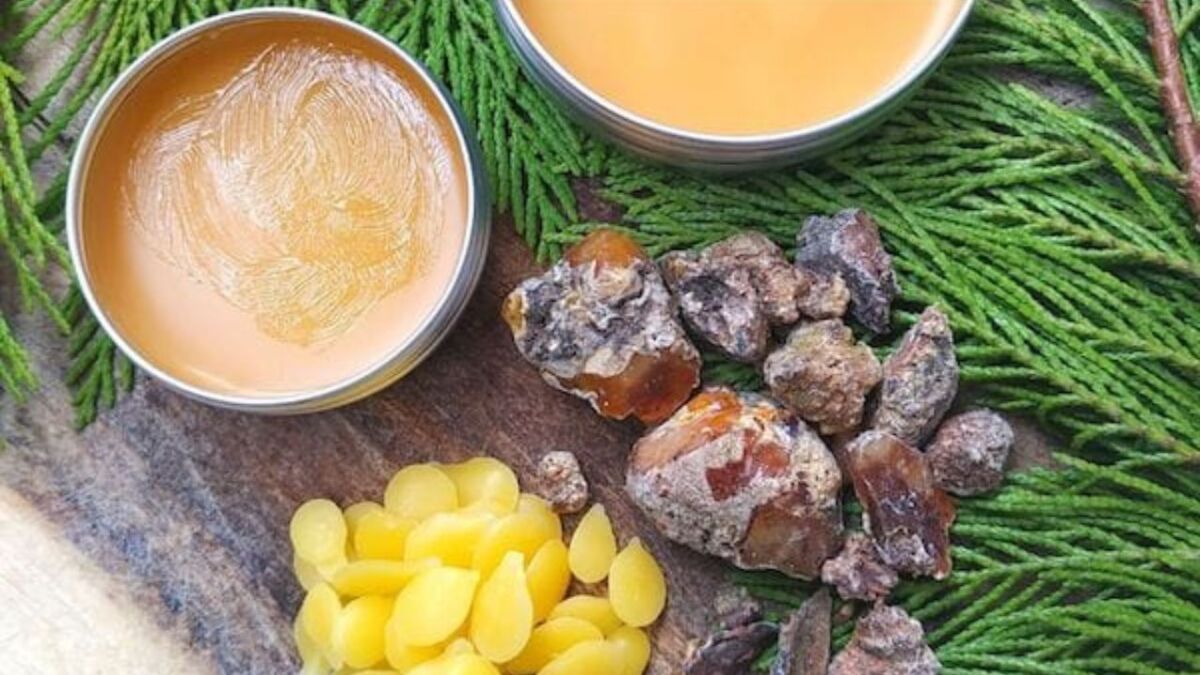
Resin is one of my absolute favorite natural materials. Sticky, fragrant, versatile. It can be turned into a salve that makes an extraordinary gift inside a neat little tin.
The golden rule comes first: Only harvest surplus, dried resin from conifers. Never deliberately score living trees.
Resin is the tree's natural wound sealant, shielding it against fungal infections and pests. Therefore:
- Never reopen fresh cuts
- Never damage healthy bark
- Never scrape away resin seals that are still protecting an open tree wound
For detailed background on tree health, check out the Baumpflegeportal.
The basic process: Resin, a base carrier oil, and beeswax are gently heated according to a reliable, tested recipe. Any forest debris is filtered out, and the liquid salve is poured into clean, dry containers. Handling hot oils and straining resin should always be done by adults.
I have compiled a detailed recipe with exact measurements, temperature thresholds, and each stage in my e-book: Making Resin Salve. Avoid guessing proportions on the fly, or your salve may end up overly stiff, greasy, or scorched.
Important gift tips:
- List all ingredients and the date of preparation on the container.
- Keep allergies in mind. Certain resin compounds can trigger contact allergies. If you suspect skin sensitivities, choose another gift idea instead.
- Do not claim medicinal cures. A wild resin balm is a pleasant traditional folk craft, not an all-purpose medical remedy.
What else tree resin can do: 16 Ways Resin Can Help You in the Wild
5. Hand-Carved Spatula: A Gift for Everyday Life
A fresh branch, a carving knife, and a few quiet evenings.
I particularly love this project because it doesn't end up forgotten on a shelf. A kitchen spatula gets used.
While carving, you can tailor it directly to the person who will hold it: How large is their hand? Do they cook in a wide skillet or a compact pan? Do they prefer clean lines or rustic curves?
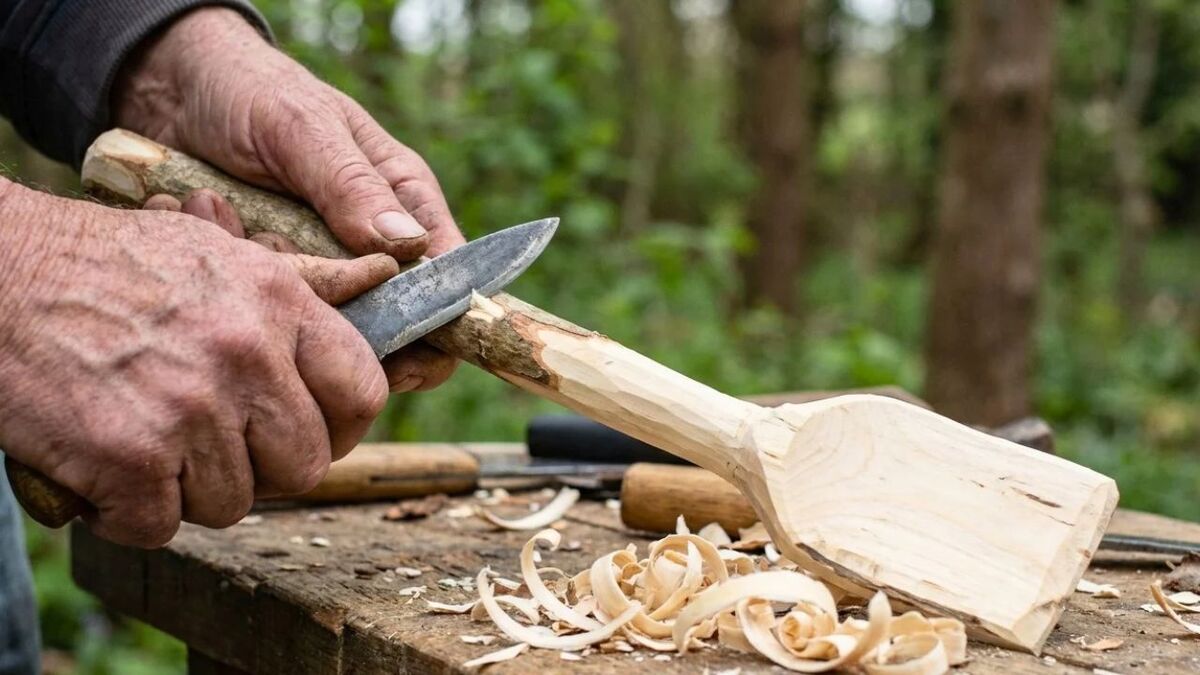
Which wood should you use? Calling it just "a branch" is obviously an oversimplification. You need a properly identified, clean, and sound piece of green wood wide enough to carve the blade. Never use rotting deadwood, treated building lumber, or unknown species for kitchen utensils. Maple, birch, and linden (basswood) make fantastic choices for beginners.
Which woods to pick and which to avoid:
The step-by-step approach:
- Trace your outline onto the wooden blank.
- Rough out the bulk shape.
- Carefully refine the handle and transition into the blade.
- Ease hard edges and smooth the surface.
- Carve the working edge thin enough for flipping, but sturdy enough not to snap.
- Allow fresh green wood to dry gradually and finish only with food-grade oils.
You can find a complete step-by-step video guide using maple in my course Mission: Wooden Spatula (5 video modules • From raw branch to finished utensil • 12 months access).
Realistic time management: This is not a ten-minute craft. Expect several unhurried sessions. And if children are joining in, they need proper safety instruction and supervision suited to their age and motor skills.
Getting started with woodcraft:
- 7 Things I Wish I Knew Before My First Carving Project
- Carving Wooden Spoons: How to Start and What You Need
- Why a Sharp Knife Is Safer Than a Dull One
6. Leather Pouch: Round, Practical, and Seamless
A plate for a template, a standard hole punch, and some cordage. This is an approachable craft project that can be completed in a single evening once you have your materials ready.
The result is a sturdy drawstring pouch for marbles, a firesteel, dried herbs, or other small pocket treasures.
What you need:
- A piece of supple leather (an offcut or scrap piece is often plenty)
- Paper, a dinner plate or lid as a round template, and a pencil
- A pair of heavy-duty shears
- Cordage or leather lace
- A suitable hole punching tool

How to do it:
- Draw a circle on paper, cut it out, and mark evenly spaced hole positions around the perimeter.
- Transfer the pattern onto the suede or back side of the leather.
- Cut out the leather disc.
- Punch the holes, keeping adequate clearance from the edge.
- Weave the lace alternately in and out through the punched holes.
- Pull both ends snug to draw the pouch closed.
Two practical tips:
- A standard office hole punch only handles thin, supple leather. For thicker hides, use a revolving leather punch.
- Cinching the pouch gathers the material, making the final bag considerably smaller than the flat circle. Size your initial diameter generously.
Find the complete illustrated tutorial with edge-margin measurements here: How to Make Your Own Leather Pouch
To be fair: Leather isn't something you simply forage in the woods. But putting existing scrap material to good use aligns closely with traditional craft ethics. I've shared my thoughts on natural materials here: Why I Use Leather and Wool in Outdoor Gear
If you'd like to take leather crafting further: How to Make Your Own Leather Buttons
7. Birch Bark Box: A Distinctive Container from Familiar Material
Birch bark is among the most versatile materials found in our northern woodlands. Waterproof, flexible, and patterned with unique grain. It makes a beautiful keepsake box that showcases its natural bark structure.
Not some mass-produced trinket, but a vessel shaped entirely by your hands.
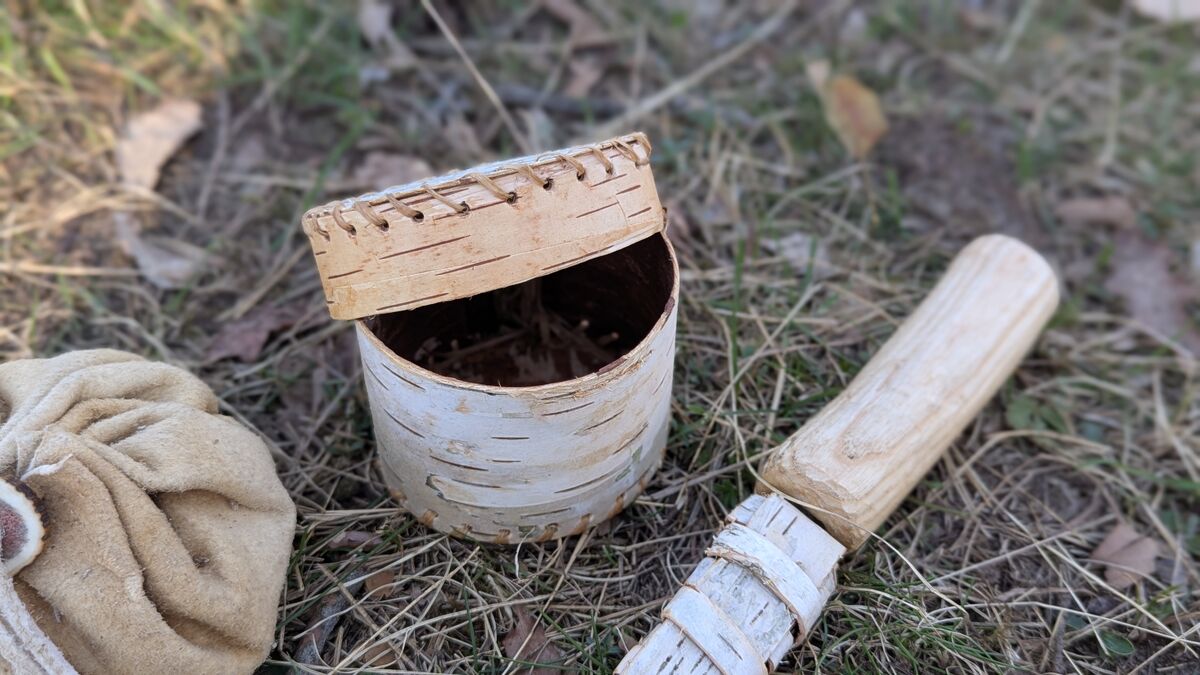
Where to source the bark? Harvest only from recently fallen birch logs—never strip bark from living trees. Peeling bark from a standing tree can permanently damage or kill it.
The core technique: Select and clean the bark, calculate the dimensions, assemble the walls into your desired shape, craft matching bottom and lid inserts, and trim the seams.
How the bark comes together varies depending on box geometry, sheet thickness, and fastening method. Here is a step-by-step project for a compact container: How to Make a Matchbox from Birch Bark
What to use it for: Keepsakes, char cloth, tinder, or other small dry items. I would not recommend using handmade bark boxes for wet foods or liquids.
Why birch bark is a bushcraft staple: Birch Bark: Practical Uses and Bushcraft Projects
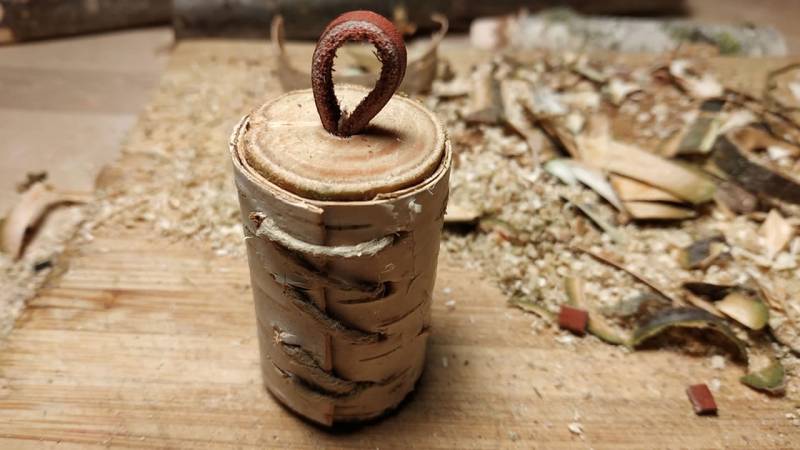
Packaging and the Personal Touch
A handmade gift deserves thoughtful wrapping that complements its nature. A few ideas:
- Repurpose existing packaging: Clean jars, small metal tins, and kraft paper you already have at home.
- Include a handwritten note: Share why you made this specific piece for them. That is often the most meaningful part.
- For salves and herbal teas: Clearly write down the ingredients and date of preparation.
- Include care or brewing instructions: How do you oil and maintain a wooden spatula? How long should the rose hip tea steep?
- Combine them: Pair a bookmark with a favorite book, a leaf-printed card with homemade tea, or slip a folded message into a birch bark box.
And perhaps the finest idea of all: give the gift of crafting together. Instead of making everything ahead of time on your own, spend an afternoon crafting these items side by side—with your children, close friends, or grandparents.
More inspiration for outdoor autumn activities: Do Something You've Never Done Before This Autumn (7 Outdoor Ideas)
It Doesn't Have to Be Perfect
The bookmark edges might turn out slightly uneven. The leaf print might smudge on your first try. The spatula handle might end up thicker than planned.
None of that matters.
What counts is not whether it looks like something bought off a store shelf. What matters is that the person holding it realizes: someone thought of me and invested their time.
Pick one of these seven projects. The one where you immediately picture the person you want to give it to.
And then simply begin.
Crafting More with Birch Bark
If the birch bark box caught your interest: in my free Birch Workshop, you can dive deeper into working with this remarkable natural material and explore traditional bushcraft techniques.


Author of the guide
Martin Gebhardt
Hey, I'm Martin. On my blog, you will learn the basics and numerous details about living in the wild. I think survival, bushcraft and the good life in nature are the keys to happiness. Find me here on Instagram or on YouTube. You can find more about my mission on the About Me page.
Was this guide helpful?
12 people found this guide helpful.
5.00 out of 5 points (12 Ratings)
Comments (0)
This post may contain affiliate links. So if you click on the links and make a purchase, I will receive a small commission at no additional cost to you. Click here, to learn more about it.