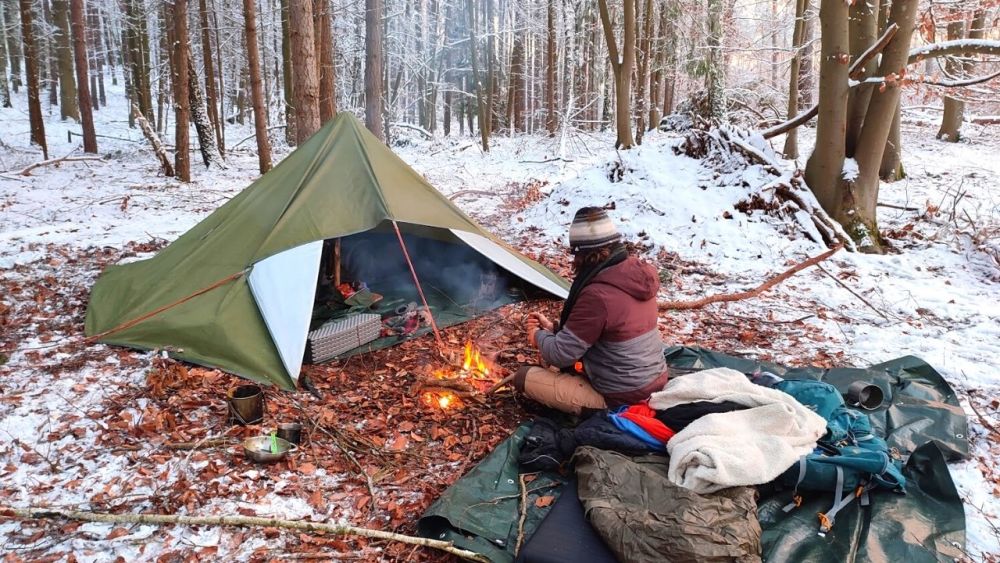
Sleeping outdoors in winter - with these proven tips it will definitely work
👉 The key facts from this guide
- Use the layering principle for your clothes to keep you warm. Your clothing should be water-resistant to protect you from wet snow.
- Waterproof shoes and thick woolen socks are important to keep your feet warm.
- Choose your campsite carefully. It should be protected from the weather and free of dead trees or fallen branches.
- Use a waterproof tarp to protect yourself and your equipment from the wet ground if you want to sleep outdoors.
- Cold doesn't just come from the air temperature, but mainly from the ground. Therefore, a sleeping mat is just as essential for sleeping as the tent or sleeping bag.
- A sleeping bag liner helps to keep your body heat in the sleeping bag better. An excellent liner can make your night several degrees warmer.
Would you like to experience a night in the forest during winter?
The snow and silence offer a particularly beautiful experience in nature.
However, many outdoor enthusiasts shy away from the freezing cold of a winter night.
But with the right equipment and a few tricks, you can handle sub-zero temperatures well.
This article prepares you for how to enjoy the beauty of winter without any worries.
Winter clothing
You are probably already familiar with the layering principle. Wear several layers of long-sleeved thermal shirts or woolen shirts and 1–2 sweaters on top.
Your jacket should be water-resistant so that the wet snow does not chill your body. A long underwear, possibly sweatpants, and outside water-resistant pants keep your legs nice and warm and dry.
Outdoor clothing or tightly woven wool (walk wool, especially loden) are suitable options as waterproof materials.
Wool is generally heavier than typical synthetic outdoor materials. The advantage of wool is that it also keeps you warm when it is damp. In addition, wool is resistant to sparks.
With woolen clothing, you can sit close to the fire or dry clothing by the fire. Functional clothing is very susceptible to sparks and quickly gets small holes.
A warm hat and gloves are a must.
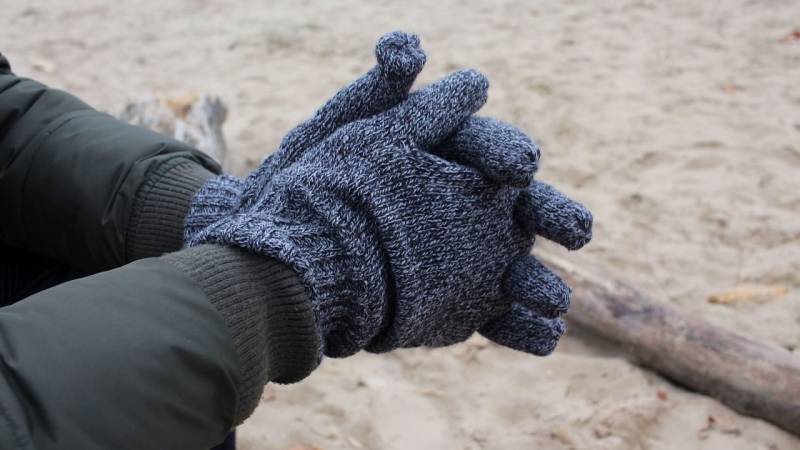
If you quickly get cold hands, I recommend taking two pairs of gloves with you. Wear a thick pair, maybe even mittens, when you are not using your hands.
Your second pair of gloves is a thinner pair of finger gloves that you use, among other things, to process your firewood, prepare food, or set up your tent.
If you rely on your smartphone outdoors, for example as a navigation aid, touchscreen gloves are helpful. With conventional finger gloves, the phone cannot be operated.
Also read
The Ultimate Guide: What Clothing to Wear for Survival Training and Bushcrafting? - The right clothing can make the difference between life and death in survival situations. In this guide, we cover what you should wear outdoors.
Tips for Warm Feet: Plastic Bags and Rescue Blankets
Waterproof shoes, for example made of waxed leather or Gore-Tex, are advisable in the snow. Lined rubber boots are also a good choice.
One or two really thick woolen socks usually keep your feet warm in everyday life. But if you are outside for many hours, you will eventually get cold feet.
An effective and inexpensive way to keep your feet warm is plastic bags!
First put on a pair of socks, then pull a sturdy plastic bag (e.g., freezer bag) over them, and finally another pair of socks. Your body heat is now no longer radiating outwards, but is being held at your feet.
You won't notice the plastic bags because of the first pair of socks, and they won't slip because of the second pair of socks. You may need to loosen your shoes a bit so that they don't become too tight.
The disadvantage: Your feet might get a little sweaty. However, for just one night outdoors, this is not a problem.
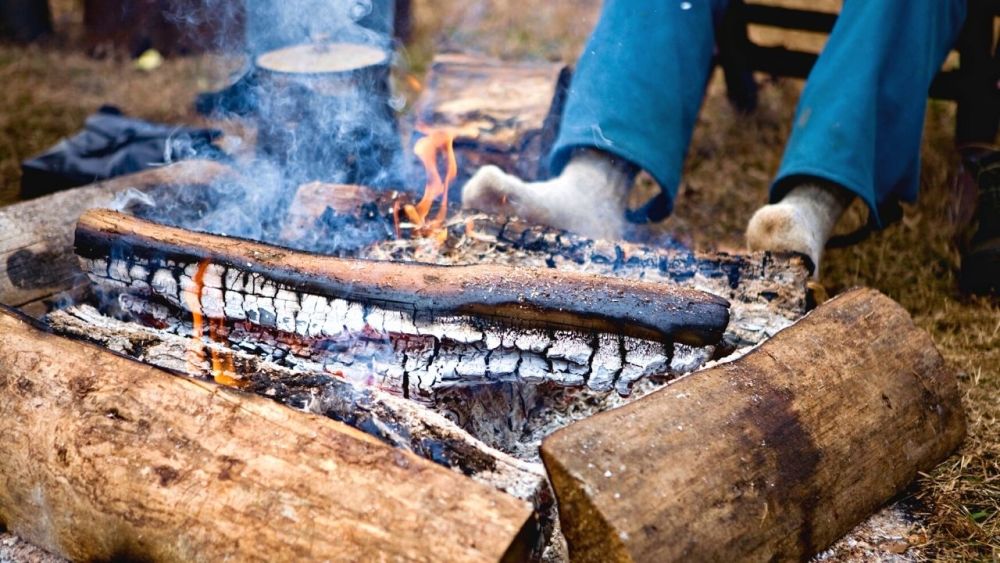
Instead of plastic bags, you can also cut strips from a rescue blanket and wrap them around your feet. If you want to maintain the breathability of your feet, wrap them only around the front of your foot.
You can also wrap strips of the rescue blanket around your insoles to protect your feet from the cold of the ground.
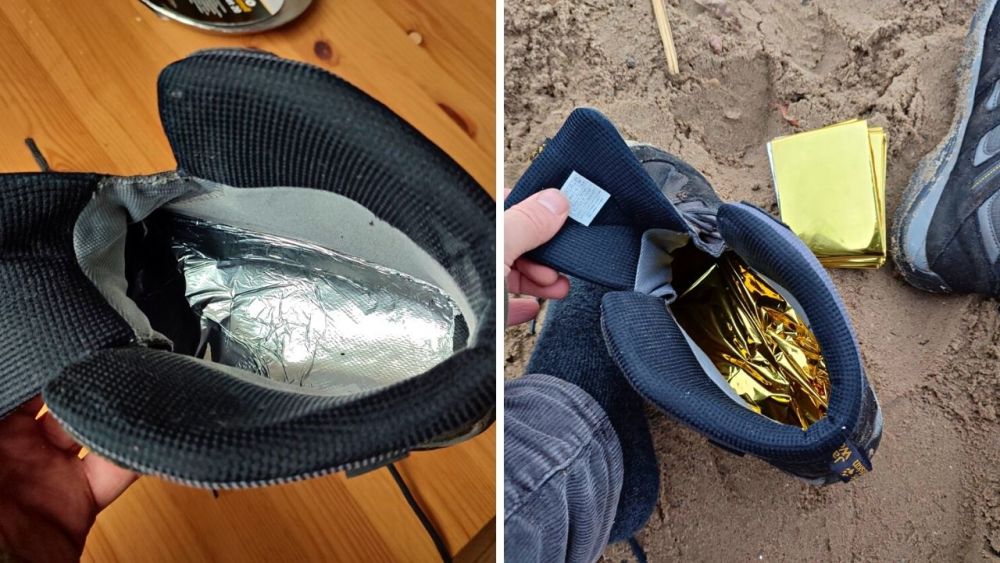
These tricks also work with conventional aluminum foil. However, it is more suitable for short-term use as it is less durable and later dissolves into small pieces. A sturdy plastic bag lasts the longest and can then be reused for other purposes.
Also read: 18 Tips to Stay Warm When Camping in a Tent and Sleeping Bag
Exertion and Sweating in the Cold
When you are in the woods at temperatures below zero degrees, movements that keep you warm are good and pleasant.
This includes, for example, gathering firewood and sawing it into shape. If you are too cold, do some exercises that warm you up, such as jumping jacks or push-ups.
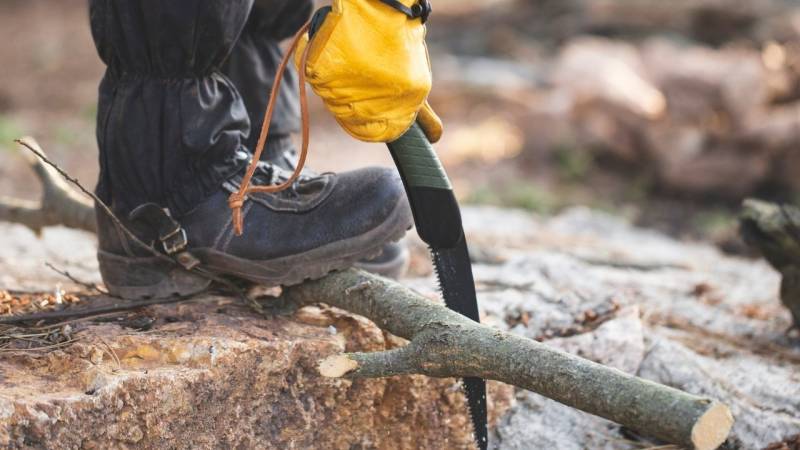
The Lumberjack Dance is a great thing because it brings joy and gets your body back to a comfortable temperature.
But be careful not to sweat too much.
When you start sweating, your bottom clothing layers become damp. Later, this damp clothing will cause you to start feeling cold.
If you notice that you're getting hot, take off one or two layers of clothing. As soon as you start feeling cool, put them back on, so you don't start getting cold. Once you're already cold, it takes a long time to warm up again.
Moderate exercise is helpful, but avoid overexerting yourself. When your body is exhausted, it has fewer resources to keep your body temperature at 37 °C, and you may start feeling cold.
Location of your camp
In winter, you may only arrive at your campsite when it's already dark. Check carefully to make sure there are no dead trees nearby or dead branches that could fall on you.
Ideally, there should be enough firewood available at the campsite (see the Firewood section)
Your sleeping area should be sheltered from the weather. Consider for yourself on site what that means at your location.
- A sheltered location is not, for example, at the top of a hill, but rather at the wind-protected foot of a slope.
- It is not in an open area, but surrounded by hedges or trees. This is particularly relevant if it could become windy at night.
In our latitudes, the west is the so-called weather side. The moist, cold winds blow from the direction of the Atlantic Ocean. The optimal location is therefore protected towards the west and more open towards the east. This way, the first rays of sun will warm you up directly at sunrise.
It is a little cooler near bodies of water due to moisture than in drier locations.
Generally, you should avoid ditches and pits, as water could run in here when the temperatures rise and the snow melts or if it rains.
Once you've found a suitable, level spot, clear it of dead wood and snow to make yourself comfortable with your tarp or tent.
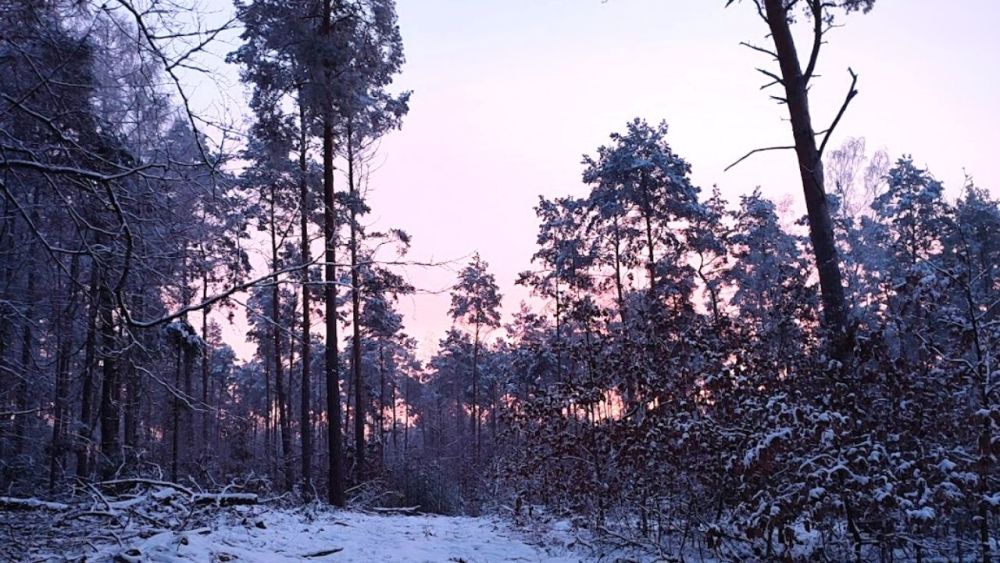
Also read: How to find the ideal location for your bushcraft camp
Sleeping outdoors
I love sleeping outdoors on a clear night. When falling asleep, you can see the stars and the snow-covered trees. When you wake up, the sun greets you with a red sky.
For me, this means freedom and connection to nature, and I feel much more comfortable than lying under a plastic tarp and being cut off from the outside world.
If you want to sleep outdoors, check the weather forecast several times for the hourly forecast, preferably also in the evening and just before going to bed. If 0% or only 10% chance of rain and snow is forecast for the whole night and also for the next morning, it will certainly stay dry.
But you can never completely rely on the weather forecast. Snowfall that is announced for the next morning or noon can suddenly come at night. Therefore, bring a sufficiently large tarp or tent for protection against unexpected snowfall.
My tip: Learn to predict the weather through clouds, animals, and plants. Read this guide: Weather prediction through clouds, wind, plants & wildlife.

To set up your tarp or tent on a night with snowfall and possibly wind, you must be familiar with your model and very routine in setting it up! If it is really only light snowfall, the protection of a bivy sack instead of a tent is sufficient.
To sleep well outside, you need a waterproof tarp that protects you and your equipment from the wetness of the ground.
You don't need a high-tech item for this. A tarp from the hardware store is sufficient. It has a large packing size and is relatively heavy, but it is waterproof, cheap, and robust. If your tarp is large enough, you can also use it as a tarpaulin in an emergency.
Also read: The first night in the forest: how to sleep well in your camp [location, equipment, attitude]
Tarp, tent, or just a tarpaulin?
If you opt for a tent, it should be sturdy enough to fend off snow and storms. Some ultralight models are not designed to carry the weight of snow. So, check that and also check the weather forecast in this situation to know how much snow to expect.
Based on this, I have written a guide: "Camping in a winter storm: these 11 tips will help you stay safe". Read it if you want to know what things to expect in a snowstorm.
If you're lying in your tent, make sure you don't touch the tent wall. Moisture that has collected on the tent wall can easily transfer to your sleeping bag. This, of course, makes it colder.
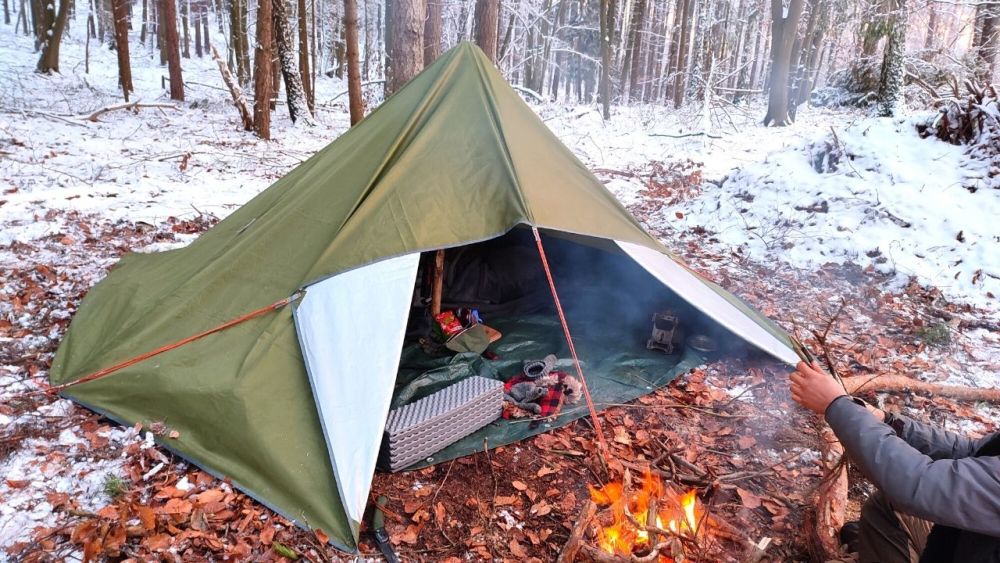
If you bring a tarp (here's my buying guide), make sure you know how to set it up and check what you need beforehand, such as a pole, stakes, or rope. You also need a groundsheet to lay on if your tarp doesn't have a floor.
A tarp should protect you, particularly from the west side (see section on location of your camp), but this also depends on the natural conditions on site.
I also don't want to neglect the possibility of sleeping in a hammock in winter. Take a look at this guide carefully and you'll stay warm.
Sleeping mat – essential
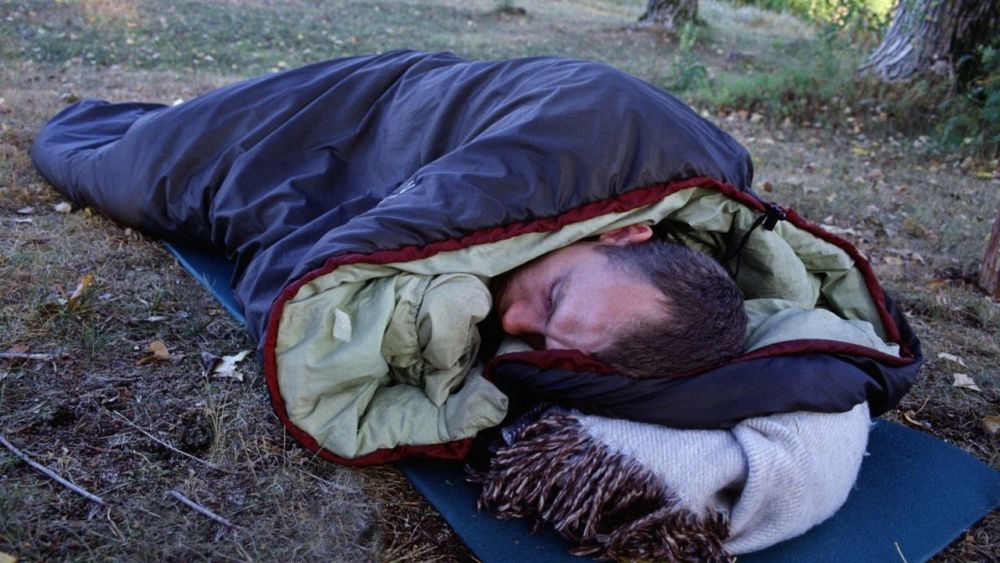
Cold doesn't just come from the air temperature, but especially from the ground. You'll quickly notice this for yourself if you sit on the bare forest floor in winter. The sleeping mat is therefore just as important for sleeping as the tent or sleeping bag.
In winter and already in autumn, a thin foam mat is definitely not enough. Instead, you need an inflatable mat that provides sufficient insulation between you and the ground.
The R-value (What does the R-value mean exactly?) according to the ASTM (American Society for Testing and Materials) F3340 standard provides an indication of the thermal resistance of a sleeping mat. However, not all mats are tested for R-value, and there are no precise temperature specifications for sleeping mats, as there are for sleeping bags.
You'll ultimately only find out if a sleeping mat is really suitable for your use in sub-zero temperatures by testing it yourself. Simply try out the mat at different temperatures. This way, you can gradually approach the minimum outside temperature at which your sleeping mat will serve you well.
You can also combine two sleeping mats, such as a foam mat and an inflatable mat. This also protects the inflatable mat from tears and holes caused by sharp objects on the ground.
Some sleeping mats are more robust, some very susceptible. Don't take any risks because if you want to sleep outside in the cold, a tear in your sleeping mat is very annoying. At home, you can repair it with special patching material, but at night you'll be cold if the mat isn't adequately filled with air.
For this reason, you should never place an inflatable mat directly on the forest floor or rocks or too close to the fire. Under the inflatable mat, you should place a foam mat or a tarp as protection.
I often have a thin foam mat as a seat pad with me. It weighs almost nothing, can get dirty, or even get a burn hole from the fire. I fold the foam mat several times and have a practical, soft seat cushion that is reasonably insulated.
Recommended reading: My recommendation + buying guide for sleeping mats – as well for winter camping
Sleeping bag – which one?
Your layers for sleeping in winter:
- Sleeping bag liner, if necessary, vapor barrier liner (VBL)
- Sleeping bag
- Second sleeping bag, bivy sack, or blanket
The simplest but also most expensive option is a winter and alpine sleeping bag with a comfort temperature below 0 degrees. If you don't have such a warm sleeping bag, simply combine multiple sleeping bags and corresponding blankets.
The sleeping bag liner
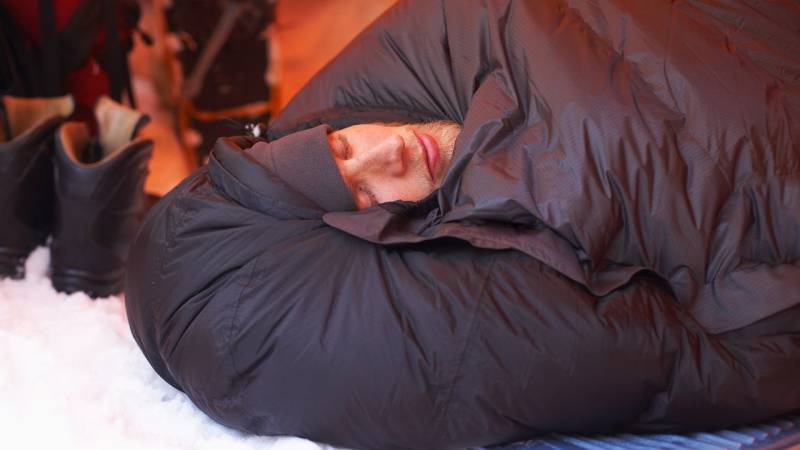
A sleeping bag liner (for VBL, see next section), which is placed inside the sleeping bag, represents the first thin layer outside your clothing.
The liner helps to better retain your body heat in the sleeping bag. An excellent liner makes your night several degrees warmer.
Just like your sleeping bag, your sleeping bag liner should also have a hood that you put on and tighten. This way, you can store a little more body heat. Your mouth and nose stay uncovered.
Another nice effect of the liner is better hygiene. You can wash it much more easily than a large sleeping bag (learn here how to wash your sleeping bag). So, if, for some reason, you have to get into your sleeping bag with dirty clothes or dirty feet, it's no problem with a liner.
Next comes your sleeping bag. There are differing opinions on whether the filling of the sleeping bag should be made of synthetic fibers or real down.
The advantages of synthetic fibers are the lower price and greater moisture resistance. The advantages of down lie in the lower weight and volume for the same level of warmth.
For regular use in winter, I recommend down sleeping bags.
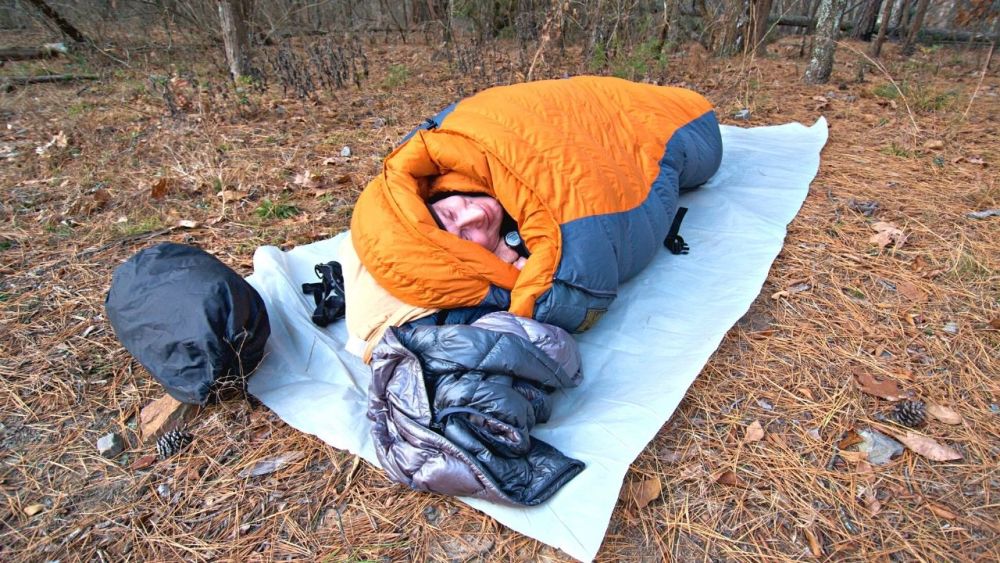
I have not had any problems with moisture with my down sleeping bag, and I have not heard any negative reports from other people who regularly sleep outside.
In any case, make sure that your sleeping bag does not get wet. The VBL (see section VBL) protects against moisture inside the sleeping bag, and a bivouac sack or water-repellent coating protects against moisture from outside. This has a much better effect than chemically treated, water-repellent (hydrophobic) down.
Combine sleeping bags to make it warmer
If your sleeping bag is not warm enough for winter temperatures, then take another sleeping bag and put it over the first one. A bivouac sack is probably the best choice here, as it protects your sleeping bag from condensing moisture from the air.
If you don't have a bivouac sack, just take a regular sleeping bag. When you arrive at a warm, dry place after sleeping outside, be sure to unpack your sleeping bags and hang them up to dry.
As an alternative to a second sleeping bag, you can also put a thick wool blanket over your first sleeping bag. Friends of mine swear by discarded army wool blankets for this purpose.
If you don't have something like this, you can improvise. For example, I have already wrapped a large coat around my sleeping bag. This has at least brought a few degrees of additional warmth.
In November, I spent a night outside with my four-year-old son at 3 degrees Celsius. At that time, in addition to our sleeping bags, I even brought two real down blankets from our beds at home in my large trekking backpack. I put them over our sleeping bags in the tent, and it was nice and warm.
With lighter or insufficiently large blankets, it happens quickly that they slip off the sleeping bag during the night when you turn over. Then you wake up shivering, and the blanket is next to you. Therefore, you should wrap the cover tightly around the sleeping bag or tuck the edges of the cover under the sleeping pad.
Depending on how cold it is, combine several methods to stay comfortably warm without alpine equipment, or at least not get too cold.
Be sure to put the hood of the sleeping bag on to warm your head and keep the heat in the sleeping bag better. Pull the sleeping bag tight enough so that only your mouth and nose are exposed to the air. Your mouth and nose should not be inside the sleeping bag, as the moisture from your breath will condense inside.
Practice at home how to tighten and open the sleeping bag when you are lying inside and can no longer see because of the hood. When I slept this way for the first few nights, I got a little panicked when I woke up, thinking I couldn't open the sleeping bag around my face anymore.
This happened to me, especially when my breathing hole had shifted a little away from my mouth and nose and I felt like I couldn't breathe freely anymore. Even today, I still find this situation uncomfortable.
Be aware of such things, stay calm if something like this happens, and practice at home.
Temperature ratings of sleeping bags
The most important value of a sleeping bag is the comfort temperature. It is best to choose a sleeping bag whose comfort temperature is a few degrees below the temperature you are preparing for.

However, your subjective sensation of cold can differ from the manufacturer's specifications. Therefore, test your equipment yourself and try out which combinations work best for you under different weather conditions.
Depending on where you buy a sleeping bag, the specifications may not correspond to European standards and testing.
Currently, I have an American sleeping bag with a comfort temperature of 3 degrees, but I already start to feel cold at 7 degrees or more.
Before that, I used a Toread sleeping bag from a Chinese brand. It had a comfort temperature of 0 degrees and kept me warm even on nights below freezing. Both sleeping bags were not purchased from EU retailers.
Vapor Barrier Liner (VBL)
A VBL is a plastic liner that protects the inside of your sleeping bag from moisture. Even in cold outside temperatures, you usually sweat a little during sleep.
In the case of strong frost, the dew point of this moisture is not outside the sleeping bag, but inside the sleeping bag. The VBL ensures that the moisture that comes out of your body stays inside the VBL and does not enter the warming layer of the sleeping bag.
If your sleeping bag is permanently wet and compressed when packed, it negatively affects the insulation ability of the sleeping bag. At very low temperatures, the moisture in the sleeping bag freezes. Compressing the sleeping bag when packing it also has problematic consequences for its thermal efficiency in this case.
If you are only spending a few consecutive nights outdoors, a VBL is not necessarily necessary. If you can regularly hang up, warm up, and dry your sleeping bag during a tour, it is also not necessary. However, if you are planning a longer tour and are outside permanently, a VBL is a sensible choice.
When sleeping in a VBL, it will be a little moist inside. This may take some getting used to at first. The most comfortable clothing in a VBL is merino wool. Merino wool is very soft on the skin and still keeps you warm even when wet. In contrast, cotton cools down.
Tips for sleeping
Never get into your sleeping bag when you're cold! If you're cold, do some push-ups or jumping jacks until you warm up, or sit by a warming fire.
Eat a warm meal before going to sleep.
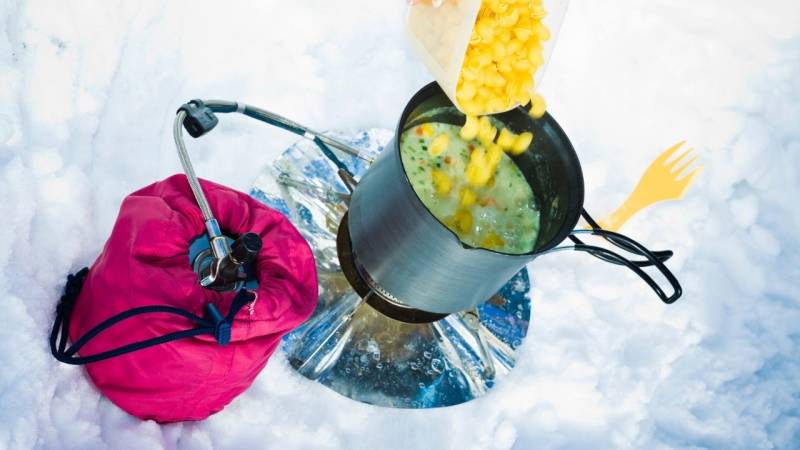
If you need to go to the bathroom at night, get up, zip up your sleeping bag, and roll it up or at least fold it up. Otherwise, all the warmth from the sleeping bag will escape, and the body will have to warm it up again. Depending on the outside temperature, this can take a while.
Furthermore, don't wait too long to empty your bladder. The urine in your bladder needs to be kept at body temperature by the body, which consumes energy and makes you feel colder faster.
Clothing in the sleeping bag
There are always discussions about what to wear in a sleeping bag. Often, it is recommended to wear only a thin layer, such as long thermal underwear. It is argued that it is more difficult to warm up the sleeping bag when wearing more layers.
In my experience, this is not necessarily true. At temperatures below zero and without a suitable sleeping bag, I have worn up to three thin shirts and two thick sweaters on top. If the insulation of my sleeping bag is insufficient, I get warmer this way than if I wear only one layer.
However, I have never worn a jacket in my sleeping bag. I suspect that with a jacket that is already self-insulated, it is more difficult to warm up the sleeping bag with body heat.
So, here too, try out what works for you and make your own experiences!
In any case, I recommend wearing a few thick wool socks in freezing weather. Furthermore, your feet should not be pressed too hard against the sleeping bag; otherwise you will get cold feet more easily.
You can put excess clothing in your sleeping bag to reduce the amount of air you need to warm with your body. This is particularly advisable for clothing, including your gloves, which you will put on directly the next morning. Otherwise, your clothing may be ice-cold when you put it on.
Improvisation: Hot water bottle and hand warmers
You first have to warm up your sleeping bag with your body temperature so that it can warm you in turn. You can make this process easier and faster by warming up the sleeping bag with a bottle.
If you have a metal bottle, fill it with hot water before going to bed. Then, put the bottle in the sleeping bag. If the bottle is too hot, wrap it in a piece of clothing or put it in a sock.
In any case, make sure that the bottle does not open and leak! A wet sleeping bag is fatal.
If you don't have a metal bottle, you can also use a plastic bottle, but hot water may allow toxic plastic particles to get into the water.
As an alternative to the bottle, stones can be used. Put stones in the fire, the longer, the better, and remove them with sticks or a shovel. The stone is extremely hot and needs to cool down a bit before you put it in your sleeping bag. Wrap a towel or something similar around the stone if necessary. Warning: do not collect stones from riverbeds, as they could break due to the moisture!
If you are on the go, you can take small hot stones from your fire as hand warmers. You could also wrap the stone in fabric if it's too hot for you. However, get rid of the stones as soon as they cool down; otherwise they'll take the warmth from your body.
Building a fire in the snow
Practice making a fire several times under less challenging conditions before relying on your skills to light a fire in deep snow!
Take several items with you to light the fire, such as one or two lighters, matches, and a fire steel (learn how to make fire with a fire steel).
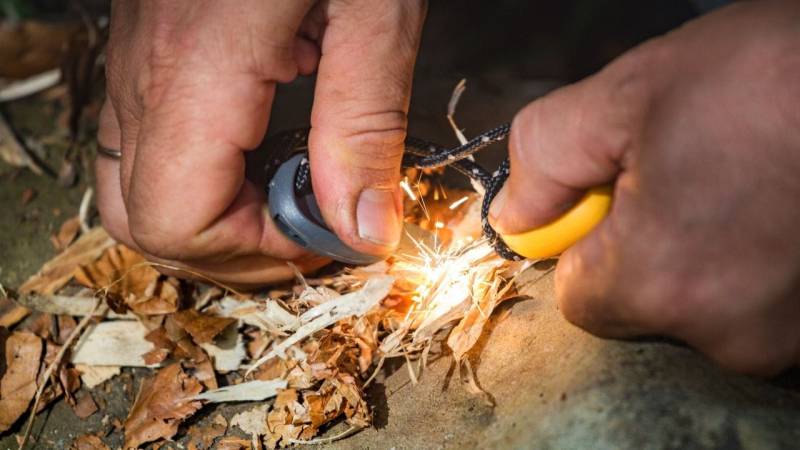
Because there are many reasons why a method may suddenly fail. Your lighter may break or unexpectedly run out. Lighters and matches can accidentally get wet. The fire steel may have fallen and gotten lost.
In extreme cold, lighters sometimes don't work. Warm up the lighter by holding it in your hand or putting it in your pocket. After a few minutes, it should work again.
Bring a little more tinder with you than usual for safety, such as birchbark and Fatwood (here you can learn more about tinder with 22 examples).
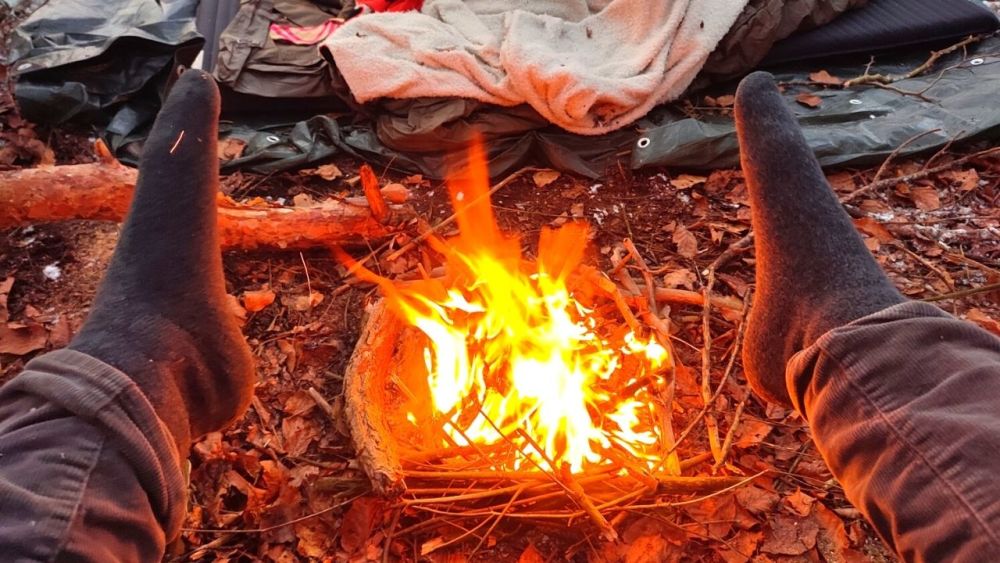
When there is snow, there is hardly any dry firewood. After all, the snow is also on the dead wood.
When you put the first layer of wet wood on the burning tinder, the type of wood is important. Soft coniferous wood like pine and spruce burns quickly due to its high resin content and is therefore the first choice.
When conifers like pines or spruces grow a little taller, the lower branches of these trees die. Their thinnest twig branches are excellent for starting a fire. But after snowfall, the snow also lies on these branches, and you need more tinder and probably have to blow a lot to ignite the wet wood.
A little trick: Don't make the fire directly on the ground, but place several logs next to each other on the ground. Then you can build your fire on top of them. Later, these logs will be dry and start to burn, and you'll have a bigger fire.
When the fire is burning well, collect more firewood to dry by the fire. Stack it in a circle around the fire. Turn the wood over after a while so that it dries well on the other side too.
It's more convenient to collect and prepare a good amount of suitable wood at the beginning, rather than collecting small amounts each time. Otherwise, you will have to get up from the fire repeatedly and collect new wood in the darkness and cold.
It's helpful to bring a handsaw to saw larger logs into pieces that fit perfectly into the fire. Usually, I'm out without a saw, but with a saw, you have more options because you can't break thicker logs. Therefore, without a saw, you are more dependent on thinner wood, which, in turn, burns faster.
Of course, you only collect deadwood and not green wood, since the latter does not burn well. To test if you have found good wood, break it. If it cracks loudly and breaks cleanly, it's just right. If it's rather flexible and still holds together in one place after breaking, it's too fresh.
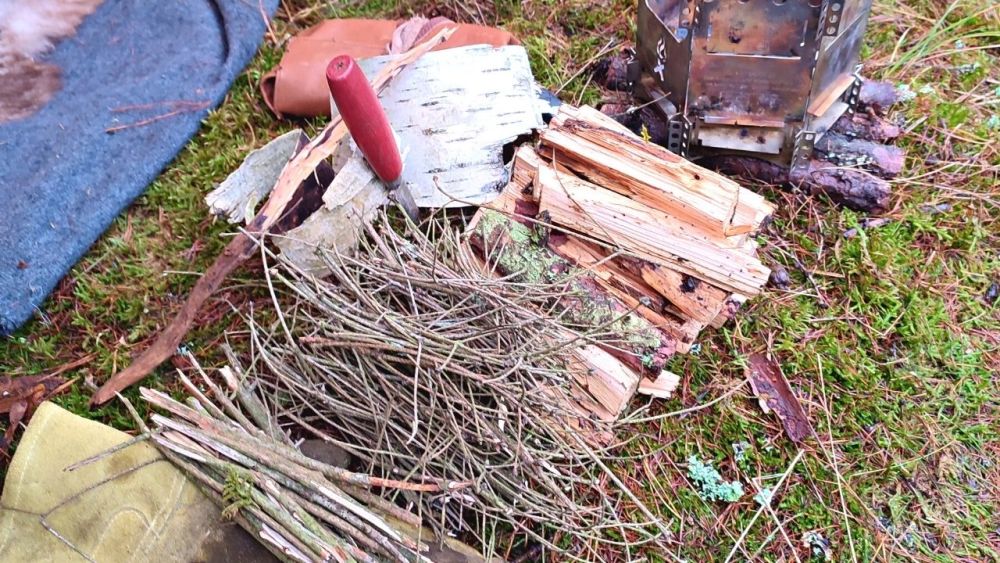
Deadwood lying on the ground in winter will also be completely moist inside and needs to dry for a long time. It's better to collect deadwood that hangs anywhere and has no contact with the ground.
To access drier layers of the wood, you can split it with an ax or a knife (here's a knife buying guide). But this is not necessarily necessary if you dry the wood long enough by the fire.
Winter Food from Wild Plants
Buds
Naturally, in winter, you won't find as many herbs and flowers as in spring. But some plant parts for tea or food are almost everywhere.
Mainly, tree buds are to be mentioned, which usually form in summer and from which new twigs, leaves, flowers, or cones grow in the next spring.
The buds of many tree species are edible, for example, from birch, beech, oak, pine, or spruce.
Buds contain many nutrients since new plant parts are created in them, and they are an essential part of the diet of many wild animals such as deer or rabbits.
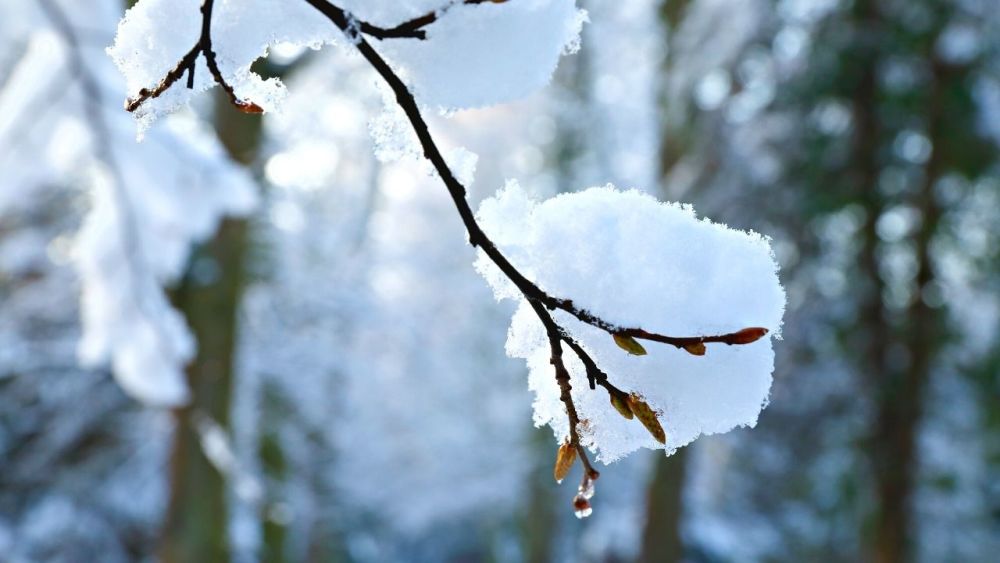
Consume buds, but only in minimal amounts if you are not yet used to this type of food, and chew the hard winter shell well.
Furthermore, trees and other plants put a lot of energy into the buds. If you pluck the buds, you are robbing the plant of its energy and its potential to grow healthily.
However, there are almost always a few fallen branches lying around with buds on them. You can collect buds from these dead but still fresh branches with a clear conscience. From living trees, you should only collect a few buds to try.
You can eat buds raw, or simply add a few buds to the pot while cooking. This makes them more digestible, but some nutrients are lost when heated.
I find it really exciting to get to know the taste of buds from different tree species (learn 6 native trees here).
Here in Brandenburg, pines grow almost everywhere, and I have come to appreciate their resinous aroma sincerely, raw, or as an addition to various dishes such as oatmeal or curry stew.
Also read: Edible plants: this emergency food can be found in the forest (list + pictures)
Needles
Another way to consume wild plants in winter is to prepare a needle tea.
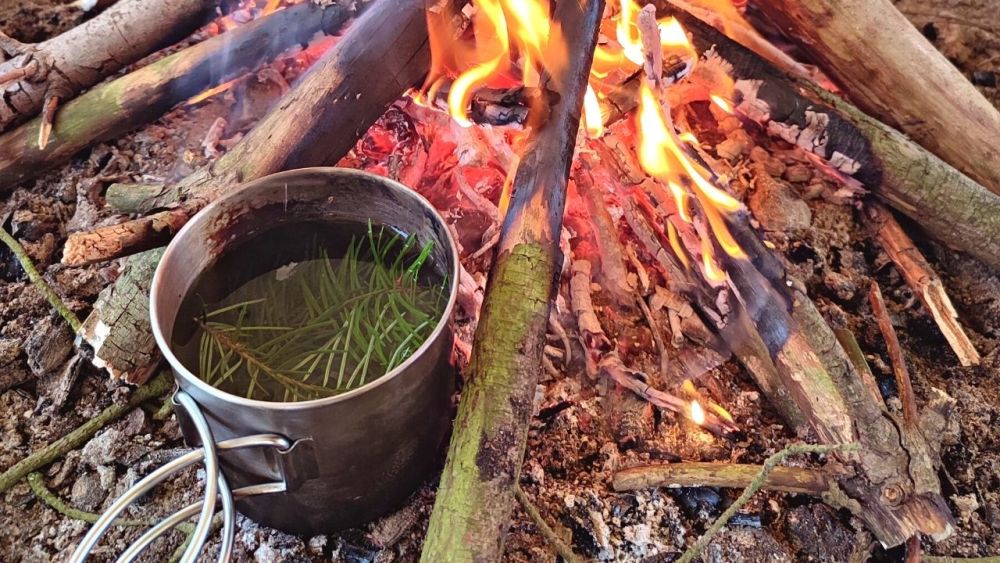
Most conifers, such as pine, spruce, fir, and Douglas fir, are suitable for this purpose. However, you should definitely be sure that you are not using yew needles. Yew is often referred to as one of the most poisonous native tree species.
To make a needle tea, simply place the needles in your pot and heat the water to 80 to 100 degrees or boil water in your pot and then pour the needles into your tea cup.
I usually use the whole small twigs instead of cutting the needles laboriously. Some people believe that the water should be heated to a maximum of 80 degrees since otherwise, many nutrients would be lost.
Needle tea is said to be particularly good for the respiratory tract and help against colds. So, it seems to be an ideal drink if you are outside for a long time in winter.
Tree Fungi
In addition to buds and trees, you can also collect tree fungi in winter.
These include the very common species Birch Bracket Fungus and Chaga Mushroom. You can make tea from both mushrooms, which many people attribute different healing effects to.
In addition, in winter you can find the rarer Chaga Mushroom, which grows on birch trees. The Chaga Mushroom is said to contain more nutrients after the onset of frost than in spring and summer.
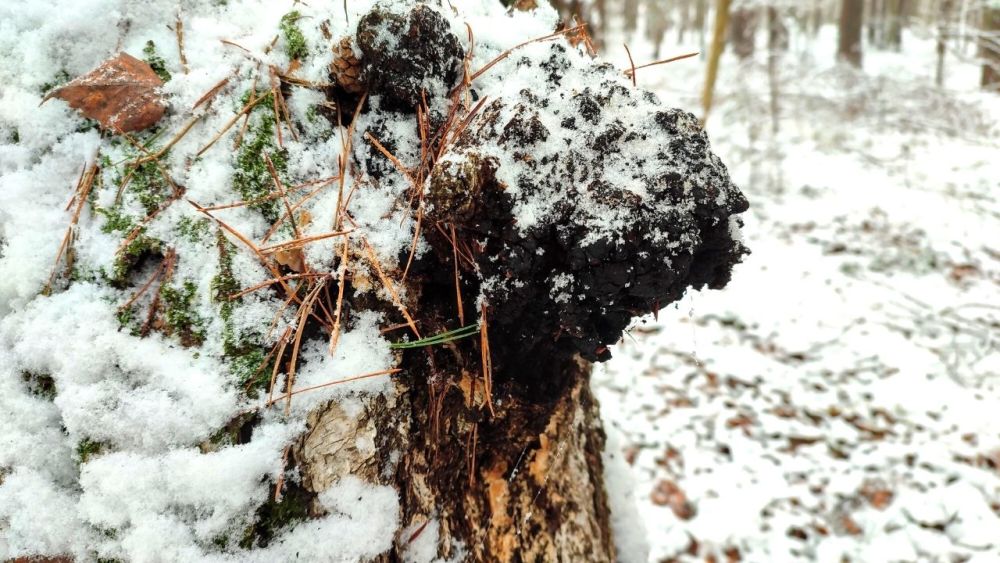
In winter, the roots of various plants such as Dandelion are also edible or can be used as tea. However, if you dig up the root of a plant, it has no chance to grow anymore. Therefore, you should only harvest the root, if at all, in small quantities and with the utmost care and only in places where many specimens of the plant species occur.
Drinking Water - Best Warm
In cold weather, humans feel less thirsty than in hot weather. Nevertheless, make sure you drink enough. Even in cold weather, especially during physical exertion, there is a risk of dehydration.
So, make sure you bring enough water for the winter. It is possible to melt snow, but it is relatively unproductive. To melt enough drinking water, you need huge amounts of snow. But it is interesting to try it out.
The optimal temperature of drinks is 37 degrees or more. All drinks whose temperature is below your body temperature must be warmed up by your body. This requires energy and makes you colder.
So, it's better to make tea and even if you don't have tea with you, warm up your water occasionally before drinking (or collect needles for tea, see Nutrition section).
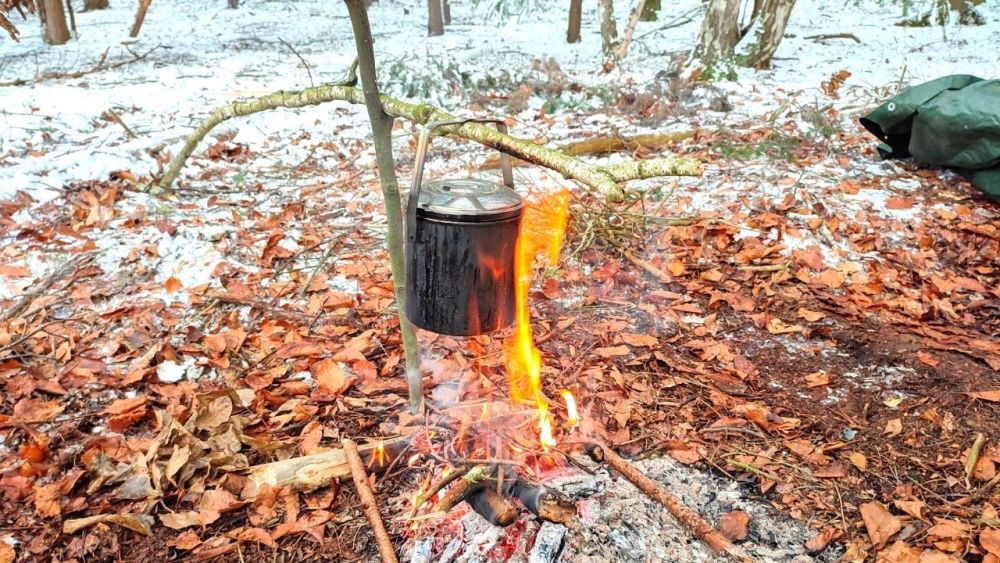
Maybe you now have the idea of taking a thermos flask on your winter trip with overnight stays. During a winter overnight stay, my thermos flask accidentally fell to the ground and lay in the snow at about -3 degrees Celsius. After 45 minutes, I found the thermos flask again. The inner insulation layer was already frozen and broken, so the thermos flask was a write-off.
Overnight, you can take a small bottle of water with you into your sleeping bag for your drinking water in the morning. Water bottles that are not in your sleeping bag overnight will contain ice chunks on nights when it is only a few degrees below freezing, or be completely frozen at even lower temperatures.
Drinking such cold water is very uncomfortable and can cause nausea. If the water is so cold or even contains ice chunks, drink very slowly and in small sips. It is advisable to briefly warm up the water in your mouth before swallowing it.
Do not leave the water bottles directly on the ground, as the ground is freezing. Pack them in your backpack instead.
A little aside: I spent a long time in China. At the beginning of my first stay, I was repeatedly surprised that people there prefer to drink warm or hot water rather than cold. According to Traditional Chinese Medicine, this is considered healthier for our body. Especially in the morning, it is more pleasant and stimulates digestion. Meanwhile, I have become so used to it that I rarely drink cold drinks and find warm drinks much more pleasant.
Read also
Can you really eat snow in survival situations? - Snow is like water, but can you eat snow when you are in a survival situation? And if so, you will find out here what you need to consider.
Animal Tracks in the Snow
The snow in winter has a great advantage over other weather conditions: you can find almost everywhere well-defined footprints of wild animals. You can follow tracks of animals that may be several days old and gain such an insight into the life of the animals.
During my last winter trip, I was able to follow the track of a hare for about 50 meters. The hare hopped slowly from one bush or young tree to the next, where it had eaten a few buds. The feeding traces were recognizable on the branches.
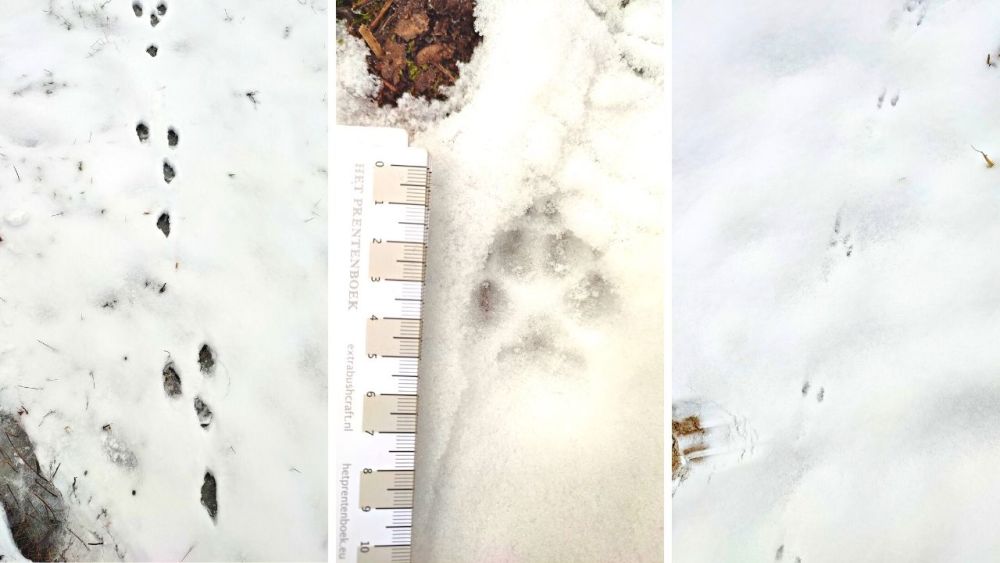
In the forest, many animals are active, especially at dawn or at night. Typically, we don't even notice them, as almost all animals are masters of sneaking and hiding. In the snow, the forest's actual activity and liveliness become clearly visible. If you're not very knowledgeable about animal tracks yet, inform yourself in advance about common footprints such as deer, hare, wild boar, and fox. This way, you can make your stay in the snow-covered forest more interesting and see exciting things.
Also read: Learn to read tracks for beginners (with many picture examples)
Darkness - it's possible without a flashlight
In winter, it's dark for a very long time. If there is a lot of snow, and it's a full moon, you can still see a lot.
I like to leave the flashlight off to experience natural darkness. After all, our ancestors didn't have electric light and were able to find their way around.
If you move around without a flashlight, do so much slower and more cautiously. Over time, you will learn to relax in the darkness of the forest.
And if it's dark, and you take off your things, remember exactly where you put them. Be cautious with knives, axes, and saws and don't leave them lying around openly!
Cold tolerance - advantageous
There are many simple ways to train your body's cold tolerance. If you are often outdoors, it is more comfortable with greater cold tolerance and you need less clothing. That's why I'm giving you a few suggestions here:
- Occasionally wear one layer less than you normally would.
- Walk outside barefoot for short distances in autumn or winter.
- Take cold showers or alternating showers that end with cold water.
- Go swimming outside in autumn or winter.
Since the Wim Hof Method (WHM), ice bathing has become fashionable. Getting used to the cold has many positive health effects.
But cold training should be done slowly and carefully, or you could end up sick in bed for a few days.
There can also be even worse things that can happen while ice bathing if you overestimate yourself! In 2021/22, someone died doing it in Berlin. Ice bathing feels great, but be careful.
Risk of injury - first aid kit is mandatory
When you're outdoors, injuries naturally have a greater impact than at home or in the city. So be extra careful. Take a small first aid kit (here's my guide to it) with you that contains at least bandages, plasters, disinfectant, and painkillers.
Learn exactly how to safely handle knives, saws, and axes and minimize the risk of injury through their use. When you get tired, stop working with sharp objects. Otherwise, you'll become careless and increase your risk of injury.
A snow cover hides many unevennesses or sticks lying on the ground. Tree trunks lying on the ground can be extremely slippery. So be careful where you step. Fortunately, the snow in the forest is less slippery than the icy sidewalks in the city.
Packing list - this should be in your backpack
You should take the most important equipment with you. Look, this is my packing list:
- Tent or Tarp (What is a Tarp?, Sew your Tarp?, Tent Buying Guide)
- Sleeping pad (Sleeping pad buying guide)
- Sleeping bag (if necessary, sleeping bag liner, VBL, bivy sack, wool blanket, Sleeping bag buying guide)
- Lighter, matches, fire striker (if necessary, flint and steel, bow drill, …)
- Tinder: birchbark, Fatwood, cotton balls, etc.
- Knife (Best bushcraft knife)
- Axe (optional, Best survival axe)
- Saw (optional, Best survival bushcraft saw)
- Flashlight
- Cooking set
- Water bottles
- First aid kit
- Smartphone
P. S. Refer to the details on equipment in the guide "What is Bushcraft".
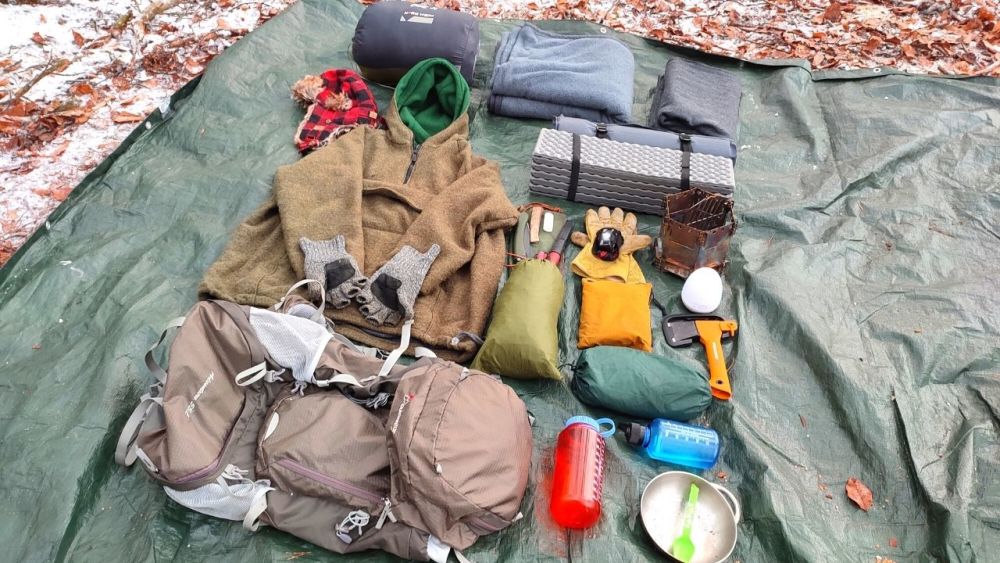
In addition to this, food and water are also necessary, as well as a flashlight if needed.
Speaking of food… Here is a delicious and hearty recipe for a cool winter evening.
Simple Curry Recipe for Winter
For winter, it's good to have a warming meal in your belly. Ginger warms wonderfully and with this thick curry, you'll go to sleep well-satiated and strengthened.
This recipe is intentionally kept simple and can be varied according to your preferences. It consists purely of plant-based ingredients and can be prepared from regional winter vegetables. The combination of vegetables, legumes, and spices is anti-inflammatory and very nutritious.
Little tip: I like to use a piece of tree bark or a sawed-off tree stump as a cutting board.
Ingredients (2 people)
- Ginger, 3-5 cm long piece
- Optional: Turmeric, 3-5 cm long piece
- 1 onion
- 2 cloves of garlic
- 200 g peeled lentils (yellow or red)
- 8 potatoes or 1 sweet potato
- 1 carrot
- Optional: other vegetables such as zucchini, eggplant, spinach, beetroot, parsnip
- Curry powder
- 3 tablespoons sesame paste (or peanut butter or coconut butter as preferred. It should be 100% nut butter, without additives such as palm oil or sugar.)
Preparation (20 minutes)
- Cut ginger and onions into thin slices. Cut the garlic into tiny pieces.
- Cut all vegetables into bite-sized pieces.
- Put the ginger (and turmeric), onions, garlic, potatoes/sweet potatoes, and carrots directly into the water.
- Bring the water to a boil.
- When the water has been boiling for about 5 minutes, add the lentils and remaining vegetables.
- Add curry powder. If you use a lot of curry powder, you don't need to salt or pepper, it's already well-seasoned.
After about 10 minutes, the lentils are cooked. Check if the vegetables are cooked enough.
Add 3 tablespoons of sesame paste and stir well. Due to its consistency, the paste cannot be easily stirred in. Do not cook the paste with the curry, but add it at the end; otherwise it will boil down and not taste as intense.
Season with more curry if desired.
Alternatively: If you bring some oil in addition, you can briefly fry onions, garlic, ginger (and turmeric) first. Then add the water and potatoes and cook. Tastes a little better, but then you need oil in addition.
What do you think of my tips? Are you now inspired to spend a night outdoors in the winter?

Author of the guide
Philipp Leuschner
From the Tibetan high plateau to the lonely desert of Namibia, I've traveled the world by hitchhiking and on foot.
In 2014 I moved to Berlin to study social and cultural anthropology. After a few years it became clear to me: I would rather work in nature and with people.
My search led me to stays in Buddhist monasteries in Myanmar and Sri Lanka and finally to training in wilderness pedagogy.
Now I work as a mentor for wilderness and mindfulness in Berlin and Brandenburg. I love being outdoors and accompanying people in nature and in their inner processes.
I offer seminars in the areas of connection to nature, wilderness knowledge and mindfulness and lead online meditation courses.
Take a look at my podcast "Metta Cast - Buddhism, Mindfulness, Meditation" and my Instagram Account.
Was this guide helpful?
32 people found this guide helpful.
5.00 out of 5 points (32 Ratings)
Comments (0)
This post may contain affiliate links. So if you click on the links and make a purchase, I will receive a small commission at no additional cost to you. Click here, to learn more about it.


