41 Bushcraft Ideas with Children - kid-friendly outdoor activities for parents, groups, and classes
Here you will find 41 great kid-friendly outdoor activities to introduce your children to Bushcrafting and nature. Perfect for family activities.

From Martin Gebhardt. Check out my “About me” page.
👉 The key facts from this guide
- Bushcraft increases children's connection to nature through practical outdoor activities.
- The attitude and participation of the parents are crucial for successfully imparting bushcraft skills.
- Skills such as making fire, handling tools safely, and identifying plants are learned through play.
- The focus is on experiencing and experimenting together, which promotes curiosity and practical understanding in children.
- Certain activities, such as building a clay oven or carving, also promote an understanding of traditional techniques and craftsmanship.
- It is also important to be aware of safety and to use tools and fire responsibly.
You want to inspire your children for nature, but you're in the dark about the what and how?
The internet is a labyrinth of information, but what suits you and your little ones?
No worries, I've got something for you!
41 Bushcraft ideas that are not only fun but also educational.
I tested it with my kids and we had the time of our lives - all without pixels and screen flickering.
Let's go - let's turn every outdoor trip into an adventure together.
Important: Your attitude is the key to a successful bushcraft day
Let me tell you one thing: When promoting your children's connection to nature, your attitude is primarily what matters.
Think about wilderness education! Here are a few tips on how to move forward with ease and joy:
Learning through curiosity and necessity
Children are curious and learn best through action.
If your child asks why birds sing, search for the answer together. Or use the necessity - "We need fire because…". This arouses interest and the little ones learn while playing.
Be the coach, not just the teacher
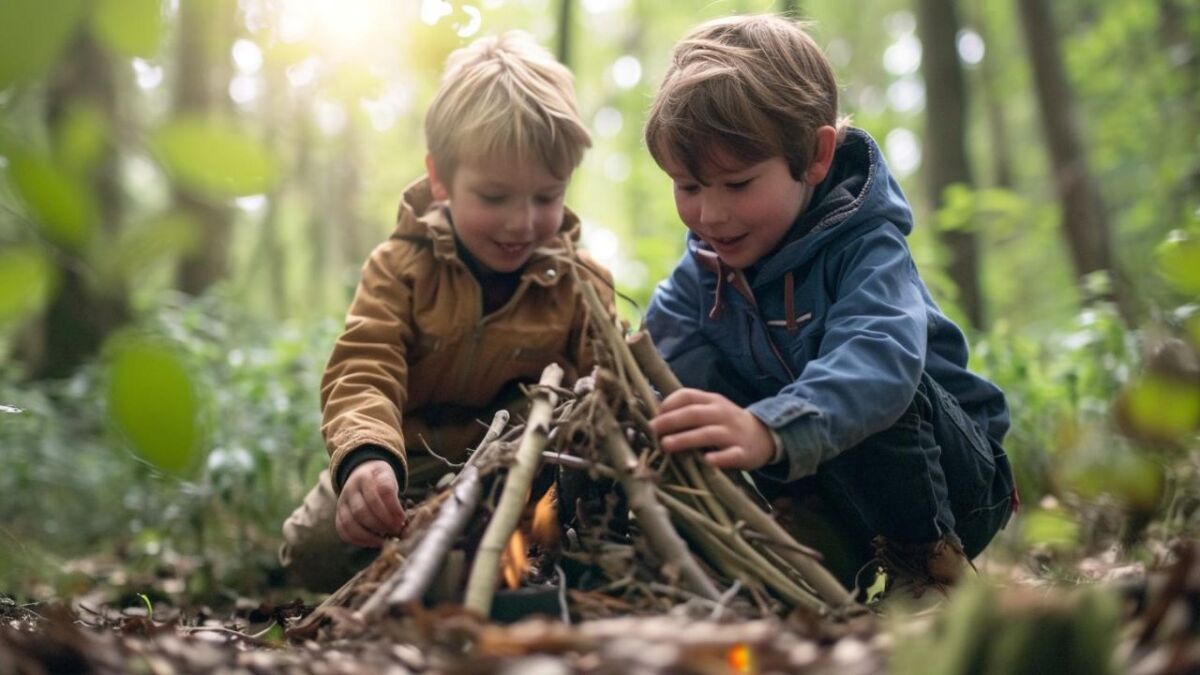
Stress is a no-go. Approach everything with a smile. Be friendly. When you make a fire, let the children participate.
Am I too lofty? No! I meet them at eye level. I sense and ask what they need.
Very important:
Children learn through observation and imitation. Your example is their inspiration.
Questions upon questions
Ask questions, guide them to the solution. But don't give everything away right away! A balancing act between instruction and curiosity; you would rather not frustrate them.
Ask: "What are your thoughts on using this branch as firewood?" and see how they react and brainstorm.
Create a plan for your bushcraft ideas
Whether in the forest, in the backyard, or at home - plan your bushcraft session. Don't overdo it in the afternoon. Set one or two priorities and then - get out!

I tell you, this approach makes the difference. You create memories and at the same time a solid foundation of knowledge and skills.
That's exactly what they need to face the wilderness with respect and competence.
Let's get started with ideas for your children.
1. Split wood safely
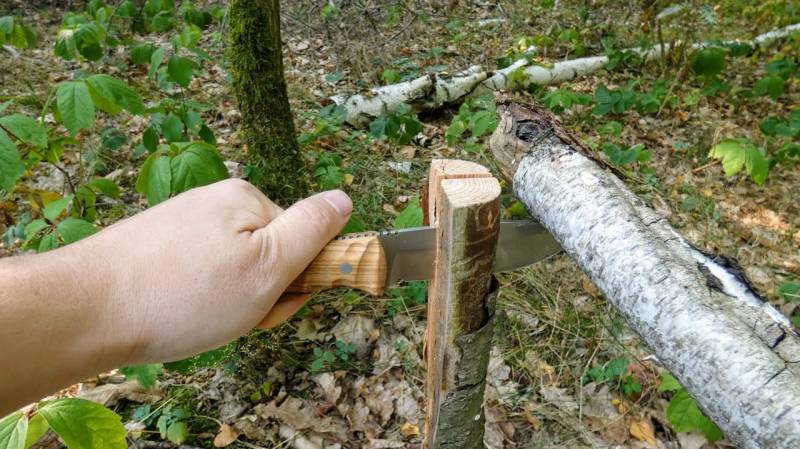
When I first showed my son how to safely split wood, I saw that amazed sparkle in his eyes.
It's not just about the fun factor, but also a fundamental skill for being outdoors and your bushcraft camp.
The Goal
The kids should learn:
- How to properly hold an axe or knife
- The safe handling of tools
- The technique of splitting with a baton
What you need
You need:
- A safe axe or knife
- A sturdy baton
- Some logs
- Safety gloves for you and the children
A place far away from other people or fragile objects is crucial to avoid accidents.
What children will learn
The children will have their:
- Improve understanding by learning the technique
- Train motor skills when handling tools
- Strengthen connection to nature by working with wood
Proper wood splitting is like a dance - it requires rhythm, respect for the tool, and a sense for the material.
What the children can practice
You can practically implement:
- The correct measurement of the logs
- Splitting smaller pieces for a campfire
- The proper striking technique with the stick
This bushcraft idea for children is suitable from the age of about 8 years, depending on the maturity and manual dexterity of the child. Safety always comes first!
Read also
What is Batoning? [with Video] - Batoning describes a special technique for splitting wood with a baton. In this article, you will learn how it works.
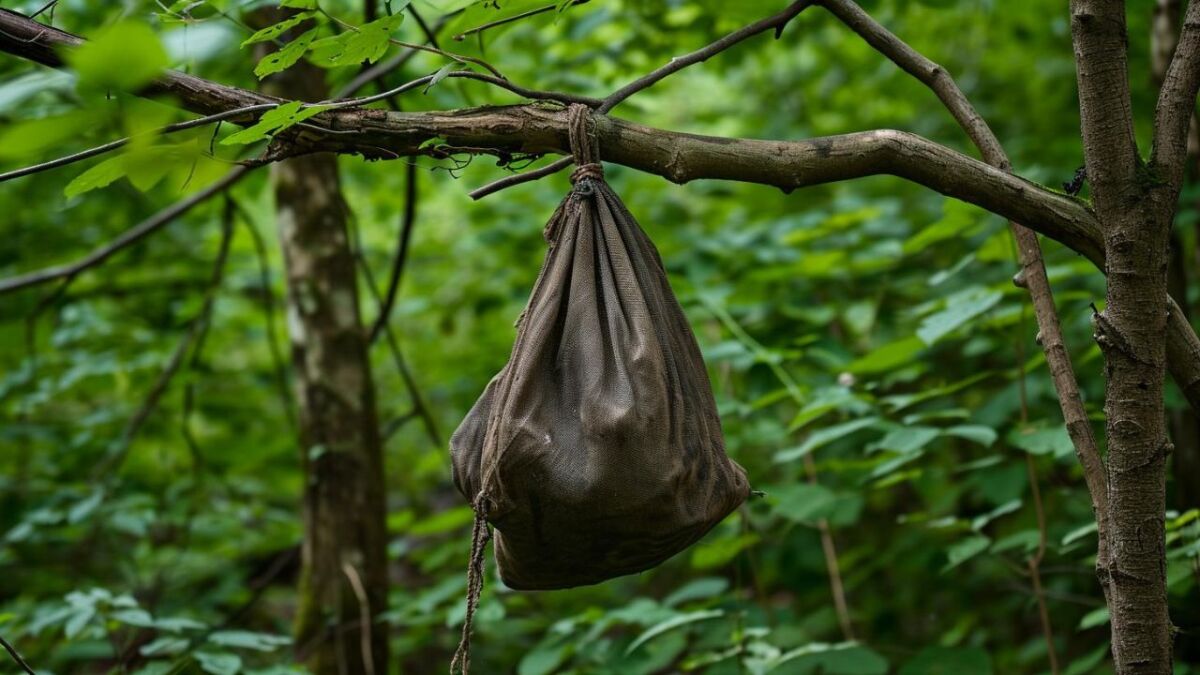
2. Tying the "bear bag"
Do you know how to protect supplies in the wilderness from hungry raccoons, curious foxes, and bears?
A "bear bag" is the answer, and tying one is a little adventure for the little ones.
The Goal
We aim to teach the children:
- Interesting facts about wildlife and how to protect supplies
- Basic knot techniques
- Essential knowledge about outdoor food safety
What you need
You need:
- A sturdy bag or backpack
- A string or rope - at least 10 meters long
- A lightweight object for throwing (e.g., a small sack)
- A tree with a suitable branch
This can easily be implemented in a forest or at a campsite.
What children will learn
Through this activity, the little adventurers improve:
- Your understanding of why food safety is important
- Your dexterity and fine motor skills in tying knots
- Your knowledge of nature and how to harmonize with it
What the children can practice
You will practice hands-on:
- Throwing the bag over a branch
- Tying secure knots to secure the bag
- Teamwork, as this is often more successful when working together
Young scouts aged 6 and above can participate in this activity, as long as adults help with knots and throwing.
"A bear bag not only keeps food safe, but also teaches respect for the wilderness and its inhabitants."
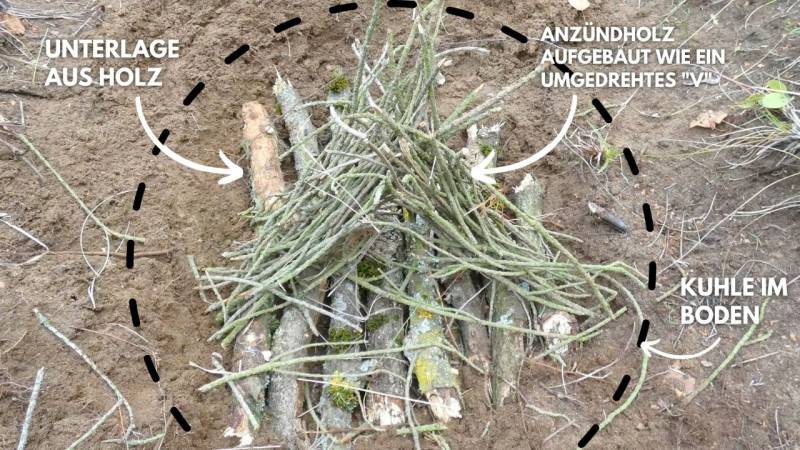
3. Prepare firewood and build a campfire
Imagine the sparkle in your children's eyes when they light their first fire themselves.
Building a campfire is not only cozy, but also a milestone in terms of bushcraft skills.
(That's why I have dedicated a complete guide to the topic: Making fire with children: tips for a successful campfire)
The Goal
Our mission objectives are clear:
- Teach safety rules for handling fire
- Learn different techniques for building a fire, such as the fire tipi
- Strengthen the sense of responsibility for nature
What you need
For a successful fire, you need:
- An open space, far away from trees and bushes
- Various dry firewood: kindling, small branches, larger logs
- Ignition material such as dry grass or birchbark
- Matches or a lighter (fire steel for the experienced little campfire makers)
What children will learn
You develop:
- An understanding of the need for preparation and organization
- Skills in safely handling fire
- Respect for the element of fire and nature
Igniting a fire, the crackling, the warmth - it teaches us mindfulness and conscious action amidst the wild nature.
What the children can practice
In this activity, they practice:
- The selection of the right firewood
- Building a fire with various methods
- The art of igniting a fire with patience and care
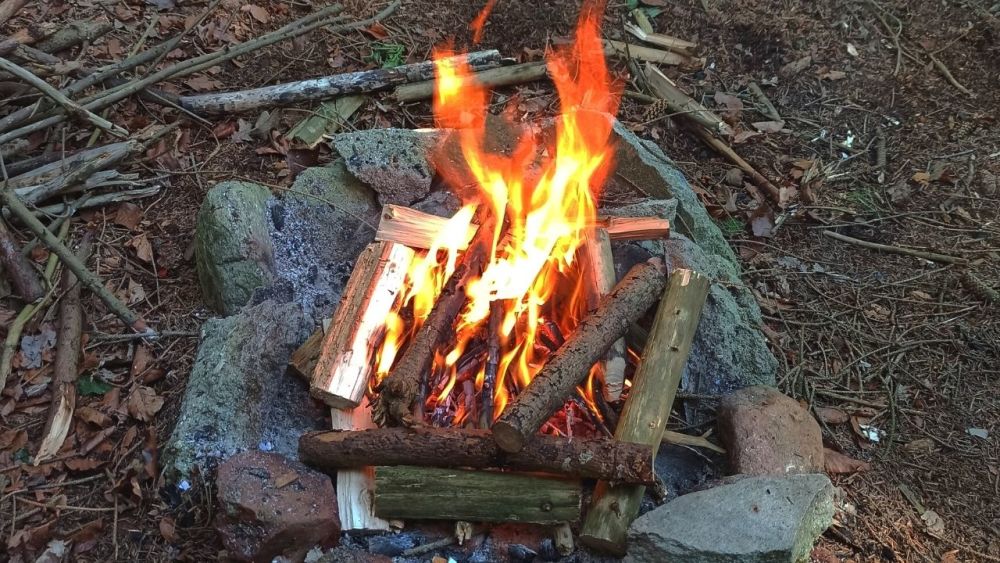
Children from 7 years old can already participate, with the younger ones focusing on collecting and arranging the wood, while the older ones are allowed to light the fire under supervision.
Read also
Tinder and Kindling: What's the Difference? - Tinder and kindling are both easy to ignite to start a fire. But there are crucial differences to consider.
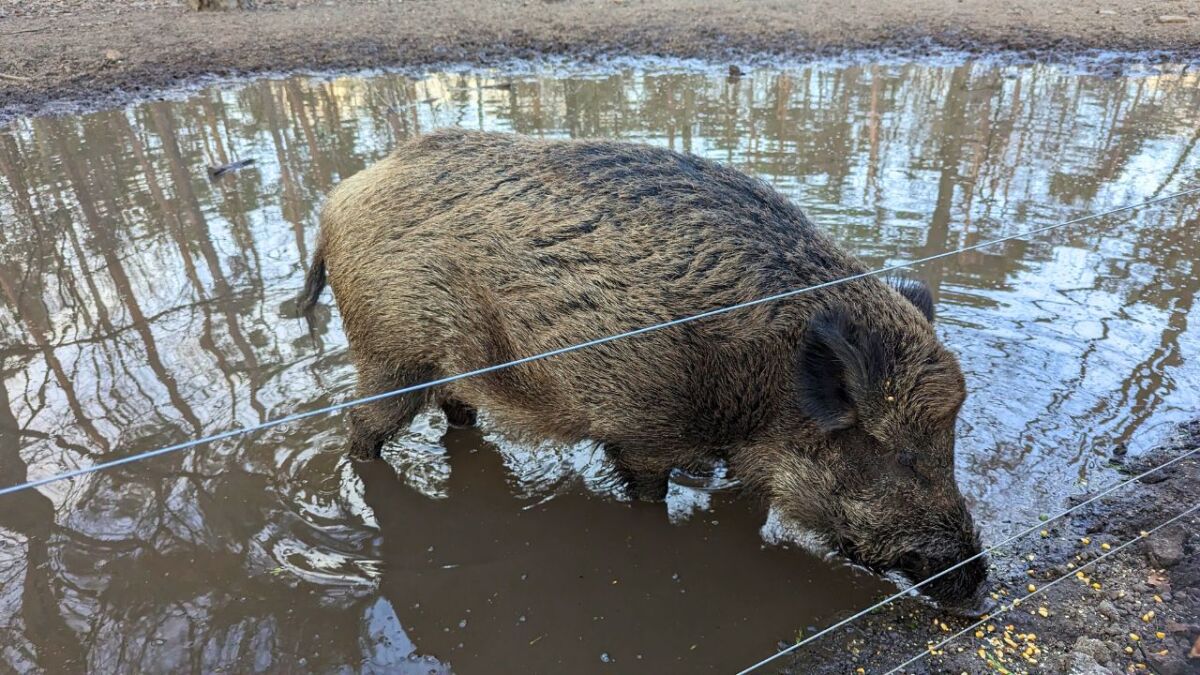
4. Behavior around wild animals
When we found a wildlife track in the forest for the first time, I saw the curiosity in my children's eyes. It's an adventure, but at the same time, one must know how to behave safely.
Just when encountering a wolf or wild boar, proper behavior is vital for survival. Grab this idea to convey knowledge and at the same time get into wildlife studies.
The Goal
The children should learn:
- How to maintain a safe distance
- How to stay calm and step back
- How to make oneself big and make noise, if necessary
What you need
For this lesson, we will need:
- Nothing material, only your knowledge and your voice
- A quiet place to have the conversation, maybe even traces of wildlife nearby
What children will learn
In this unit, you will learn:
- How animals think and why they sometimes come closer
- Important rules of behavior for encounters with wild animals
- How to maintain a respectful distance and still enjoy nature
What the children can practice
The kids can practice:
- To remain calm when they discover exciting things in nature
- To recognize the first steps of animal language and behavior
- To practice the correct behavior with you through role-playing
This activity is suitable for children aged 5 and above, as even young children can learn when to be quiet and when to make themselves heard.
Knowing how to behave correctly around wild animals not only provides safety, but also a deeper respect for the creatures of the forest.
For more information, check here: Encounters with Wolves and Safety with Wild Boars.
5. Botany in the Green
Do you remember what it was like when you first recognized an edible plant?
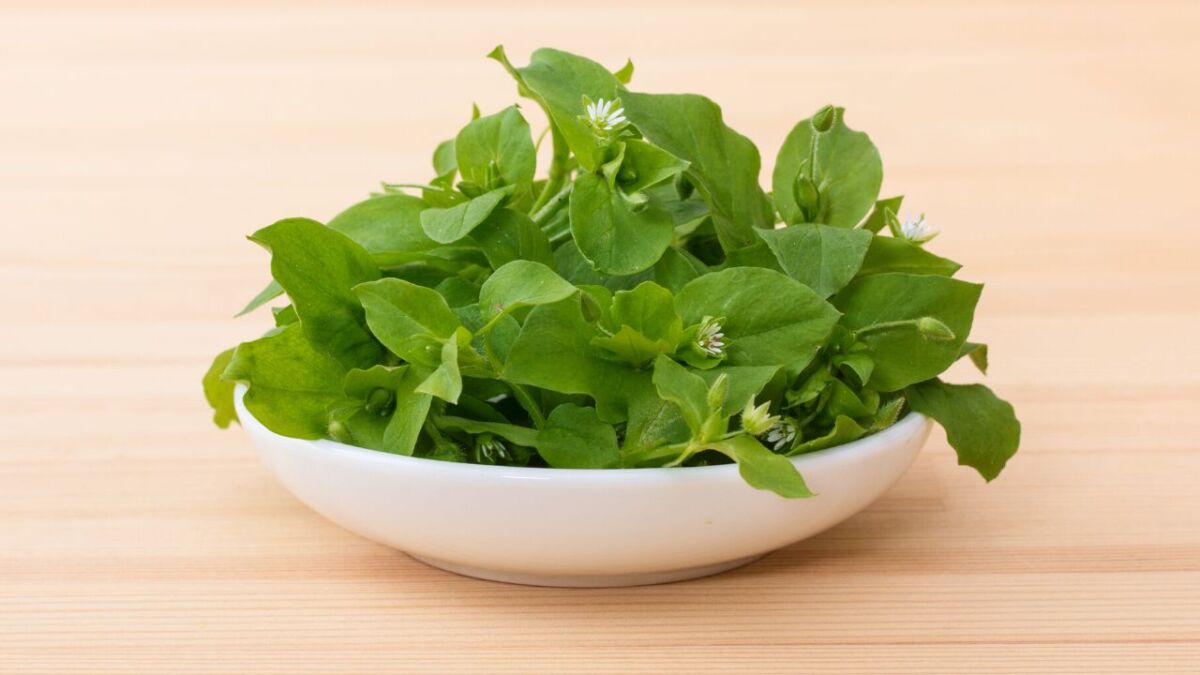
The excitement in my children's eyes when they were able to distinguish a chickweed from a poisonous plant for the first time was priceless.
It is a crucial step to connect with the earth with this Bushcraft idea for children.
The Goal
Our goal is to teach the children:
- Distinguishing native plants from invasive species
- Safely identifying edible wild plants
- Developing responsible stewardship of the flora
What you need
For this, expedition into the world of plants, you will need:
- A good field guide or app for wild plants
- A garden or natural area with various plants
- Sample plants that are easy to identify
What children will learn
The children expand their knowledge by:
- Recognize characteristics of plants and their differences
- Sharpen your observation skills by noticing the intricacies of nature
- Understand how plants contribute to the ecosystem and how we can utilize them
What the children can practice
When exploring the plant world, children practice:
- Patience and perseverance when searching for and identifying plants
- Recording characteristics and discoveries in a nature journal
- Responsibility in dealing with nature by learning which plants they should not touch or eat
This activity is suitable for children aged 4 and above, always under supervision to ensure they do not touch or put anything dangerous in their mouths.
Getting to know plants is like learning a new language that deeply connects us with the earth.
For more information on edible plants and their identification, take a look here: Chickweed, Daisies, Dandelions, and Sorrel.
6. Navigation and Orientation Outdoors
Do you remember the adventure, the feeling of being properly oriented, even when the path was not marked?
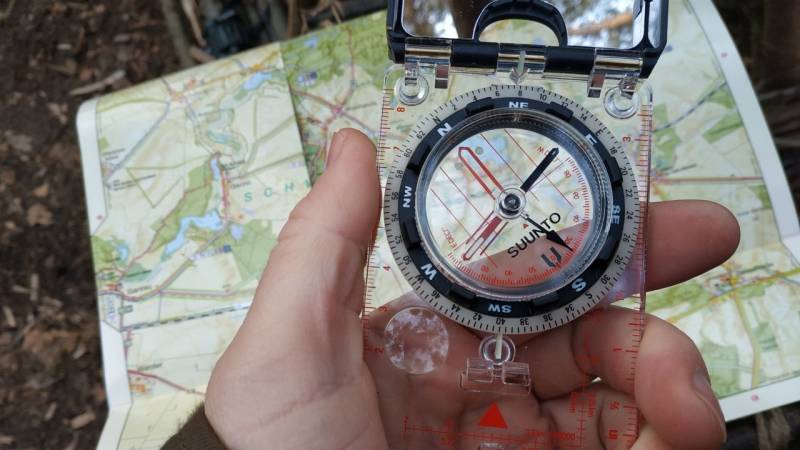
I showed my children how to navigate without Google Maps, and it was a complete success with this bushcraft idea for kids.
The Goal
The children should learn:
- Basics of map reading
- Working with the compass
- Using natural landmarks like the sun
What you need
To get started, you need:
- A simple map of the area
- A compass
- Optional: a watch for more advanced navigation techniques
- An open area to lay the map on the ground and practice what you've learned
What children will learn
Through this experience, your children will strengthen:
- Your spatial imagination
- Your ability to follow and implement instructions
- Your understanding of how people used to navigate before digitalization
What the children can practice
When learning navigation, children can:
- Take map and compass in hand and determine their position
- Learn to identify and use landmarks
- Discover how to navigate using shadows and the position of the sun
This activity is suitable for preschool children, around 5 years old, with the concepts being adjustable according to age.
The ability to navigate independently gives a sense of freedom and independence that is incomparable.
For more information regarding navigation with and without a compass, take a look at these helpful guides: How to Use a Compass? and Navigation without a Compass.
7. Animal and Track Knowledge: A Forest Detective Game
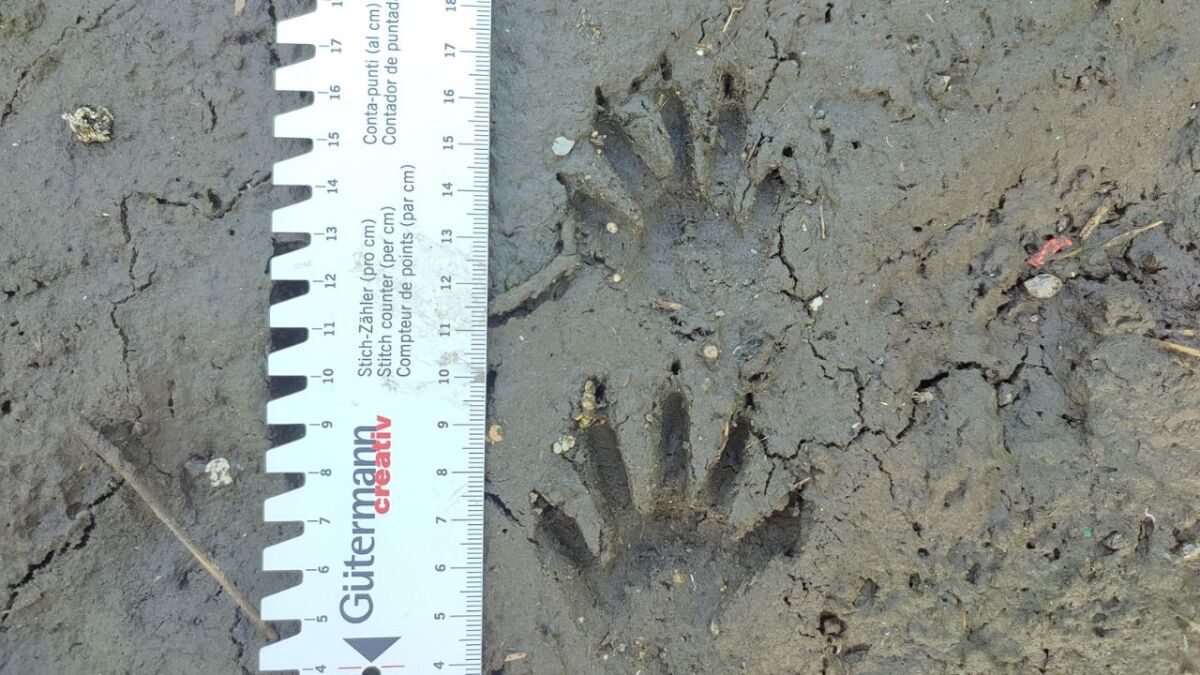
Imagine you were a detective in the deep green of the forest. My kids and I went on a search for clues - that's real detective work!
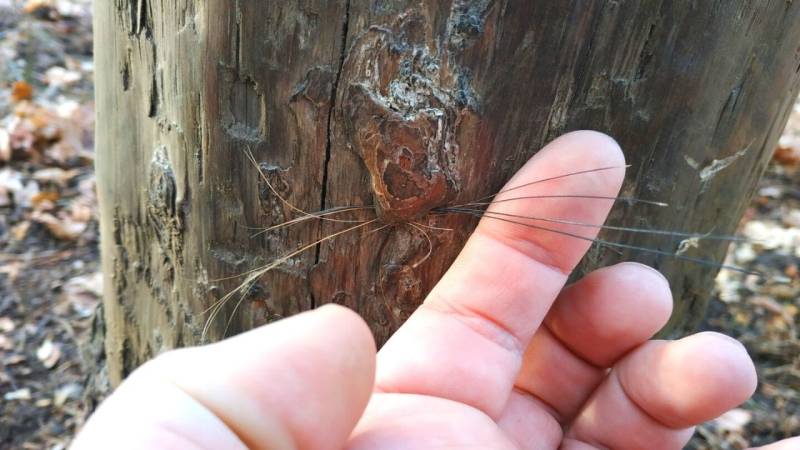
There we discovered the hidden stories of the animal world. Footprints, hair, droppings, feeding traces, etc.
The Goal
We want to show the children how to:
- Recognizes and interprets animal tracks and signs
- Distinguishes different animals based on their tracks
- Experiences nature observation as an exciting game
What you need
For this exciting investigation, we need:
- A guide to tracking
- A piece of undeveloped land with signs of wildlife
- Perhaps plaster to cast and take tracks
- A digital camera or smartphone for photos
What children will learn
Children improve their:
- Observation skills, by learning to pay attention to details
- Knowledge base about native wildlife
- Ability to draw conclusions from observations
What the children can practice
The little trackers are practicing:
- Patience and silence to not scare away animals
- Skill in comparing tracks with images from a guide
- Creativity in inventing stories about the discovered tracks
This bushcraft idea is suitable for children aged 4 and up because practice makes perfect for those who want to become master detectives!
Every trace tells a story - it's like reading a natural history book that lies right at our feet.
For a deeper understanding of animal tracks, visit the page: Tracking for Beginners and Tracking in the Snow. If you want to test your knowledge, try the Animal Tracks Quiz: Animal Tracks Quiz.
8. Weaving Baskets - Getting Creative with Natural Materials
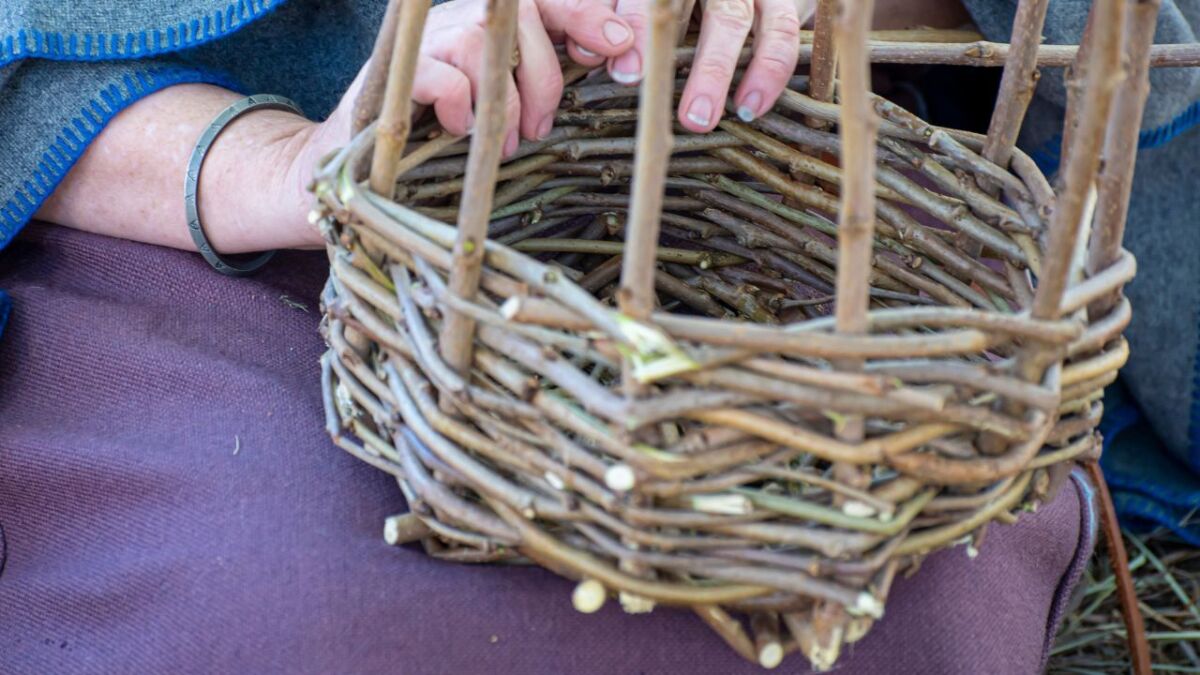
Outside, with our hands in the cool water of the stream, while we weave willow rods into baskets - that is pure nature craftsmanship.
I will never forget how proud my children were when they presented their first self-woven baskets.
The Goal
What we aim for:
- Learning the basic techniques of braiding
- Understanding sustainable use of natural materials
- Promoting patience and concentration through detail-oriented handwork
What you need
To get started, you will need:
- Flexible branches or willow rods, soaked for increased flexibility
- A bucket of water to keep the rods moist
- A knife or garden shears for clean cuts (only for adults or older children)
A quiet spot outdoors or by the stream is perfect for braiding.
What children will learn
Through braiding, children strengthen:
- Your fine motor skills and hand-eye coordination
- Your creative flair in designing your own braided works
- Your appreciation for handicrafts and handmade items
What the children can practice
You can practice:
- Different weaving patterns and techniques
- Dexterity and precision in handling the rods
- Patience, as good weaving takes time and attention
This idea is suitable for children aged 6 and above, as they should already have a good level of fine motor skills.
Weaving baskets connects us to nature in a very special way - it is an ancient craft that teaches us to create from what surrounds us.
9. Recognizing Poisonous Plants - Safely Through the Green
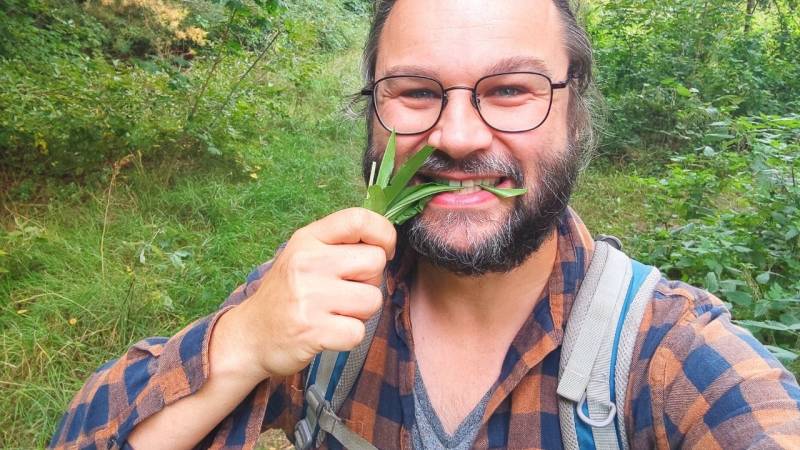
Do you remember your first encounter with a plant where you weren't sure if it was poisonous?
I had this moment with my children and it was a real eye-opener. Knowing which plants to avoid is essential.
The Goal
What we want to achieve with this idea:
- Differentiation between toxic and non-toxic plants
- Understanding the importance of plant knowledge for safety
- Memorization of characteristic features of toxic plants
What you need
For a safe exploration tour you need:
- Pictures or descriptions of poisonous plants in your area
- Gloves in case something needs to be touched
- A natural area where these plants actually grow
What children will learn
The children expand their knowledge by:
- Learn visual differences between safe and dangerous plants
- Become aware of the risks that can lurk in nature
- Learn to be cautious and respectful of the environment
What the children can practice
The children can practice:
- Identifying specific characteristics such as leaf shapes, colors, and stem structures
- Being aware of the risks when dealing with unknown plants
- Sharing their knowledge with friends to increase their safety as well
This knowledge transfer is suitable for children aged 7 and above, as they already have a certain level of understanding of nature and can retain the information.
Recognizing poisonous plants is like learning a safety rule - essential and potentially life-saving.
If you are keen to learn more about poisonous plants, I recommend my e-book "11 life-threatening poisonous plants", which will help you navigate safely through the local plant world.
These guides will also help you:
- Edible Plants: Find this emergency food in the forest (List + Pictures)
- Food Search in Winter: Over 41 edible plants, nuts, roots, and more for emergency food in cold weather
10. Safety rules in the forest - Basics for little adventurers
When I first ventured deeper into the forest with my children, it was clear to me: safety comes first - whether it's hiking, bushcraft, or survival.
We discussed the "What to do when…" and I realized how important it is for my children to know and respect these wilderness rules.
The Goal
Goals of our forest hike today:
- Teach children how to behave when they get lost
- Emphasize the importance of meeting points
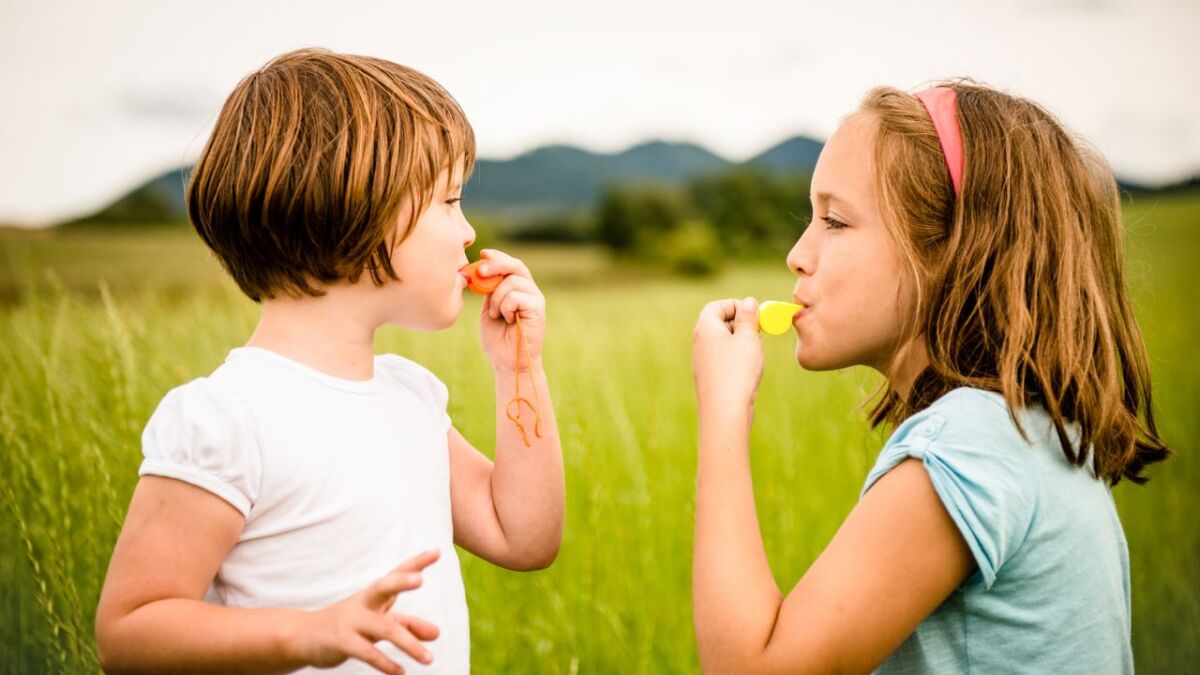
- Provide instructions on how to use a safety whistle
What you need
What you need for the safety training:
- Safety whistles for every child
- A quiet area in the forest for explaining and practicing
- Possibly a mobile phone or walkie-talkie for emergencies (not for the children, but for you)
What children will learn
The children gain the following from the Bushcraft idea:
- An awareness of potential dangers in the forest
- Knowledge of how to attract attention without panicking
- Confidence in their ability to remain calm in difficult situations
What the children can practice
The young forest rangers are practicing:
- The use of the safety whistle in an emergency
- Orientation based on natural landmarks and meeting points
- Communication skills through the establishment of check-in points
This bushcraft lesson is suitable for children from preschool age, around 5 years old, as early learning promotes safe and confident actions in nature.
Being in the forest means freedom and adventure, but also knowing the rules that help you safely return home.
11. Creating Simple Tools - The Bushcraft Basecamp
I still remember well when I built my big son's first walking stick with him - the joy and wonder in his eyes were priceless.
He carried the stick everywhere until it broke. Thereafter, a saw followed.
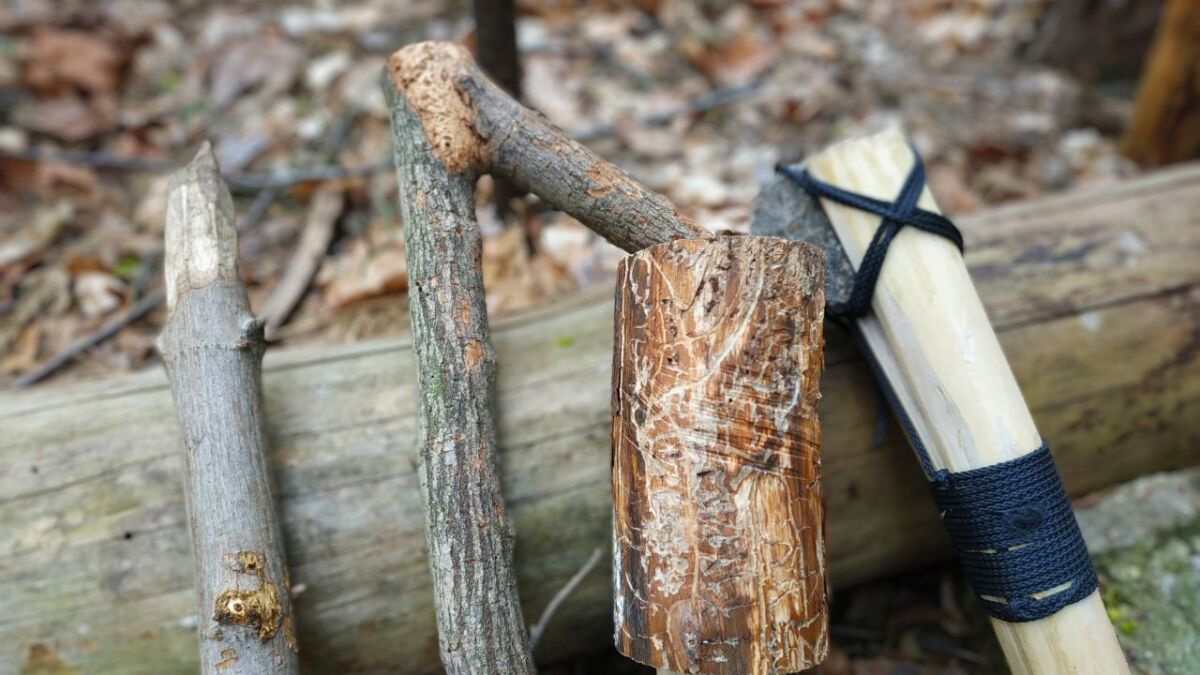
Creating something useful with your hands is what Bushcraft is all about in its purest form. What does the idea look like exactly?
The Goal
Our adventure destination today:
- Learn how to make simple tools from nature
- Understand why tools are an extension of our abilities
- Promote sustainable resource management
What you need
For your small bushcraft project you will need:
- A solid, straight piece of wood for the walking stick
- A larger piece of wood for the bushcraft hammer
- A sharp knife for carving (use under supervision)
A place in nature where tool making can be practiced is ideal.
What children will learn
The children are working on:
- Crafting basic skills
- A deeper understanding of how tools work
- The ability to create the essentials with what nature provides
What the children can practice
The young Bushcrafters can put their skills to the test:
- Carving and shaping wood
- Working with tools under supervision
- Patience and precision required for such work
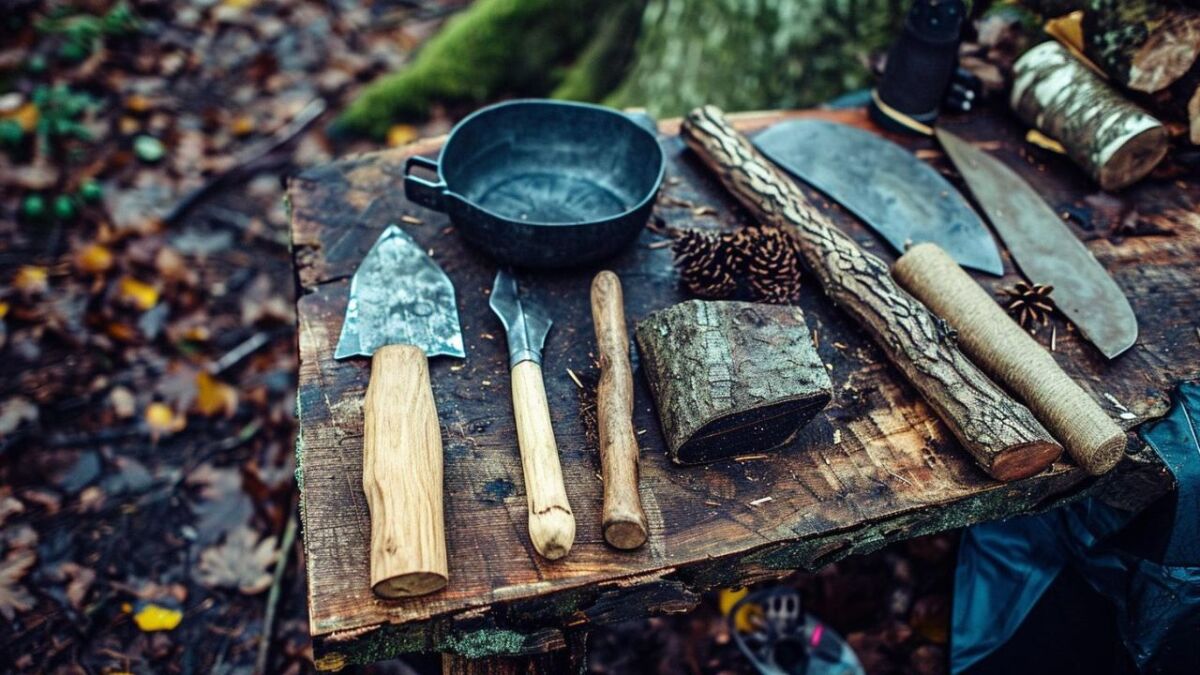
These tool-building ideas are suitable for children aged 7 and older, as they already have the necessary coordination skills and understanding of craftsmanship.
By creating your own tools, you not only learn about bushcraft, but also about your creativity and problem-solving skills.
A guide to building a bushcraft hammer can be found here: Building a bushcraft wooden hammer.
12. Building a Tripod - Basic Structure of Camp Life
Do you remember how you built a forest camp as a child? How exciting it was to create a structure that stands?
I experienced exactly that with my children when we built our first tripod - and it stood like a champ!
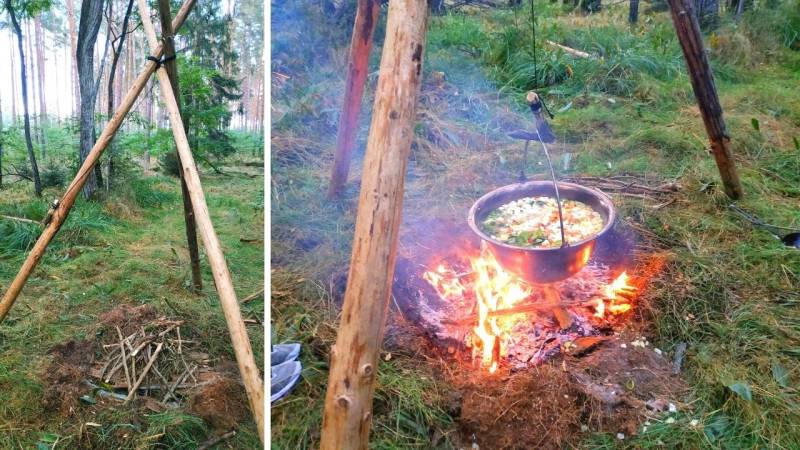
The Goal
Today's bushcraft idea for children includes:
- Teaching basic construction principles
- Understanding stability through three-point support
- Exploring the benefits of tripods in warehouse construction
What you need
To build the tripod, we need:
- Three long, straight sticks, sturdy enough to hold weight
- Strong string or rope for tying the sticks
- A bit of space to set up the tripod
A forest area with enough straight material/branches is ideal for this.
What children will learn
Children learn during this activity:
- How to connect sticks to create a stable structure
- Why three-point structures are particularly stable
- Creative thinking for diverse applications of a tripod
What the children can practice
The little warehouse builders practice:
- Various knots that hold and yet remain solvable
- Teamwork because together the tripod is easier to create
- Fine motor skills through tying and adjusting the knots and sticks
Building a tripod is already an exciting and achievable challenge for children aged 6 and up.
My suggestion: Hang on to it and test if it's stable! Later, throw a blanket over it and you'll have an instant tipi.
The tripod is not only a practical structure in the camp, it is also a lesson in physics and craftsmanship, wrapped in an adventure.
If you need a step-by-step guide, you will find it here: Build a tripod.
13. Making and Using Gorge Hooks - The Fishing Revolution
There we stand, my children and me, on the shore, and I show them how our ancestors caught fish without modern fishing rods.
The homemade Gorge Hook is exciting and effective, and the kids are always thrilled by the idea when they have made this little piece themselves.
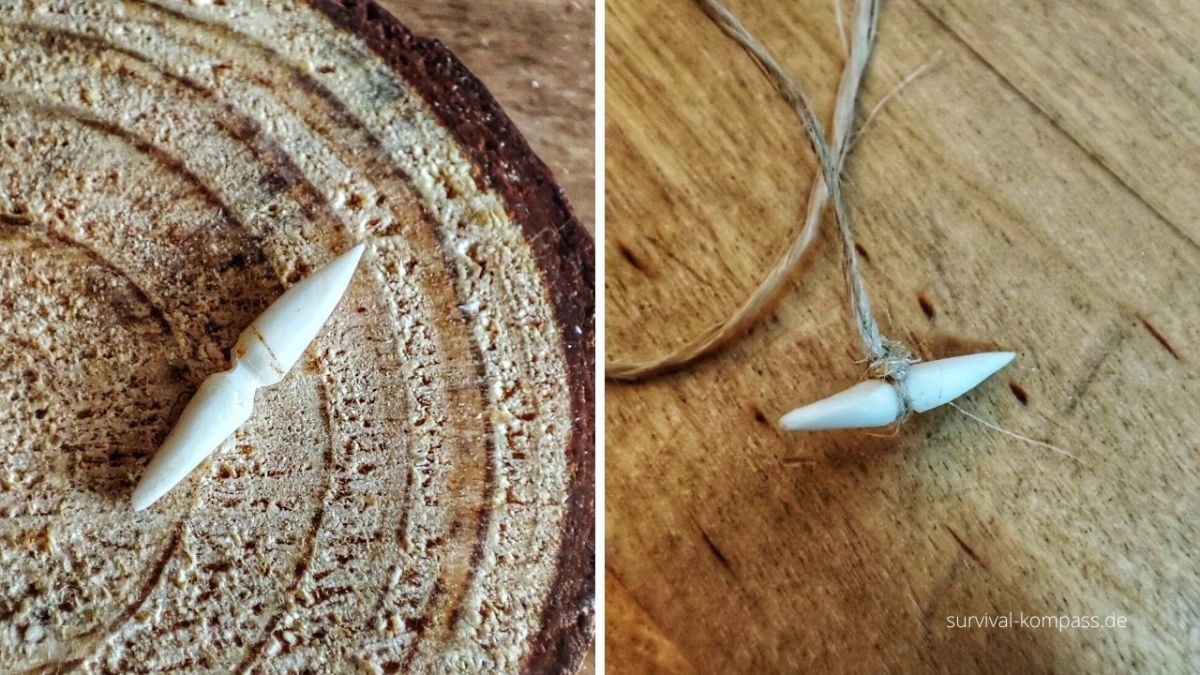
The Goal
Our plan is:
- Creating a simple, prehistoric fishing tool - the Gorge Hooks
- Developing an understanding of ancient fishing methods
- Generating awareness of the connection between food and nature
What you need
For our little fishing trip we need:
- A small piece of wood or bone
- String, ideally in natural camouflage color
What children will learn
The children gain knowledge and skills from the idea:
- Dexterity in carving the hook
- Patience and finesse in making and using the fishing rod
What the children can practice
The aspiring young anglers practice:
- Finding suitable wood
- Or working with bones and getting to know their structure
- The technique of carving the hook correctly
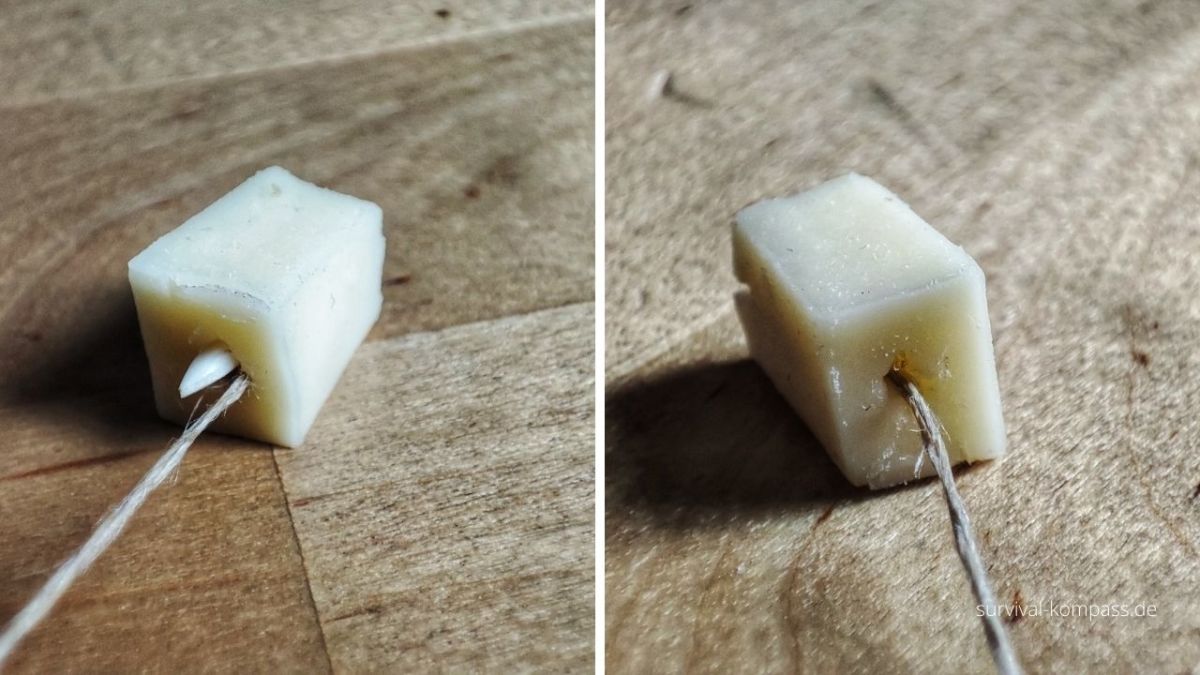
This bushcraft idea is suitable for children aged 8 and above, as they should already have a certain level of dexterity and patience.
The Gorge Hook is a testament to human ingenuity and takes us back to the roots of survival.
For more information on the subject, please visit: Survival Fishing Techniques.
14. Building Snare Traps - The Art of Survival
I still remember the day when I explained the concept of snare traps to my children.
Your fascination with this ancient fishing technique was great, and we all agreed that we would only use it for practice and not for catching real animals. (Read more about the laws in Germany: Is bushcraft legal? What is allowed in Germany?)
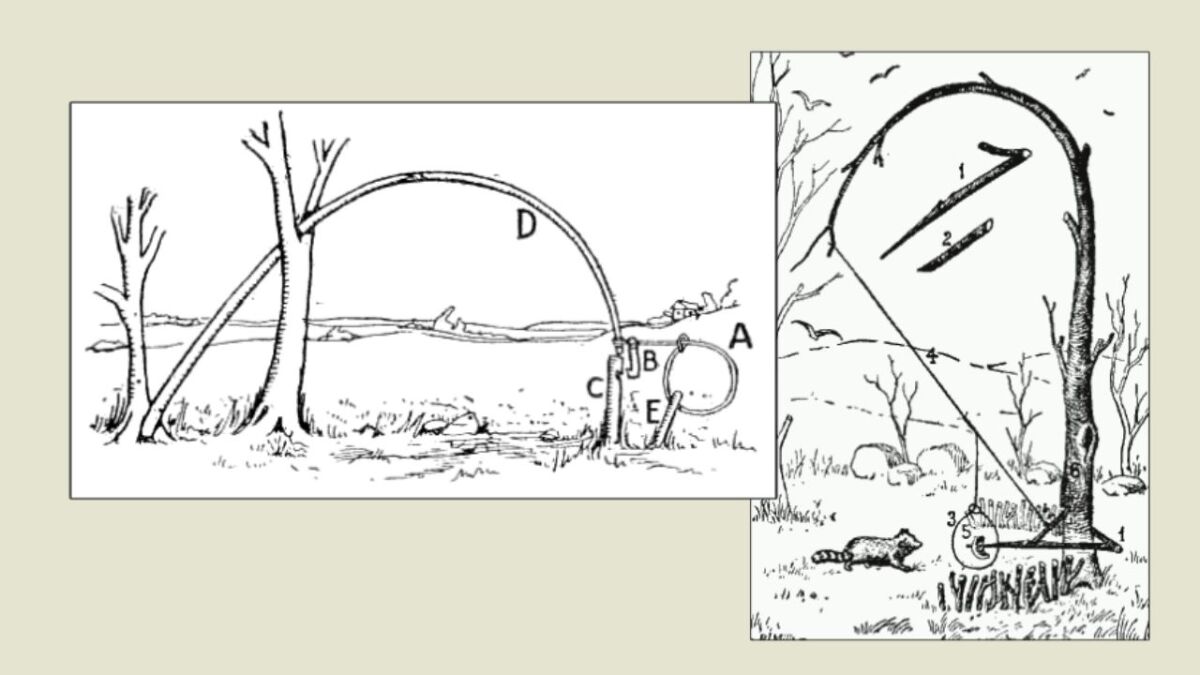
The Goal
What we would like to learn today:
- Understanding the basics of trap building
- Safely setting up snare traps
- Building knowledge of traditional hunting methods
What you need
For our lesson in bushcraft, we need:
- Strong cord or thin ropes
- Straight sticks for trigger mechanisms
- A suitable area where we can practice without disturbing the wildlife
What children will learn
The children expand their understanding of:
- Mechanical processes and how traps are triggered
- Respectful nature observation and the principle of "Leave No Trace"
- Skill in handling simple tools and materials
What the children can practice
The little bushcraft adventurers are practicing:
- Building different types of snares
- Proper construction and safe handling of traps
- Responsibility - because we only build for learning, not for catching
This activity is intended for children aged 10 and older, as they already have a greater sense of responsibility and better motor skills.
Setting traps is a part of human history and teaches us how our ancestors survived in nature.
15. Ignite fire with the Firesteel - let sparks fly
Imagine you are back in the Stone Age and have to start a fire without modern tools.
This is how my children feel every time we pull out our Firesteel and let the first sparks fly.
This bushcraft idea for children is not only a ritual, but also a piece of independence that we earn.
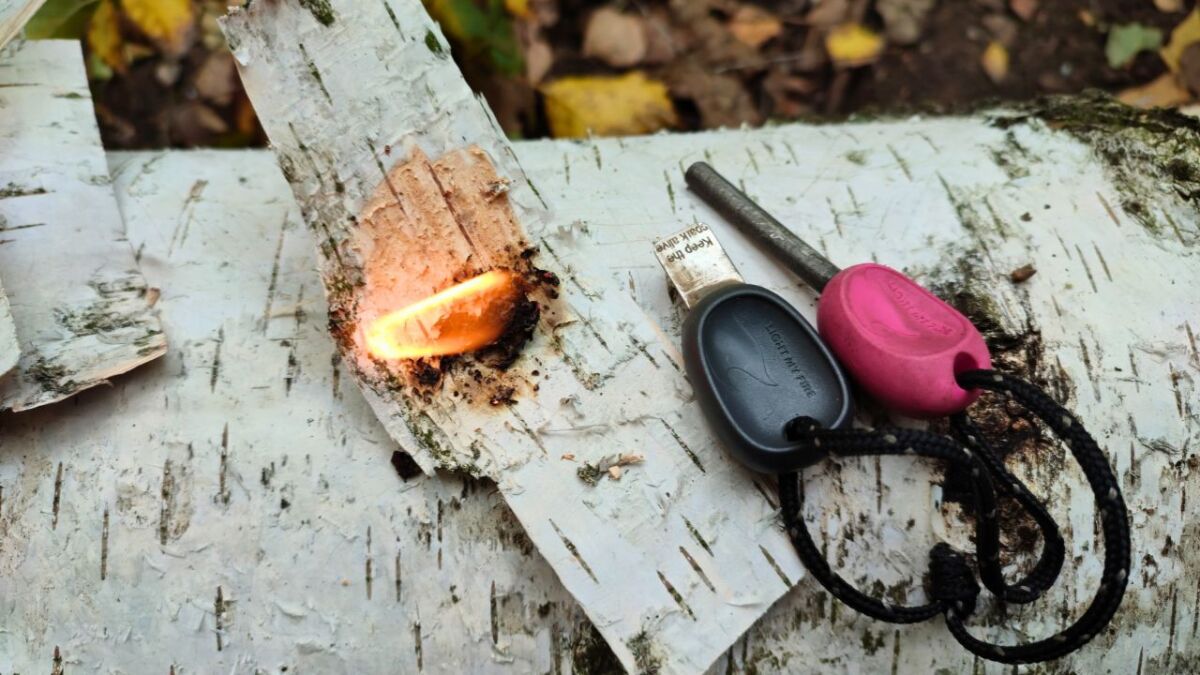
The Goal
Our mission for today:
- Master the technique of making fire with a Firesteel
- Collecting and preparing natural tinder
- Gain experience in handling sparks and fire
What you need
For this fascinating children's idea, we need:
- A high-quality fire steel (here's my top list)
- Collectible natural tinder such as dry grass, Fatwood, or birchbark
- A safe location, away from flammable materials
What children will learn
The children develop with the idea:
- A skillful hand in handling the Firesteel
- Patience and endurance in kindling the fire
- A deeper understanding of the element of fire and its significance for survival
What the children can practice
The young survivors practice:
- Selection and preparation of tinder materials
- Handling the fire striker and generating sparks
- Building a small fire under supervision
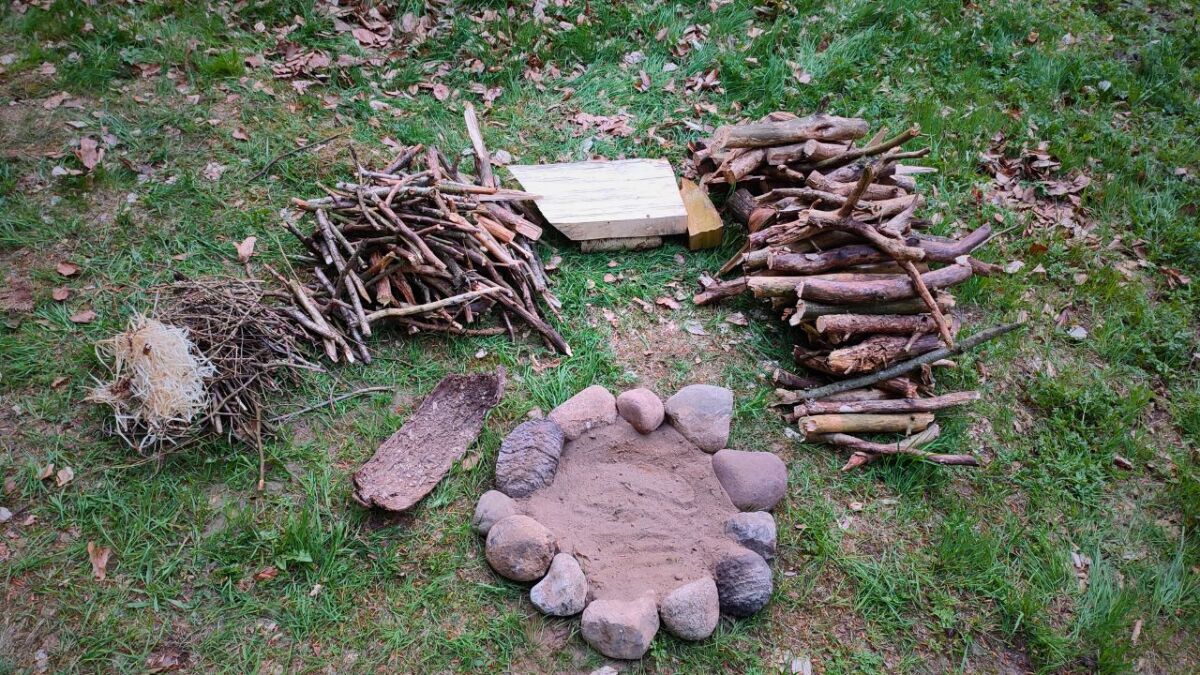
This lesson is particularly suitable for children aged 6 and above, as they learn to handle fire respectfully and responsibly.
Igniting a fire with a Firesteel gives an incredible feeling of success and self-sufficiency.
For those who need a detailed guide: Firesteel - with this guide you will definitely ignite a fire.
16. Collecting Materials and Crafting - Nature as a Playground
Do you know the joy of collecting treasures in nature with your children and creating something of your own?
These moments are priceless: The world becomes an adventure land, nature becomes a partner in play.
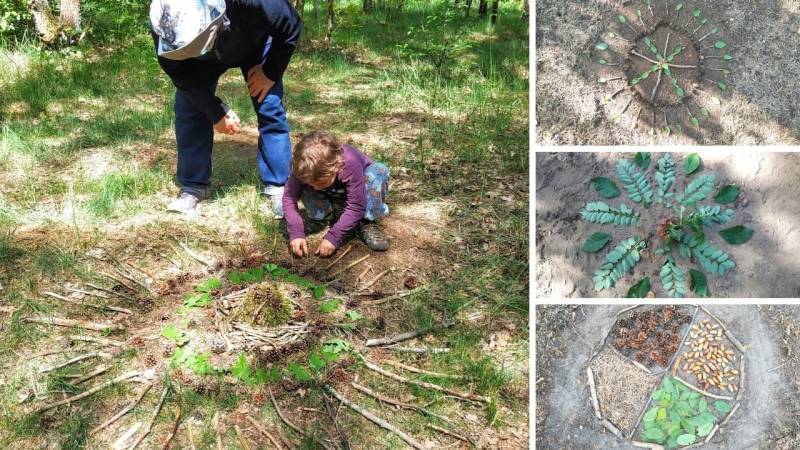
The Goal
We have the following goals:
- Collecting natural materials such as leaves, sticks, and stones
- Learning how to be creative with found materials
- Developing sustainable craft ideas
What you need
What we need for our creative project:
- A bag or basket for the collected treasures
- A natural area where collecting is allowed
- Simple tools like scissors and binding materials for crafting
What children will learn
Through this activity, the children strengthen:
- Your observational skills and awareness of the environment
- Your imagination when designing your own artwork
- Your appreciation for natural materials and sustainable craftsmanship
What the children can practice
The children can practice the following with the idea:
- Different techniques of collecting and sorting
- Skillful and creative processing of the found materials
- Enjoyment in sharing and presenting their natural creations
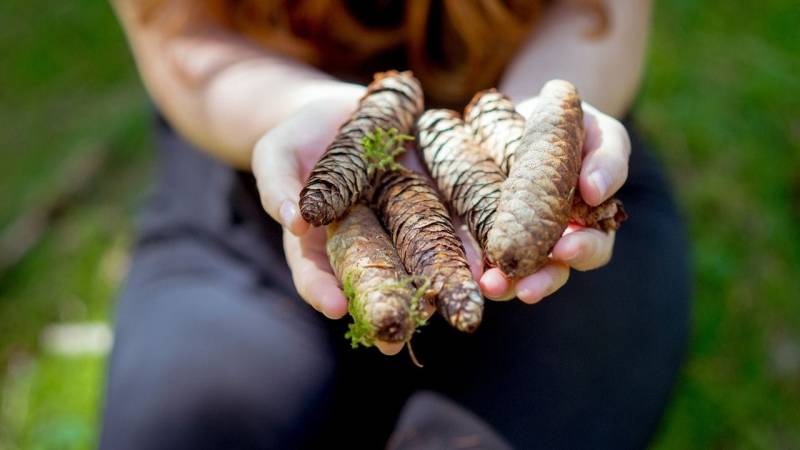
This activity is wonderful for children of all ages, as even the little ones enjoy the search and the older children unleash their artistic side.
Creating with natural materials not only sharpens the senses, but also promotes a deep understanding of the resources that the Earth provides us.
Collecting things is a primal instinct that everyone enjoys.
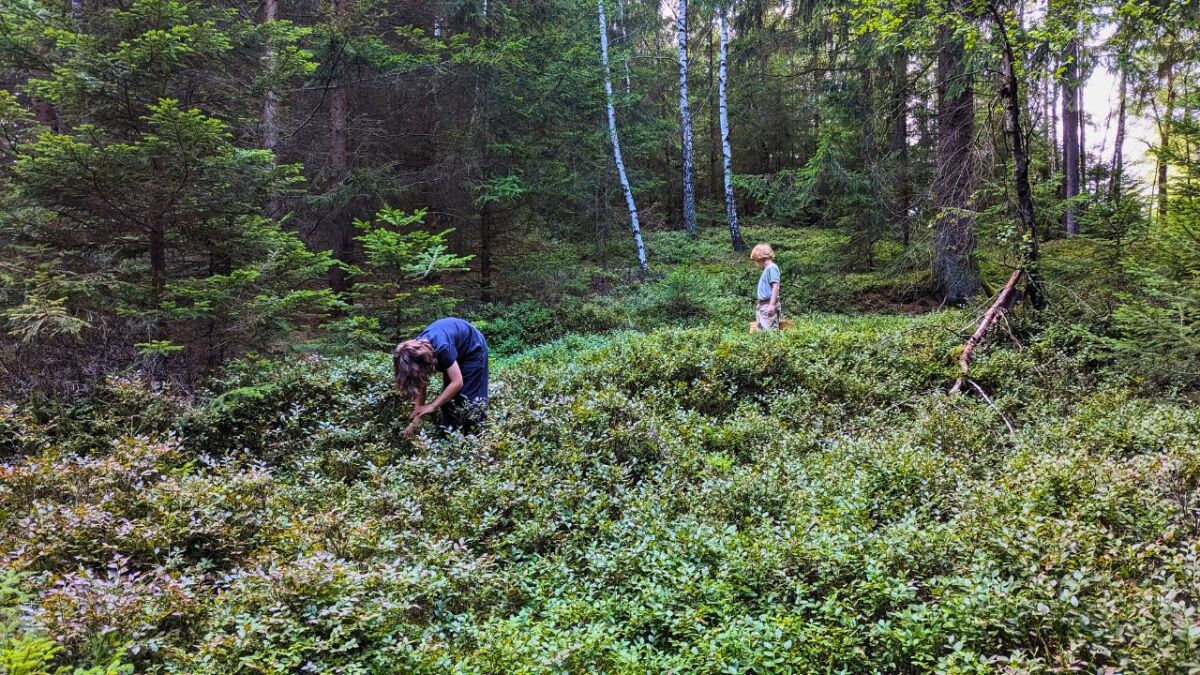
17. Safety when collecting food - replenishing supplies in the forest
Imagine you are walking through the forest with your children and discover edible berries.
How do you explain to them which berries they are allowed to pick and which ones they are not?
Safety when collecting food is essential and can also be a lot of fun when you know how to do it!
The Goal
What we want to achieve with the idea:
- Recognize which berries and plants are safe to eat
- Understand the importance of safe foraging
- Impart the knowledge to never eat anything unknown
What you need
For our collection tour we need:
- Identification book or app for plant identification
- Baskets or bags for collecting
- Gloves, in case we are unsure
- An area where collecting is allowed and safe
What children will learn
The children are learning:
- Important safety rules when collecting berries and plants
- Differences between edible and poisonous plants
- Responsible handling of nature and resources
What the children can practice
During their discovery tour, they practice:
- Observation and identification of wild plants
- Collecting and sorting edible plants
- Care and respect in dealing with nature and everything it offers us
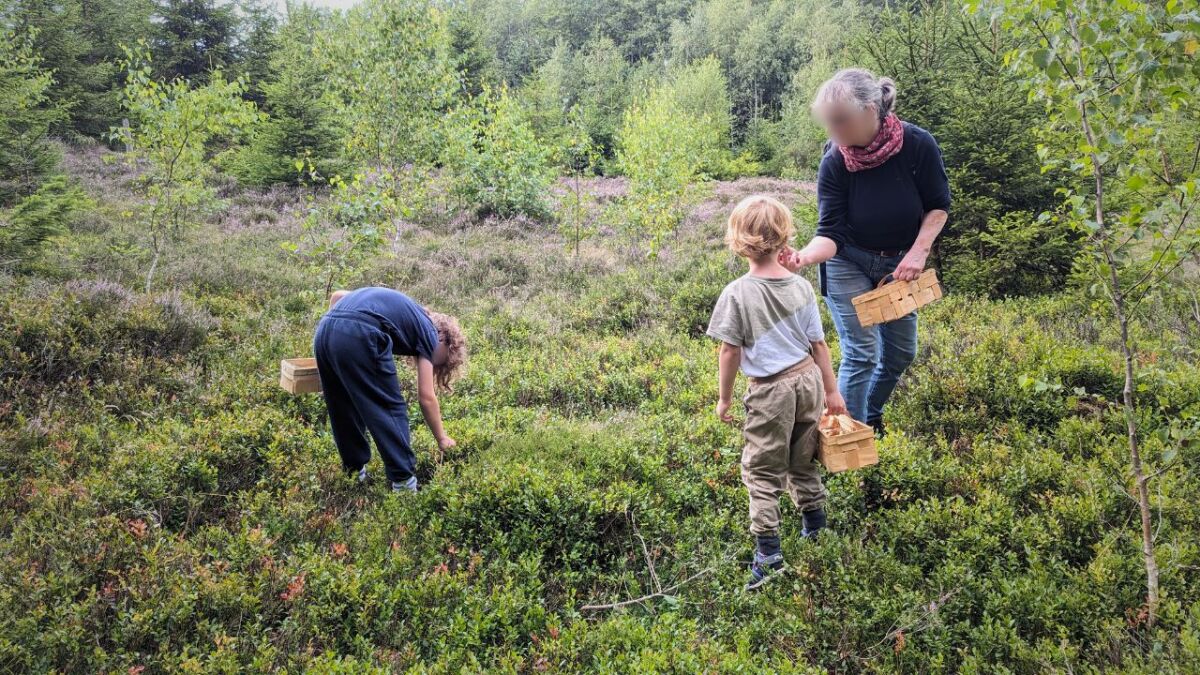
This bushcraft idea is suitable for children aged 5 and above, provided that you as an adult are present and ensure that they do not try anything dangerous.
When collecting berries and plants, the greatest adventure is to learn how rich and generous nature provides for us.
For more information and tips on safely foraging for food in the forest, take a look at this guide: Emergency Food in the Forest.
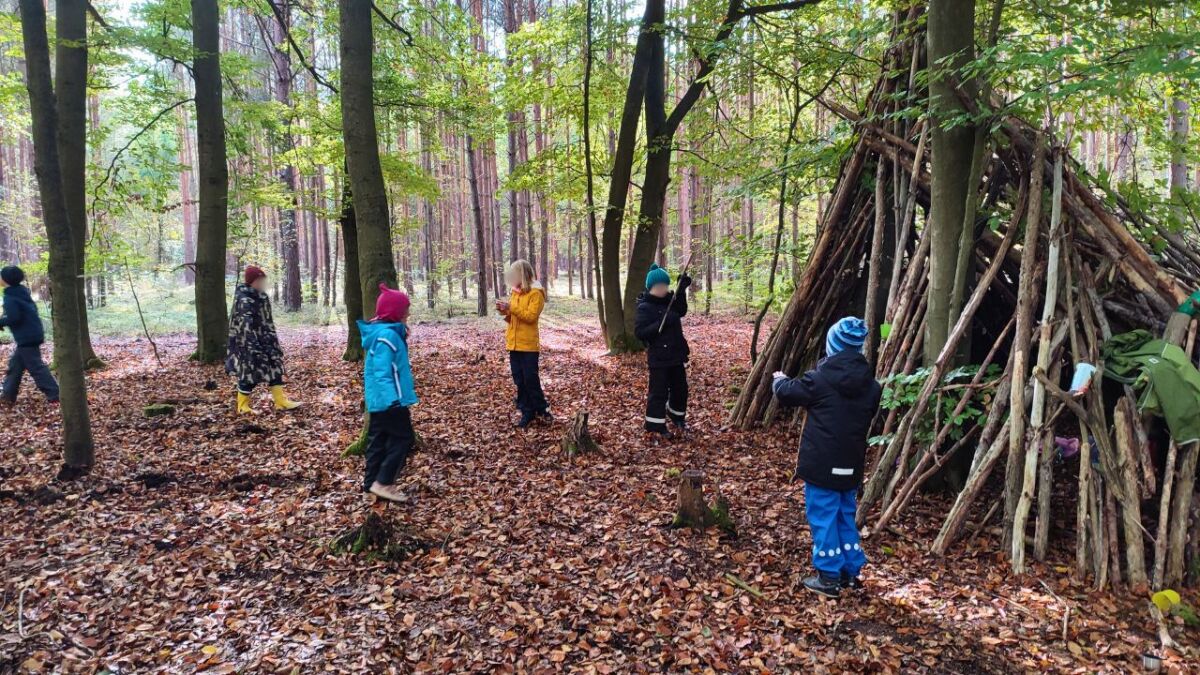
18. Building Shelters and Huts with Children - Little Architects in the Wilderness
There I am, kneeling with my children in the leaves, as we gather branches and leaves to build our own little shelter.
Building such a cabin is a project that provides protection and brings pride.
The Goal
This bushcraft idea for children aims to:
- Learn basic techniques for building shelters
- Acquire knowledge about using materials from nature
- Realize the importance of protection in the wilderness
What you need
For our construction project, we need:
- Different lengths and thicknesses of branches and sticks
- Leaves, bark, or other natural materials as roofing
- A suitable spot in the forest with enough building materials
What children will learn
The children learn from the idea:
- Principles of construction and statics of shelters
- Importance of insulation and protection from the elements
- Teamwork and planning when multiple children are working together
What the children can practice
When building the shelter, the children practice:
- Finding and sorting suitable building materials
- Creating a stable and weatherproof structure
- The joy of one's own creation and the feeling of security
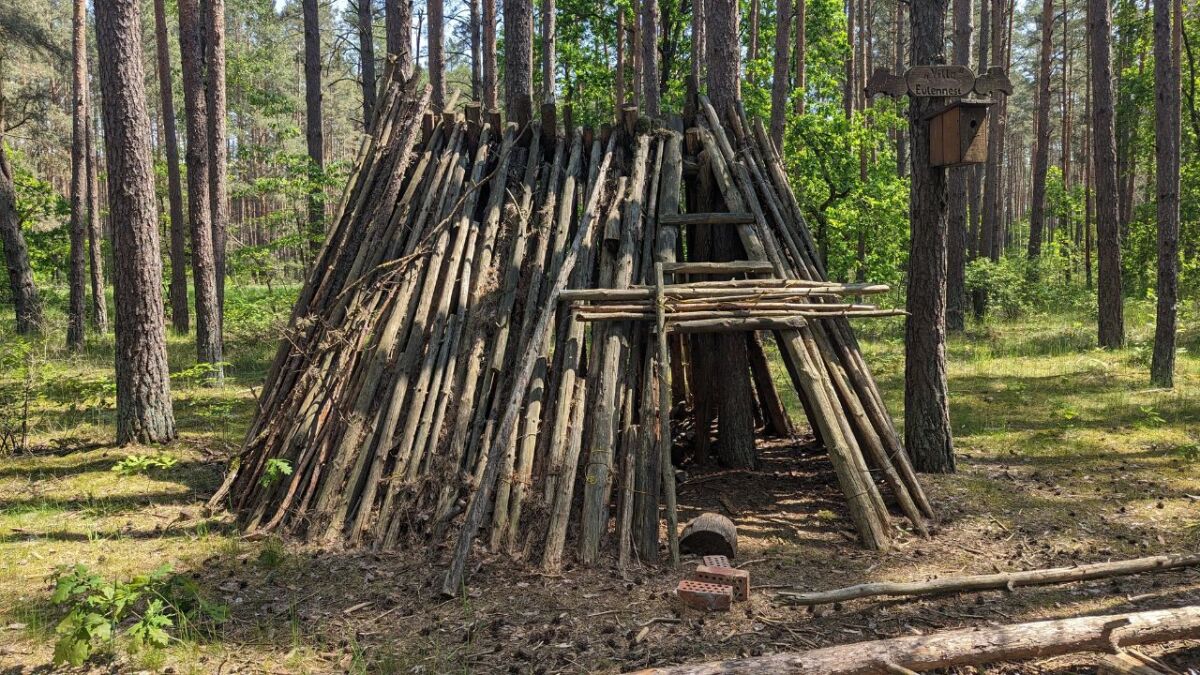
This activity is suitable for children aged 6 and older who can understand and participate in the construction of a simple shelter with the help of a structure.
Building a shelter in the woods is one of the most basic survival skills and promotes creativity and practical thinking.
If you need even more inspiration and guidance, you can find more information here: Bushcraft Shelter and Winter Survival Shelters.
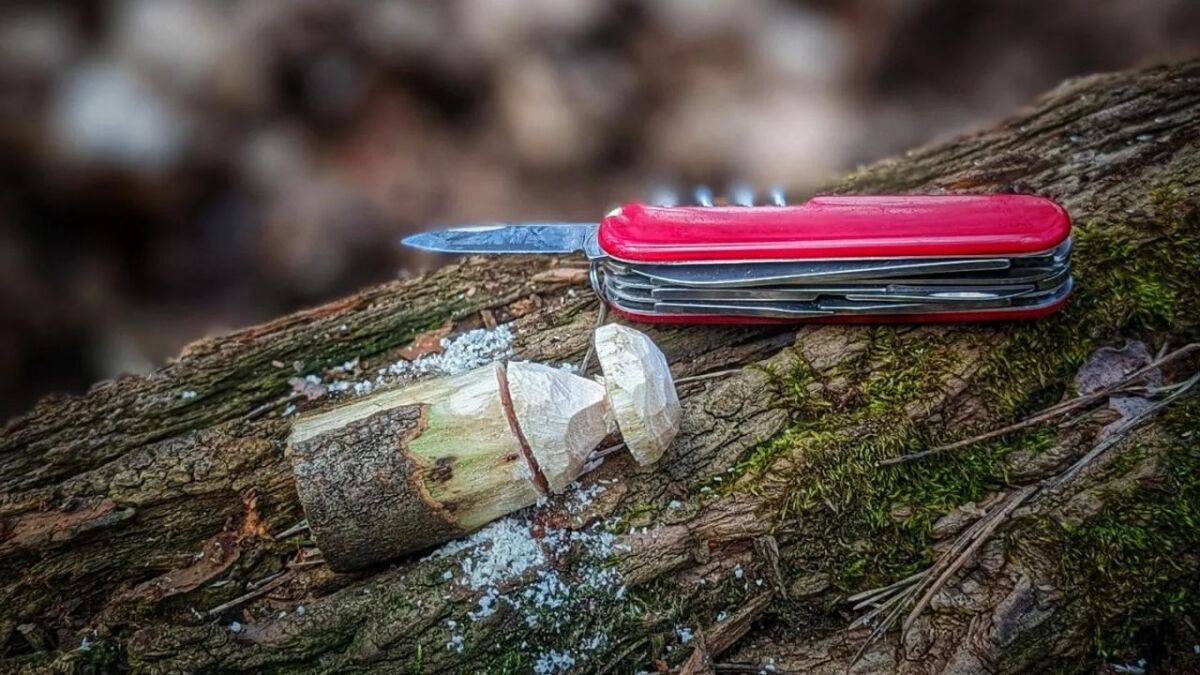
19. Knives are not toys: Teaching children how to handle them safely
Knives often fascinate children - they radiate a sense of adventure and are the tool of choice in the wilderness.
Of course, we must not forget, a knife is not a toy. It is essential to teach children from the beginning how to handle it safely.
Respect the blade, and it can be your loyal companion.
The Goal
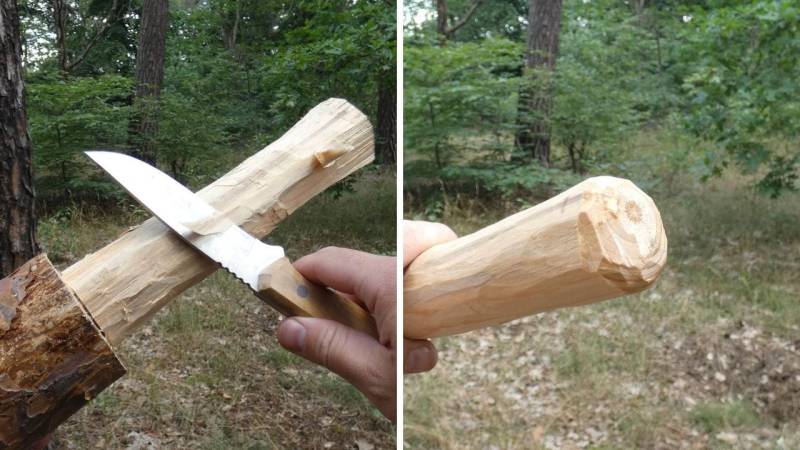
This activity is about teaching children the basic skills of safely handling a bushcraft knife. I want to convey to them:
- How to hold a knife properly.
- Why (almost) always cut away from the body.
- How to safely hand over a knife to someone else.
- What carving techniques exist and how to apply them.
- Why mindfulness and concentration are crucial when handling a knife.
What you need
You need:
- A child-friendly bushcraft knife (preferably with a rounded tip) and a fixed blade. (Here's a recommendation: Mora Safe Pro or the BeaverCraft carving knife)
- A cutting board or a wooden block as a base.
- Branches or soft wood (such as poplar, willow, or lime) for practicing carving.
- A safe environment - far away from unnecessary distractions.
- A first aid kit, better safe than sorry.
What children will learn
This important lesson offers much more than just carving. Children improve:
- Your motor skills through the precise movements of carving.
- Your perception by learning to focus on the task.
- Your understanding of responsibility by safely using a tool that can be dangerous.
- Your connection to traditional craftsmanship and nature by working with natural materials.
What the children can practice
When handling a knife, children can learn various practical skills:
- Sharpening a stick into a peg.
- Creating simple tools and toys out of wood, such as boats, figures, butter knives, walking sticks.
- Experimenting with different carving techniques to see what effects they can produce (e.g., peeling, notching).
Recommended minimum age
Given the necessary maturity and concentration, I recommend that children from 7 years old are ready for this idea. With constant vigilant supervision and patience, the techniques can be practiced safely.
Read also
The 5 best carving knives for children - and why I do not recommend Opinel knives (+carving guide for parents) – Learn from the wilderness educator and wilderness mentor which knives are best suited for children to use for carving. Are Opinel children's knives really good?
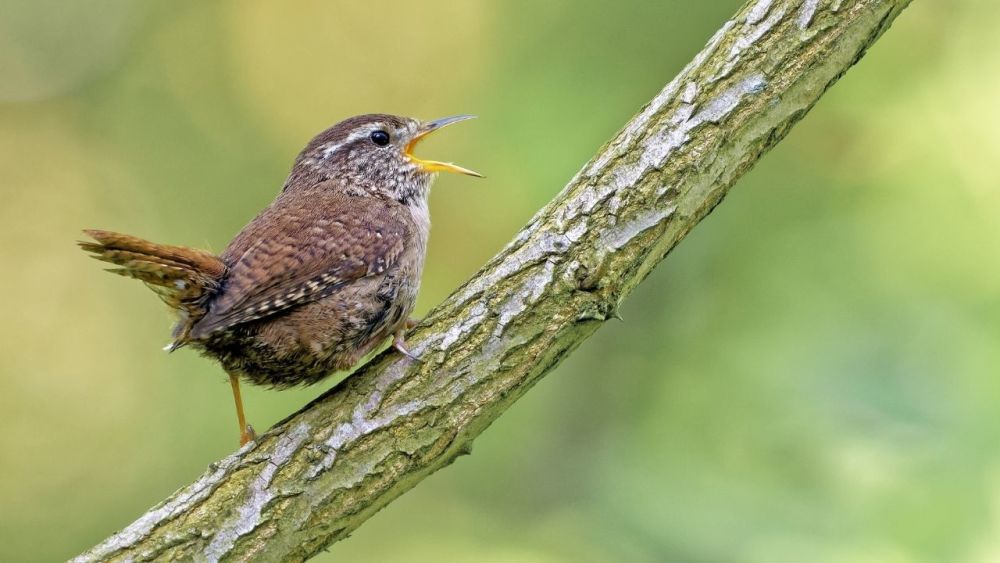
20. Discovering Birds: Observing the Guardians of the Forest
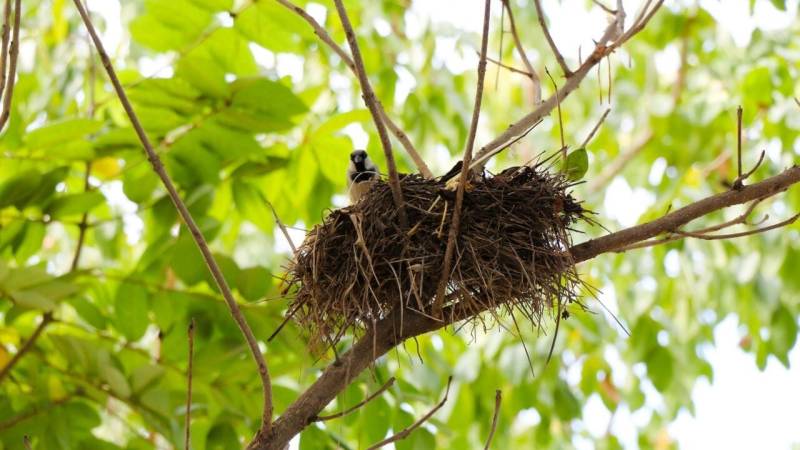
The world of birds is unique and fascinating. When you explore nature with children, the doors to a great adventure open - bird watching.
The colorful feathers, the different songs, and the majestic flying - all of this makes children's eyes light up and teaches them to appreciate the fine details of nature.
The Goal
I want to use this idea to encourage children to not only see birds, but to observe, identify, and understand their behavior.
The following is on the program:
- Learn how to properly use binoculars.
- Distinguish birds based on characteristics such as color, shape, and song.
- Maintain patience and silence while waiting for birds.
- Develop an awareness of the importance of birds in our ecosystem.
- Increase the joy of discovering and learning about the diversity of species in our environment.
What you need
To immerse ourselves in the world of birds, we should have the following ready:
- A few child-friendly binoculars.
- A bird identification guide or app (such as MERLIN for Android or Apple).
- A notebook and pens to record observations.
- A quiet spot in nature, preferably with various trees and bushes.
- Snacks and drinks - observation can involve patient waiting times.
What children will learn
Bird watching is more than just a hobby. Children learn:
- To sharpen your senses and pay attention to details.
- To increase your patience and concentration while waiting for birds.
- To deepen your connection and understanding of nature and its flying friends.
- To take responsibility for the environment by learning about the role of birds in the ecosystem.
What the children can practice
In practice, children can engage in the following activities:
- Recording the date, time, and weather conditions during the observation.
- Drawing birds or making feather sketches.
- Listening to and imitating bird songs.
- Creating a map of the region with marked locations where specific birds have been sighted.
Recommended minimum age
Bird watching is suitable for children aged 6 and older, as long as they are supervised and have the curiosity to be quiet and observe.
For more insights into the world of birdwatching, here is a helpful guide for you: Birdwatching for Beginners. Discover the basics of bird language there and become part of this wonderful world together with your children.
21. Kneading and Baking Outdoors: Stockbrot as a Campfire Classic
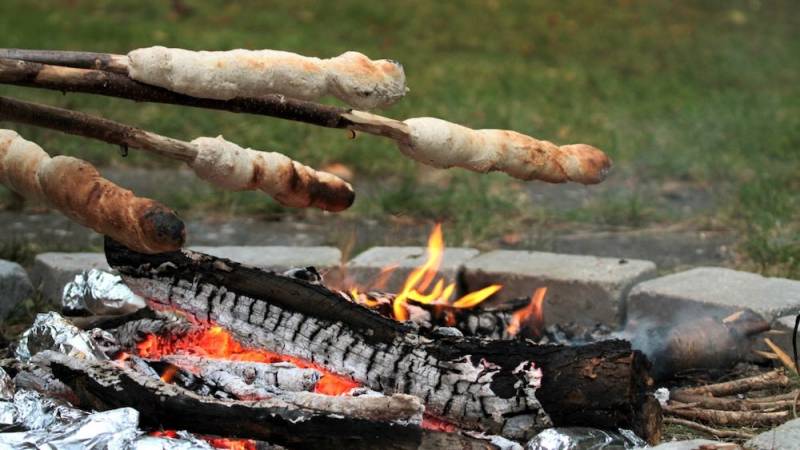
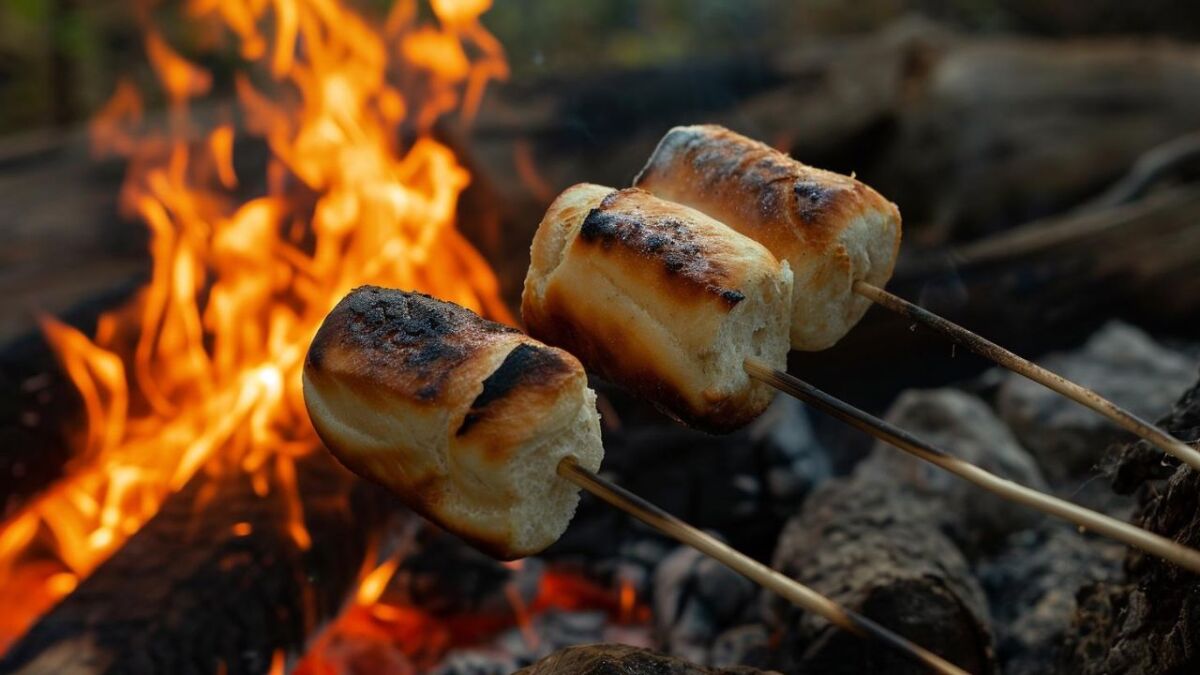
A campfire, the twilight, the sounds of the forest - and the scent of fresh campfire bread. Good idea, right?
Baking stock bread is an activity that creates magical moments for children, as it combines adventure with the enjoyment of having created something of their own.
The Goal
The goal is clear: We want to bake campfire bread, but the path to get there is filled with learning opportunities.
This includes:
- Learning the recipe for stick bread dough.
- The proper selection and preparation of the stick for baking.
- Recognizing the ideal embers for baking stick bread.
- Teamwork and patience while waiting for the perfectly baked bread.
- The experience of cooking food over an open fire.
What you need
Your campfire bakery only needs a few ingredients and tools:
- A simple campfire bread recipe - flour, water, a pinch of salt, maybe some sugar.
- Long, clean branches - preferably from deciduous trees, to shape the sticks for baking.
- A campfire with good embers - without high flames that could burn the bread.
- The right spices or spreads to enhance the finished bread.
- A bucket of water or sand for emergencies next to the campfire area.
What children will learn
Children learn valuable lessons beyond baking:
- Awareness of a recipe - kneading and shaping the dough.
- An understanding of the transformation of ingredients through heat and fire.
- A sense of time and temperature to bake the bread perfectly.
- The skill to handle open flames safely and respect fire.
What the children can practice
Baking stock bread gives children some practical skills along the way:
- Experimenting with different dough shapes and patterns.
- Varying baking times to achieve the perfect browning.
- Creating your own dough variations with different ingredients for future campfire nights.
Recommended minimum age
Children from the age of four can participate in breadstick baking if they are supervised and can handle the fire safely.
And here's a tip: If your kids have no patience, get yourself a grill and prepare your bread in a relaxed manner.
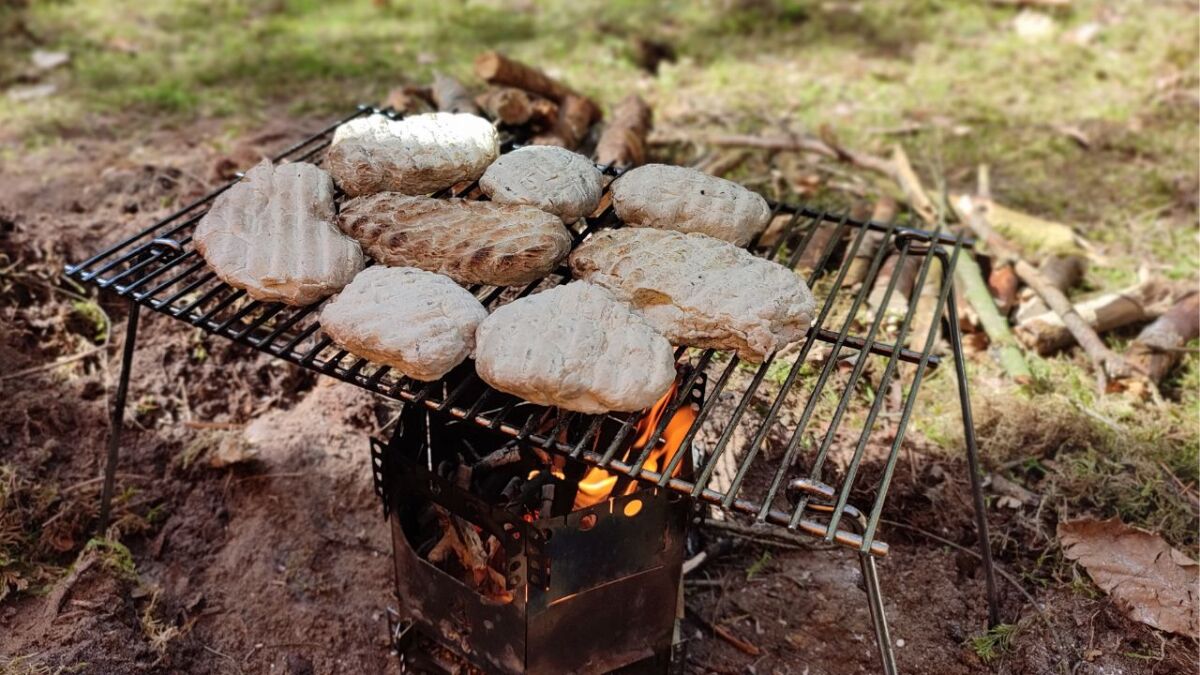
If you want to delve deeper into the topic, you will find a great guide here on how to conjure up the perfect campfire bread with your children: Campfire bread. This will turn your next trip into nature into a real culinary experience.
22. Pressing Plants: A Herbarium for Young Explorers
Imagine walking through the forest and every little branch, every leaf becomes a potential treasure.
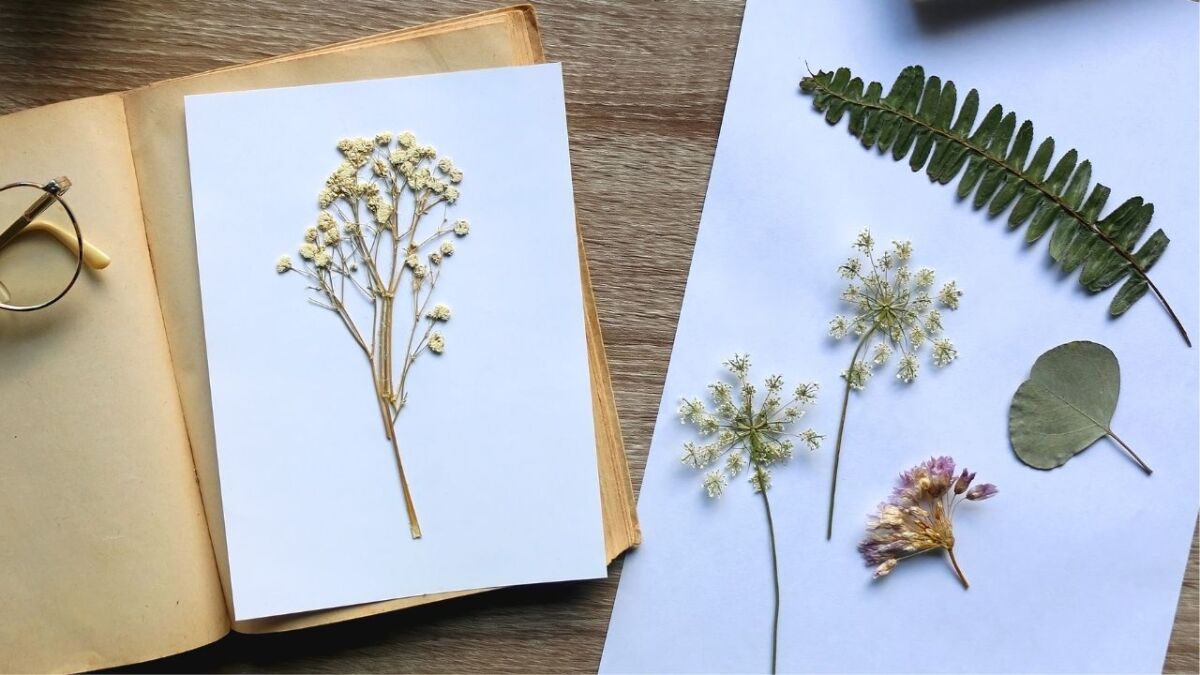
Pressing plants is a sensory activity. It's like capturing a small piece of summer that children can proudly stick in their herbarium.
And here we are once again appealing to a primal instinct: The act of collecting things!
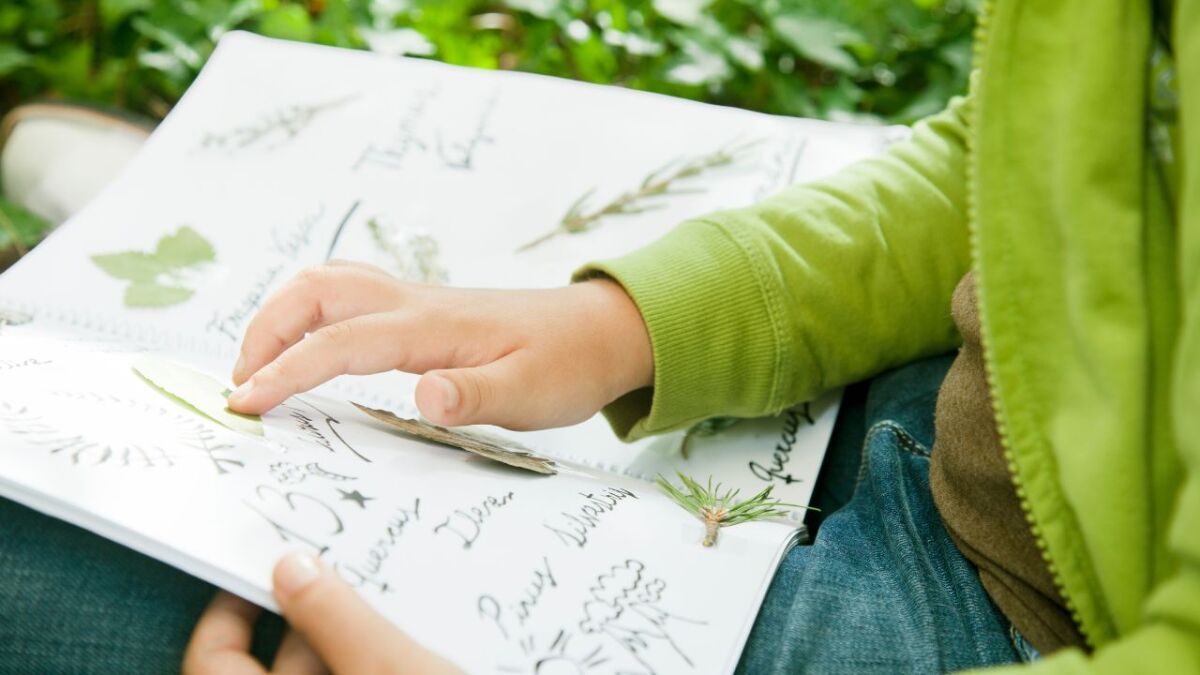
The Goal
The goal is to introduce children to nature by teaching them:
- To collect and identify various plants.
- To press plants with care and respect for nature.
- To create and design a herbarium.
- To develop patience while pressing and drying plants.
- To recognize the importance and value of biodiversity.
What you need
For this, patient and fulfilling activity, you only need a few things:
- A plant pressing set or alternatively heavy books and absorbent paper.
- A field guide to identify the collected plants.
- A notebook or empty album to create the herbarium.
- A beautiful, plant-rich location where you can collect together.
- Writing materials to record information about the plants.
What children will learn
Children strengthen their skills in many ways:
- They sharpen their powers of observation and learn to look closely.
- They expand their knowledge of flora and learn to identify plants.
- They develop a sense of the importance of ecology and conservation.
- They learn to interact with plants without causing harm to them.
What the children can practice
Pressing plants gives children the opportunity to be hands-on:
- You will learn how to carefully select and collect plants.
- You will practice placing and pressing plants carefully between layers of paper.
- You will create your own herbarium, practicing creativity and patience.
- You will write small reports about each plant, which will enhance your language skills.
Recommended minimum age
Children aged 6 and above can immerse themselves in the world of botany and create their own herbarium.
A watchful eye and gentle guidance are needed for the little ones to learn how to respectfully preserve the beauty of plants.
23. Night Hike: The Mysterious World after Sunset
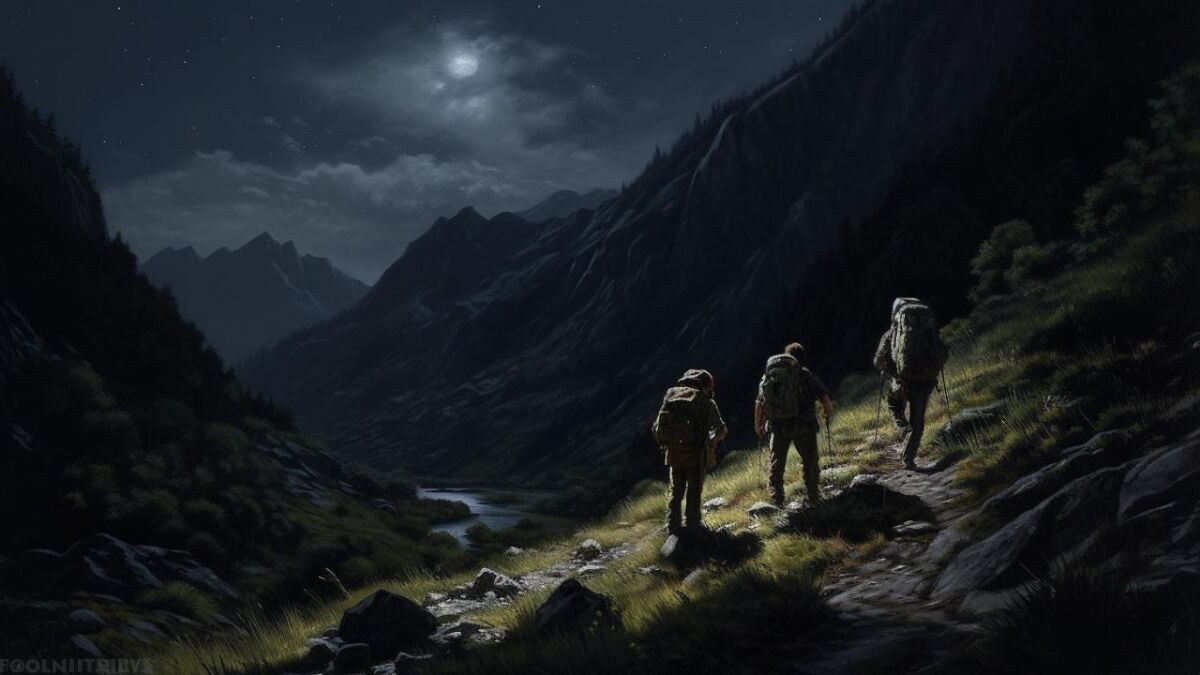
The chirping of crickets, the glow of fireflies, the cool breeze of the night air - a night hike is a tempting adventure that opens the door to a world that has remained hidden from most children so far.
Maybe you are also planning to do your first Bushcraft Overnighter with your child soon? Then this exercise is a great idea!
The Goal
The aim of the night hike is to show children nature from a different perspective. There is a lot to learn:
- Adapting the senses to darkness and discovering the nocturnal wildlife.
- Overcoming fear and developing an understanding of nature at night.
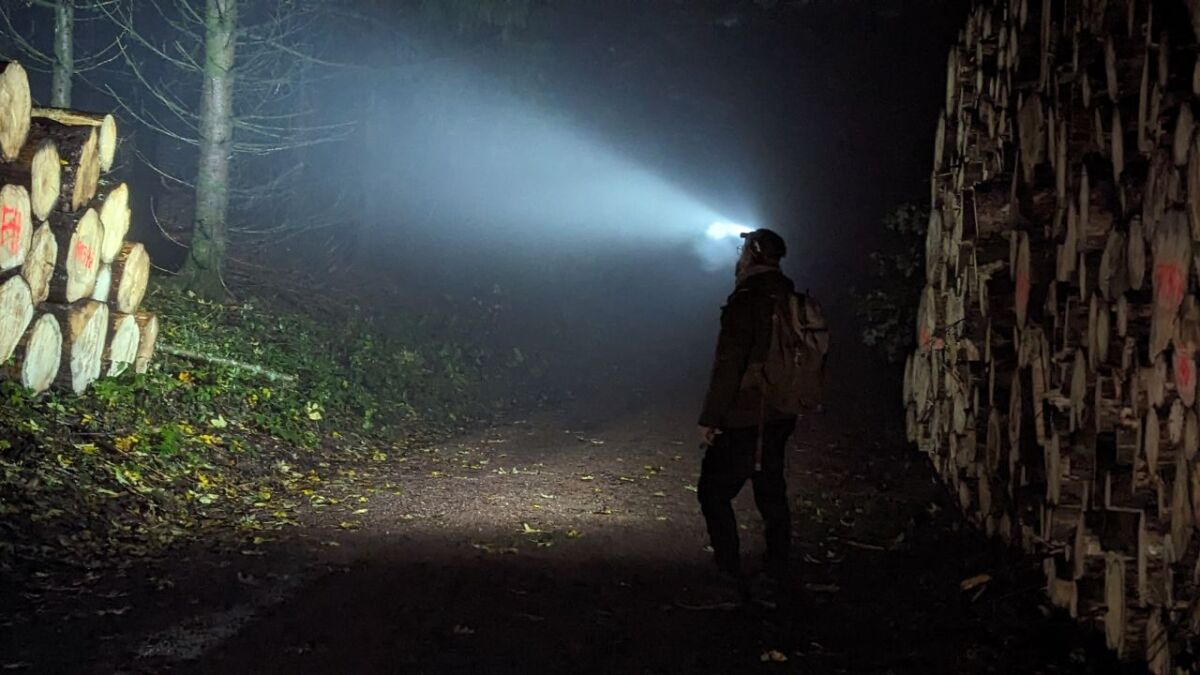
- Navigating and moving safely in the dark using flashlights or headlamps.
- Recognizing and identifying nocturnal sounds and their sources.
What you need
Not much equipment is needed for this nocturnal adventure:
- A good flashlight or headlamp for each child and for yourself.
- Warm clothing and possibly insect repellent.
- A route that you have already walked during the day.
- Simple guides for nocturnal sounds and animals, if available.
- A small backpack with snacks and drinks for a relaxing break in the moonlight.
What children will learn
A night hike is incredibly educational:
- Children learn to sharpen their senses and focus on hearing and feeling.
- They discover that darkness is exciting and not just scary.
- They get a sense of the calm and peace that the night offers.
- They learn to respect nature, even when they can't see it.
What the children can practice
In addition to fun, the night hike offers practical exercises:
- They practice walking quietly and gently in the dark so as not to disturb the wildlife.
- They learn to overcome their fear of the dark and feel safe.
- They can explore the night sky and identify constellations with a star map.
- They practice moving as a group and looking out for each other.
Recommended minimum age
For children around 7 years old, night hikes are usually a great experience. They are old enough to appreciate the adventure, but still have a lot of natural curiosity about the secrets that the night holds.
24. Building a Raft: Adventure Idea on the Water
Gliding down a calm river on a self-built raft - that sounds like a real adventure. Children are natural builders and tinkers.
Building a raft promotes their creativity and problem-solving skills. It is also a wonderful way to experience the laws of physics in a practical manner.
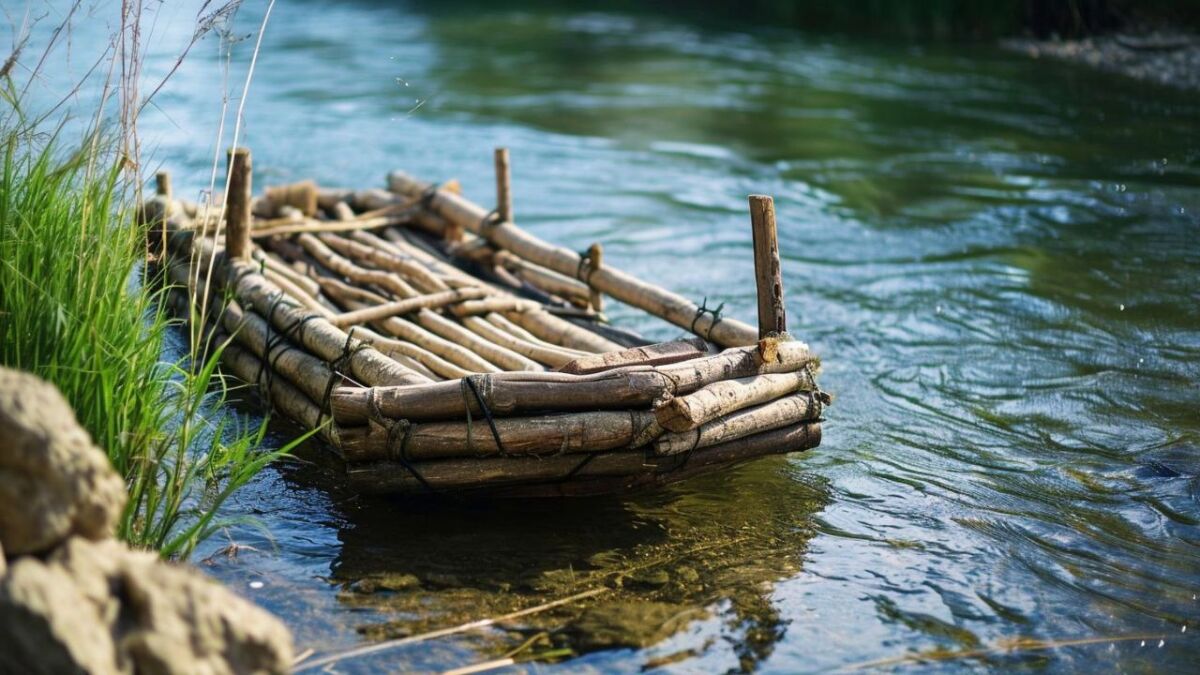
The Goal
The aim of this activity is to teach children how to build a buoyant raft using simple materials and teamwork. They should:
- Understand basic principles of construction and buoyant forces.
- Learn how to tie knots for raft building using ropes (source).
- Experience how materials from nature can be applied practically.
- Promote teamwork and coordination during the construction process.
What you need
To build a safe and floating raft, we need:
- Long, straight sticks or small logs for the base.
- Strong ropes or strings to connect the sticks.
- Floating devices like empty canisters or barrels for increased buoyancy are ideal.
- A flat, calm water surface - a small pond or a slow river are ideal.
- Life jackets for all participants - safety first.
What children will learn
The children benefit in several areas:
- They improve their craftsmanship skills by tying the sticks together.
- They learn the principles of buoyancy and construction.
- They build a relationship with water and its environment.
- They develop an understanding of resource utilization and sustainability.
What the children can practice
There are some practical skills to learn in raft building:
- The selection of suitable sticks and the estimation of their load-bearing capacity.
- The tying of various knots that must hold in the water.
- The placement of the flotation devices and the testing of the raft's buoyancy.
- Working as a team to bring the project to a successful completion.
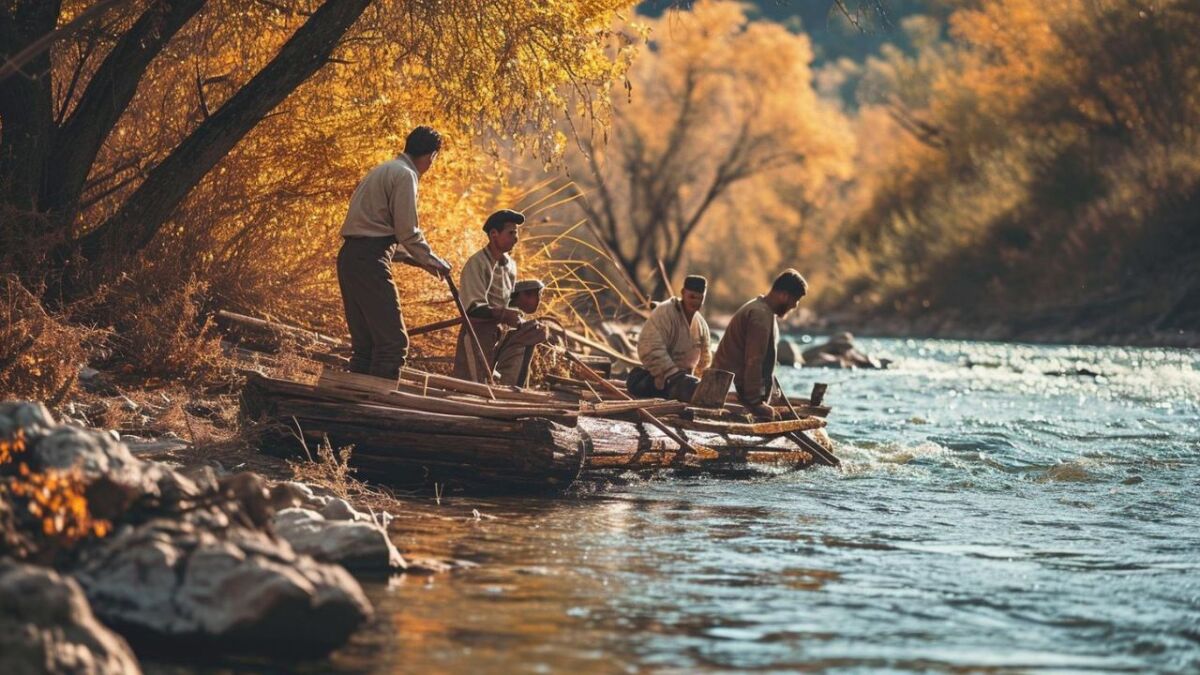
Recommended minimum age
Children from the age of 10 can learn a lot from this activity and usually have the necessary patience and understanding for the more complex aspects of raft building.
Safety aspects are particularly important, so there must always be a supervising person present.
25. Map Drawing: Capturing the World with Your Own Eyes
Imagine the world as an empty canvas, just waiting to be explored and captured by you.
When drawing a map, children sharpen their perception of their surroundings and at the same time learn to capture places and routes in a creative way.
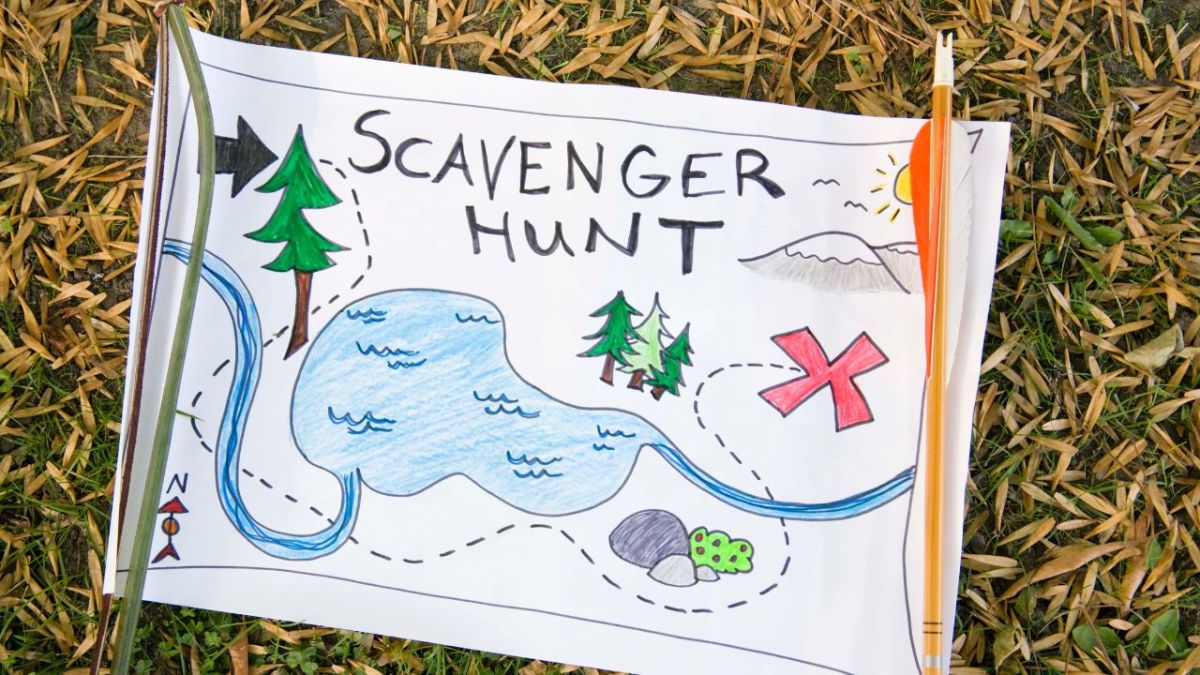
The Goal
The aim of this activity is to teach children:
- To understand the basics of cartography and orientation.
- To create a physical representation of an area based on personal observations.
- To accurately estimate and transfer distances and natural features.
- To develop and strengthen visual perception and spatial thinking abilities.
What you need
To create your own map, you will need:
- Paper or a drawing board.
- Writing and coloring materials such as pens, ruler, and possibly compass.
- Time to explore and familiarize yourself with the area to be mapped.
- A keen eye for details and patience, especially when scaling becomes challenging.
What children will learn
When drawing a map, children learn the following:
- How to observe the landscape and perceive important features.
- The ability to transform what is seen into a reduced format.
- A sense of measurements and proportions.
- The connection to their environment by actively exploring and documenting it.
What the children can practice
Children can practice practical skills such as:
- Finding and marking reference points such as trees, buildings, or rivers.
- Applying ratios and scale calculations to draw a map.
- Using color coding to differentiate different types of landmarks.
- Handling compasses and other tools for orientation.
Recommended minimum age
Children from 8 years old usually have the necessary concentration and interest to engage with the subject of cartography.
At the same time, this is a great opportunity to combine family outings and hikes with an exciting learning task.
Read also
Become native through mapping: An activity for exploring and getting to know a place (+2 missions for children) - With mappings and maps, children explore their environment in an intensive way. Learn about two great missions for yourself and children's groups.
26. Casting Animal Tracks: Take-Home Nature Impressions
There is little that is more exciting for young explorers than discovering and identifying the tracks of wild animals.
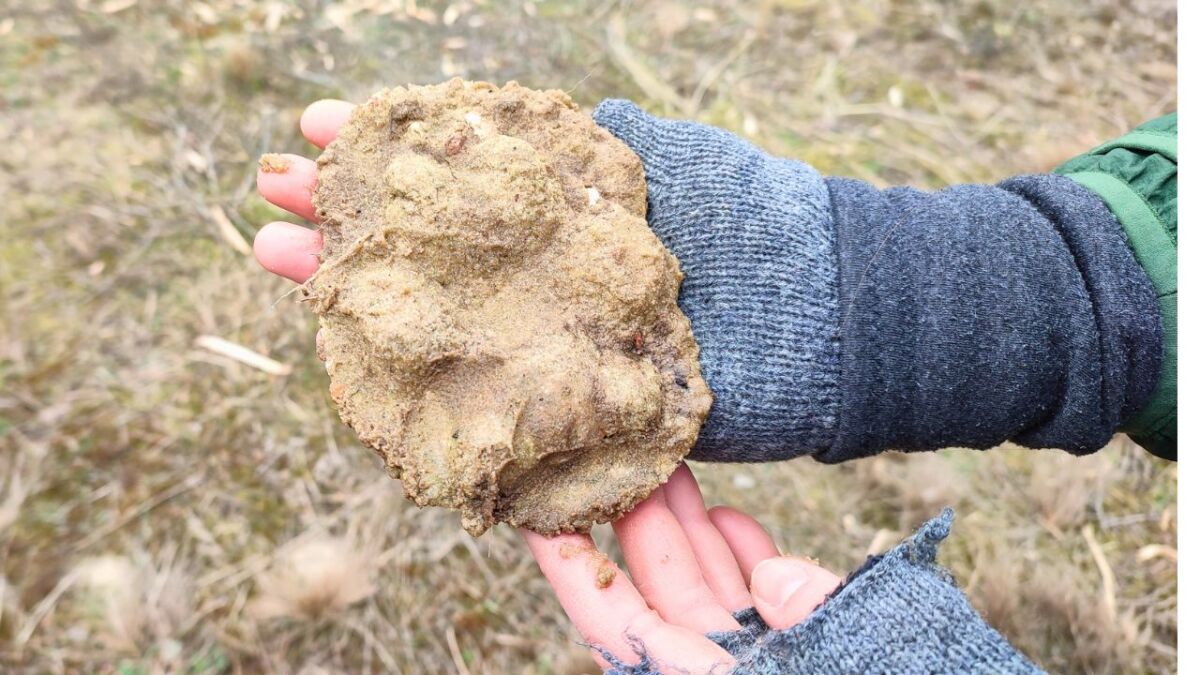
Casting animal tracks is an activity that sharpens the senses and introduces children to the basics of tracking and animal observation playfully.
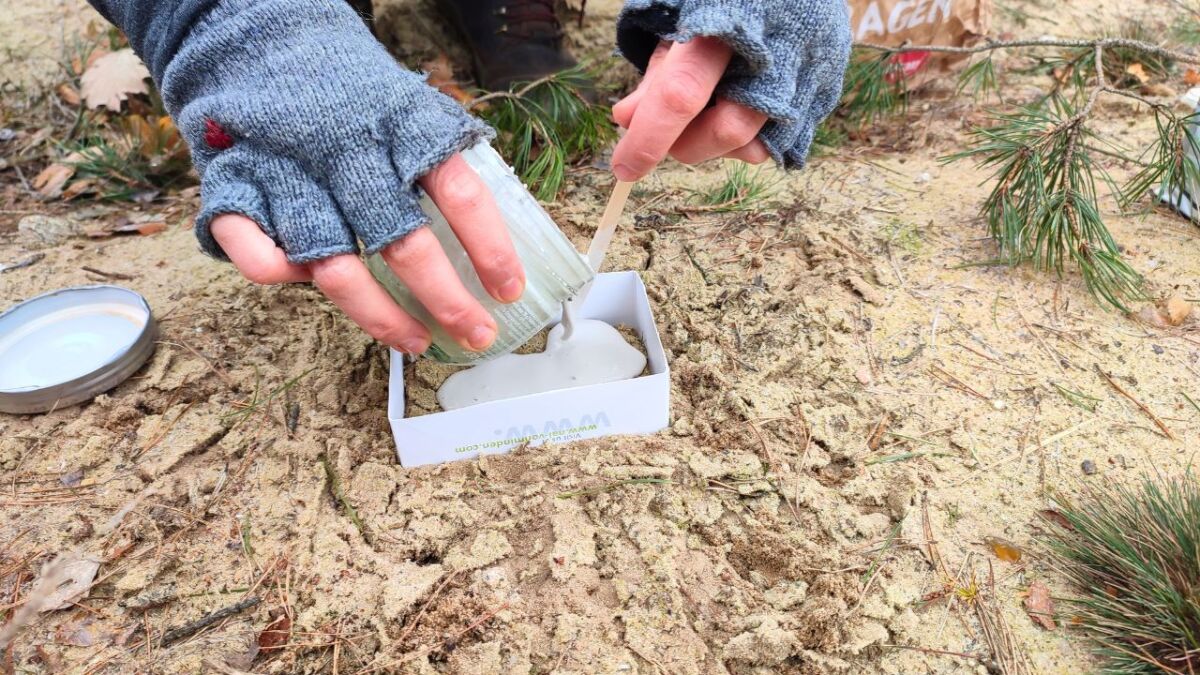
The Goal
The goal of this exciting activity is:
- To draw the children's attention to details in the terrain.
- To convey knowledge about the local wildlife and their traces.
- To spark the children's interest in natural sciences and ecology.
- To create a lasting, tangible memento of their discovery that they can proudly take home.
What you need
For animal track casting, you will need some specific materials:
- Plaster or another suitable casting material.
- Enough water to mix the plaster.
- Container or frame to keep the casting material in place.
- A spatula or similar tool to smooth the surface.
- A quiet, natural habitat where the animals have left their traces.
What children will learn
By casting animal tracks, children learn:
- How to identify and interpret different animal tracks.
- Patience and careful work to obtain good impressions.
- A stronger connection and appreciation for wildlife and nature.
- Scientific approaches and methods of documentation.
What the children can practice
The children practice various practical skills, such as:
- The careful mixing and pouring of the plaster without disturbing the track.
- The waiting for the plaster to harden and the track to be carefully exposed.
- The cataloging and labeling of their cast prints for their collection or as a project for school.
- Finding animal tracks by learning to read the signs in nature and draw conclusions about animal activities.
Recommended minimum age
I recommend this activity for children aged 6 and above, as it requires a certain level of caution and patience.
Under supervision, even younger children can participate, fascinated by the magic of the moment when a fleeting trace becomes a lasting imprint.
Reading tip: In my animal tracks database you will find many footprints and traces of native animals (Germany).
27. Making a sundial: Measuring time with nature
The sun moves across the sky, telling the story of time - a story that has been told for millennia.
By crafting a sundial, children immerse themselves in the world of astronomy and learn to measure time using shadows.

The Goal
The goal is to show children how to build a functioning sundial with the simplest means and thereby:
- Develop an understanding of the movement of the Earth relative to the Sun.
- Learn the basics of time measurement and astronomy.
- Improve spatial thinking and the ability to recognize patterns.
- Promote manual dexterity and creativity.
What you need
To make a sundial, you will need:
- A flat piece of cardboard or wood as a base.
- A straight stick or pencil to serve as a shadow stick.
- A compass to determine the cardinal directions.
- A sunny day to set and calibrate the sundial.
- Possibly colored pencils or markers to mark the times.
What children will learn
When crafting a sundial, children gain the following experiences:
- You learn how to determine the time using the sun.
- You recognize the regularity of nature and how it was used for time orientation in the past.
- You understand the significance of the position of the sun and how it changes throughout the day.
- You playfully discover physical and astronomical principles.
What the children can practice
With the homemade sundial, children can practice the following:
- Aligning the shadow stick to the north and adjusting the clock according to the geographical location.
- Observing and marking the position of the shadow every full hour.
- Recognizing the correlation between the position of the sun and the time.
- Applying the sundial on different days to test its accuracy.
Recommended minimum age
Children around 8 years old usually understand the concepts behind the sundial well and enjoy experimenting with light and shadow.
28. Build a Water Wheel: Discover the Power of Water with this Fun Idea
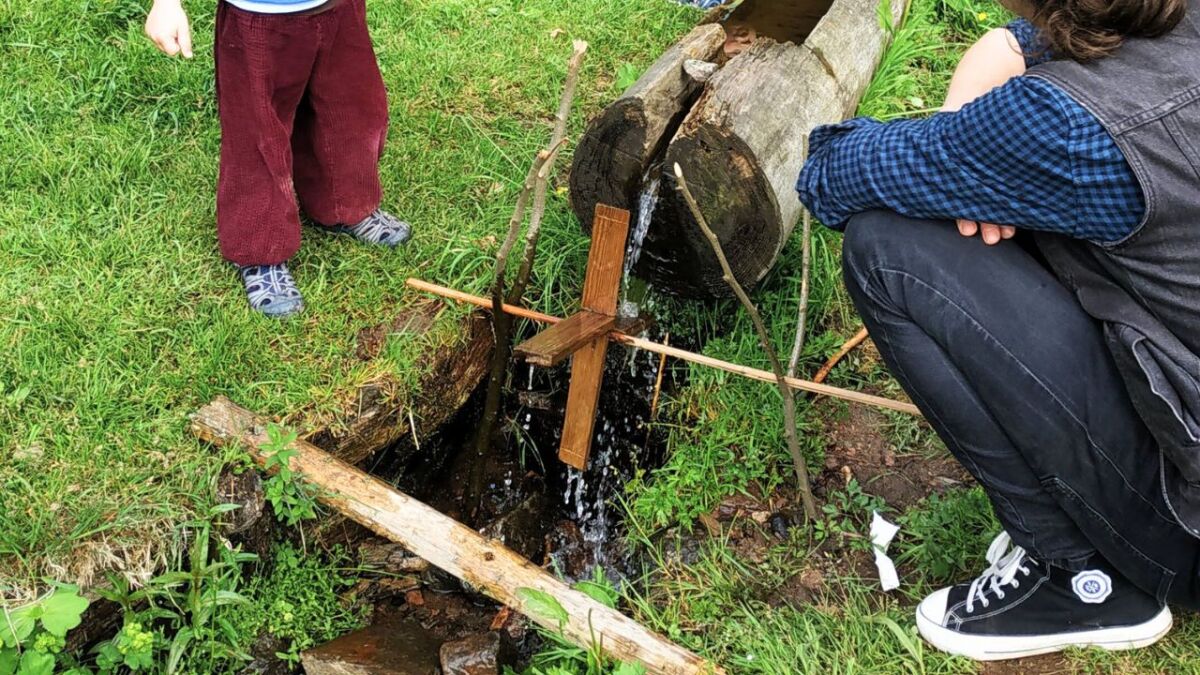
Imagine water flowing along a path and turning a small wheel - that's the magic of a water wheel.
Children are fascinated by movement and power transmission. A self-made water wheel shows playfully how water can generate energy.
The Goal
The goal of building a water wheel is:
- To convey children an understanding of renewable energies and physics.
- To promote skills in handling tools and materials.
- To stimulate creative thinking by finding their solutions for construction.
- To encourage teamwork and collaboration as they build the water wheel together.
What you need
For your small hydroelectric power plant, we don't need much:
- Bark, wood, empty yogurt cups or bottles as scoops for the wheel.
- A sturdy stick or axle to attach the scoops.
- Simple tools like scissors or a knife to cut the materials.
- A stream or other waterway where the water wheel can be placed.
- Binding material, such as zip ties or string, to securely fasten the parts.
What children will learn
By building the water wheel, children learn:
- How water in motion generates energy and how it can be utilized.
- That renewable energy is clean and environmentally friendly.
- Basic mechanical concepts such as axis, pivot point, and leverage.
- The importance of respecting and protecting nature and its resources.
What the children can practice
When experimenting with the water wheel, children can practice the following:
- Experimenting with different shovel shapes and sizes to see how they affect efficiency.
- Adjusting the position of the wheel in the water stream to achieve maximum rotational force.
- Observing and analyzing how changes in the water flow affect the function of the wheel.
- Measuring and documenting the results of their experiments.
Recommended minimum age
A simple water wheel can be built by children as young as 5 years old. More complex models that require more skill and understanding are suitable for children aged 8 and older.
With every age, the possibility to increase the complexity of the project and delve deeper into the subject increases.
29. Building a water filtration system from natural materials: Survival trick for clean drinking water
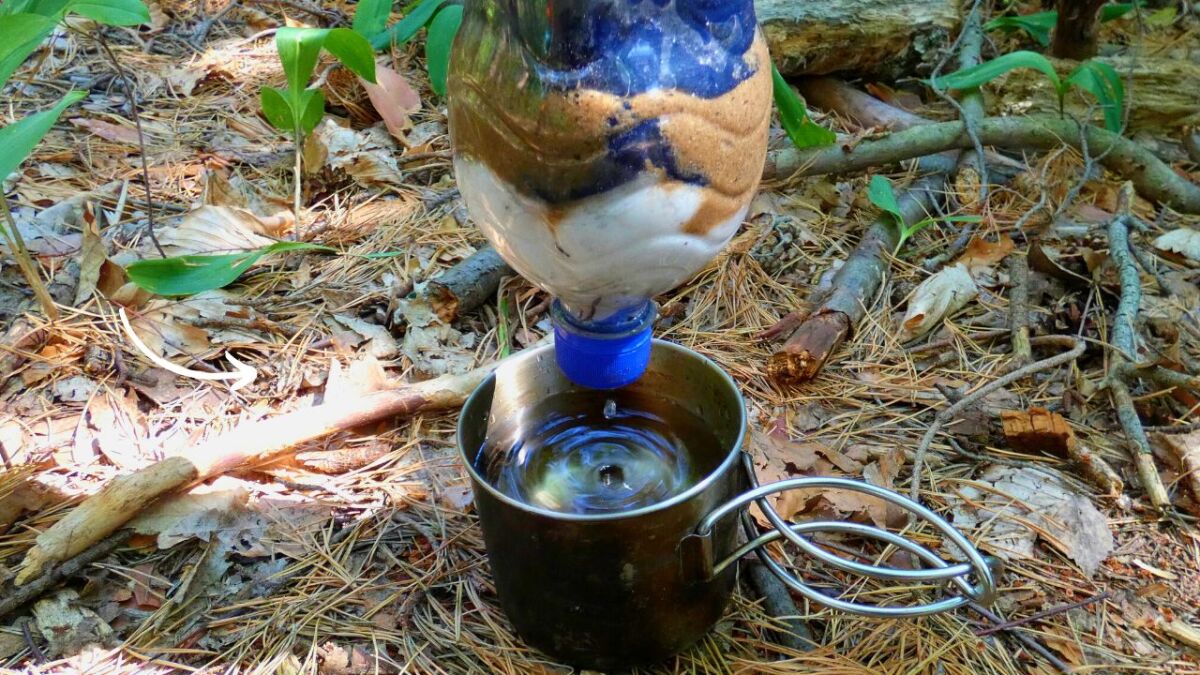
A sip of clear water from a self-built filter made with materials from nature - that's not just a trick from the survival handbook, it's pure science and fun at the same time!
Children learn how to purify water in case of emergency.
The Goal
The aim of this idea is to provide children with a basic understanding of water filtration while:
- To demonstrate how to build an effective water filter using simple natural materials.
- To impart knowledge about water quality and the importance of clean drinking water.
- To develop practical skills in handling natural resources.
- To promote problem-solving skills and scientific thinking.
What you need
To build a bushcraft water filtration system, you only need a few things:
- Turbid water (e.g., from a pond).
- Various layers of natural materials such as sand, cotton, gravel, charcoal, moss, and grass.
- Two containers: one for the unfiltered and one for the filtered water.
- An old plastic bottle to place the layers in.
What children will learn
Through the construction of the water filter system, the children learn:
- The principles of filtration and the importance of clean water.
- How the different layers stop dirt and microorganisms.
- Appreciation of natural resources and sustainable thinking.
- Awareness of the environment and health.
What the children can practice
This project allows children to practice the following skills:
- Collecting and sorting natural materials according to their filtering ability.
- Layering the materials in the correct order for maximum purification.
- Experimenting with different combinations of filter materials.
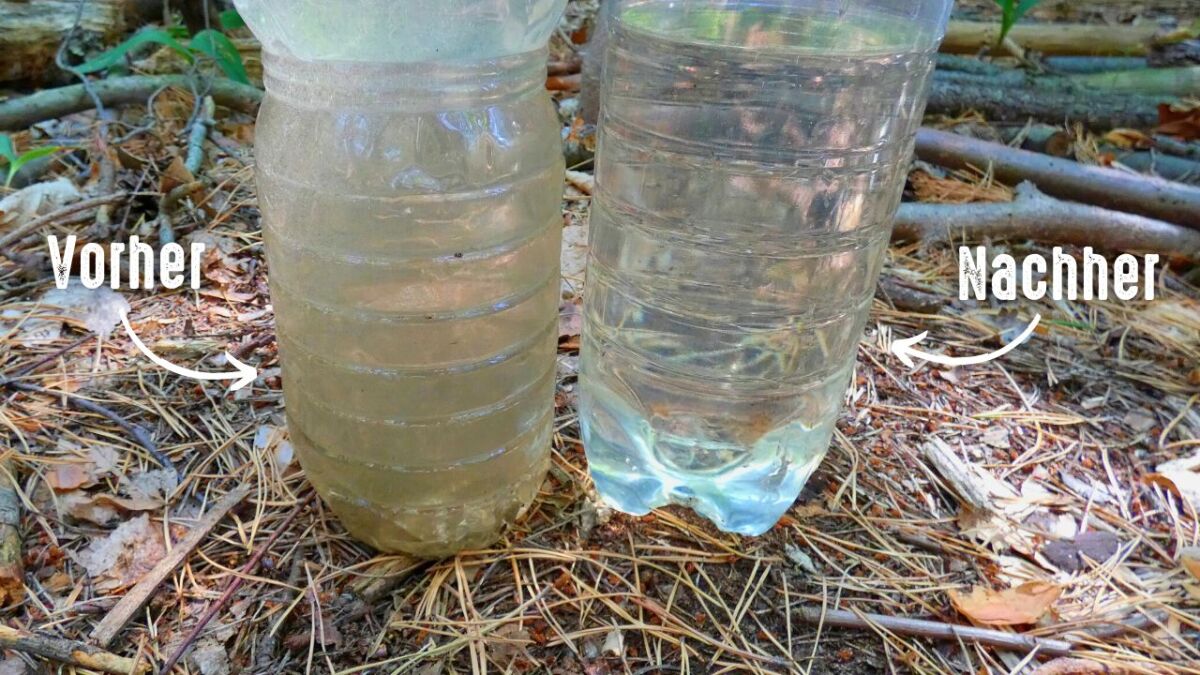
- Observing and comparing water quality before and after filtration.
Recommended minimum age
This activity is suitable for children aged 8 and above. Children of this age can grasp the concepts and actively participate in collecting and layering the filter materials.
Under your guidance, they can learn playfully how important it is to have access to clean water.
Read also
How to build your own survival water filter [Survival Basics] - You will learn how to build a simple water filter yourself. I will also show you two other filters that are easy to implement outdoors.
30. Carving Wooden Spoons: Experience Traditional Craftsmanship with this Idea
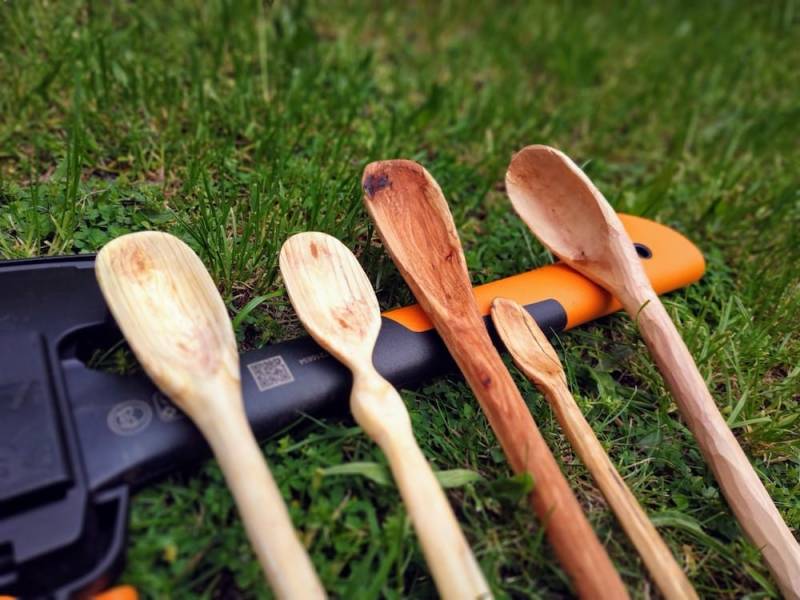
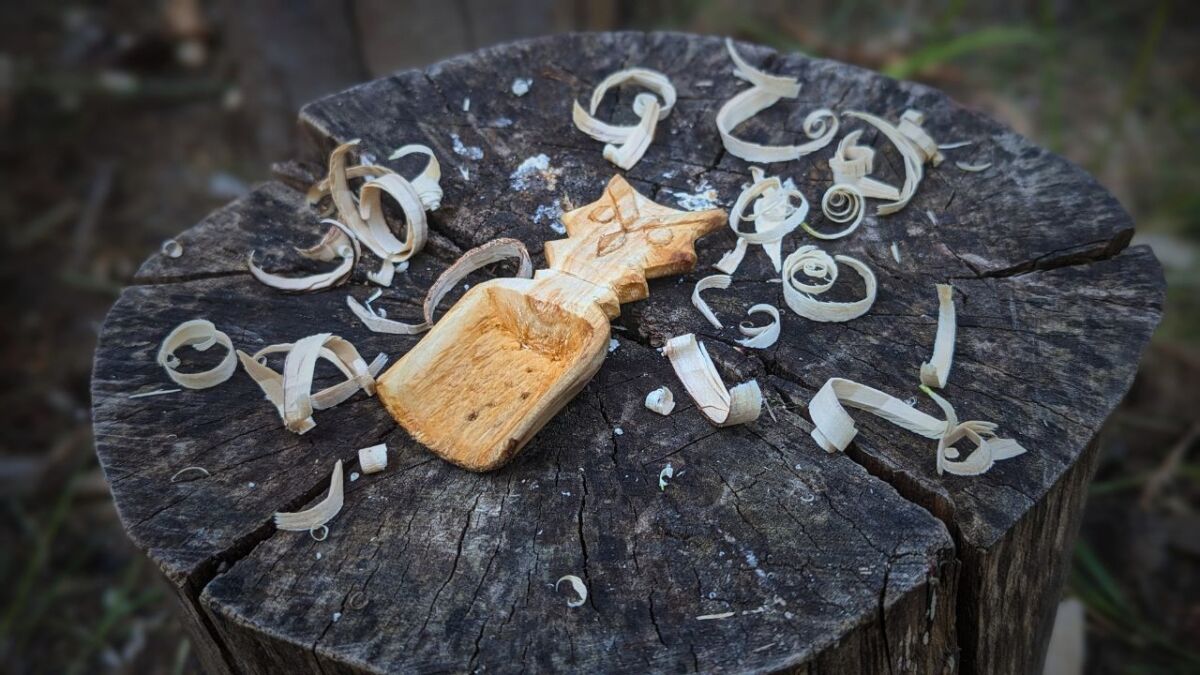
A self-carved spoon, whose shape and grain are as unique as a fingerprint - not only a useful tool, but also a work of art.
The carving of a spoon connects children with ancient craft traditions and teaches them valuable skills.
The Goal
This activity is about developing a basic understanding of woodworking and teaching how to:
- Carves a simple wooden spoon with few tools.
- Knows and appreciates the grain and texture of different types of wood.
- Practices careful work and handling of carving tools.
- Exercises patience and attention to detail.
What you need
To carve a wooden spoon, you only need a few things:
- A piece of soft wood, such as cardboard or lime wood, that is easy to carve.
- A sharp carving knife and, if necessary, a peeling knife.
- A stable surface and ideally a finger guard.
- Sandpaper to smooth the spoon at the end.
- A little oil to treat and preserve the wood.
What children will learn
Children will not only be actively involved in craftsmanship in this project, they:
- Learn how to handle carving tools with focus and safety.
- Discover how different types of wood react and how they can be shaped.
- Develop a sense of symmetry and form.
- Build self-confidence and independence by creating a useful object.
What the children can practice
Carving a spoon gives children the opportunity to practice the following skills:
- Removing layers of wood in small, controlled cuts.
- Shaping the spoon form, first roughly, then increasingly finer.
- Sanding for a smooth surface and finishing with a protective coating.
- Patience and perseverance, as carving is an art that should not be rushed.
Recommended minimum age
This activity is recommended for children aged 10 and older, as working with sharp tools requires a certain level of maturity and motor skills.
Under expert guidance, even younger children can carve simple shapes under supervision and learn important fundamentals.
Read also
Carving wooden spoons: how to get started and what you need (basics) - And carving is part of bushcraft. And what's better than self-carved spoons? Here I show you how to do it and what you need.
31. Natural Ropes and Cords: The Art of Rope Making
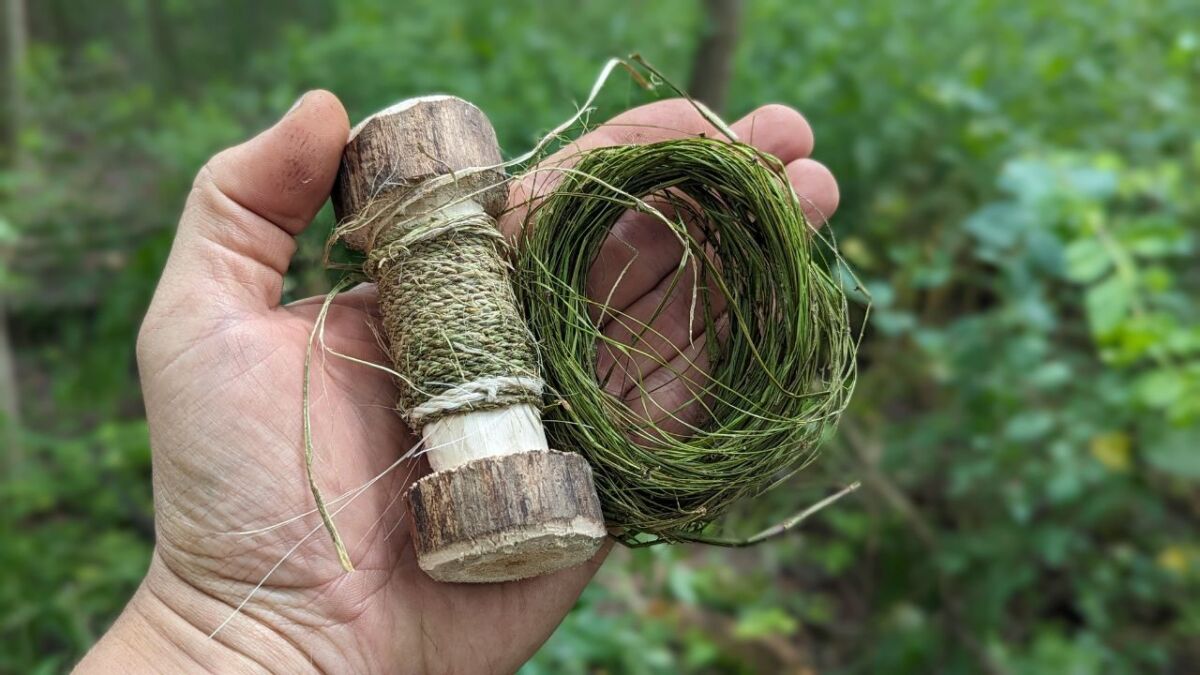
Forget synthetic ropes from the outdoor shop - today we are diving into the traditional art of rope making.
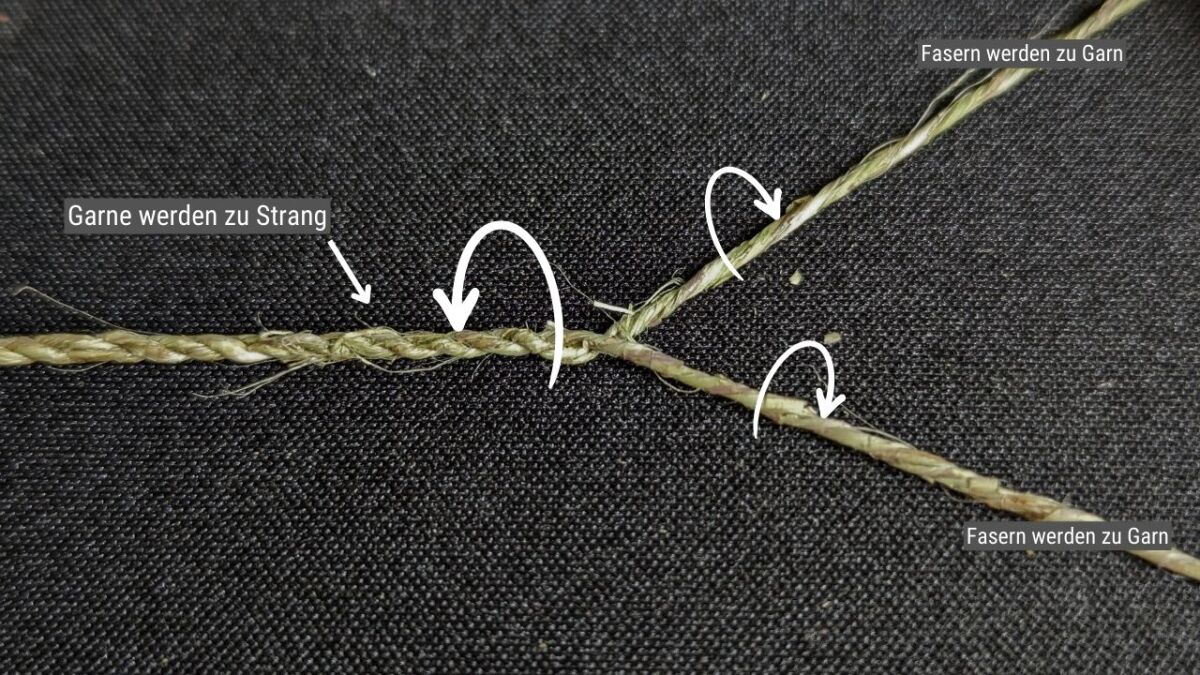
With skillful hands and a little patience, children can twist their ropes and cords from plant fibers, which they can use in everyday life or on their next adventures.
The Goal
The main goal of making strings is to show children:
- How to identify and collect suitable plant fibers.
- The technique of spinning and twisting fibers into a cord or rope.
- The basic principles of stability and cohesion in a rope.
- Appreciating the value of natural materials and handmade items.
What you need
To make natural ropes, you only need a few natural resources:
- Plant fibers suitable for making rope, such as nettles, hemp, or jute.
- A clean workspace where you can spread out and work with the fibers.
- Perhaps gloves to protect your hands from rough fibers.
- Some water to keep the fibers supple.
What children will learn
Children will learn a lot about nature while making ropes:
- You will recognize which plants are good sources of fibers.
- You will learn about the ancient technique of rope making, which our ancestors already knew.
- You will understand the physical properties of braided materials.
- You will discover that great things can also be achieved with simple means.
What the children can practice
Rope making offers children the opportunity to practice important skills:
- The careful extraction of fibers from plants.
- The application of techniques such as twisting and spinning to create strength.
- The measuring and dividing to produce ropes of the desired length and thickness.
- The experimentation with different braiding and knotting techniques for specific applications.
A complete guide can be found here: Making rope and sturdy cord from nettle, using natural materials for survival
Recommended minimum age
This activity is ideal for children from the age of about 8 years, as it requires both fine motor skills and patience. Under guidance, they can learn how to create something useful and lasting with the simplest means.
32. Making Natural Remedies from Forest Plants
In the forest, there is a world full of medicinal herbs and plants that can not only nourish us, but also provide well-being in the form of natural remedies.
Today we are going on a treasure hunt and discovering how to turn forest plants into healing ointments. It is a magical process that children and adults alike can learn a lot from.
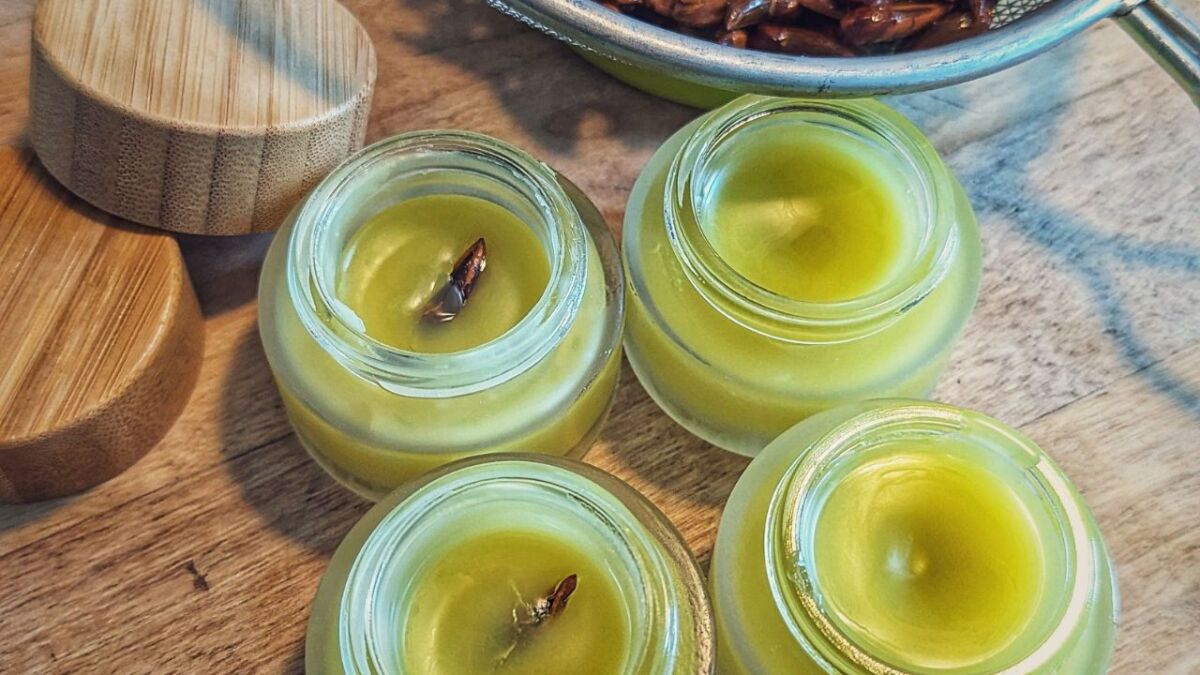
The goal is to strengthen the connection to nature and rediscover and pass on the ancient knowledge of medicinal plants.
The Goal
- Identification of healing plants
- Understanding the manufacturing process of a healing ointment
- Expanding knowledge about traditional natural medicine
What you need
To make a natural healing ointment, you will need the following things:
- Collecting material: fabric bags or baskets for the herbs
- Ingredients: medicinal plants such as marigold, plantain, chamomile, or St. John's wort
- Base: Vaseline or beeswax as a base for the ointment
- Additives: oil (e.g., olive oil, to extract the plant substances)
- Tools: pot and bowl for the water bath, wooden spoon, sieve
- Containers: small jars or glasses for the finished ointment
What children will learn
By collecting and processing the medicinal herbs:
- Sharpen your observation skills for natural elements
- Strengthen your manual skills in picking and processing
- Learn respectful interaction with nature and its resources
- Understand the value of self-production of products compared to buying
What the children can practice
When making the ointments, children practice practical skills:
- Collecting and identifying medicinal herbs
- Processing the herbs into a healing essence
- Melting and mixing the components of the ointment
- Filling the finished ointment into containers
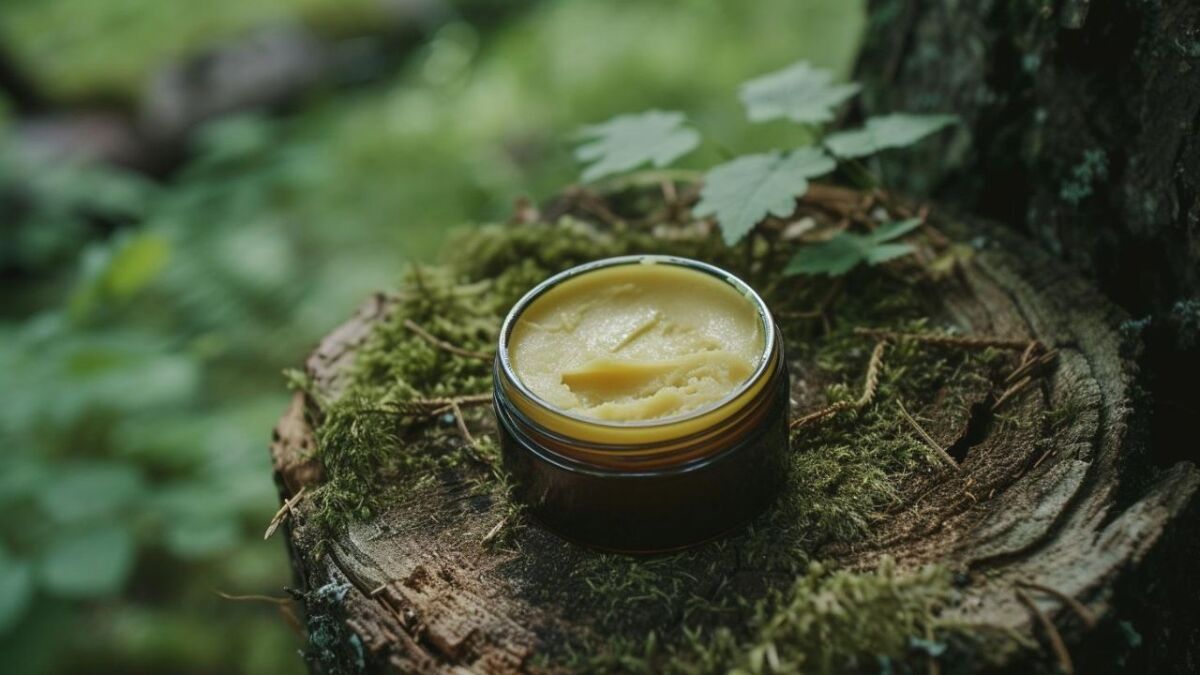
This idea is suitable for children from about 6 years old, as they should have enough patience for the process and understand the necessary caution when handling a water bath. However, an adult must be present.
Let's dive together into the world of the healing powers of nature and show children how they can create something useful and healthy with their hands.
33. Understanding and Building a Sun and Shadow Compass
It's a sunny day and we not only want to enjoy the light, but also figure out how we can use it to build our own compass.
With the help of the sun, a few sticks and stones, a magical connection to nature is created - a perfect bushcraft idea for children!
We don't just build a compass, we also understand how the ancient explorers navigated.
Dive with me into the knowledge of the ancient sailors and scouts - it is an adventure for the mind and the heart.
The Goal
We will learn the following today:
- Basics of sun movement and cardinal directions
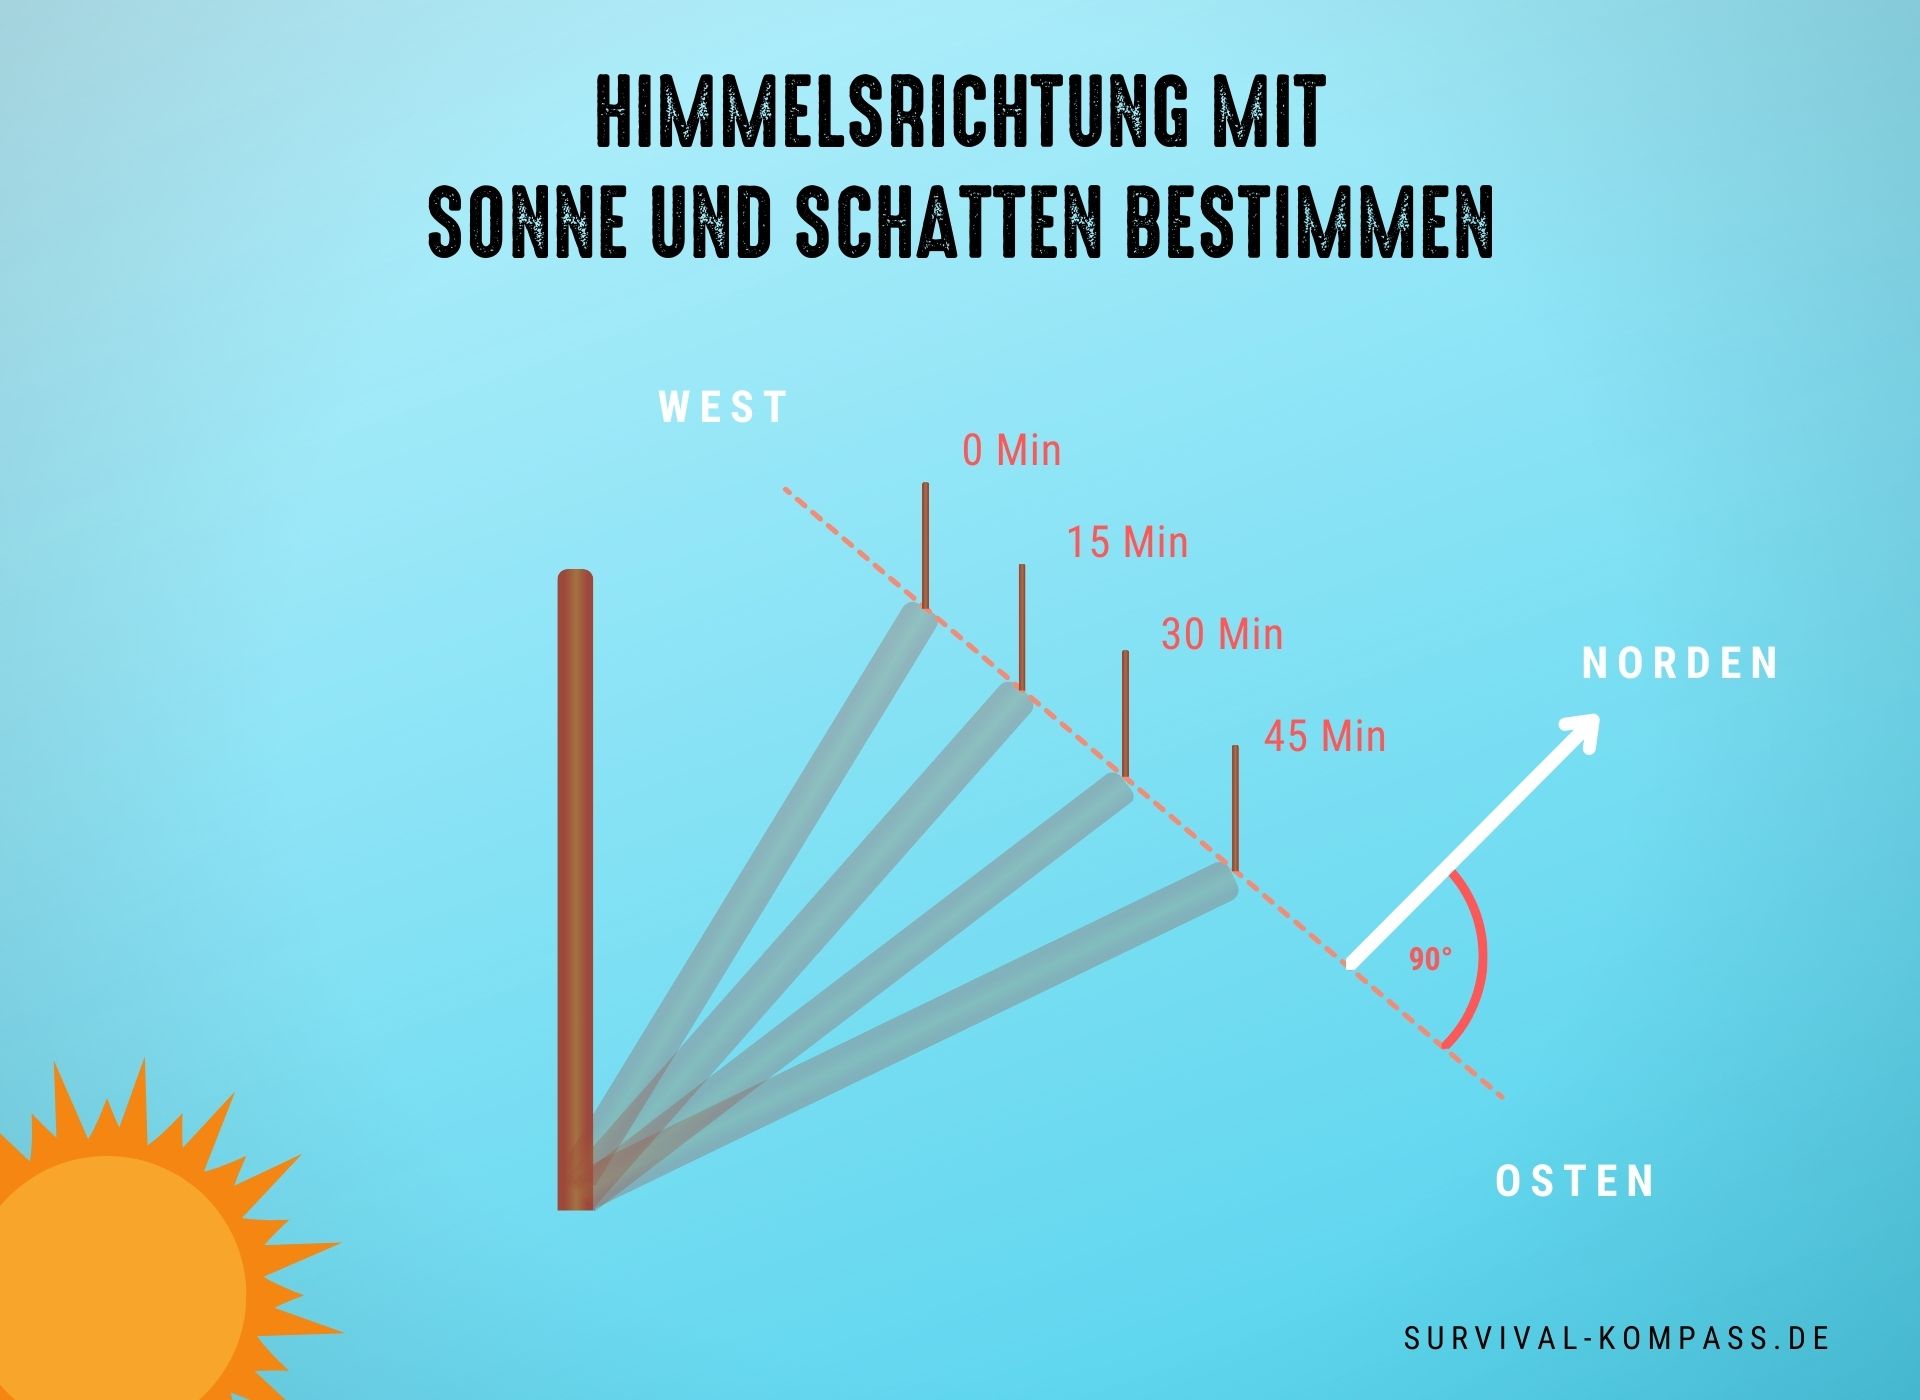
- How to determine cardinal directions using the sun and shadows
- Building a simple yet effective sun compass
What you need
For our sun compass, we don't need much:
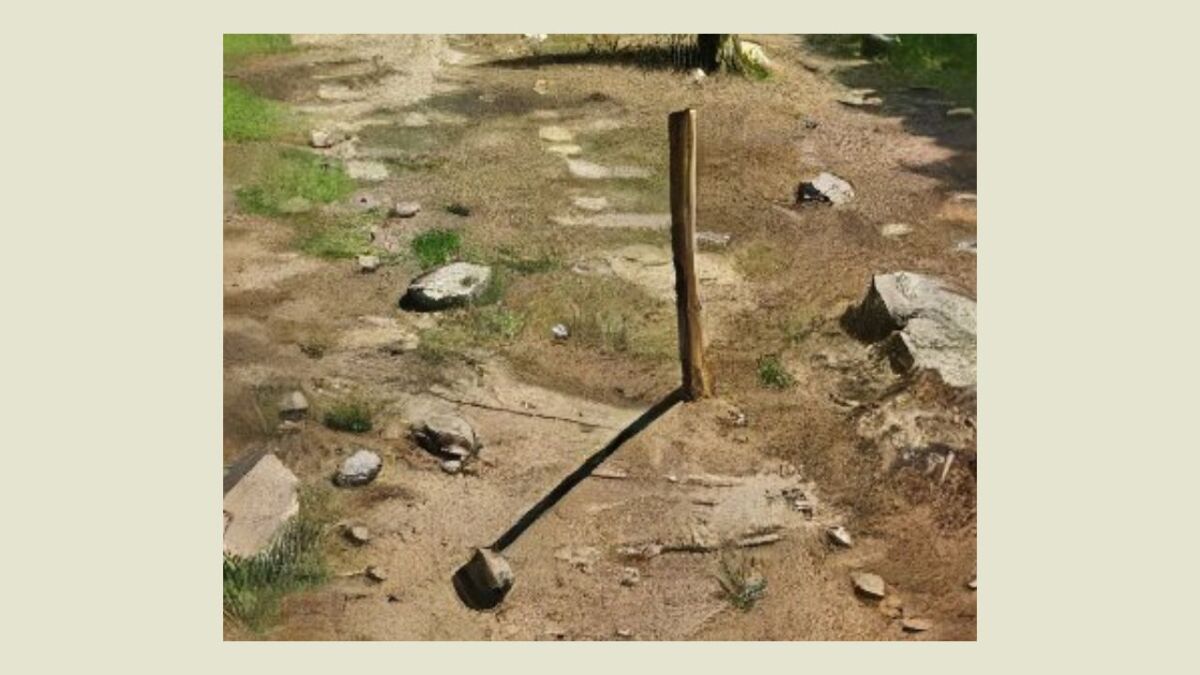
- A long stick: as our gnomon, casting a shadow
- Some smaller stones: to mark the tip of the shadow
- Flat surface of the ground: level and sunny spot
- Clock: to measure the time between the markings
What children will learn
Through this sunny experiment, children get a sense of:
- Time and space in interaction with nature
- First scientific observation methods
- Practical applications of geometry and physics
- Patience and precision while observing and recording the shadows
What the children can practice
In the practical part, we promote:
- The ability to track the path of the sun throughout the day
- Laying and reading markings for the cardinal directions
- Constructive thinking through building a functional navigation aid
This activity is particularly suitable for children aged 8 and older, as they already have some understanding of abstract concepts and patience for long-term observations.
👉 Detailed information and a guide to this idea can be found here: How to determine the cardinal directions using shadows (shadow stick method)
Together, we explore the secrets of the sun and build a bridge between ancient wisdom and new fascination. And who knows, maybe through this playful approach you will discover a little navigator in your child.
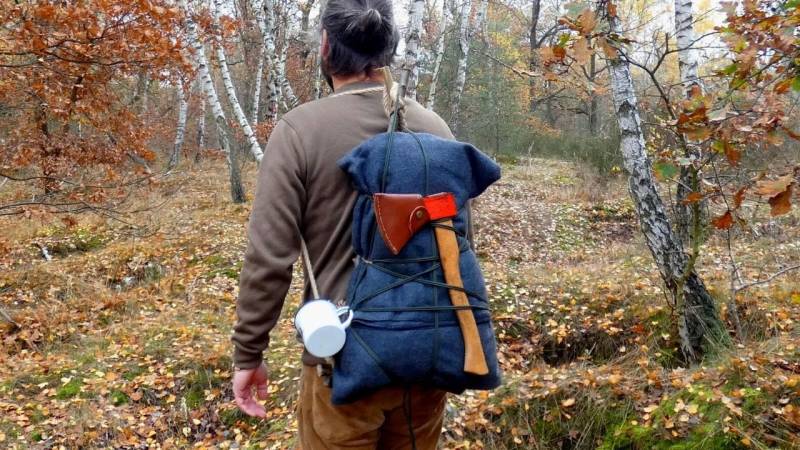
34. Building a backpack frame as a bushcraft idea for children
Imagine you're on a trip and your backpack breaks. What to do? Exactly, we build a backpack frame!
This traditional tool helps us distribute the load better and enables carrying on the back.
In addition, we learn how to make practical objects using simple tools and natural materials.
The Goal
We want to achieve together:
- Understanding of traditional carrying aids
- Skills in handling tools and materials
- A practical and nature-oriented solution to an everyday problem
What you need
To build a backpack frame, we need:
- Sturdy branches: preferably straight and robust
- String or rope: for tying the branches
- Saw and knife: for cutting and sharpening the branches
- A plan: sketch or instructions on how the frame should look
- A blanket: to store everything in
What children will learn
When building the backpack frame, children experience:
- How to create practical objects with simple means
- The importance of planning and structure
- The basics of knot tying and construction
- A sense of balance and weight distribution
What the children can practice
Children can practice the following practical skills:
- Measuring and cutting wood
- Creating sturdy structures by properly connecting branches
- Handling ropes and applying various knot techniques
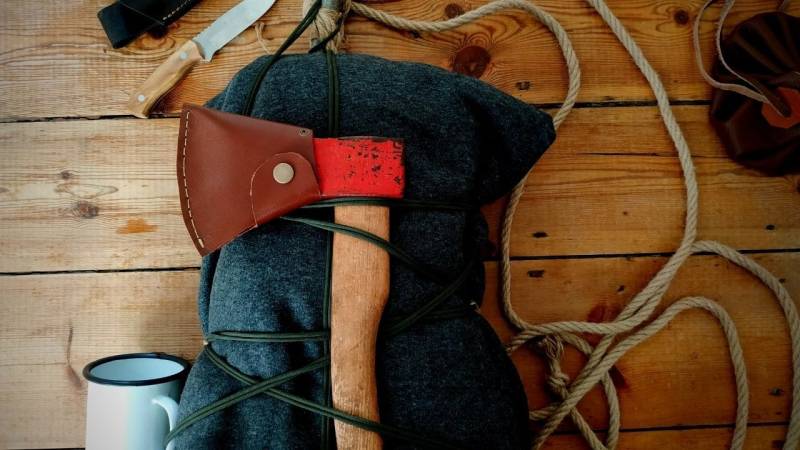
This activity is excellent for children aged 10 and above, as it requires some strength and skill in handling tools.
Now let's get started and build our own backpack frame - not only practical, but also a great experience for young and old in the great outdoors!
👉 You can find a detailed video tutorial in the Wilderness Year Program "Wildimpuls".
35. Making Cooking and Eating Tools as an Idea
Imagine sitting by the campfire and the crisp apples you've gathered are practically begging to be eaten.
But wait, we're in the wilderness - and where are the utensils? No way, we'll carve our own!
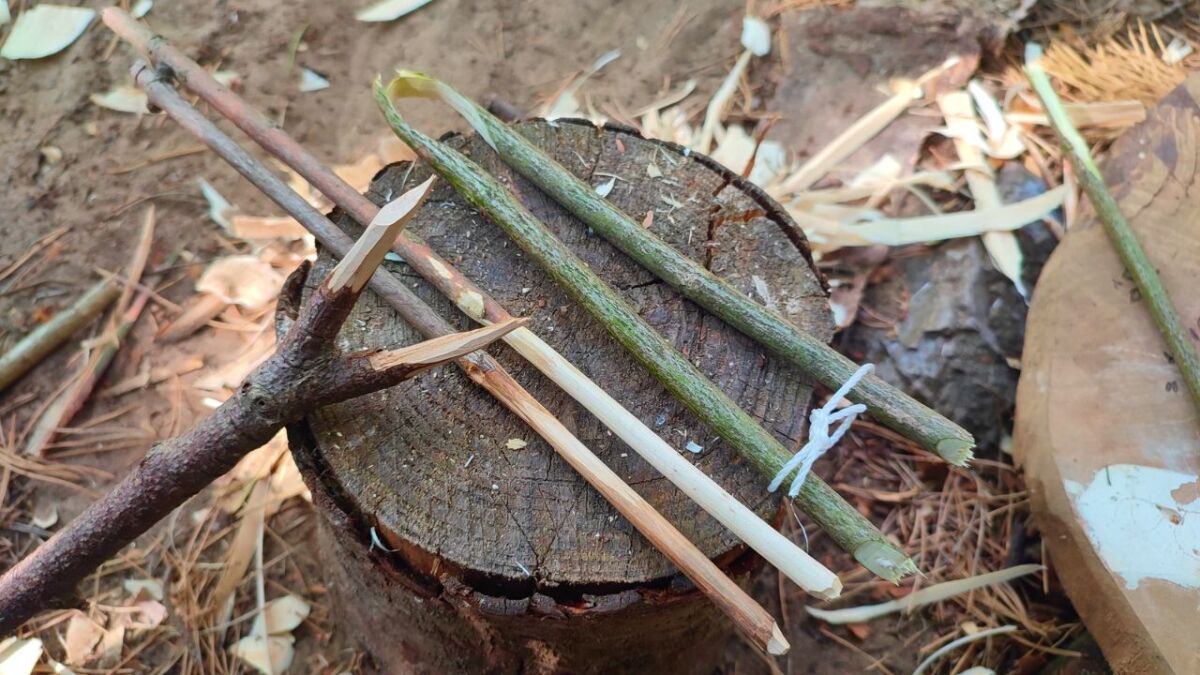
With a little skill and creativity, we get to work and conjure up chopsticks, a fork, a butter knife, or even a practical tongs.
This is not only a huge amount of fun, but also an invaluable step towards self-sufficiency.
The Goal
Our adventure today leads us to the following skills:
- Basics of carving and shaping wood
- Designing functional everyday objects
- Understanding form and function in the context of nature
What you need
For our little masterpieces we need:
- Green wood: It is the easiest to work with and does not splinter easily.
- Carving knife: Sharp and reliable, to ensure safe and efficient work.
- Cutting board: A small wooden block or other sturdy surface.
- Sandpaper: For the final touch and to achieve a smooth finish.
What children will learn
In this creative activity, children develop:
- A sense for the material wood and its characteristics.
- Motor skills and a steady hand when carving.
- An understanding of sustainable consumption and resource recycling.
- The ability to creatively solve problems.
What the children can practice
Practically, the children practice:
- The handling and care of carving tools.
- The production of various utility items through various carving techniques.
- The finishing of workpieces through sanding and fine work.
- The safe handling of tools and respect for the sharpness of the blades.
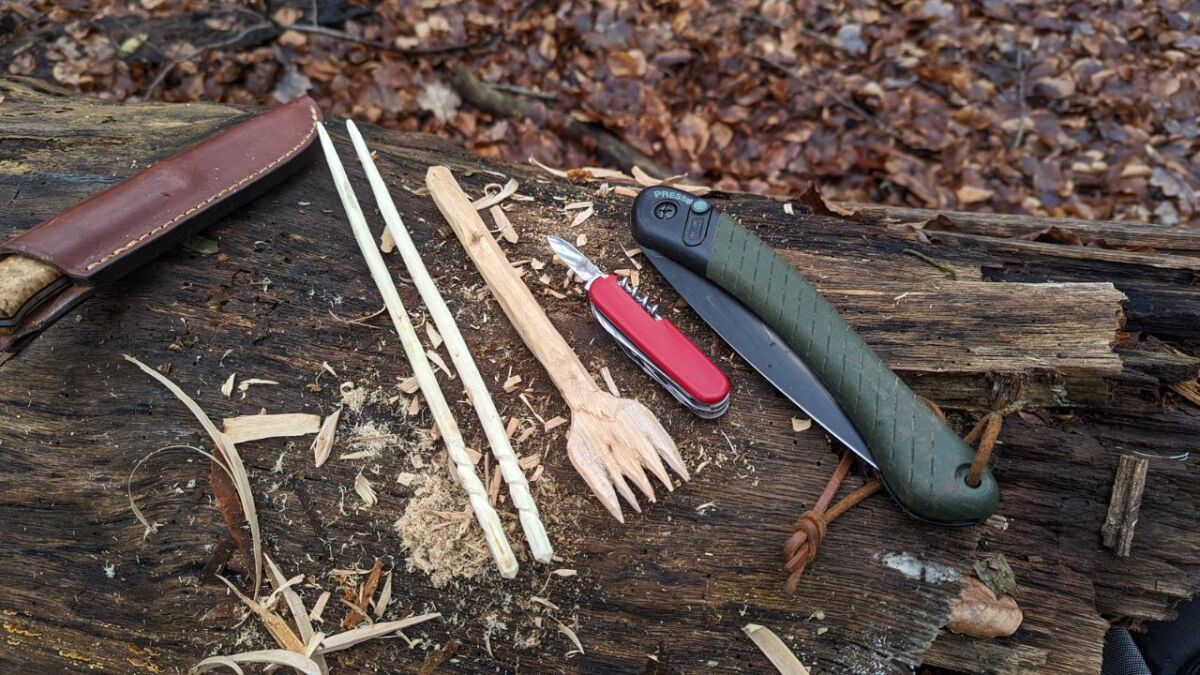
This activity is excellent for children aged 8 and above, as fine motor skills and attention are required to avoid injury.
Grab the knife and let's get started - we'll turn a simple branch into something useful and at the same time a valuable memento of our time in nature.
👉 Need additional information? Then you will find a video tutorial about it in the weekly missions of the "Wildimpuls Program".
36. Making Torches
When night falls and darkness envelops the forest, there is hardly anything more magical than illuminating the path with a homemade torch.
Torches awaken the spirit of adventure and allow us to immerse ourselves in past times. It is an art that leads us back to nature and shows us how we can bring light into the darkness with simple means.
So, grab some materials and let's build torches that not only light up, but also illuminate the imagination.
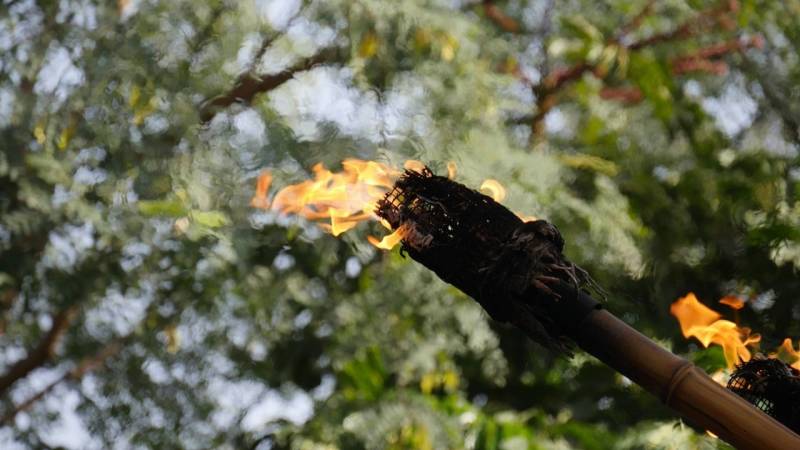
The Goal
We want to achieve:
- Understanding the production of a traditional light source
- Recognizing the burning characteristics of different natural materials
- Skill in safely handling fire
What you need
For our torches we need:
- Tree resin: It serves as a natural fuel.
- Dry material: like jute or cotton, to wrap the torch head.
- Long sticks: as handles for the torches.
- Wire or sturdy cord: to attach the fabric to the stick.
What children will learn
While we assemble the torches, the children learn interesting facts about:
- The properties of natural materials and their uses
- The history and significance of fire for humans
- Responsible handling of fire and nature
What the children can practice
When building torches, they gain practice in:
- Skillful tying and wrapping of materials
- Careful handling of flammable substances
- The planning and execution of a project from start to finish
This activity is particularly suitable for children aged 10 and older, as a certain level of maturity and responsibility is required when handling fire.
Bringing light into the darkness is not only a practical learning process with this activity, but also a moment full of atmosphere and sense of community.
37. Setting up Tarps
To be in nature means to be exposed to the elements. But don't worry because with a tarp, we are prepared for rain and sun!
Setting up a tarp is like solving a little puzzle outdoors - we search for the perfect attachment points, tighten the ropes, and create ourselves a shelter.
It's a skill that protects and gives freedom. So let's work on this basic outdoor knowledge together and turn our camp area into a cozy retreat.
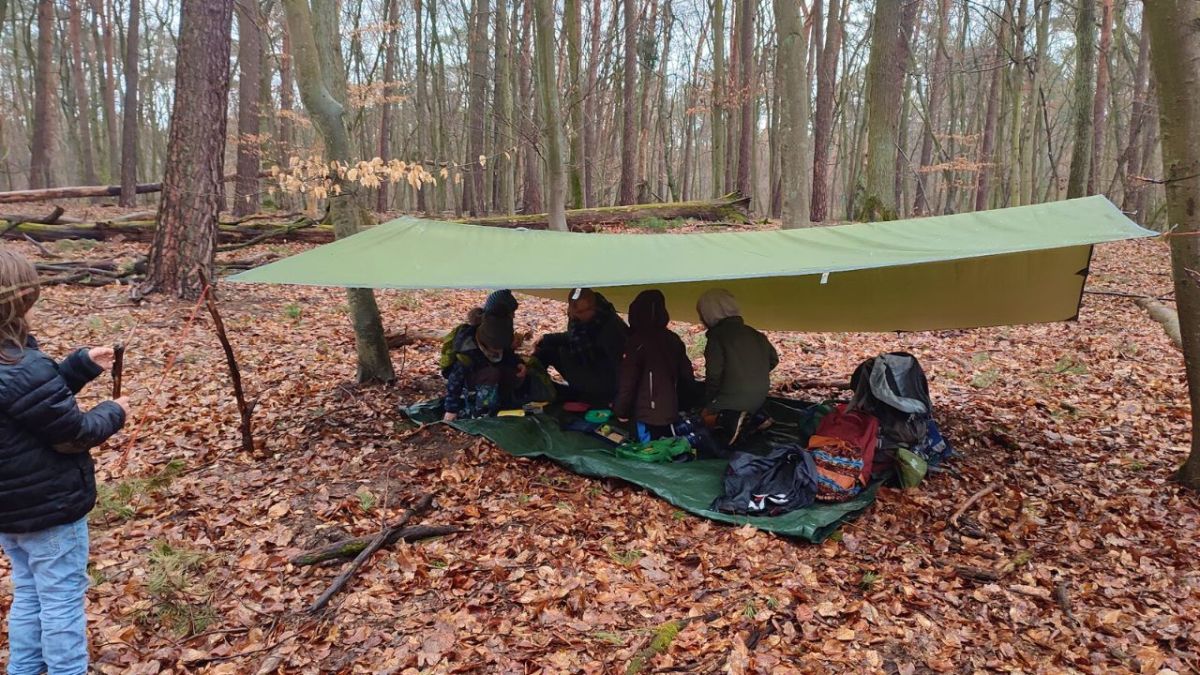
The Goal
We aim to learn today:
- How to create an effective weather protection with a tarp
- Various knots and techniques for fastening and tensioning
- Planning and implementation of a temporary shelter
What you need
To set up a tarp, we need the following equipment:
- A tarp: waterproof and durable (here you can find my top list)
- Ropes or cords: for the attachment points
- Sturdy trees or poles: as anchor points
- Pegs: for securing to the ground
What children will learn
When setting up the tarp, children experience:
- The importance of teamwork and communication
- Spatial awareness and estimating sizes and distances
- The importance of preparation and adaptability to the environment
What the children can practice
Children practice:
- Handling of simple tools and materials
- Understanding and applying knot knowledge
- Patience and focus when building a stable shelter
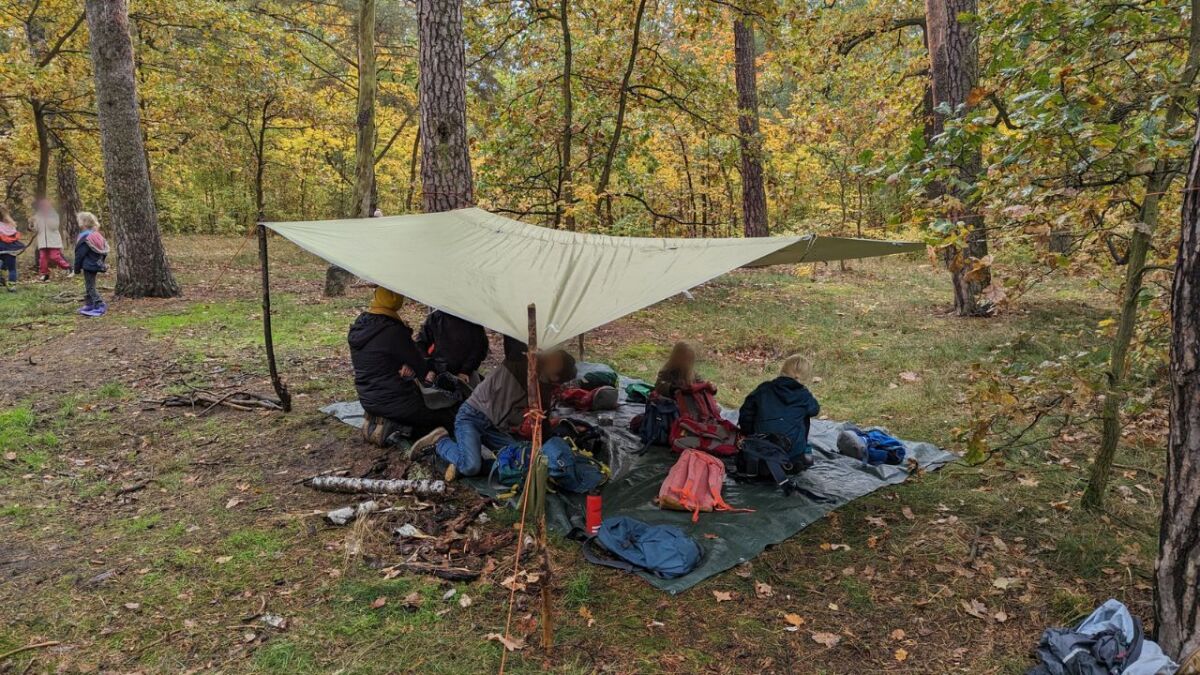
This bushcraft idea for children is especially suitable for children aged 6 and above, as it requires dexterity but not high physical strength.
Once the tarp is set up, we have not only created protection from wind and weather, but also a small piece of home in the wilderness.
Here you can learn how to set up your tarp correctly: Setting up a tarp - The right guide and in the Wildimpuls program I show step-by-step setups for many weather situations.
38. Building an oven out of clay and stones
Imagine being able to build your own oven in the middle of the wilderness. With it, you can bake bread, fry fish, or warm yourself on cool evenings.
This is not a fairy tale, but real Bushcrafting and therefore a great bushcraft idea for children! A clay oven combines ancient building techniques with the enjoyment of a warm fire.
He connects us with the earth and teaches us to work with what nature provides us.
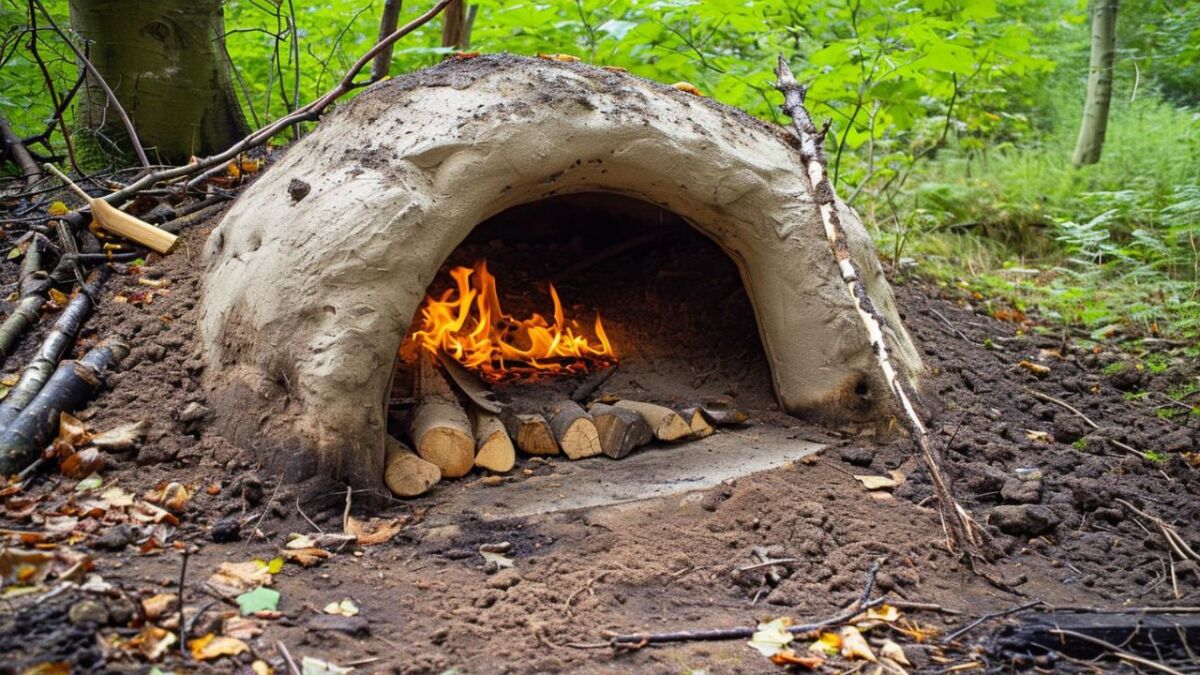
The Goal
We have the following goals:
- Understand and apply traditional building techniques
- Utilize natural resources such as clay and stones
- Create a functional oven using simple materials
What you need
To build a clay oven, we need:
- Clay: The main component of our oven
- Bricks: These serve as a stable foundation and structure
- Shovel and bucket: For mixing the clay and carrying the bricks
- Water: To make the clay pliable
What children will learn
The children gain insights into:
- Early engineering and architecture
- The importance of solid foundations and structures
- Thermal properties and insulation concepts
- Respect for fire and its diverse uses
What the children can practice
The children practice practical skills in:
- The mixture and application of natural materials
- The construction of a stable and functional structure
- Patience and endurance in a long-term project
- Teamwork, as many hands are needed in oven construction
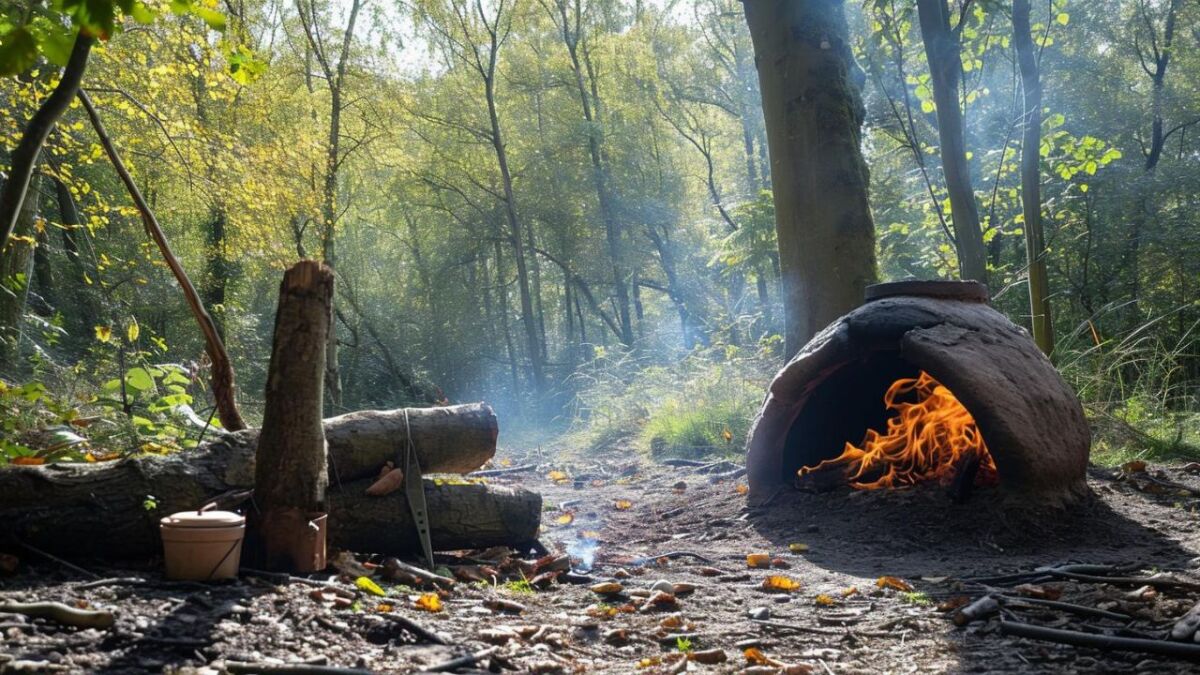
This activity is suitable for children aged 12 and older, as they need some strength for digging and lifting the stones.
Such a project connects - with nature, with the group, and with the history of our ancestors. It not only brings warmth to our circle, but also the satisfaction of having created something lasting.
Read also
How you find clay, prepare it and wash it so you can do pottery – Discover in the guide where you can find clay. Learn how to clean the clay by soaking, sieving, and sedimenting for pottery.
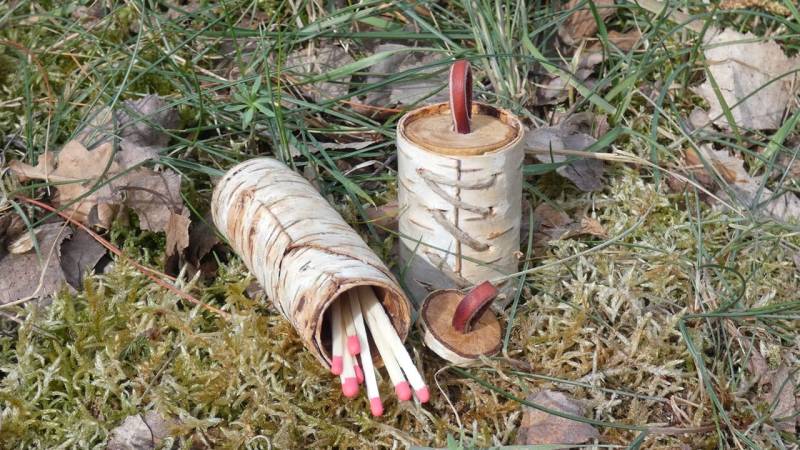
39. Building a Birch Bark Box
It rustles when touched and tells a story from days gone by - birchbark. It is not only beautiful to look at, but also a great material for all kinds of bushcraft projects for children.
Today we will shape a box out of this natural material. Ideal for keeping small treasures or safely carrying home your self-collected berries.
The Goal
The following skills we will acquire:
- Learn the traditional way of bark craft
- Develop skill in shaping and assembling the bark
- Work with precision in cutting and crafting the box
What you need
For our birchbark box you will need:
- Birch bark: Best collected in spring when it peels off easily
- Sharp knife: For clean cuts in the bark
- Needle and thread: Preferably made of natural material, for sewing the box (optional)
- Simple template: As a guide for cutting the pieces (optional)
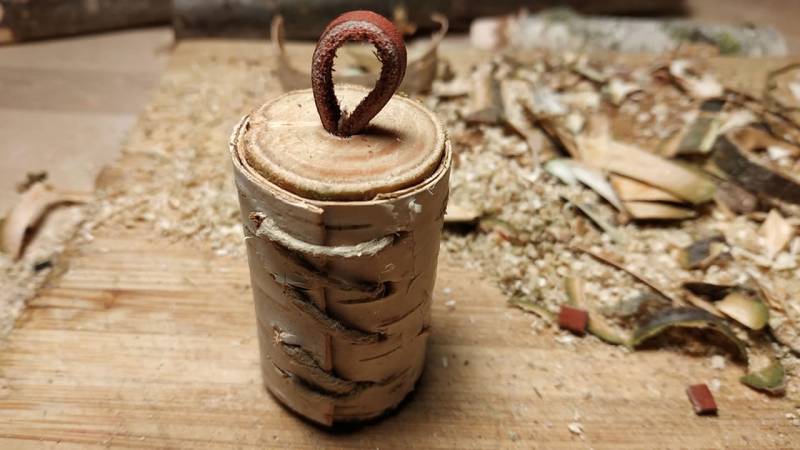
What children will learn
The children will discover many new things:
- The properties of birchbark and its possible uses
- The importance of careful work and planning
- A piece of traditional craftsmanship that has almost been forgotten
What the children can practice
When building the box, the children practice:
- Fine motor skills through cutting and sewing
- Creative thinking in designing their own box
- Patience and concentration, as good craftsmanship takes time
- Engagement with the type of tree
This activity is suitable for children from 7 years old. Under supervision, they quickly learn how to handle the materials and are proud of what they can create with their hands.
With every stitch and cut, we connect a little more with tradition and nature. It is a wonderful feeling to see how a piece of bark transforms into a useful and personal item.
40. Building a Spear as a Bushcraft Idea for Kids
A spear is more than just a stick with a point - it is a tool that combines skill, precision, and knowledge of nature.
Although we no longer use it for hunting today, we can use spear throwing as a sport and as a connection to our ancestors.
When building a spear, we learn a lot about balance, materials science, and the intricacies of carving.
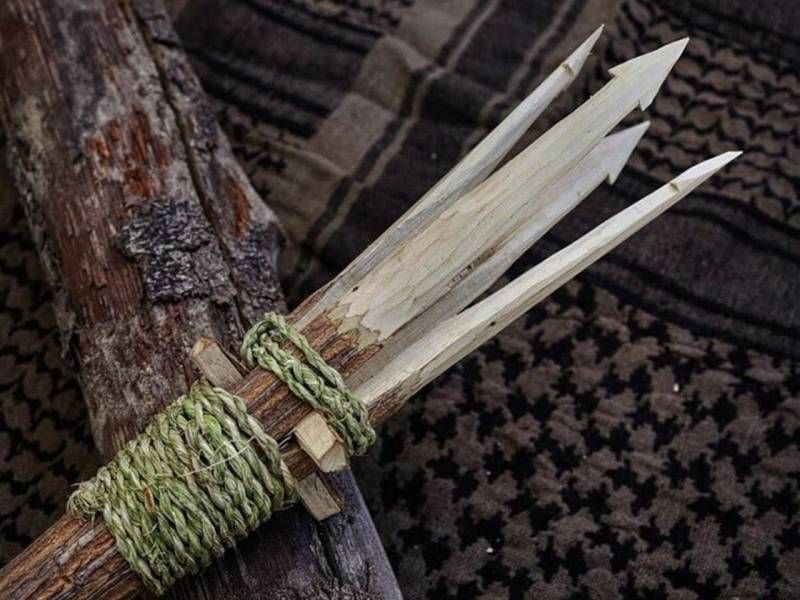
The Goal
We would like to acquire the following:
- Basics of tool making in nature
- Understanding the balance and aerodynamics of a spear
- Skills in handling carving tools
What you need
For your spear you will need:
- A straight, sturdy branch: As a base for the spear
- A carving knife: To shape the tip and smooth the wood
- Sandpaper or sharpening stone: For fine-tuning the tip
- Safety equipment: Gloves for protection during work
What children will learn
Children learn about spear construction:
- How important good material and solid craftsmanship are
- That early humans were able to develop complex tools
- How to achieve the best results through trial and error
What the children can practice
In the practical part, the children practice:
- Careful carving and shaping of wood
- Handling tools and appreciation for craftsmanship
- Testing and fine-tuning the spear to achieve optimal flight characteristics
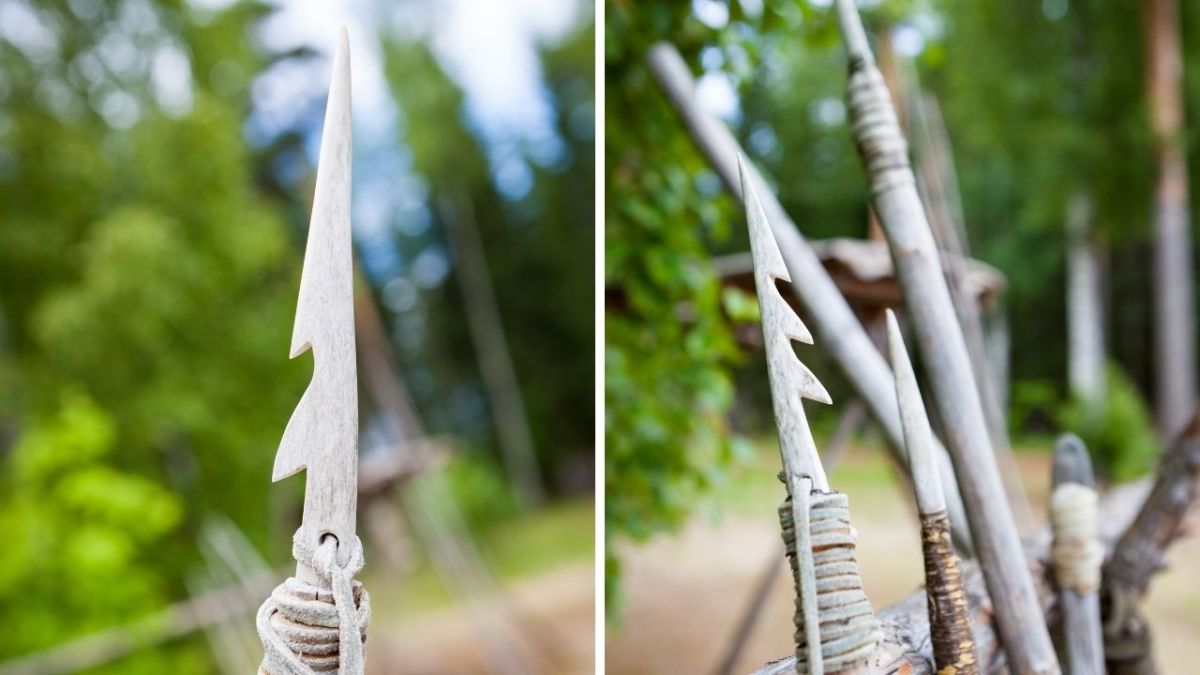
This activity is suitable for children aged 10 and older, as it requires a certain level of strength and skill in handling a knife.
Building a spear is a journey back to the roots of humanity and a sportive pleasure that promotes precision, strength, and dexterity. Here you will find a guide to spear building in the e-book: Building Your First Spear - An Introduction.
41. Collecting Tinder - What Burns Well?
It crackles, it pops - the fire comes to life. But before that happens, we need to find the right material.
Gathering tinder is essential for making fire and Bushcrafting, making it a great bushcraft idea for children. It teaches us to observe nature closely and understand which materials ignite the best fire.
Ready for an exciting experiment? Then let's go searching for the best tinder!
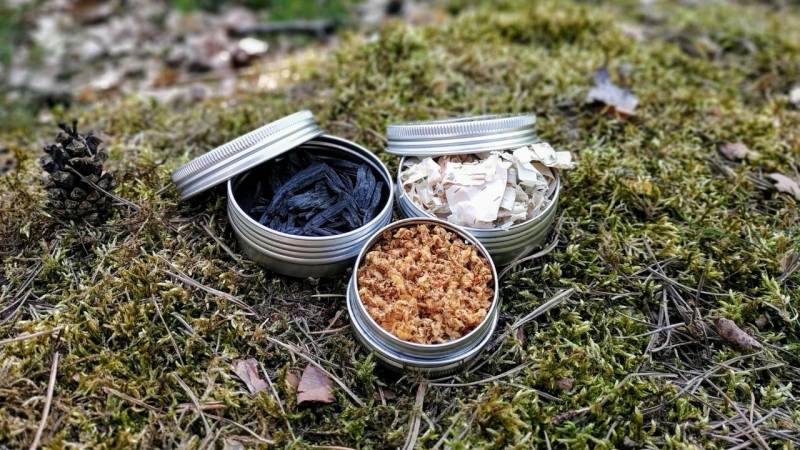
The Goal
What we want to achieve:
- Knowing which natural materials are suitable as tinder
- Understanding the moisture and flammability of different materials
- Ability to ignite efficient fire with natural materials
What you need
For our tinder search, we need the following:
- Bag, basket, or pocket: For collecting tinder
- Firesteel or matches: For testing flammability
- A safe environment: Ideally a fireproof surface or secure fire pit
What children will learn
Going on a tinder search means learning:
- How to carefully select and test materials
- Why not every material burns equally well
- Important properties for good ignition material
What the children can practice
The practical thing about it is:
- Distinguishing between dry and wet material
- Collecting and sorting by combustibility
- Practicing safe handling of fire
This activity is suitable for children aged 6 and older. Under supervision, the handling of fire can be practiced in a playful and safe manner.
Lighting a warming fire is a basic skill in Bushcrafting and a fascinating science in itself.
Let's go, we will become detectives of nature and find out what keeps the flame alive! Here you can find more information about tinder: The ultimate tinder collection.
How did you like the 41 ideas? Were you able to gain new impressions or impulses?
Write it in the comments! Or do you have any more bushcraft ideas for kids?


Author of the guide
Martin Gebhardt
Hey, I'm Martin. On my blog, you will learn the basics and numerous details about living in the wild. I think survival, bushcraft and the good life in nature are the keys to happiness. Find me here on Instagram or on YouTube. You can find more about my mission on the About Me page.
Was this guide helpful?
17 people found this guide helpful.
5.00 out of 5 points (17 Ratings)
Comments (0)
This post may contain affiliate links. So if you click on the links and make a purchase, I will receive a small commission at no additional cost to you. Click here, to learn more about it.


